
How to Color Clothes Digital Art
Digital art is a great way to color clothes without using any real-life paint. This blog post will learn how to color clothes digital art style and create a cohesive outfit. Whether you’re new to digital art or are just looking for new techniques, this article is perfect for you!
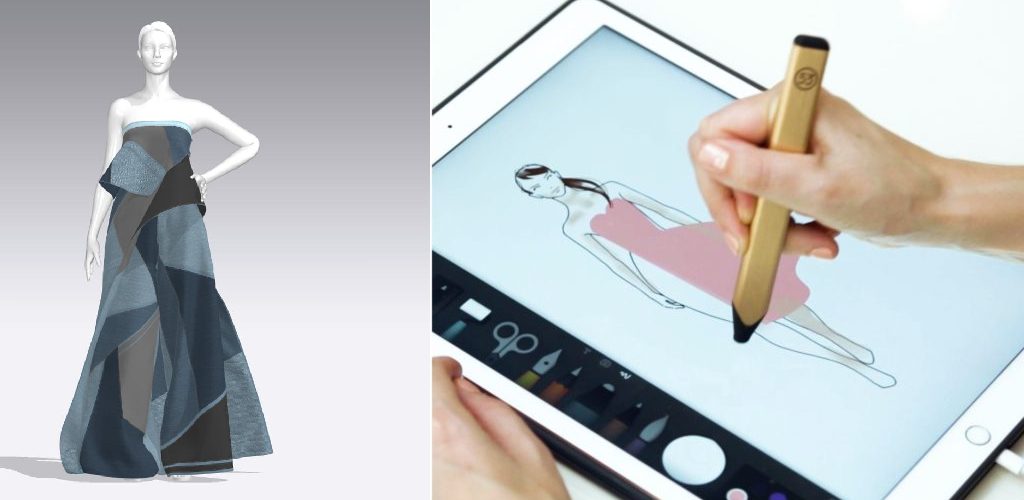
We will be using the brush tool, layer styles, and adjustment layers. You can use these techniques to create colorful designs for your clothing line or add some extra flair to your wardrobe. Let’s get started!
10 Effective Ways on How to Color Clothes Digital Art:
1. Lasso Tool
It’s usually used as a tool to extract an object from its background. However, the lasso tool can also be used as a freehand paint bucket to shade or color clothes and other objects. The brush opacity can be adjusted depending on how light or dark we want our shading.
2. Blending Mode:
This blending mode can darken the colors, enhance shadows and make colors richer. Photoshop will treat white as the base color multiplied by the darker color applied to it. If you use this tool or method, make sure that your brush opacity does not reduce much because it might create a hard-to-see line.
3. Brush Tool
The brush tool enables you to change the shape and size of your paintbrush, but mostly we use it without any changes. You can use different brushes (round, hard round eraser, and flat) and opacity levels. You can also use it as a stamp or clone tool to copy and paste the clothes onto another layer.
4. Color Replacement Tool
This color replacement tool can replace one color with another, which is very effective when we want the clothes’ colors to produce a different shade than its original color. It’s advisable that before using this tool, you should set the colors as foreground and background first.
5. Shading in Black & White
This technique gives the clothes a more realistic look in digital art. We should use the pressure-sensitive pen tablet’s other tools such as brushes, color replacement tools, and airbrushes to add shading.
6. Weaving Effect
This digital art technique is the opposite of coloring the clothes in black & white. We can create a shaded effect by making an image look woven using different colors without using the lasso or color replacement tool. The blurred images on the right of this article will show you how to do it.
7. Using the Color Wheel
We can use the colors of clothes just by using the color wheel. So, how does it work? It is easy! If you want to make a certain part of clothes lighter, pick its complementary color (the opposite color of your desired shade) on the color wheel. For instance, if you find blue is not light enough for you, you can choose green because blue’s complementary color is green.
8. Blurring Effect
This tool is a great way to make colors lighter and brighter. To use this tool, duplicate the transparent background layer you used to color the clothes onto another layer by right-clicking on the original layer and then selecting “duplicate layer.” Select this new layer and go to Filter > Blur > Gaussian Blur. Adjust the blur radius by sliding around until you see a brightness effect on your clothes.
9. Color and Light
This tool is an effective way to add color and lighting effects to the clothes. It’s like coloring clothes in black & white, but this time we will use many layers. First, outline your clothes (with no shading) onto a new layer; then add another layer on top of it and set it as an overlay mode. This will make the lighter colors brighter. After that, use another layer set as a multiply mode to shade your clothes with darker colors.
10. Outlining Effect
The best way to outline clothes is using the color that’s already used on them or by using another bright color on its layer underneath the original layer of clothes. This can be done by adding a new layer on top of the clothes and selecting a bright color. Right-click on the new layer and select “Stroke.” Then, choose your desired width by sliding around the number or letter until you find a suitable value.
Different Types of Light Sources and How They Affect Colors:
Now that you know how to color clothes digital artfully. You also want to know about different light sources and how they affect colors.
1. Toplight:
A light source that is directly above the object you are looking at causes the shadows to fall out from underneath the object. If you were to look at a ball that was sitting on a table under a top-light, you would see two things: first, the entire front half of the ball would be illuminated, and second, there would be an obvious shadow on the bottom left side of the ball from where the light is shining down on it.
2. Side-light:
The side-light allows the artist to emphasize small details of the clothing. It will typically be placed under one arm or just running down the center of the shirt. Make sure that you’re still following your light source! Unfortunately, there are no shortcuts for this; you’ll need to study how shadows behave and figure out how to get both of the effects of a side-light in your image.
3. Rim lighting:
This means that the light source is shining directly from behind the object you’re looking at. As a result, there will be an ominous “halo” of light around the edge of anything facing away from it, and everything will be shaded on each side with hard, unblended lines.
4. Fill lighting:
The fill light is precisely what it sounds like; it fills the shadows created by the other light sources and smooths out the shading for a more even look overall. You can see your other light sources once you’ve added this one, but they won’t be as harsh or dark.
5. Backlighting:
The backlight is the light source that shines directly from behind the object you’re looking at. As expected, this will cause a glow to appear on any surface facing towards it and causes those areas to have very bright highlights.
6. Ambient lighting:
All of your lights sources, as well as the sun and any other light source in your image, will be considered ambient lighting. If you want to emulate a studio setting where there aren’t any windows or direct outside light sources, this is what you’ll have to work with. Keep in mind that if you go overboard, you could end up with results like this.
How to Shade Clothes, Coloring, and Shading Shirt Folds?
There are a few different techniques to use when coloring clothes; you can color each part of the clothes separately or try and shade the whole piece. This way is easier to do but may not look as good because it requires more breaks in your coloring to give depth. Also, this method will use more colors than necessary; that’s why it’s so important to use the right colors for your shirt, pants, etc. Shading a whole piece of clothing can look better but will take longer to do and may seem overwhelming at first if you have never tried.
It requires more breaks in your coloring to give the depth, but it will bring your piece together. You can use 1 or 2 primary colors in this method and then break up those colors with highlights and low-lights. You must choose the right highlights and low-lights because if you don’t use the correct color, they will look off. For example, if you are shading a shirt, choose one primary color for the shirt itself and then use some sort of highlight or low-light to make the folds more defined.
Is There a Difference Between Drawing and Digital Art?
Yes, there is a difference. The drawing con sists of pencils, pens, markers, and other drawing utensils being put to paper, whereas digital art uses a computer with a graphics tablet or, more frequently, a mouse. It depends on what software is being used for this tool.
The main difference is that digital art isn’t permanent; erasing your mistakes can be pretty straightforward, depending on how you want it to look. Drawing happens in real life, whereas digital art occurs online or on a computer screen.
Conclusion:
The most important thing to remember is that color choice and contrast will make your design pop. When choosing colors, you should consider the meaning of each one and how it is used within a particular culture or religion. The best way to color clothes digital art is to stylize the original artwork and then add a layer for clothing.
This will allow you to reuse your artwork without having to create lots of new ones from scratch each time you want a different outfit on an avatar or character. We hope this article has given you some inspiration for how to color clothes digital artfully, as well as inspired you to think outside the box when it comes to your own designs. If you have any questions or want to know more about this topic, then feel free to comment below!
Elizabeth Davis
Elizabeth is a creative writer and digital editor based in the United States. She has a passion for the arts and crafts, which she developed from a young age. Elizabeth has always loved experimenting with new mediums and sharing her work with others. When she started blogging, she knew that DIYquickly would be the perfect platform to share her tutorials and tips. She's been writing for the blog from the beginning, and her readers love her helpful advice and easy-to-follow instructions. When she's not writing or editing, Elizabeth enjoys spending time with her family and friends.


