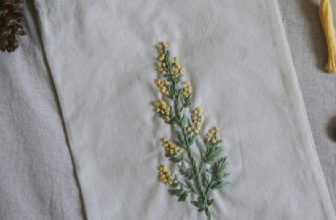
How to Cover the Back of Embroidery on Clothes
Embroidery is a beautiful and intricate art that can elevate any clothing item to something unique. However, the back of the embroidery can be unsightly with loose threads and knots. Fortunately, there are easy and effective ways to cover the back of the embroidery to ensure a neat finish. In this blog post, we’ll go over some tips and tricks on how to cover the back of embroidery on clothes.
Can You Cover the Back of The Embroidery on The Clothes?
Embroidery on clothes has become increasingly popular in recent years, adding a personal touch to any garment. However, one question that often arises is whether it is possible to cover the back of the embroidery to prevent roughness or irritation against the skin. The answer to this question is yes, it is possible to cover the back of the embroidery.
Various options, such as a stabilizer or an extra layer of fabric, are available to create a soft backing. By covering the back of the embroidery, you ensure comfort and make your embroidery look neater and more professional. So add that beautiful embroidery to your clothing, knowing that you can cover the back and make it even more comfortable to wear.
Why Should You Cover the Back of Embroidery on Clothes?
Embroidery is a beautiful and intricate art form that adds texture and dimension to clothing. However, as with any creative endeavor, it’s important to consider the practicalities. When it comes to embroidery, covering the back of the design is essential. Not only does it prevent any stray threads from snagging on things and pulling the embroidery out of shape, it also ensures that the design looks professional and finished.
The last thing you want is for the back of your embroidery to detract from the beauty of the front. Covering the back of your embroidery is a simple step that can make all the difference in the longevity and appearance of your garment.
7 Tips and Tricks for How to Cover the Back of Embroidery on Clothes
1. Use Fusible Interfacing
One of the easiest ways to cover the back of the embroidery is to use fusible interfacing. This thin fabric is ironed onto the back of your embroidery to keep the threads and knots from showing through. Fusible interfacing also gives your embroidery some added stability and helps prevent fabric puckering.

2. Sew a Lining
Another way to cover the back of the embroidery is to sew a lining on the inside of your clothing item. This works particularly well for items like jackets or blazers. Using a lining fabric close to your garment’s color will help mask any protruding embroidery threads.
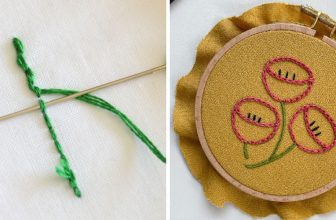
3. Backstitching or Knotting
Depending on the complexity of your embroidery design, using a backstitch or knotting method can be a helpful tool in covering the back of your embroidery. This method involves weaving the embroidery threads under or over one another to prevent any knotting or loose threads from showing on the back of your piece.
4. Felt Backing
A felt backing is another effective way to cover the back of the embroidery. Felt is a thick, sturdy fabric ideal for hiding embroidery knots and threads. It also adds extra protection to your embroidery, preventing it from unraveling over time.
5. Use a Decorative Backing
If you want to add a bit of whimsy to your embroidery project, using a decorative backing can be a fun option. This could be a fun print fabric or patterned felt layered behind your embroidery. Not only will this add an interesting design element to your piece, but it will also serve to cover any knots and loose threads.
6. Add a Patch
Patches are an easy and fun way to cover the back of your embroidery, especially if you don’t want to add any extra fabric layers. You can use a patch that’s either solid or patterned, depending on what look you’re going for. Iron-on patches are a great option since they’re easy to apply and require no sewing.
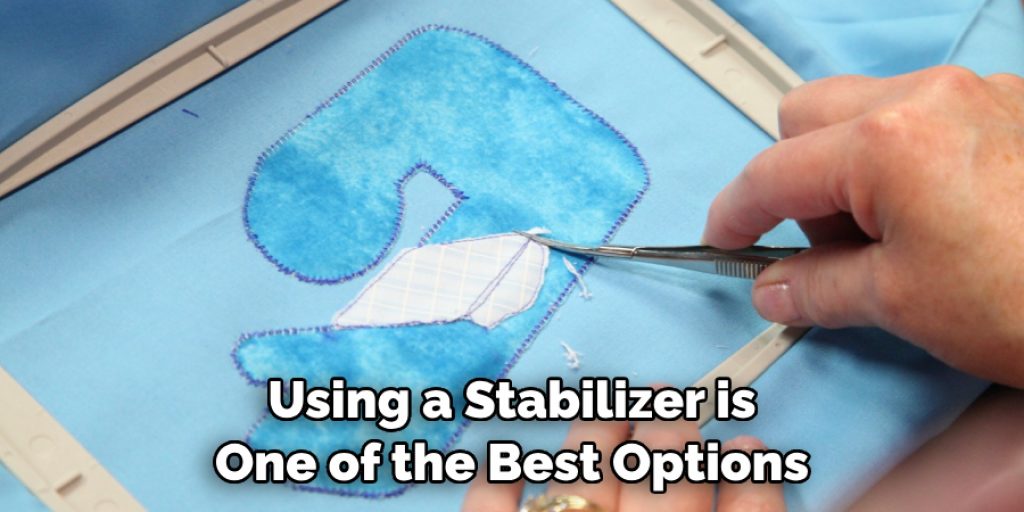
7. Use a Stabilizer
If you’re looking for a more professional finish to your embroidery piece, using a stabilizer is one of the best options. Stabilizers come in various forms and can be used behind your embroidery design to provide additional support and prevent thread shifting. They also help to cover any knots or loose threads that may be visible on the back of your item.
By following these tips, you can create a professional-looking embroidered piece that looks great from both front and back. You’ll also have peace of mind knowing that your project is secured with high-quality materials that will stand the test of time. So don’t let a few pesky knots and threads get in the way of creating your perfect piece – use these tips to cover the back of your embroidery and show off your amazing work!
5 Considerations Things When You Need to Cover the Back of Embroidery on Clothes
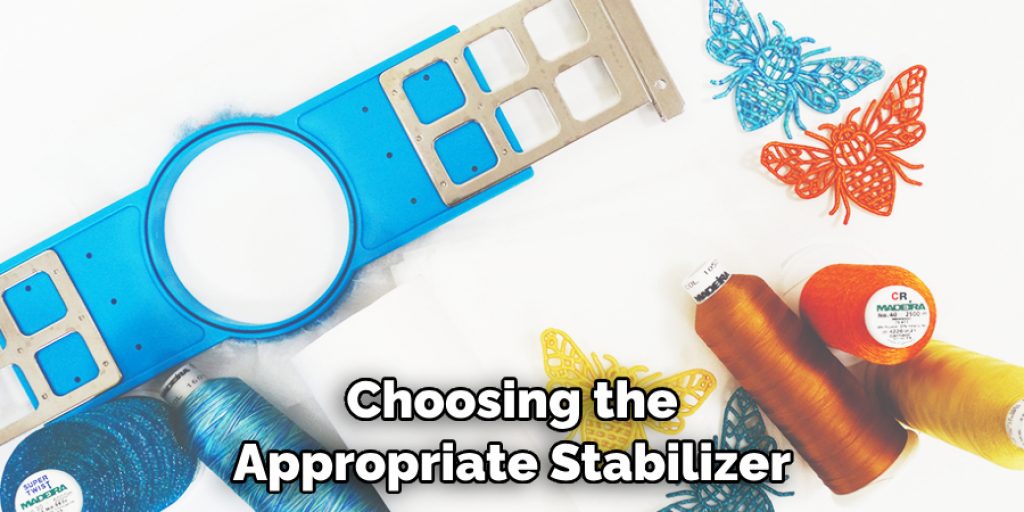
1. Stabilizer
When you need to cover the back of embroidery on clothes, one of the most important considerations is the type of stabilizer you use. Stabilizers are materials placed behind the fabric to support and stabilize embroidery stitches. The type of stabilizer you choose will depend on the fabric and design you are working with.
For example, if you are working with a lightweight fabric, a lightweight tear-away stabilizer may be best. If you are working with a heavy fabric, a cut-away stabilizer may be more suitable.
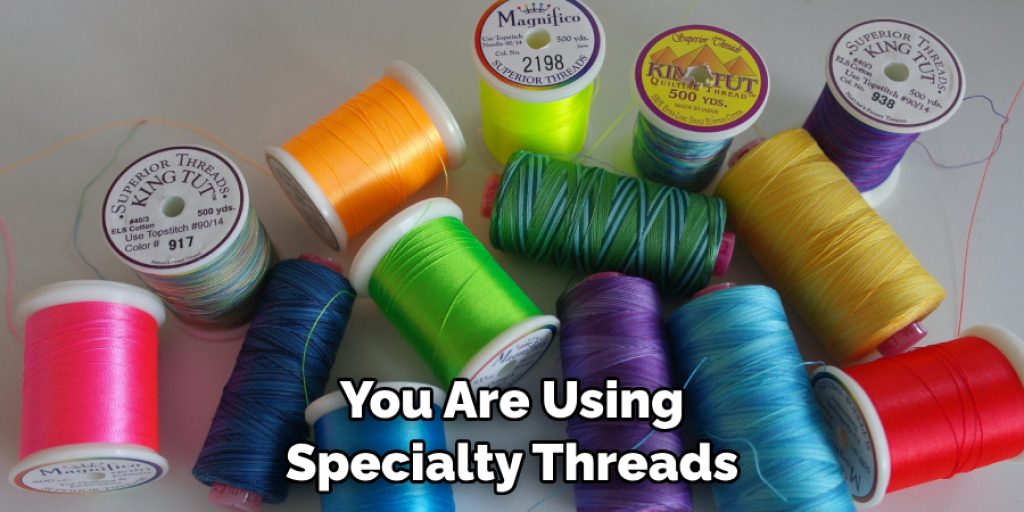
2. Thread Type
Another consideration when covering the back of embroidery on clothes is the type of thread you use. Different types of thread have different properties, such as strength, colorfastness, and sheen, that can affect how your design looks when finished.
For example, rayon threads have a higher sheen than polyester threads and can make your designs look more vibrant and colorful. Additionally, some threads, such as metallic threads, may require a special backing or topping to keep them from snagging or unraveling during embroidery stitching.
3. Hoop Size
The hoop size you use is also important when covering the back of embroidery on clothes. The hoop should be large enough to accommodate your design without stretching or distorting it but small enough so that it does not show through on the front side of your garment. Additionally, if you use multiple hoops for larger designs, make sure they all fit snugly together without any gaps between them so your design will remain secure during stitching.
4. Needle Type
The type of needle used for covering the back of embroidery on clothes is also important because it affects how smoothly your stitches form and how easily they pass through the fabric layers beneath them. Generally speaking, needles with smaller eye sizes and sharper points work best for most fabrics, while needles with larger eyes and blunter points work better for heavier fabrics such as denim or canvas.
Additionally, suppose you are using specialty threads such as metallic threads or monofilament threads. In that case, you may need a special needle designed specifically for those thread types to prevent breakage or snagging during stitching.
5 Backing Material
When covering the back side of embroidery on clothes, it is important to consider what type of backing material will be used under the fabric layers to provide additional stability and support for stitches while preventing them from showing through on the front side when finished. Common options include iron-on interfacing or fusible webbing, which can provide extra stability while still allowing some flexibility for movement within garments after completion.
Benefits of Cover the Back of Embroidery on Clothes
Embroidery is a popular way to add personal flair and style to clothing, but many people overlook the importance of properly covering the back of the embroidery. While it may seem like a small detail, properly covering the back of an embroidery design can offer several benefits. Not only does it help to protect delicate embroidery threads from snagging or catching on other fabrics, but it also adds stability to the garment.
Additionally, covering the back of an embroidery design can help prevent itching or irritation to the skin, making it a must for sensitive skin. By taking the time to cover the back of your embroideries, you can ensure that your clothing looks great and lasts longer too.
Some Common Mistakes People Make When Trying to Cover the Back of Embroidery on Clothes
Embroidering clothing has been a popular way to customize garments and give them a unique touch. However, the process does require some finesse and attention to detail. One common mistake people make when embroidering is neglecting to cover the back of the embroidery. Doing so can lead to fraying or damaging the embroidery when the garment is washed or worn.
Another mistake is using the wrong type of stabilizer for the fabric, which can cause puckering or shifting of the embroidery design. Choosing the appropriate stabilizer for the fabric and embroidery design is crucial to ensure a smooth and professional finish. By taking the time to properly cover and stabilize the back of the embroidery, you can prevent frustration and ensure your garment will last for many years to come.
Conclusion
Covering the back of embroidery doesn’t have to be a daunting task. By following these tips and tricks, you can ensure a professional and neat finish to your embroidery projects. Whether you opt for fusible interfacing, sewing a lining, using a backstitching or knotting method, felt backing, or decorative backing, you’ll have various options.
Embroidery is a beautiful art form, and by covering the back of your pieces, you can showcase your projects to their fullest potential. Thanks for reading our post about how to cover the back of embroidery on clothes.
Nancy Behan
Nancy is an embroidery artist, fashion blogger and a full time editor at DIY quickly. Nancy edits the fashion section on DIY quickly, focusing on the embroidery and cross stitch articles, alongside with fabric and other costume design elements. She graduated from the University of Michigan with a Bachelor of Arts in Art History. She loves to work on her own projects, read books and watch romantic movies in her spare time.