
How to Crochet a Leaf Easy
Are you looking for a fun and easy crochet project? Look no further! Crocheting a leaf is a simple and enjoyable way to add nature-inspired decor to your home.
How to crochet a leaf easy can add a delightful touch to various projects, whether it’s for embellishing a scarf, creating a charming brooch, or incorporating it into larger pieces like blankets or home décor. This straightforward guide will walk you through the simple steps needed to crochet a leaf, making it accessible for beginners and enjoyable for experienced crafters.
With just a few basic crochet stitches and a little patience, you can create beautiful leaves that can be used in countless creative ways. So grab your yarn and hook and start crafting this lovely accessory!
What Will You Need?
Before we dive into the crochet instructions, let’s gather all the necessary materials. You’ll need:
- Crochet hook (size will depend on your yarn weight)
- Yarn in the desired color
- Scissors
- Yarn needle
That’s it! With just these four items, you can create a beautiful crocheted leaf. Now, let’s move on to the fun part – crocheting!
10 Easy Steps on How to Crochet a Leaf Easy
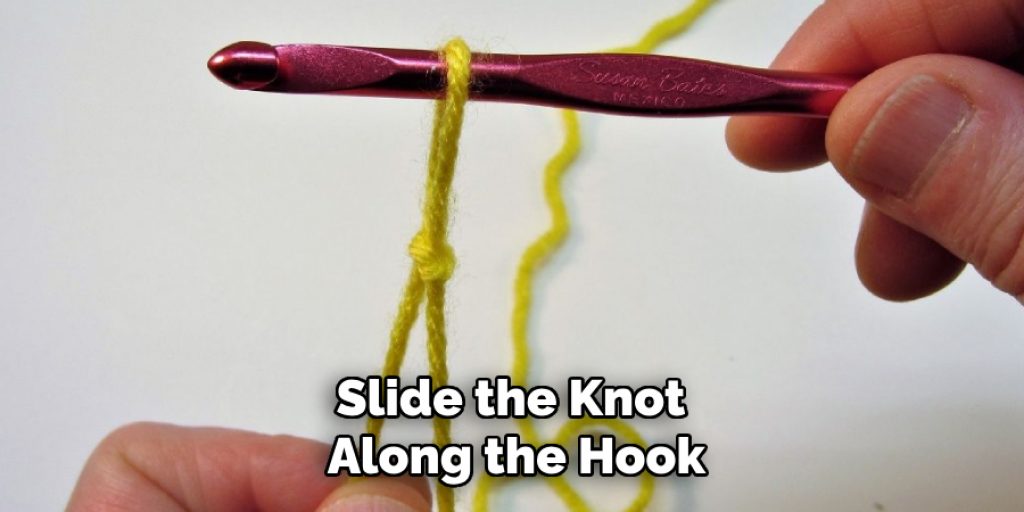
Step 1: Make a Slip Knot
To begin your crocheting journey, start by making a slip knot with your yarn. This first step is essential as it serves as the foundation for all your future stitches. To create a slip knot, take the yarn and form a loop, ensuring that the working yarn (the part connected to the ball of yarn) is on top of the other strand.
Pull the length of the working yarn through the loop, creating a smaller loop. Gently pull both ends to tighten the knot onto your crochet hook. Make sure it’s snug but not too tight, as you will need to slide the knot along the hook as you work easily. You are now ready to start your first stitch!
Step 2: Chain Stitch
After you’ve secured your slip knot on the crochet hook, it’s time to create a foundation for your leaf using chain stitches. To do this, yarn over (wrap the yarn around the hook) and pull through the slip knot on your hook. This action creates your first chain stitch. Repeat this process until you have a chain approximately 10-15 stitches long, depending on how large you want your leaf to be.
Remember, the more chain stitches you make, the bigger your leaf will appear. Keep your tension consistent for a neat finish, and you’re ready to move on to the next step!
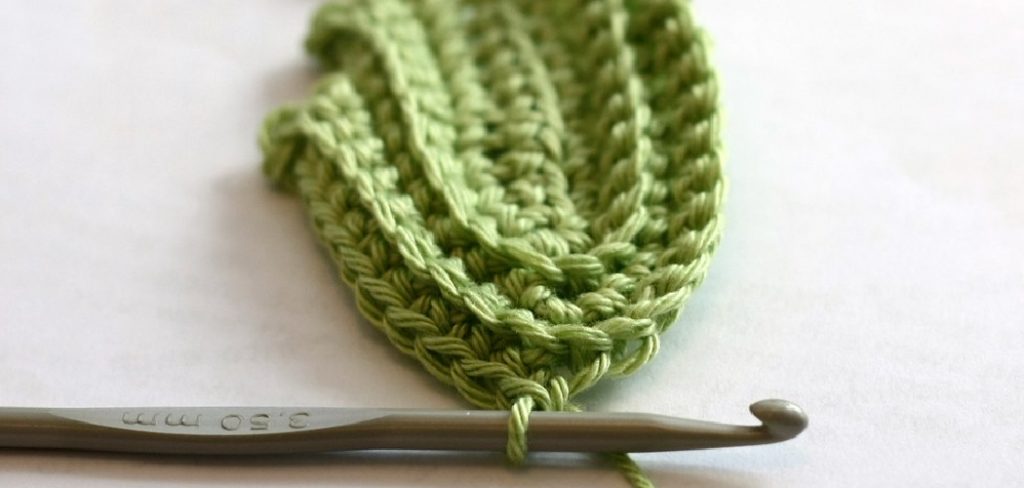
Step 3: Create the Leaf Shape
Now that your chain stitches are ready, it’s time to form the leaf shape. Beginning in the second chain from your hook, work a single crochet stitch by inserting your hook into the chain, yarn over, and pulling through. You should now have two loops on your hook. Yarn over again and pull through both loops to complete the single crochet. Next, continue along the chain by working single crochet stitches into each chain until you reach the end. Once you reach the end of your chain, you should have a row of single crochet stitches forming the bottom edge of your leaf. This will create a sturdy base for the intricate shaping in the following steps.
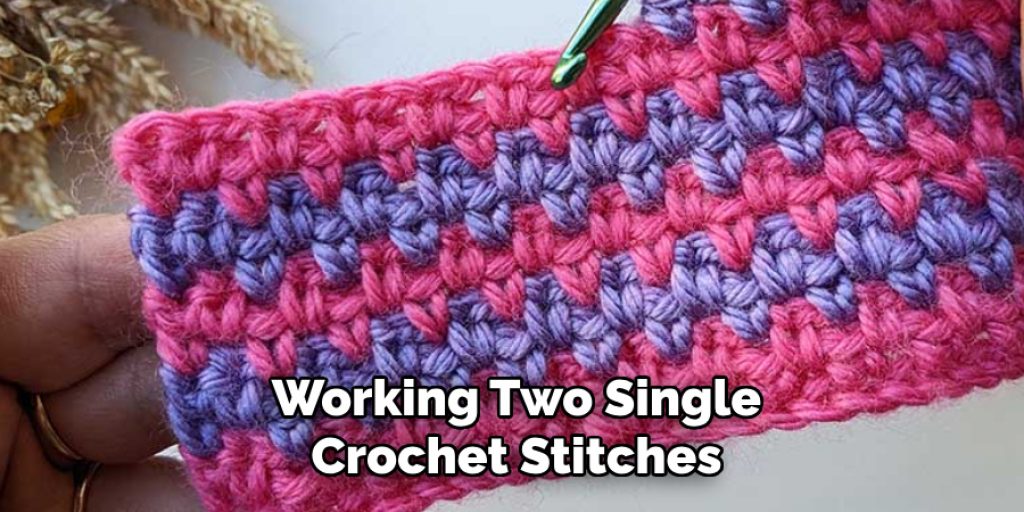
Step 4: Shape the Leaf’s Tip
To give your leaf a more defined shape, it’s time to create the tip. After completing the row of single crochet stitches, chain 1 and turn your workaround. In the first stitch of this new row, work two single crochet stitches to create an increase, which will help form the pointed tip of the leaf. Then, continue to work single crochet stitches across the row until you reach the last stitch. In the last stitch, again work two single crochet stitches to round off the end. This technique of increasing in the first and last stitch will give your leaf a lovely tapered appearance!

Step 5: Create the Leaf’s Ridges
To add some texture and depth to your leaf, it’s time to create the ridges. Start by chaining 1 and turning in your work. In the first stitch, make a single crochet. Work a double crochet stitch for the next stitch by yarning over, inserting your hook, yarning over again, pulling through two loops, and then yarning over once more to pull through the last two loops. Repeat this pattern—1 single crochet followed by 1 double crochet—for the rest of the row. This alternating stitch pattern will give your leaf beautiful ridges.
Step 6: Continue Shaping
After completing the ridge row, chain 1 and turn your work again. This time, we will taper the other side of the leaf to maintain symmetry. Begin by working two single crochet stitches into the first stitch, and then single crochet across until you reach the last two stitches. In the last two stitches, work a single crochet to decrease the length gradually. This creates a balanced leaf shape as you continue to work toward the tip.
Step 7: Finish the Leaf
You’ll want to make final adjustments and secure your work to complete your crocheted leaf. It’s time to finish once you’ve tapered the leaf shape to your satisfaction. Chain 1 to ensure your last row, cut the yarn, leaving a tail about 6 inches long. Pull the tail through the last loop on your hook to lock it in place. Use your yarn needle to weave in loose ends, ensuring your work is neat. You can add a little twist to the leaf’s shape by slightly bending or curling the edges to give it a more natural appearance.
Step 8: Adding a Stem
Let’s add a small stem to create a complete look for your leaf. Start by cutting off a small length of yarn in a contrasting color or a similar shade to the leaf. Attach the yarn at the base of the leaf using a slip stitch or knot. From here, the chain about 5 stitches to form the stem’s length. After reaching your desired length, secure the chain with a slip stitch in the first chain to create a loop. Cut the yarn, leaving a tail to weave in, and carefully pull the end through to lock it in place. Your leaf is now adorned with a lovely stem!
Step 9: Finishing Touches
Now that your leaf is complete take a moment to admire your handiwork! Check for any loose ends and weave them using your yarn needle for a polished finish. To enhance the leaf’s appearance further, consider using a fabric stiffener to give it more structure. Simply lightly brush or spray the stiffener onto the leaf, shaping it as desired, and let it dry completely. This step adds durability, allowing you to use your crocheted leaf in various projects, from home décor to accessories.
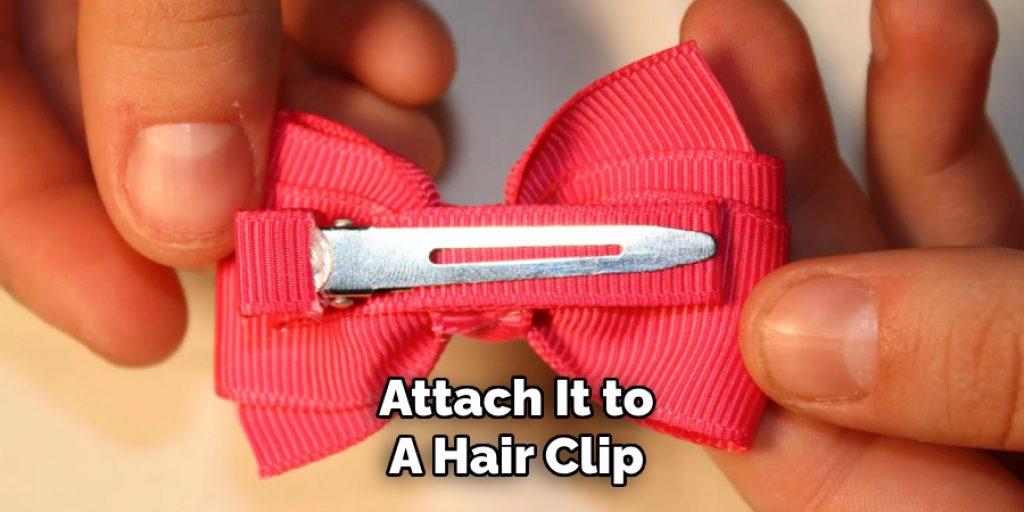
Step 10: Exploring Creative Applications
With your beautiful leaf complete, the possibilities for its use are endless! Incorporate it into a crochet mobile, attach it to a hair clip, or create a garland by stringing multiple leaves together. You could also use the leaves as embellishments on handmade cards or gift packages. Let your imagination guide you, and enjoy the satisfaction of incorporating your crochet skills into new and exciting projects!
By following these steps and experimenting with different yarns, colors, and sizes, you can create a stunning collection of crocheted leaves to add a touch of nature to your crafting.
5 Things You Should Avoid
- Skipping the Slip Knot: Always start your project with a slip knot to ensure your stitches are secure and easy to work with. Skipping this step can lead to a loose beginning that may unravel.
- Neglecting Tension: Maintaining consistent tension throughout your stitches is crucial for a neat and uniform leaf. Different tension can create irregular shapes and sizes, making your leaf appear unprofessional.
- Using Incompatible Yarn: Avoid using yarn types that are too thick or thin for your chosen hook size. Match your yarn and hook to achieve the best results and desired leaf texture.
- Rushing Through Increases and Decreases: Take time when working increases and decreases as these are essential for shaping your leaf. Rushing can result in uneven edges and awkward shapes.
- Forgetting to Weave in Ends: Leaving loose ends can detract from the overall appearance of your crochet leaf. Always remember to weave in any tails neatly to achieve a polished finish.
Conclusion
How to crochet a leaf easy may seem daunting at first, but by following these straightforward steps, you can create beautiful, symmetrical leaves with ease.
Remember to start with a secure slip knot, maintain consistent tension, and choose the suitable yarn for your project. Take your time when shaping the leaf through increases and decreases, and don’t forget to weave in any loose ends for a polished finish. Whether enhancing your home décor, crafting accessories, or personalizing gifts, crocheted leaves can add a wonderful touch of nature to any creation.
With a bit of practice and creativity, you can produce a stunning array of leaves that reflect your unique style and flair!
Elizabeth Davis
Elizabeth is a creative writer and digital editor based in the United States. She has a passion for the arts and crafts, which she developed from a young age. Elizabeth has always loved experimenting with new mediums and sharing her work with others. When she started blogging, she knew that DIYquickly would be the perfect platform to share her tutorials and tips. She's been writing for the blog from the beginning, and her readers love her helpful advice and easy-to-follow instructions. When she's not writing or editing, Elizabeth enjoys spending time with her family and friends.


