
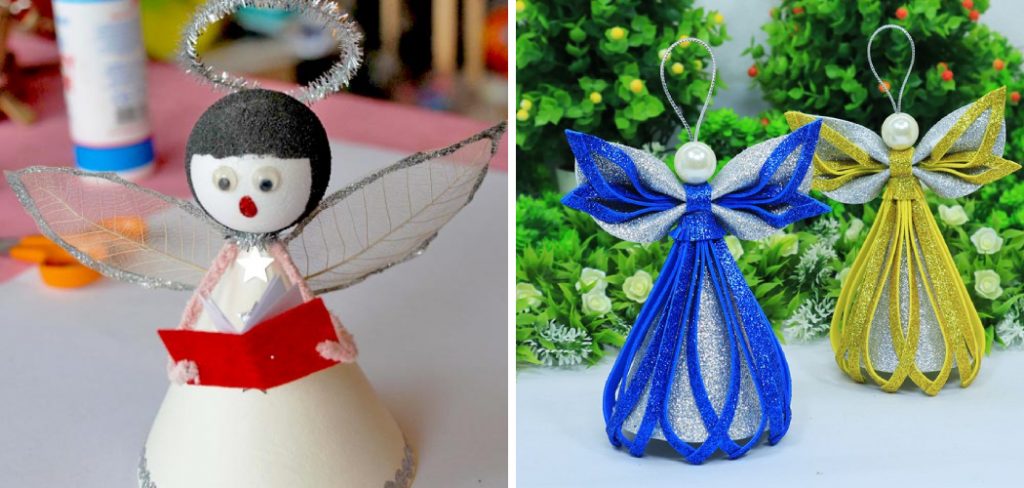
How to Decorate a Foam Angel
Angels are often associated with hope, love, and protection. As such, they make for a popular decorative item in many households. While there are various types of angels to choose from, a foam angel is one that can add an ethereal touch to any room. Not only are they affordable and easy to make, but they also give you the freedom to personalize them to your liking. In this guide, we will show you how to decorate a foam angel in simple steps.
Materials needed
Before we get started, here are the materials you will need:
- A foam angel cutout
- Acrylic paint
- Paintbrushes (various sizes)
- Glitter
- Hot glue gun
- Ribbon or string for hanging
- Optional: small embellishments such as rhinestones or beads
12 Easy Steps on How to Decorate a Foam Angel
Step 1: Prepare the Foam Angel
The first step to decorating a foam angel is to prepare the cutout. If you are unable to purchase a pre-cut one, you can easily make your own by tracing an angel shape onto a piece of foam and cutting it out. Once you have your foam angel cut out, lightly sand the edges to smooth out any rough spots.
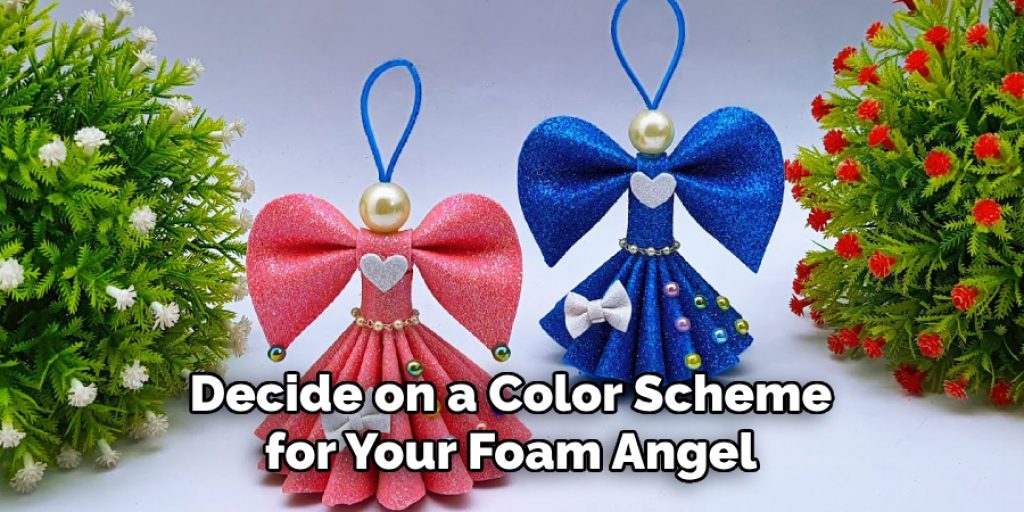
Step 2: Choose Your Color Scheme
Next, decide on a color scheme for your foam angel. You can opt for traditional angel colors such as white, gold, and silver, or go with something more vibrant, like pastel colors. Once you have chosen your colors, gather the corresponding acrylic paints.
Step 3: Paint the Angel’s Body
Using a paintbrush, begin painting the angel’s body in your chosen color. You may need to apply multiple coats for full coverage. Let each coat dry completely before adding another layer. And don’t forget to paint the back of the angel as well.
Step 4: Paint the Angel’s Wings
Once the body is dry, it’s time to move on to the wings. Dip your brush into a different color and carefully paint each individual feather on the wings. You can use multiple colors or stick with one, depending on your preference.
Step 5: Add Glitter
For a touch of sparkle, add some glitter to the wings. You can either sprinkle it on while the paint is wet or use a small amount of glue and then apply the glitter. As an alternative, you can also use a metallic paint for a shimmering effect.
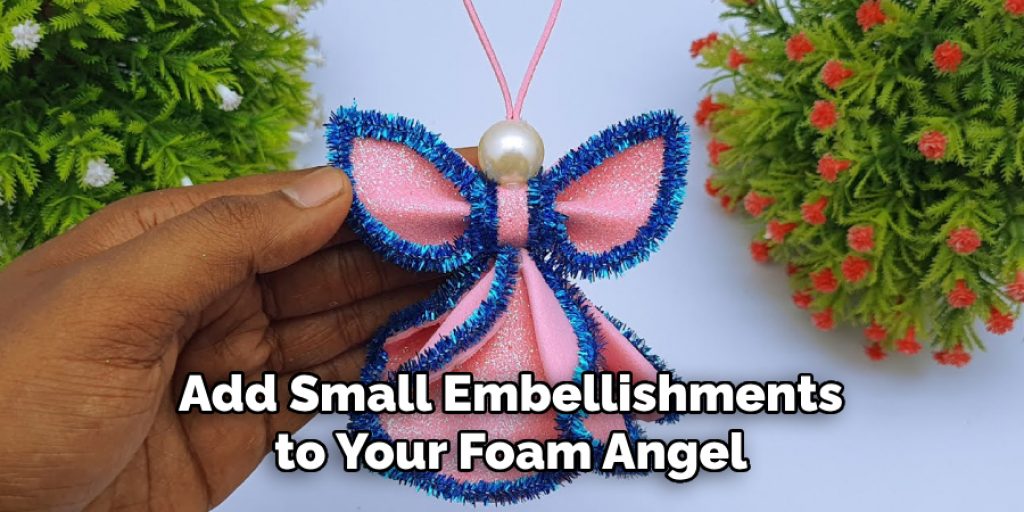
Step 6: Personalize with Small Embellishments
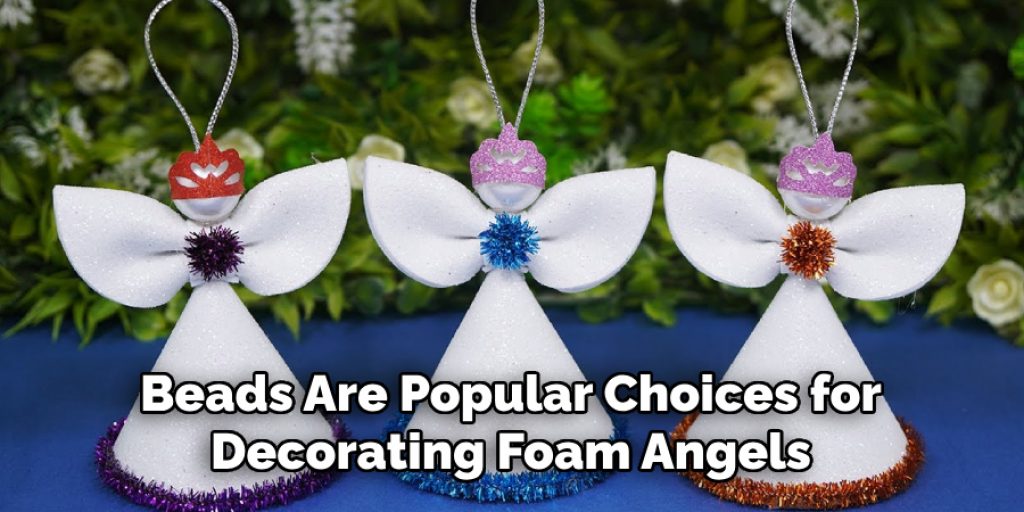
If desired, you can add small embellishments to your foam angel, such as rhinestones or beads. Use hot glue to attach them in strategic places, such as the center of the wings or on the angel’s dress. Even a simple ribbon or bow can add a nice touch.
Step 7: Create a Halo
To create a halo for your angel, you can use thin wire or pipe cleaners. Shape it into a circle and attach it to the back of the angel’s head with hot glue. Some people prefer to use a thin, gold ribbon instead for a more delicate look.
Step 8: Add Facial Features
Using black paint or a permanent marker, add the angel’s facial features. You can give her closed eyes with long eyelashes for a peaceful expression or draw on open eyes and a smile. Be creative and make it your own!
Step 9: Let the Angel Dry Completely
Once you have finished decorating the foam angel, let it dry completely before moving on to the next step. This will ensure that all of your hard work stays intact. Then, turn the angel over and repeat the process on the back if desired.
Step 10: Attach Hanging Ribbon or String
To hang your foam angel, attach a ribbon or string to the back with hot glue. Make sure it is secure before hanging. Keep in mind that this is also a great way to personalize the angel – you can use a ribbon with words or phrases on it or choose a color that matches your decor.

Step 11: Display Your Foam Angel
Now that your foam angel is complete and ready to hang find the perfect spot to display it. You can hang it on a wall, place it on a shelf, or incorporate it into a centerpiece. Get creative and have fun with it!
Step 12: Make More Angels
Once you have mastered the art of decorating foam angels, feel free to make more! You can create a whole collection in different sizes, colors, and styles. They also make great gifts for friends and family.
Decorating a foam angel is a fun and easy way to add a touch of whimsy and charm to your home decor. And with the ability to customize it to your liking, each foam angel will be unique and special. So gather your materials, follow these steps, and let your imagination soar as you create beautiful foam angels for yourself or others.
9 Safety Measures to Keep in Mind When Decorating
While decorating a foam angel is generally a safe and enjoyable activity, it’s important to keep these safety measures in mind:
1) Use Hot Glue with Caution
Hot glue guns can cause severe burns if not used properly. Always handle them with care, and make sure to keep your fingers away from the heated tip. And remember to unplug the glue gun when not in use.
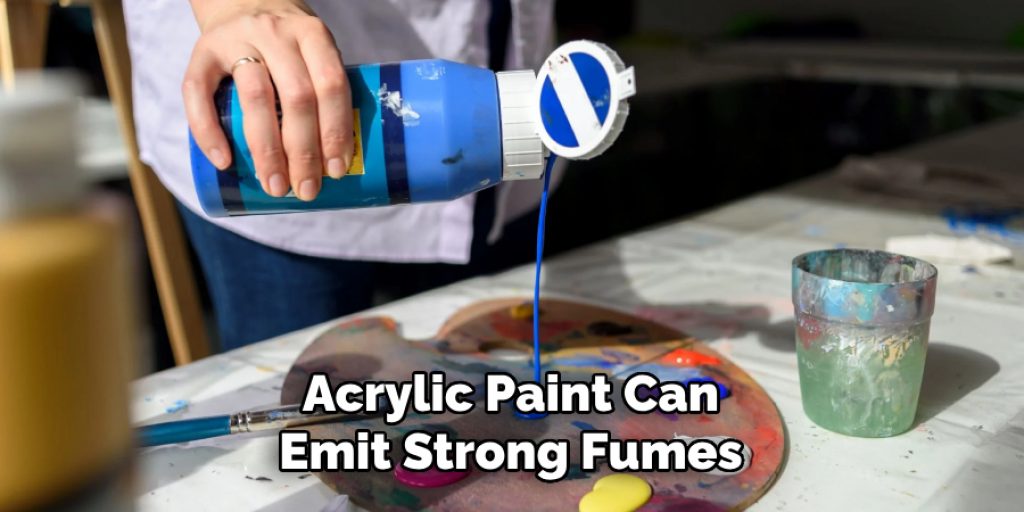
2) Use a Well-Ventilated Area
Acrylic paint can emit strong fumes, so it’s important to work in a well-ventilated area. If possible, open windows or use a fan to circulate fresh air. Some people may also choose to wear a mask for added protection.
3) Protect Your Work Surface
When using paints and glues, it’s important to protect your work surface. You can use newspaper or an old tablecloth to avoid any spills or stains on furniture. While decorating, try to keep the work area tidy and clean up any spills immediately.
4) Keep Small Embellishments Away from Children and Pets
Small embellishments such as rhinestones and beads can be a choking hazard for young children or pets. Keep them out of reach while working on your foam angel project. For added safety, consider using larger embellishments or opting for a different decoration method.
5) Take Breaks
It’s easy to get caught up in the excitement of decorating and forget to take breaks. Make sure to step away from your project every once in a while to rest your eyes and hands. This will also give you a chance to assess any potential hazards or make any necessary adjustments.
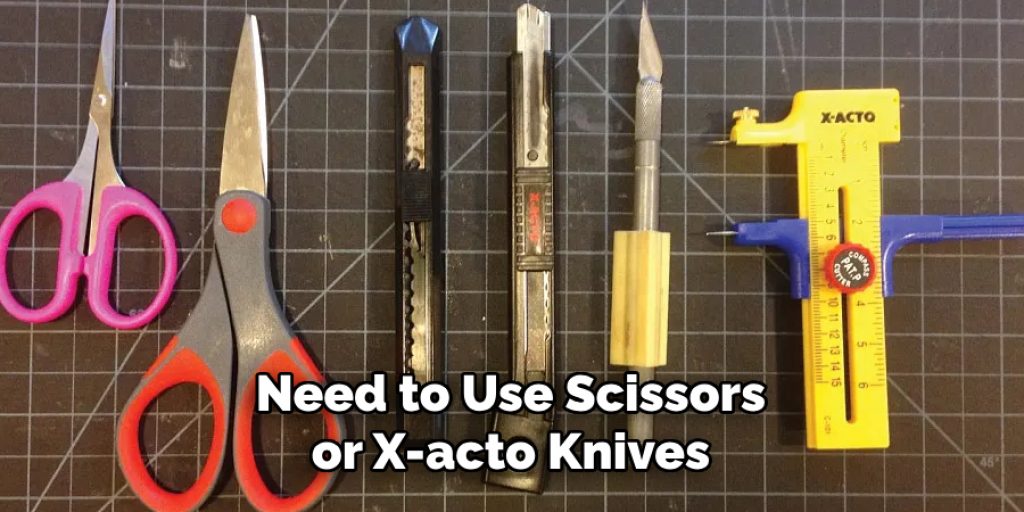
6) Use Sharp Tools with Caution
If you need to use scissors or X-acto knives to cut out your foam angel, remember to handle them with caution. Always cut away from your body and keep your fingers away from the blade. It may also be helpful to have a pair of pliers nearby in case you need to adjust any wire or pipe cleaners.
7) Keep Paint and Other Materials Out of Reach
To prevent accidental ingestion or spills, make sure to keep all paints and materials out of reach of children and pets. This is especially important for small tubes of paint, which may look like candy to young children.
8) Follow Instructions on Products Carefully
When using any paints, glues, or other materials, make sure to read the instructions and warnings carefully. This will ensure that you are using the products safely and effectively. Just because a product is labeled as non-toxic does not mean it is completely safe to ingest or use in large quantities.
9) Use Caution When Working with Electrical Outlets
If using any electrical tools such as glue guns or small lights for your foam angel, make sure to handle the outlets and cords with caution. Keep them away from water or other liquids, and make sure to unplug them when not in use.
By following these safety measures on how to decorate a foam angel, you can ensure a safe and enjoyable experience while decorating your foam angel. Remember to always prioritize your well-being and handle all materials with care.
8 Things to Avoid When Decorating a Foam Angel
While decorating a foam angel can be a fun and creative activity, there are some things to avoid in order to ensure the best results:
1) Using Sharp or Heavy Materials
When decorating your angel, it’s important to consider its weight. Lightweight materials such as feathers, ribbons, and beads work well for foam angels. Avoid using heavy or sharp materials that can weigh down the angel or potentially damage it.
2) Overcrowding with Embellishments
It may be tempting to add as many embellishments as possible to your foam angel, but be mindful of overcrowding. Too many decorations can take away from the overall look and make it appear cluttered. It’s best to stick to a few well-placed embellishments for a more balanced and aesthetically pleasing result.

3) Using Toxic Materials
When selecting materials for your foam angel, make sure to avoid any toxic or hazardous substances. This includes certain types of paint, adhesives, and other decorations that may contain harmful chemicals. Always check the labels and opt for non-toxic options whenever possible.
4) Rushing the Drying Process
When using paints or glues, it’s important to let them dry completely before moving on to the next step. Rushing the drying process can lead to smudging or even ruining your foam angel altogether. Be patient and allow for adequate drying time.
5) Ignoring Safety Measures
As mentioned earlier, it’s important to follow safety measures when decorating a foam angel. Ignoring these measures can lead to accidents or injuries. Take the necessary precautions and prioritize your well-being while creating your beautiful foam angel.
6) Skipping Step-by-Step Instructions
While it may be tempting to jump ahead or take creative liberties with your foam angel, make sure to follow step-by-step instructions carefully. This will ensure that your angel turns out as intended and may also help prevent any mistakes or mishaps.
7) Neglecting to Plan Ahead
Before starting your foam angel project, take some time to plan out the design and gather all the necessary materials. This will help prevent any last-minute rushes or complications during the decorating process.
8) Forgetting to Have Fun
Last but not least, it’s important to remember to have fun while decorating your foam angel. Don’t get too caught up in perfection or making everything look perfect. Embrace imperfections and enjoy the creative process! After all, your unique foam angel will be a reflection of your creativity and personal touch. So take a deep breath and let your imagination run wild.
By avoiding these things and following the tips mentioned earlier, you can ensure a successful and enjoyable foam angel decorating experience. Remember to prioritize safety, be creative, and have fun while creating your one-of-a-kind decoration. Your foam angel is sure to bring beauty and joy to any space it graces.
8 Additional Tips for Decorating a Foam Angel
In addition to the safety measures and things to avoid, here are eight additional tips to keep in mind when decorating a foam angel:
1) Experiment with Different Materials
While feathers, ribbons, and beads are popular choices for decorating foam angels, don’t be afraid to experiment with different materials. Consider using fabric scraps, paper cutouts, or even small trinkets to give your angel a unique and personal touch.
2) Incorporate Different Textures
Adding different textures can add depth and interest to your foam angel. Consider using materials like glitter, faux fur, or even sand to create a dynamic look. As always, make sure to use non-toxic options and allow for proper drying time.
3) Incorporate Personal Touches
Adding personal touches is a great way to make your foam angel even more special. Consider incorporating elements such as photos, symbols, or small mementos that hold sentimental value to you.
4) Use Color Schemes
To create a cohesive and visually appealing foam angel, consider using a color scheme. This can help tie all the different decorations together and create a harmonious look. And don’t be afraid to add pops of color for a playful touch!
5) Don’t Forget the Back
While the front of your foam angel may be the main focus, don’t neglect to decorate the back as well. This will ensure that your angel looks beautiful and complete from all angles. But remember to keep the weight and balance in mind.
6) Take Breaks
Decorating a foam angel can be a time-consuming process, so make sure to take breaks as needed. This will prevent you from getting burnt out or making any mistakes due to fatigue. Step away for a few minutes, or come back to your project another day with fresh eyes.
7) Get Creative with Display
Once your foam angel is decorated, think of creative ways to display it. You can hang it on a wall, place it on a stand or shelf, or even incorporate it into a holiday centerpiece. The possibilities are endless!
8) Share Your Creation
Finally, don’t forget to share your beautiful foam angel creation with others. It can be a great conversation starter and a way to showcase your creativity. Plus, it’s always nice to spread joy and inspiration through your art. So go ahead and display your foam angel proudly! With these additional tips on how to decorate a foam angel in mind, you’re sure to create a stunning foam angel that will bring beauty and cheer into any space.
Frequently Asked Questions for Decorating a Foam Angel
Can I Use Any Type of Foam for My Angel?
It’s best to stick to craft foam or styrofoam specifically designed for crafting when making a foam angel. These types of foam are sturdy and easy to decorate. Using other types of foam may not yield the desired results.
Do I Need to Use a Template for My Angel?
While using a template can be helpful, it’s not necessary. You can freehand your angel or use a pre-made foam shape as a guide. As long as you have an idea in mind and the right materials, your angel will turn out beautifully.
Are There Any Age Restrictions for Decorating a Foam Angel?
While this activity is suitable for all ages, it’s best to supervise younger children and make sure they are using non-toxic materials. For older children or adults, feel free to get as creative as you want!
Can I Hang My Foam Angel Outdoors?
It’s not recommended to hang your foam angel outdoors as it may not withstand weather conditions and could get damaged. It’s best to display your angel indoors, where it can be enjoyed for a longer period of time.
How Long Will My Foam Angel Last?
With proper care, your foam angel can last for years! Just make sure to store it in a dry and cool place when not in use, and avoid placing heavy objects on top of it. This will help preserve its shape and decorations. So go ahead and enjoy your beautiful foam angel for many seasons to come! Remember to have fun, be creative, and share your creations with others.
Conclusion
Decorating a foam angel can be a fun and rewarding activity for all ages. By following safety precautions on how to decorate a foam angel, planning ahead, and incorporating personal touches, you can create a unique and beautiful angel decoration. Utilize different materials, textures, and color schemes to make your angel truly stand out.
Don’t forget to take breaks and enjoy the process! And remember to share your creation with others, as it is sure to bring joy and inspiration to those who see it. So gather your materials, let your creativity flow, and have fun bringing your foam angel to life!
Angela Ervin
Angela is the executive editor of DIY quickly. She began her career as an interior designer before applying her strategic and creative passion to lifestyle and home. She has close to 15 years of experience in creative writing and online content strategy for housekeeping, home decorations as well as other niche efforts. She loves her job and has the privilege of working with an extraordinary team. She lives with her husband, two sons, and daughter in Petersburg. When she's not busy working she spent time with her family.


