
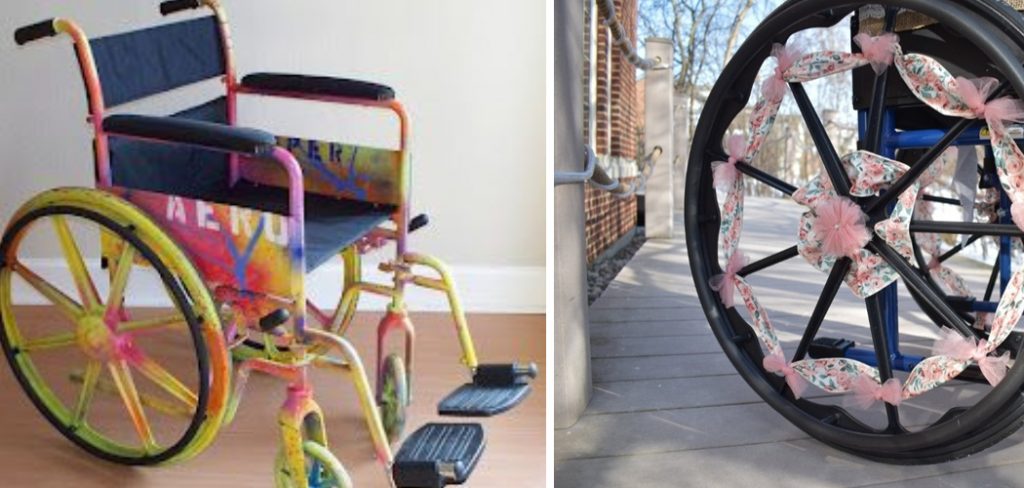
How to Decorate a Wheelchair
Wheelchair decoration is not just an artistic expression; it’s a celebration of individuality and personality. For many wheelchair users, their wheelchair is not just a mobility device but an extension of themselves. How to decorate a wheelchair can transform it from a purely functional apparatus into a unique and personal statement.
This guide aims to inspire and instruct on how to infuse one’s wheelchair with character and style. Whether you’re aiming for something subtle and elegant or bold and vibrant, there are countless ways to personalize your wheelchair.
From simple, cost-effective methods to more elaborate projects, we’ll explore a variety of options to suit every taste and budget. Embarking on this creative journey enhances the wheelchair’s aesthetic appeal and fosters a positive sense of self and identity.
What are the Benefits of Decorating a Wheelchair?
Decorating a wheelchair has numerous benefits, including:
- Personalization: By adding your own touch to your wheelchair, you can make it uniquely yours and reflect your personality.
- Increased Visibility: A decorated wheelchair is more noticeable and can increase visibility in busy or crowded places. This is particularly beneficial for safety purposes.
- Conversation Starter: Decorated wheelchairs often draw attention and can serve as a conversation starter, allowing you to connect with others and potentially break down social barriers.
- Promotes Self-Expression: Wheelchair decoration is an excellent way to express yourself creatively and showcase your individuality.
- Boosts Self-Esteem: A decorated wheelchair can increase confidence and self-esteem by making users feel more comfortable and proud of their wheelchair.
- Encourages Accessibility Awareness: By decorating your wheelchair, you can raise awareness about accessibility and disability in society, promoting inclusivity and understanding.
These are just a few of the many benefits of decorating a wheelchair. Now, let’s explore some practical ways to decorate your wheelchair.

What Will You Need?
The materials and supplies needed for decorating a wheelchair will depend on the chosen method. Generally, these items are considered essential:
- Washable Markers or Paint: These can be used to draw designs or patterns on the wheelchair frame.
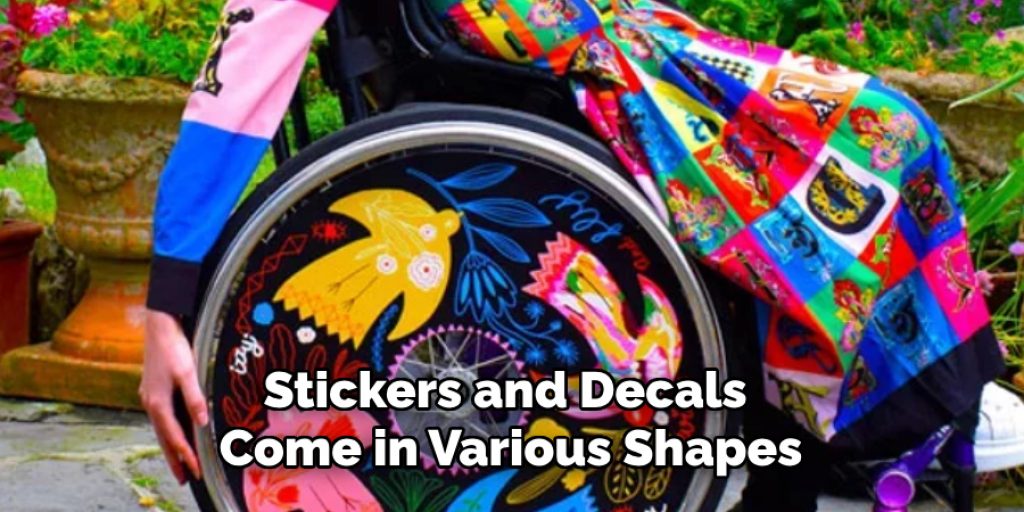
- Stickers and Decals: Stickers and decals come in various shapes, sizes, and designs, making them a versatile option for decorating wheelchairs.
- Fabric or Tape: Fabric or tape can be wrapped around the wheelchair frame, adding color and texture.
- LED Lights: LED lights add a fun and playful touch to the wheelchair, particularly for evening events or celebrations.
- Craft Supplies: Items such as ribbons, beads, feathers, and glitter can add a unique and personalized touch to the wheelchair.
- Tools: Depending on the chosen method, you may need scissors, glue, or tape to attach decorations to the wheelchair frame.
Once you have your supplies, it’s time to get creative and decorate your wheelchair!
10 Easy Steps on How to Decorate a Wheelchair
Step 1. Plan Your Design:
Before you start decorating, it’s essential to have a clear idea of what you want your wheelchair to look like. Consider themes, color schemes, and the overall style you’re aiming for. Drawing a sketch or creating a mood board can help visualize your concept and ensure a cohesive design.
Step 2. Clean Your Wheelchair:
To ensure that decorations adhere properly and look their best, start with a clean surface. Use a damp cloth to wipe down the entire wheelchair, removing any dirt, dust, or grime. Pay special attention to the areas where you plan to apply decorations to ensure they stick well.
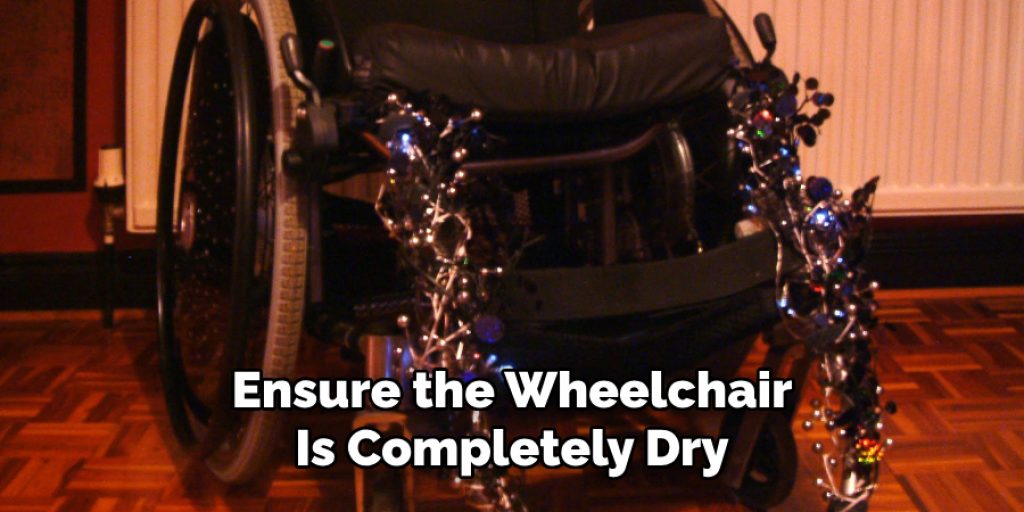
If your wheelchair has any oily or greasy spots, a bit of mild soap mixed with water can help remove these residues. Ensure the wheelchair is completely dry before moving on to the next step. This preparation step is crucial for a smooth decorating process and can significantly impact the durability and appearance of your decorations.
Step 3. Apply Your Base Decorations:
Once your wheelchair is clean and dry, begin with your base layer of decorations. This could involve wrapping the frame in colored fabric or tape, painting certain parts of the wheelchair, or applying larger decals as your primary design elements.

Ensure that any paints or adhesives used are safe for the wheelchair’s material and that you’re working in a well-ventilated area if using products with strong odors. Applying the base decorations sets the tone for your overall design, so take your time and make sure everything is positioned and adhered to correctly. This foundational layer can also provide a cohesive look that can be built upon with more detailed embellishments.
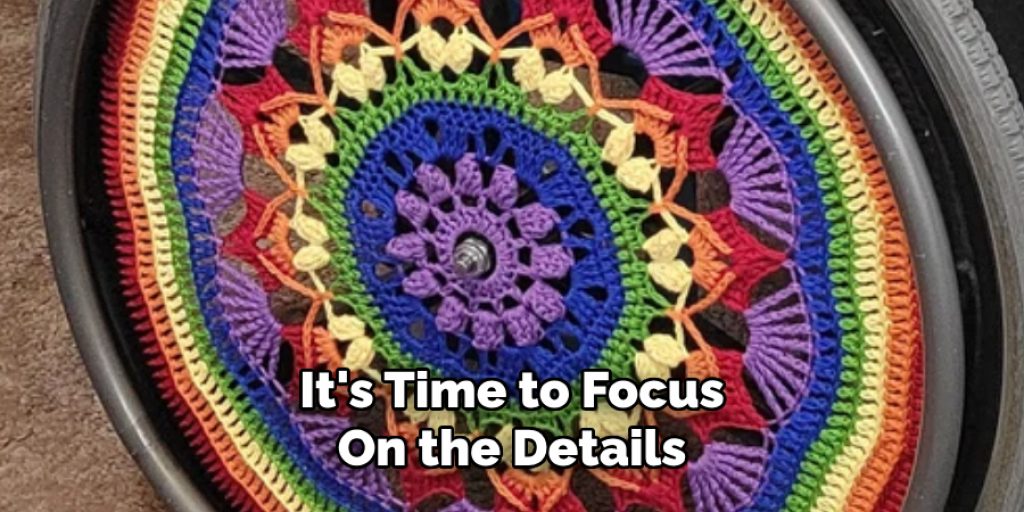
Step 4. Add Detailed Embellishments:
With your base decorations in place, it’s time to focus on the details that will make your wheelchair truly stand out. Detailed embellishments could include sticking on smaller decals, applying strips of LED lights, or attaching beads, feathers, and other craft supplies to add texture and movement.
When adding these finer details, consider areas of the wheelchair that receive the most visibility, such as the spokes of the wheels, the backrest, or the sides of the seat. Use glue or tape to secure these items, ensuring they’re firmly in place while considering the long-term maintenance and practicality of your wheelchair. These embellishments are your chance to express your creativity and add character to your wheelchair, making it a reflection of your personality and style.
Step 5. Personalize with Stickers and Decals:
After adding your base decorations and detailed embellishments, personalize your wheelchair further with stickers and decals that reflect your interests, passions, or personality traits. This step allows for a deeper expression of your identity, from your favorite quotes to symbols that represent something significant to you.
Stickers and decals can easily transform the look of your wheelchair without being permanent, offering flexibility in changing designs as your interests evolve. Carefully place them in strategic locations to ensure they’re visible and complement the overall design.
Step 6. Showcase Your Artistic Flair with Paintings:
For those with a knack for painting, incorporating hand-painted designs can add a bespoke touch to your wheelchair. Use washable markers or paints that are formulated for the material of your wheelchair frame. This step allows you to showcase your artistic talents, from delicate floral patterns to bold abstract art.
Before starting, sketch your design lightly with a pencil or washable marker to serve as a guide. Painting on your wheelchair not only makes it unique but also turns it into a moving piece of art. Allow sufficient drying time for your paintings to avoid smudging, ensuring your artwork remains pristine and vibrant. This creative process can be incredibly satisfying and result in a wheelchair that truly stands out.
Step 7. Illuminate with LED Lights:
Adding LED lights to your wheelchair not only elevates its appearance but also enhances visibility during nighttime. Strategically place LED strips along the frame, under the seat, or around the wheels for an eye-catching glow.
Choose from a variety of colors or programmable options that allow you to change colors and patterns based on your mood or the occasion. When installing LED lights, make sure the battery pack is securely attached and in a position where it won’t interfere with the wheelchair’s functionality or comfort. This step transforms your wheelchair into a striking and safe vehicle, especially advantageous after sunset.
Step 8. Enhance with Sound:
For an added layer of personalization, consider integrating a sound system or attaching a portable speaker to your wheelchair. This allows you to enjoy your favorite music or audiobooks wherever you go, creating a more enjoyable and customized experience. Ensure that the speaker is securely attached and positioned in a way that does not hinder the wheelchair’s functionality or your access to controls.
You can choose a speaker that matches the aesthetic of your wheelchair, blending seamlessly with your decorations. This step is not only about enhancing the visual appeal but also about adding a soundtrack to your daily movements, making every ride more pleasant and lively.
Step 9. Final Touches and Maintenance:
After you have completed your decorative upgrades, it’s important to give your wheelchair a thorough inspection to ensure all decorations are securely attached and do not interfere with its functionality. Check that nothing obstructs the wheels, brakes, or handles and that your view and access to the controls are unimpeded.
Regular maintenance checks are essential to keep your decorations looking fresh and to ensure the safety and longevity of your wheelchair. Cleaning your wheelchair gently with a damp cloth can help maintain the vibrancy of your decorations. Additionally, periodically assess and replace any worn-out decorations or lights to keep your wheelchair looking its best. This final step ensures that your wheelchair not only reflects your personality but remains practical and safe for everyday use.
Step 10. Celebrate Your Creation:
Once all steps are complete, take a moment to appreciate the effort and creativity that went into customizing your wheelchair. Sharing your newly decorated wheelchair with friends family, or on social media can not only showcase your artistic flair but also inspire others in the community to personalize their mobility aids.
Celebrating your creation is about more than just the final product; it’s about expressing your individuality and owning your mobility experience with pride. Remember, your wheelchair is an extension of you, and through these personalized touches, it tells a unique story. Enjoy the smiles, compliments, and conversations that your newly decorated wheelchair will undoubtedly provoke.
By following these steps, you can transform your wheelchair into a personalized and vibrant expression of yourself.
5 Additional Tips and Tricks
- Use Removable Decals: Decals are a great way to personalize a wheelchair without committing to a permanent design. They come in various shapes, sizes, and themes. Plus, they can easily be changed according to mood or season.
- Add a Personalized Wheel Cover: Wheel covers not only add a splash of color and personality but also keep clothes clean from wheel splatter. You can find them in different designs or even customize them with your own artwork.
- Incorporate LED Lights: LED lights can be attached to the underside of the wheelchair frame to add an illuminated flair. This not only looks cool but can also improve visibility during nighttime outings.
- Sew or Attach Patches: For those who prefer a more traditional approach, sewing or attaching patches to the wheelchair’s backrest or side bags can showcase personal interests, achievements, or affiliations. It’s a classic way to decorate and personalize items with deep personal meaning.
- Utilize Handlebar Grips for Wheelchairs with Push Handles: Switching out the standard grips for vibrant, patterned ones not only adds a touch of personality but also improves grip comfort for whoever may be assisting with the wheelchair.
With these additional tips and tricks, personalizing a wheelchair can become an enjoyable and creative process.
5 Things You Should Avoid When Decorating a Wheelchair
- Avoid Permanent Modifications Without Professional Help: Making permanent changes to a wheelchair’s structure can affect its warranty and functionality. Always consult with a professional before considering structural alterations.
- Steer Clear of Obstructive Decorations: Ensure that decorations do not hinder the wheelchair’s operation or accessibility. Decorations should never block wheel paths, restrict movement, or interfere with the ability to fold the chair.
- Do Not Use Materials that Could Cause Injury: Sharp edges, loose strings, or small detachable parts can pose safety risks, especially when they are within reach of moving parts.
- Avoid Heavy Additions: Adding too much weight with decorations can make the wheelchair harder to push and maneuver. When adding decorations, keep the wheelchair’s weight balance in mind.
- Be Cautious with Electrical Modifications: When adding lights or electronic elements, ensure they are battery-operated and securely mounted. Avoid any modifications that could expose you or the wheelchair to water damage or electrical hazards.
By mindful adherence to these guidelines, wheelchair users can safely express their personality and style while maintaining their wheelchair’s integrity and functionality.
How to Decorate a Wheelchair for a Wedding?
Decorating a wheelchair for a wedding is a special and exciting way to add a personal touch to the celebration. Here are some tips for this special occasion:
- Choose Romantic Colors: Incorporate romantic colors such as shades of white, ivory, blush, or gold into the decorations. This will tie in with the overall theme of the wedding and create a cohesive look.
- Use Flowers: Flowers are a classic and beautiful addition to any wedding decoration. You can use fresh or artificial flowers to decorate the wheelchair’s handles, backrest, or footrests. Opt for flowers that match the bride’s bouquet for a coordinated look.
- Add Ribbons and Bows: Ribbons and bows add a touch of elegance and charm to the wheelchair. You can wrap them around the handles, tie them on the backrest, or attach them to the footrests.
- Personalize with Photos: Incorporate photos of the couple onto the wheelchair’s decorations. You can print out small pictures and attach them to ribbons or use photo frames as part of the decoration.
- Include Signs or Banners: Adding a sign or banner to the wheelchair is a great way to showcase a special message, such as “Just Married” or the couple’s initials. You can hang these on the backrest or attach them to the sides of the wheelchair for everyone to see.
Remember to always consider the safety and functionality of the wheelchair when decorating for a wedding. Avoid obstructive decorations and be mindful of the weight added to the chair. With these tips, you can create a beautiful and personalized decoration for a wheelchair on this special day.

How Do You Make a Hotel Wheelchair Friendly?
When traveling, wheelchair users often face challenges in finding wheelchair-accessible accommodations. To make a hotel room more wheelchair-friendly, here are some tips to keep in mind:
- Request a Wheelchair-Accessible Room: When booking a hotel, be sure to specify that you require a wheelchair-accessible room. This will ensure that the room is designed with accessibility features such as wider doorways and roll-in showers.
- Consider the Layout: When choosing a room, consider the layout of the space. Look for rooms with open floor plans that allow for easy maneuvering in a wheelchair.
- Check for Bathroom Adaptations: Ensure the bathroom has grab bars, a raised toilet seat, and a roll-in shower or bathtub with a built-in seat. These adaptations will make using the bathroom much easier for wheelchair users.
- Assess Furniture Placement: Take note of where furniture is placed in the room. Is there enough space to move around in a wheelchair? Are there any unnecessary obstacles that could be removed?
- Inquire About Additional Services: Some hotels may offer additional services such as a portable shower bench or bed rails for extra support. Be sure to inquire about these services when making your reservation.
By following these tips, you can make a hotel room more wheelchair-friendly and ensure a comfortable stay for wheelchair users.
Conclusion
How to decorate a wheelchair is more than just an exercise in creativity—it’s a meaningful way to express individuality and enhance the daily experience of wheelchair users. To transform a wheelchair with personal flair, remember to prioritize safety and functionality alongside aesthetic appeal.
Whether it’s for a special occasion like a wedding or simply to reflect personal interests, the right decorations can turn a functional device into a personalized statement. Always opt for reversible, non-obstructive, and lightweight decorations to maintain the wheelchair’s integrity and ensure ease of use.
By following these guidelines, wheelchair users and their loved ones can enjoy the process of customization, making every ride a little more joyful and expressive.
Angela Ervin
Angela is the executive editor of DIY quickly. She began her career as an interior designer before applying her strategic and creative passion to lifestyle and home. She has close to 15 years of experience in creative writing and online content strategy for housekeeping, home decorations as well as other niche efforts. She loves her job and has the privilege of working with an extraordinary team. She lives with her husband, two sons, and daughter in Petersburg. When she's not busy working she spent time with her family.


