
How to Decorate Classroom Windows
Are you a teacher looking for ways to spruce up your classroom? Consider adding some decorations to your windows! Window decorations can add color and interest and provide opportunities for learning in the classroom.
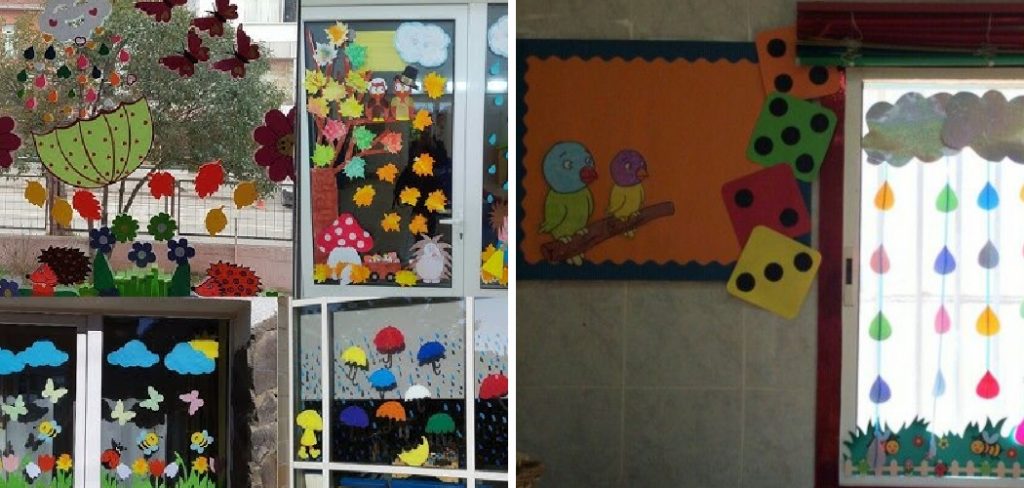
Decorating classroom windows is an effective and creative way to brighten up the learning environment, foster a sense of belonging, and visually stimulate students’ minds.
Transforming plain glass into a vibrant display can turn the classroom into a more welcoming space, making it conducive to both teaching and learning. Whether it’s for seasonal themes, celebrating cultural events, or showcasing student work, window decorations can serve as a dynamic backdrop to the educational experience.
This guide will explore various ideas and tips on how to decorate classroom windows, ensuring that they not only look appealing but also enhance the educational atmosphere.
Why Decorate Classroom Windows?
There are several benefits to adding decorations to classroom windows. Here are some of the main reasons why teachers should consider incorporating window displays into their teaching practice:
- Enhance Visual Learning: Decorating windows can provide a visual representation of lesson concepts, making them more tangible and easier for students to understand.
- Create a Welcoming Atmosphere: Colorful and inviting window displays help create a warm and welcoming environment for students, making them feel comfortable and at ease in the classroom.
- Showcase Student Work: Classroom windows can serve as a perfect space to display student artwork, projects, or achievements. This not only gives students a sense of pride but also inspires them to continue creating and learning.
- Celebrate Seasonal Themes: Window decorations are an easy and fun way to reflect seasonal changes and holidays. They can bring a sense of excitement and celebration into the classroom, making learning more engaging.
- Promote Cultural Awareness: Classroom windows can be used to showcase diverse cultures, traditions, or celebrations. This helps foster understanding, respect, and appreciation for different backgrounds among students.
These are just some of the many benefits of decorating classroom windows. So, let’s explore some creative ideas for making your classroom windows pop!
What Will You Need?
Before getting started, make sure you have the following materials handy:
- Window clings or stickers in various shapes and colors
- Washable markers or paint pens
- Construction paper, colored tissue paper, or crepe paper
- Scissors, tape, glue sticks, and string
- Cardstock or poster board for creating large displays
Some of these materials can also be found at your local dollar store, making it budget-friendly to decorate your classroom windows.
10 Easy Steps on How to Decorate Classroom Windows
Step 1. Choose a Theme:

The first step in decorating your classroom windows is to select a theme. This could be based on the current season, an upcoming holiday, a specific subject you are teaching, or even a classroom project.
A coherent theme will not only make your window decoration process easier but also ensure that the end result is visually cohesive and related to the educational content being taught. For instance, if you’re teaching a unit on marine biology, choosing a sea life theme for your decorations could inspire students and reinforce the subject matter.
Alternatively, themes based on holidays such as Halloween, Christmas, or Earth Day can make the classroom feel festive and directly involve students in seasonal celebrations.
Step 2. Plan Your Design:
Once you’ve chosen a theme, take some time to plan out your design. Consider what elements of the theme can be visualized and how they can be arranged in the window space. Sketching your ideas on paper can be a helpful way to visualize the overall look before you start decorating. Think about the balance and layout of elements such as color and shapes, and how they’ll be viewed both from inside the classroom and from the outside.
This step helps organize your resources and ensure that the final outcome is both attractive and aligned with your educational goals. Planning ahead also minimizes the risk of running out of materials midway through the decorating process.
Step 3. Prepare the Window Surface:
Before you start decorating, it’s important to ensure that the window surface is clean and ready. Remove any dust, dirt, or smudges with a window cleaner and a lint-free cloth, allowing the decorations to adhere better and be displayed clearly.
If you’re planning to use washable markers or paint pens, testing them on a small area of the window can help you gauge how easily they can be applied and removed. Ensuring that the window surface is prepared not only enhances the appearance of your decorations but also prevents any damage to the window during the decorating and cleanup process.
Step 4. Begin Decorating:
After preparing the window surface and finalizing your design plan, it’s time to start decorating. Begin by applying the base elements of your design, such as background colors or large shapes, using your chosen materials. If you’re using window clings or stickers, carefully place them according to your layout. Use washable markers or paint pens for precision for designs requiring more detail, such as drawings or text.

Remember to step back occasionally to assess your work from a distance, ensuring that the overall composition balances well and aligns with your vision. Engaging students in this process can be a fun and interactive way to incorporate art into your curriculum, allowing them to contribute creatively while reinforcing the theme being taught.
Step 5. Add Details and Accents:
Once the base elements of your design are in place, it’s time to add details and accents that will make your window art truly stand out.
This could include adding smaller decorative elements like stars, clouds, or animals that fit with your theme, using contrasting colors for emphasis, or incorporating 3D elements such as paper flowers or folded constructions for a dynamic look. Encourage students to participate in this stage by having them create specific pieces that can be added to the window.
Not only does this allow for a more personalized touch, but it also gives students ownership over the classroom environment. Attention to detail can transform a simple design into a captivating display that captures the imagination and interest of everyone who sees it.
Step 6. Layer for Depth:
After adding all the details and accents, consider layering elements to create a sense of depth in your window display.
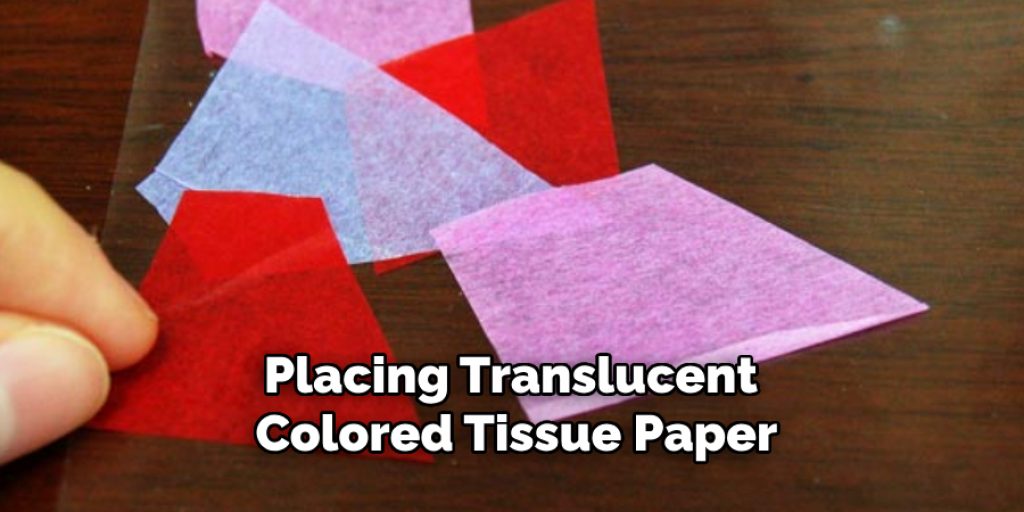
This can be achieved by overlapping various materials or using different textures. For example, placing translucent colored tissue paper behind more solid shapes can create a lovely stained-glass effect that is particularly striking when backlit by sunlight.
Alternatively, using strings to hang elements like leaves or snowflakes at varying distances from the window surface can add a dynamic 3D aspect to your decorations.
Involve students in this process by assigning them to groups, each responsible for a layer, fostering teamwork while enhancing the visual impact of your display.
Step 7. Incorporate Lighting:
Incorporating lighting into your window decoration can dramatically enhance its visual appeal, especially during the early morning or late afternoon.
Consider using small, battery-operated LED lights or fairy lights to highlight certain areas or to create a glowing effect around specific elements of your design. For safety and ease of maintenance, ensure that any lights used are suitable for use in a classroom setting and can be easily turned on and off.
This step not only adds a magical touch to your decorations but also draws attention to the intricate details of your window display, making it a focal point in the classroom both day and night.
Step 8. Maintain and Update as Necessary:
After your window decoration is complete, it’s important to keep an eye on it for maintenance needs. Over time, some elements may fade, peel, or become damaged, especially if exposed to direct sunlight or adverse weather conditions through an open window.

Schedule regular check-ins to assess the condition of your display and make any necessary repairs or updates. This might include replacing faded materials, re-securing loose elements, or even updating the design to reflect new themes or seasons.
Involving students in the maintenance process not only teaches them responsibility and pride in their environment but also offers the opportunity to refresh the display together, keeping the classroom dynamic and engaging.
Step 9. Share and Reflect:
Once your window decoration project is finished, take a moment to share and reflect on the work done. Encourage students to discuss what they learned during the process, which aspects they found most enjoyable, and what they would like to try in future projects.
Sharing the completed window decoration with the wider school community through newsletters, social media, or school websites can also provide recognition for the students’ hard work and creativity. Reflection not only allows for a sense of accomplishment but also fosters a deeper understanding of the artistic process and collaboration.
This step is crucial in closing the project on a positive note, leaving students inspired and looking forward to their next creative challenge.
Step 10. Evaluate the Project:
Once the window decoration project is completed and you’ve had the opportunity to share and reflect with your students, the next step is to evaluate the project’s overall success and areas for improvement.
Consider gathering feedback from students, other teachers, and staff about the window display. What did they like most? What suggestions do they have for future projects? This feedback is invaluable for understanding the impact of your project beyond the classroom and can guide planning for future art projects.

Additionally, evaluate your objectives for the project against the outcomes. Did the students learn what you intended? How did the project enhance their understanding of the theme or lesson? Taking the time for this evaluation will not only celebrate the achievements but also bolster the educational value of incorporating creativity and art in your curriculum.
By following these steps, you can create a visually stunning and educational window display that engages students in a fun and interactive way.
5 Additional Tips and Tricks
- Seasonal Themes: Adapt the window decorations to change with the seasons. This keeps the classroom visually stimulating and relevant. For instance, autumn leaves for the fall, snowflakes in the winter, flowers in the spring, and sun motifs during the summer can be fun and educational.
- Educational Displays: Use the windows to display educational content, such as math concepts, historical timelines, or science cycles. This combines decoration with learning tools, making the environment both educational and engaging.
- Student Artwork Showcase: Encourage students to contribute artwork to the window decorations. This not only personalizes the space but also gives students a sense of pride and ownership over their classroom environment.
- Transparent Color Filters: Apply transparent color filters to the windows. This can easily transform the feel of the classroom throughout the day as the natural light changes, providing a dynamic learning environment. Plus, it can be an interesting way to study color and light.
- Interactive Elements: Consider adding elements that students can interact with, such as question-of-the-day posters or vocabulary words that change weekly. Not only does this make the windows a focal point of the classroom, but it also stimulates regular student engagement with the material displayed.
With these additional tips and tricks, you can take your classroom window decorations to the next level.
5 Things You Should Avoid When Decorating Classroom Windows

- Overcrowding: Avoid cluttering the windows with too many decorations. This can detract from their aesthetic appeal and potentially block natural light, making the classroom feel cramped and dark. Aim for a balanced and clean look that enhances the learning environment without overwhelming it.
- Blocking Emergency Exits: Never place decorations that obscure or block access to emergency exits. Safety should always come first, and all escape routes must remain clear and visibly marked at all times.
- Using Non-removable Adhesives: When removing decorations, avoid using tapes or glues that leave residue or can damage the windows. Instead, opt for removable adhesives designed for glass to keep the windows clean and in good condition.
- Ignoring Light Needs: Be mindful of the classroom’s natural lighting needs. Avoid using decorations that are too dark or opaque, as they can significantly reduce the amount of sunlight entering the room, which is essential for a vibrant and energizing learning space.
- Forgetting Inclusivity: When selecting themes or educational content for window decorations, ensure they are inclusive and reflect the diversity of the classroom. Avoid decorations that might exclude or be insensitive to any student’s cultural background or beliefs. Aim for themes that foster a welcoming and inclusive environment for all students.
By avoiding these common mistakes, you can create a safe, inclusive, and visually stimulating classroom environment that enhances the learning experience for all students.
How Do You Dress a Picture Window?
When it comes to dressing a picture window, there are several options to consider. Here are some tips to help you make the most of this large and often eye-catching feature in your classroom:
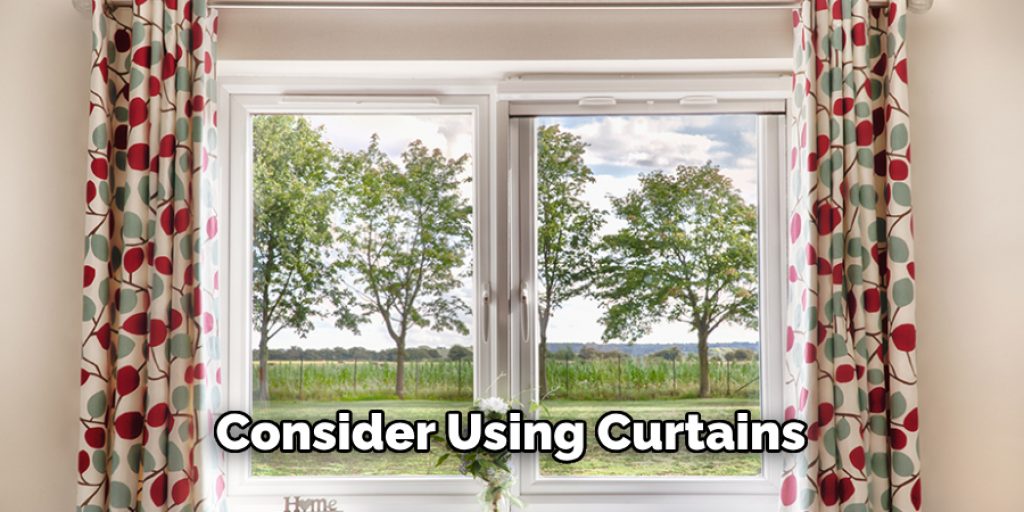
- Use curtains or drapes: One option for dressing in a picture window is using curtains or drapes. Depending on the material and color chosen, they can add texture, color, and softness to the space. Consider using curtains that match your classroom’s theme or color scheme for a cohesive look.
- Install Window Blinds: Another option is to install window blinds, which can provide privacy and light control while still allowing natural light to enter the room. Choose from a variety of styles and materials, such as wood, faux wood, or fabric, to fit your classroom’s aesthetic.
- Add Valances: Valances are a decorative addition that can enhance the appearance of any window, including picture windows. They are available in various styles and patterns, making it easy to find one that complements your classroom decorations.
- Hang Window Toppers: Similar to valances, window toppers can add a touch of elegance and personality to a picture window. They come in various lengths, materials, and designs, making it easy to find one that suits your classroom’s style.
- Use Window Clings: For a fun and temporary option, consider using window clings to dress up your picture windows. These are available in various designs and can be easily removed without any
These are just a few ideas for dressing up your classroom’s picture window. Whatever option you choose, make sure it complements the overall aesthetic of the room and does not obstruct any natural light or emergency exits.
What Type of Color Scheme Should You Use for Window Decorations?
When choosing a color scheme for your window decorations, it’s essential to consider the overall aesthetic of your classroom. Here are some tips to help you select the right colors:

- Match Your Classroom Theme: If your classroom has a specific theme, such as animals or space, consider incorporating those colors into your window decorations. This will create a cohesive look and tie everything together.
- Stick to a Complementary Color Scheme: Choose colors that are opposite each other on the color wheel, such as blue and orange or purple and yellow. This will create a visually appealing contrast in your window decorations.
- Use Analogous Colors: If you prefer a more harmonious color scheme, choose colors that are next to each other on the color wheel, such as blue and green or yellow and orange. This will create a calming and unified look in your classroom.
- Incorporate Neutrals: Neutrals, such as beige, gray, or white, can help balance out brighter colors in your window decorations. They also provide a clean and timeless look that won’t clash with other elements in the classroom.
- Consider Seasonal Colors: If you like to change up your window decorations frequently, consider incorporating colors that reflect the current season or holiday—for example, warm tones for fall, red and green for Christmas, or pastels for spring.
Ultimately, the color scheme you choose for your window decorations should complement your classroom’s overall aesthetic and create a welcoming and stimulating learning environment for your students.
Conclusion
How to decorate classroom windows offers a unique opportunity to enhance the learning atmosphere, making it more engaging and pleasant for students. By incorporating seasonal themes, educational displays, student artwork, transparent color filters, and interactive elements, teachers can create a dynamic environment that stimulates curiosity and learning.
However, it’s crucial to maintain a balance by avoiding overcrowding, blocking emergency exits, using non-removable adhesives, ignoring light needs, and forgetting inclusivity. Additionally, dressing up a picture window with curtains, blinds, valances, window toppers, or window clings can further elevate the classroom’s ambiance.
Ultimately, well-decorated classroom windows make the educational space feel more inviting and inclusive, fostering a positive learning environment for everyone.
Angela Ervin
Angela is the executive editor of DIY quickly. She began her career as an interior designer before applying her strategic and creative passion to lifestyle and home. She has close to 15 years of experience in creative writing and online content strategy for housekeeping, home decorations as well as other niche efforts. She loves her job and has the privilege of working with an extraordinary team. She lives with her husband, two sons, and daughter in Petersburg. When she's not busy working she spent time with her family.


