
How to Decorate Jam Jars
Decorating jam jars is a delightful way to repurpose these humble containers into charming and versatile decorative pieces. Whether you’re looking to add a rustic touch to your home decor, create personalized gifts, or simply enjoy a fun crafting project, decorating jam jars offers endless possibilities for creativity.
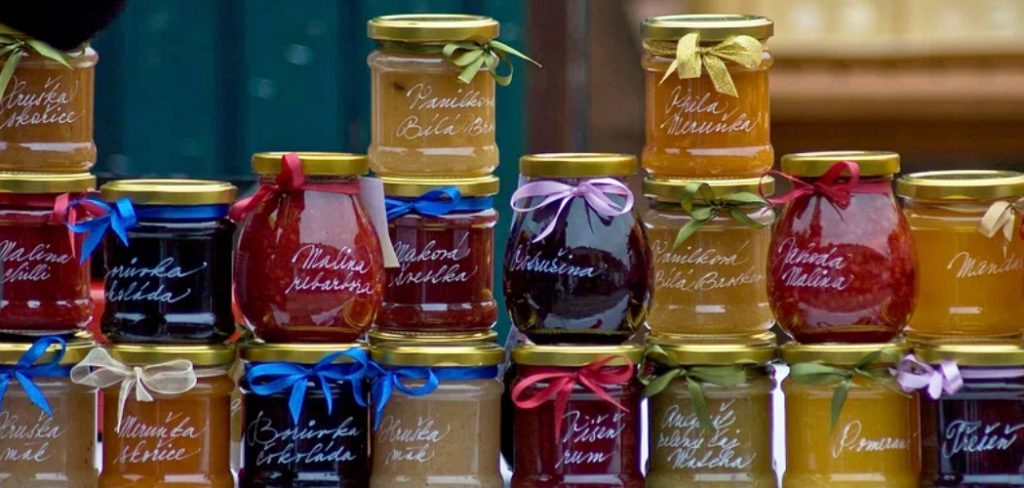
From simple embellishments like ribbons and twine to more elaborate designs featuring paints, decoupage, or etching techniques, there’s something for every style and skill level. In this guide, we’ll explore a variety of methods and ideas for how to decorate jam jars, providing inspiration and step-by-step instructions to help you transform these ordinary containers into beautiful works of art. Get ready to unleash your imagination and breathe new life into your collection of jam jars with these creative decorating ideas.
The Charm of Decorated Jam Jars
Decorated jam jars possess a unique charm that can enhance any space or occasion. Their appeal lies not only in their aesthetic beauty but also in their versatility and the personal touch they add to our surroundings. A jam jar turned into a candle holder or a plant pot, for instance, reflects a blend of creativity and sustainability, bringing warmth and character to a home.
Similarly, when used as containers for homemade gifts or as part of a table setting, these decorated jars create a sense of intimacy and care. The process of transforming a simple jar into a piece of decor is both therapeutic and fulfilling, offering an opportunity to express oneself through art and craft. In essence, the charm of decorated jam jars comes from their ability to turn the ordinary into something extraordinary, making the everyday more beautiful and meaningful.
Versatility of Decorated Jam Jars
The versatility of decorated jam jars is truly remarkable, enabling these repurposed items to fit seamlessly into a wide range of uses and settings. One of their most appreciated qualities is how they can be adapted for various purposes, from functional household items to festive decorations. For example, a beautifully decorated jam jar can serve as a vase for fresh flowers, adding a touch of rustic elegance to any room.
Alternatively, when equipped with a tea light or votive candle, these jars become enchanting lanterns that cast a soft, warm glow, perfect for creating a cozy atmosphere indoors or out. They’re also incredibly useful for organizing, whether it’s for storing small office supplies, kitchen spices, or bathroom essentials in a stylish way.
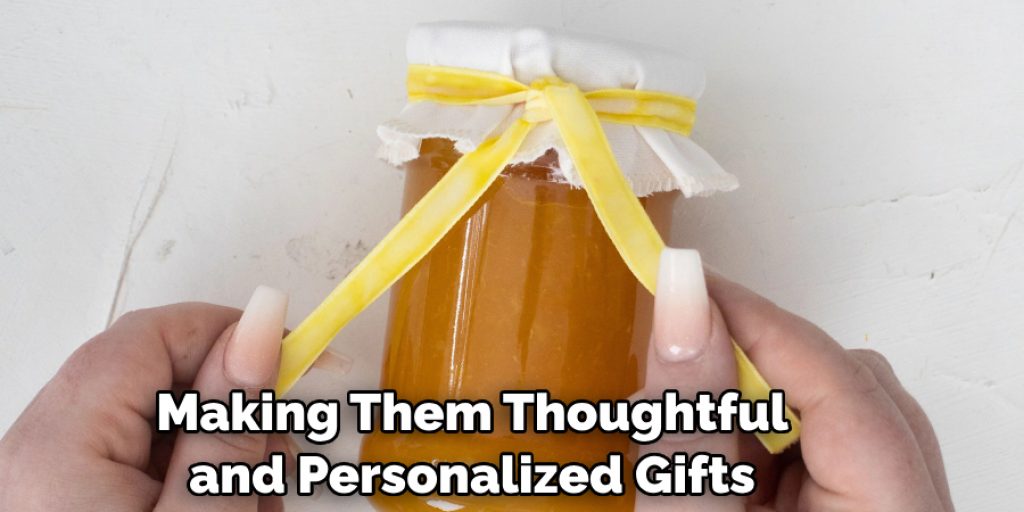
During the holiday season, decorated jam jars can be filled with homemade treats or crafts, making them thoughtful and personalized gifts for friends and family. The ability of these jars to blend functionality with aesthetic appeal demonstrates their unmatched versatility, making them an indispensable part of creative decorating and gift-giving.
Choosing the Right Jam Jars for Decoration
Before you begin the exciting process of decorating, selecting the right jam jars is crucial to the success of your project. The ideal jar for decoration depends not only on the intended use but also on the personal style you wish to achieve.
Firstly, consider the size and shape of the jar. Smaller jars are perfect for delicate decorations or as holders for small items, while larger jars offer more space for bold designs and can be repurposed for practical uses like storage containers or vases. The shape of the jar also plays a significant role; choose jars with smooth surfaces for easier application of materials like paint or decoupage.
Another important aspect is the condition of the jar. Ensure that the jars are clean and free from labels or residue, which provides a pristine canvas for your decorations. Additionally, the transparency of the glass is worth considering. Clear jars are ideal for projects where the contents are a focal point, like terrariums or candle holders, allowing a full view of the inside. Tinted or textured glass jars can add an interesting visual effect to your decorations but may limit visibility.
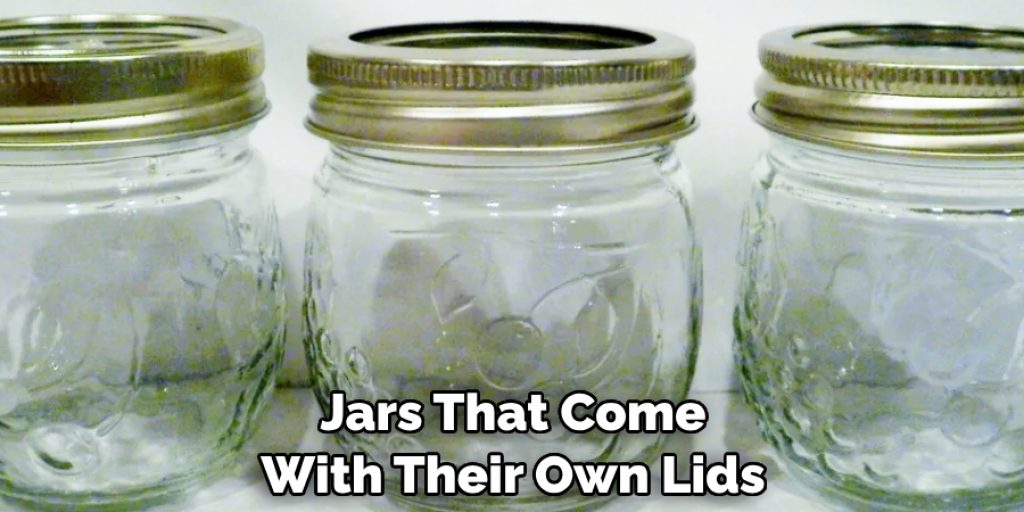
Finally, think about the lid. Metal lids can be painted, and fabric covers can be used for a rustic look, while jars with locking lids add a unique aesthetic and functional element. The choice of the right jar sets the foundation for your creative process, ensuring your decorated jars not only look beautiful but are also perfectly suited to their new role in your home or as a gift.
Types of Jam Jars Suitable for Decoration
When it comes to selecting jam jars for decoration, the options are as varied as the potential designs themselves. Understanding the types of jam jars that lend themselves to crafting can help you choose the best container for your project.
- Classic Mason Jars: These jars are iconic for their sturdy construction and wide mouths, making them a versatile choice for a range of decorative projects. Their clear glass showcases contents beautifully, and they’re available in a variety of sizes.
- Vintage or Antique Jars: For projects requiring a touch of nostalgia or rustic charm, antique jars with unique shapes, colored glass, or embossed logos offer distinctive character and a story behind each piece.
- Small or Miniature Jars: Ideal for delicate decorations or favors, small jam jars can be used to hold tiny plantings, as votive candle holders, or as miniature storage solutions for beads, spices, or other small items.
- Hexagonal or Novelty-Shaped Jars: These jars add an element of interest with their unusual shapes, providing a unique base for decoration. They work well for standout gifts or as conversation pieces in your decor.
- Recycled Commercial Jam Jars: Reusing jars from store-bought jams embraces sustainability and can be a cost-effective way to gather containers. These jars often come in standard sizes, but their labels and sometimes unique shapes can add to your project’s appeal.
- Jars with Lids: Jars that come with their own lids offer additional decorating opportunities. The lids can be painted, decoupaged, or replaced with fabric covers to complement the jar’s decoration.
Each type of jar has its own set of qualities that can enhance different decorative projects. Whether you’re aiming for a modern look with clear, sleek lines or a more traditional, homey aesthetic, there’s a jam jar perfectly suited to your creative vision. Choosing the right type of jar is the first step in bringing your decorative ideas to life.
Factors to Consider When Selecting Jam Jars
When selecting jam jars for your decorative projects, there are several factors to consider to ensure your creations not only look appealing but are also practical and suitable for their intended purpose. Beyond the basic considerations of size, shape, and type, here are some additional aspects to keep in mind:
- Purpose of the Jar: Define the primary use of your decorated jar. Will it be used for storage, as a decorative piece, or perhaps as a container for a gift? Different uses may require jars of certain sizes, shapes, or with specific features, such as airtight seals for storage purposes.
- Material and Durability: Most jam jars are made of glass, which is ideal for many projects. However, the thickness and durability of the glass can vary. Consider where and how the jar will be used to ensure it is sturdy enough for its intended purpose, especially if it will be handled frequently or filled with heavier items.
- Aesthetic Compatibility: The jar’s appearance should align with the overall design vision of your project. For instance, if you’re aiming for a vintage look, an antique jar might be more appropriate. For modern designs, a jar with clean lines and clear glass might be better suited.
- Cost: While many projects are cost-effective, particularly if recycling jars, the cost can become a factor if purchasing jars specifically for crafting. Bulk purchases or wholesale options might offer savings if you need a large quantity of jars.
- Environmental Impact: Consider the ecological footprint of your project. Using recycled jars or repurposing jars you already have at home is an environmentally friendly choice, reducing waste and promoting sustainability.
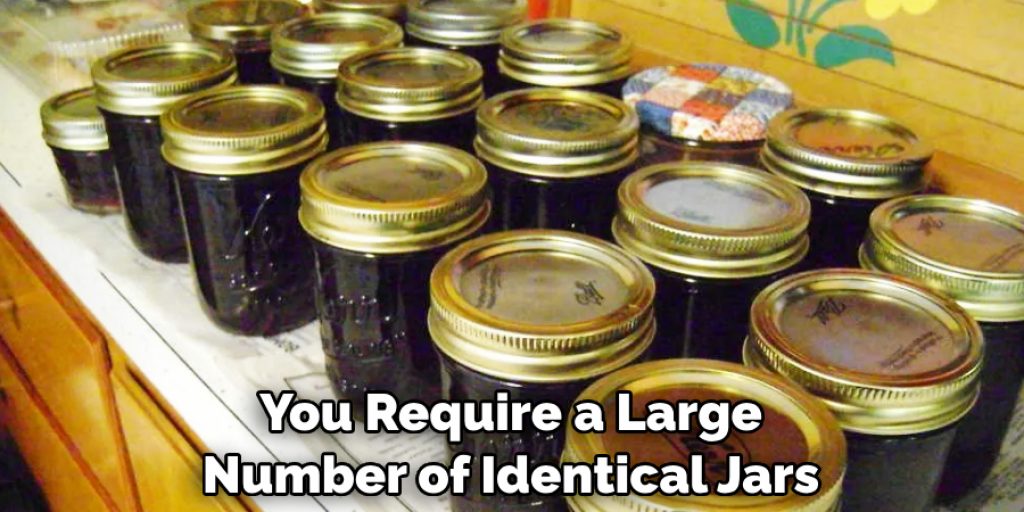
- Availability: Ensure the jars you need are readily available, especially if you require a large number of identical jars. Limited availability might necessitate adjustments to your project scope or timeline.
By taking these factors into account, you can select the perfect jam jars for your decorative projects, resulting in creations that are not only beautiful but also practical and in harmony with your artistic vision.
10 Methods How to Decorate Jam Jars
1. Paint and Stencil Designs
Painting jam jars allows for endless customization and creativity. Start by cleaning and drying the jars thoroughly. Then, use acrylic paints to coat the jars in your desired base color. Once the paint dries, use stencils to add intricate designs or patterns. Choose stencils with holiday motifs, geometric shapes, or nature-inspired patterns. Use a small brush to carefully fill in the stencil outlines with contrasting paint colors. Allow the paint to dry completely before sealing the design with a layer of clear sealant.
2. Decoupage with Decorative Paper
Decoupage is a versatile technique that involves adhering decorative paper or fabric to surfaces using a specialized adhesive. To decorate jam jars with decoupage, select patterned or decorative paper that complements your desired aesthetic. Cut the paper into small pieces or strips, then apply a thin layer of decoupage glue to the surface of the jar. Carefully place the paper onto the glued surface, smoothing out any wrinkles or air bubbles. Continue layering the paper until the entire jar is covered, overlapping edges as needed. Once dry, seal the decoupage with another layer of glue or clear sealant for durability.
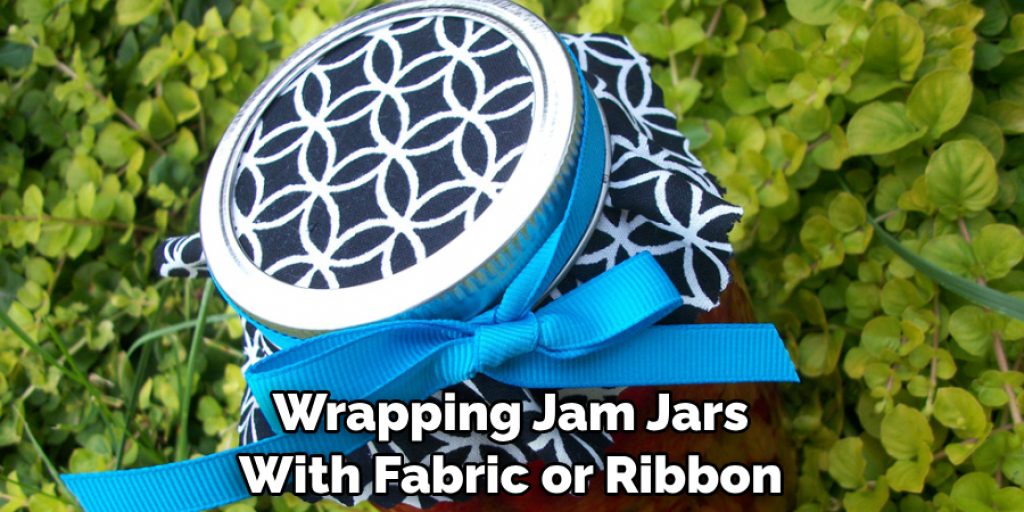
3. Wrap with Fabric or Ribbon
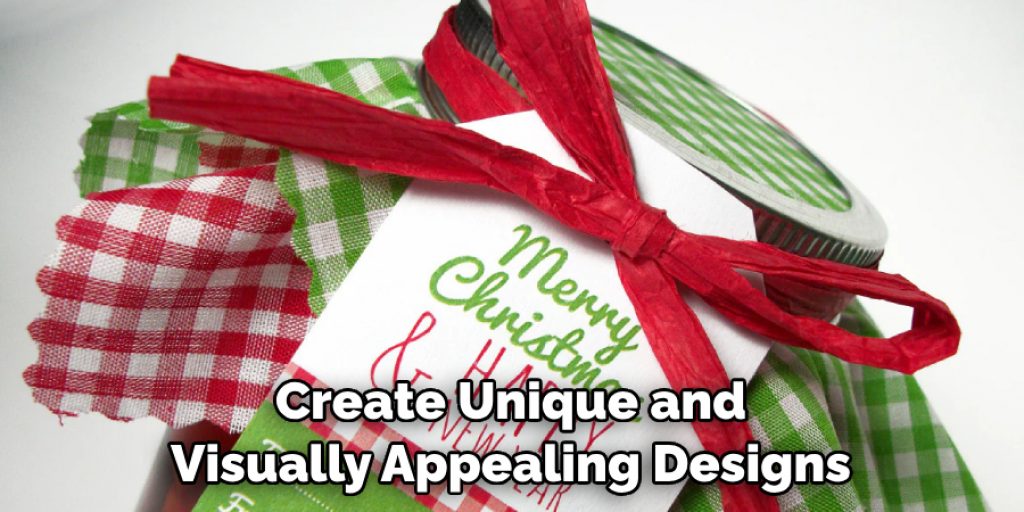
Wrapping jam jars with fabric or ribbon adds texture and visual interest to their appearance. Choose colorful fabric scraps or decorative ribbons that coordinate with your decor theme. Cut the fabric or ribbon to the desired length, then wrap it tightly around the body of the jar, securing the ends with glue or double-sided tape. For added flair, tie a bow or knot at the top of the jar. Experiment with different fabric textures, patterns, and ribbon widths to create unique looks for each jar.
4. Etch Glass
Etching glass creates a frosted or textured effect on the surface of jam jars, adding an elegant touch to their appearance. To etch glass, you’ll need glass etching cream, adhesive stencils, and protective gloves. Clean the jars thoroughly and apply the adhesive stencils to the desired areas of the glass. Carefully spread a thick layer of etching cream over the stenciled areas, ensuring complete coverage. Allow the cream to sit for the recommended time specified on the product packaging, then rinse it off with water and remove the stencils. The result is a beautifully etched design that adds sophistication to your jam jars.
5. Dip-Dye or Ombre Effect
Create a trendy dip-dye or ombre effect on your jam jars using liquid dye or acrylic paint. Start by mixing your chosen dye or paint colors with water to create a diluted solution. Dip the bottom portion of the jam jar into the dye or paint mixture, holding it in place for a few seconds to allow the color to absorb. Gradually lift the jar out of the dye or paint, allowing excess liquid to drip off. For an ombre effect, gradually dilute the dye or paint as you move up the jar, creating a gradient of color. Allow the jars to dry completely before displaying them.
6. Add Embellishments
Embellishing jam jars with decorative accents such as beads, charms, or buttons adds a whimsical touch to their appearance. Use hot glue or craft adhesive to attach the embellishments to the surface of the jars.
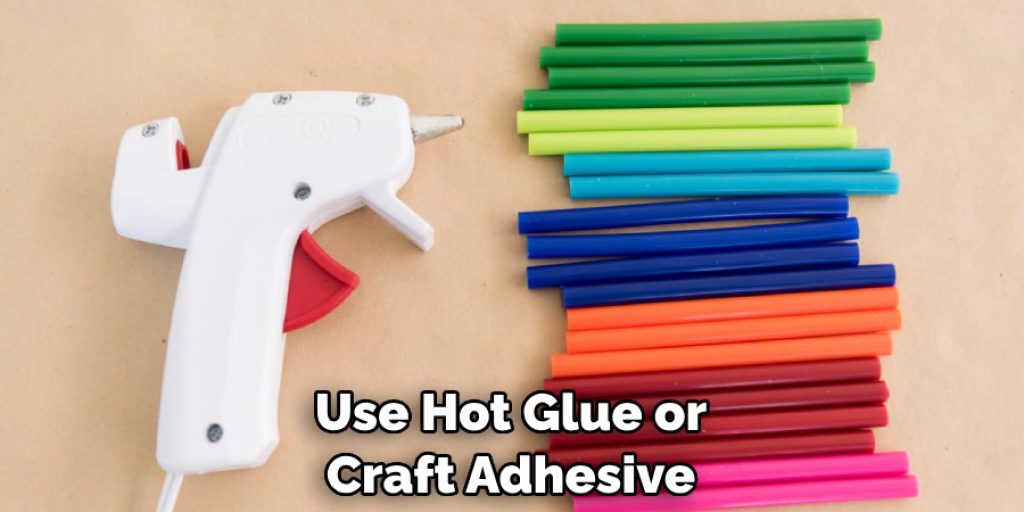
Arrange the embellishments in unique patterns or clusters, mixing and matching different shapes, sizes, and textures for visual interest. Consider incorporating themed embellishments such as seashells for a beach-themed jar or miniature ornaments for a holiday-inspired design. Allow the glue to dry completely before handling the jars to ensure the embellishments stay in place.
7. Create Chalkboard Labels
Adding chalkboard labels to jam jars not only allows you to personalize them but also makes it easy to identify the contents inside. Purchase adhesive chalkboard labels or paint a small section of the jar with chalkboard paint. Use chalk or chalk markers to write labels or draw designs directly onto the chalkboard surface. Erase and update the labels as needed, making these jars versatile for storing various items or giving as gifts. Chalkboard labels are perfect for organizing pantry staples, crafting supplies, or homemade jams and preserves.
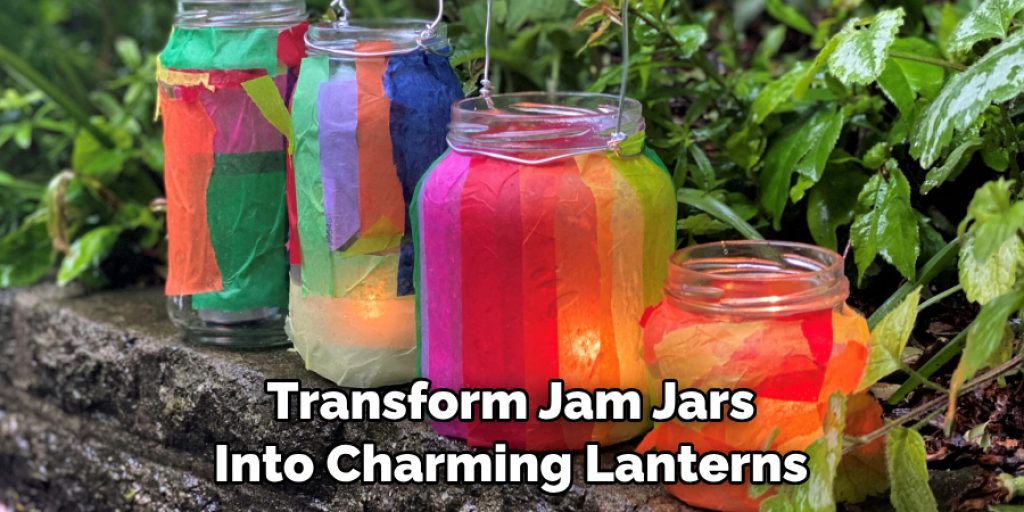
8. Illuminate with LED Lights
Transform jam jars into charming lanterns or votive holders by adding LED lights inside. Clean the jars thoroughly and insert battery-operated LED lights or fairy lights into the jars. Arrange the lights to fill the jars evenly, ensuring they are securely in place. You can further enhance the ambiance by placing decorative items such as pinecones, faux snow, or holiday ornaments inside the jars along with the lights. These illuminated jam jars make beautiful centerpieces for parties, weddings, or outdoor gatherings.
9. Personalize with Handwritten Messages
Adding handwritten messages or quotes to jam jars adds a personal touch and makes them meaningful gifts for loved ones. Use permanent markers or paint pens to write messages directly onto the surface of the jars. Choose meaningful quotes, holiday greetings, or personalized messages for special occasions such as birthdays or weddings. You can also write the recipient’s name or initials on the jars to create personalized party favors or place settings. Allow the ink to dry completely before handling the jars to prevent smudging.
10. Upcycle with Natural Elements
Decorate jam jars with natural elements such as twigs, pinecones, or dried flowers to create rustic-inspired decor pieces. Collect natural materials from your backyard or local craft store and arrange them creatively around the jars.
Use hot glue or craft adhesive to attach the natural elements securely to the surface of the jars. Experiment with different combinations and arrangements to create unique and visually appealing designs. These upcycled jam jars add a touch of nature to your home decor and make charming centerpieces for seasonal celebrations or outdoor events.
Conclusion
In conclusion, transforming plain jam jars into beautifully decorated pieces adds a touch of charm and personality to any occasion. This guide has provided you with the inspiration and know-how to unleash your creativity and turn ordinary jars into delightful works of art. Whether you opt for rustic elegance, whimsical motifs, or minimalist sophistication, the process of decorating jam jars allows you to express your unique style and elevate your homemade preserves or gifts to the next level.
As you put the finishing touches on your crafted jars, remember to balance aesthetics with functionality, ensuring that they not only look stunning but also serve their intended purpose effectively. So, embrace the joy of crafting, experiment with different techniques and materials, and delight in the endless possibilities of decorating jam jars for any occasion. Thanks for reading, and we hope this has given you some inspiration on how to decorate jam jars!
Angela Ervin
Angela is the executive editor of DIY quickly. She began her career as an interior designer before applying her strategic and creative passion to lifestyle and home. She has close to 15 years of experience in creative writing and online content strategy for housekeeping, home decorations as well as other niche efforts. She loves her job and has the privilege of working with an extraordinary team. She lives with her husband, two sons, and daughter in Petersburg. When she's not busy working she spent time with her family.


