
How to Do an Invisible Stitch on Pants
Doing an invisible stitch on pants might seem intimidating, but with some practice and the right supplies, your sewing skills can truly shine! Whether you’re new to sewing or a seasoned expert looking for a refresher course on sewing techniques, this post has everything you need for making an attractive yet durable seam.
Learn all about how to do an invisible stitch on pants. Discover how easy it is to finish off those hard-to-reach places with precision stitching while learning helpful tips along the way. Let’s get started – you’ll be ready to take your pant projects up a notch in no time with this must-know technique!
The Importance of a Seamless and Invisible Stitch in Pants
Having seamless and invisible stitch on pants is an essential part of garment construction. An invisible stitch keeps the seams between two pieces of fabric together without being seen from the outside, creating a clean, professional look. It’s also important for comfort since it allows for more movement in the pants. In addition, having a strong and well-done invisible stitch helps to ensure durability and quality, making the garment last longer.
By using an invisible stitch on your pants you can guarantee a professional finish that will keep your garment looking great for years to come. An invisible stitch is also much less noticeable than a regular stitch pattern, making it ideal for use in more delicate fabrics or designs where having visible stitching would detract from the overall look. Lastly, an invisible stitch makes it easier to alter pieces of clothing if needed since it’s easier to unpick without leaving any trace of the previous seam.
Now that we know why an invisible stitch is so important when constructing pants, let’s take a look at how to do an invisible stitch correctly. With the right techniques and tools, anyone can make sure their seams are secure and look professional.
Gathering the Necessary Materials for the Invisible Stitch
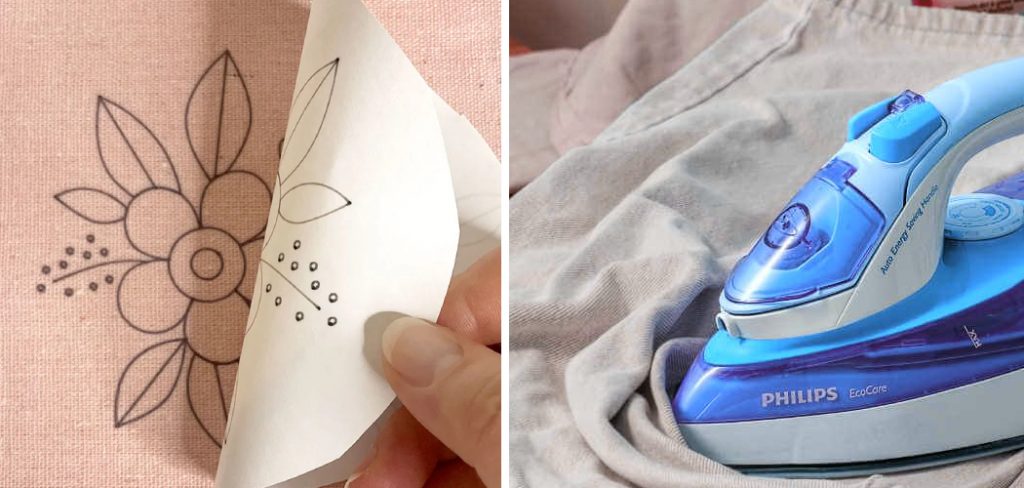
Before beginning the invisible stitch, it is important to have the right materials on hand. This includes a sewing needle (preferably one with a sharp, fine point), thread in the same color as the pants, and scissors. It is also recommended to use an iron and tracing paper or tailor’s chalk to mark the area of sewing.
Once all of the materials are gathered, thread the needle and tie a knot at the end of it. A double knot is preferred to ensure that the stitch does not come undone. Be sure to leave a tail at least an inch long so that it can be used to secure the ends of the stitch when finished. With the needle and thread ready, you are now ready to begin the invisible stitch.
Next, use the tracing paper or tailor’s chalk to mark the area of stitching. This will help you keep the stitch straight and in line. With the area marked, you can now begin to make the stitches. Starting at one end of the area, gently insert the needle into the fabric and bring it out a few millimeters away. Pull slowly on the thread while keeping it taut to ensure that there are no gaps between each stitch. Continue this process until you reach the end of the marked area.
When you have reached the end, tie a double knot to secure the stitch while also ensuring that it is not visible from either side of the fabric. Finally, use an iron to press down on the stitches and make sure they are properly secured in place. With this final step completed, your invisible stitch should now be finished!
10 Ways How to Do an Invisible Stitch on Pants
Method 1: Prepare Your Materials
Before you begin the invisible stitch, gather your materials. You will need a needle, thread that matches the color of your pants, a thimble (optional), and a pair of pants to work on. Ensure that your needle is appropriate for the fabric weight of your pants.
Method 2: Position the Pants
To start, turn your pants inside out and align the edges or hems that need to be sewn together. Use pins or fabric clips to hold the fabric in place, ensuring a clean and even seam line.
Method 3: Thread the Needle
Take a length of thread and thread it through the eye of the needle. Double the thread and knot the ends together. This technique provides extra strength and stability to your stitches.
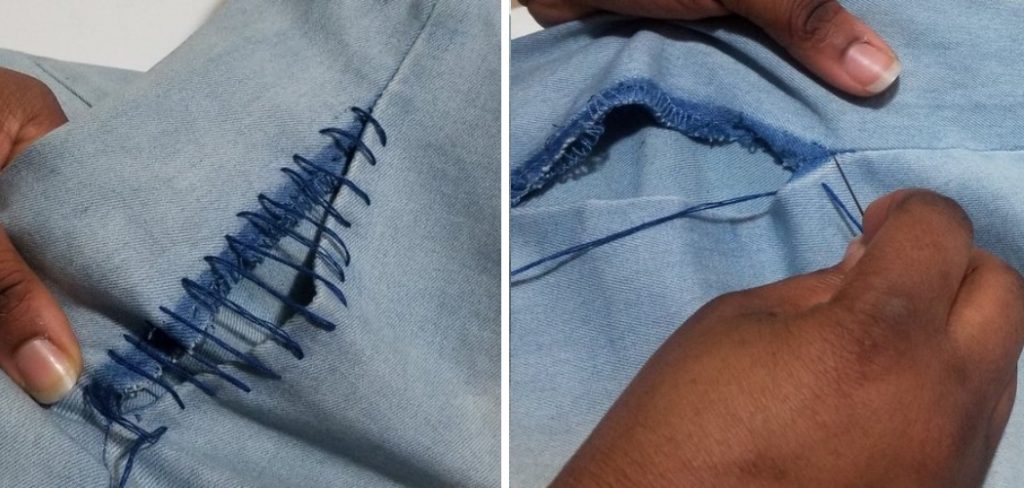
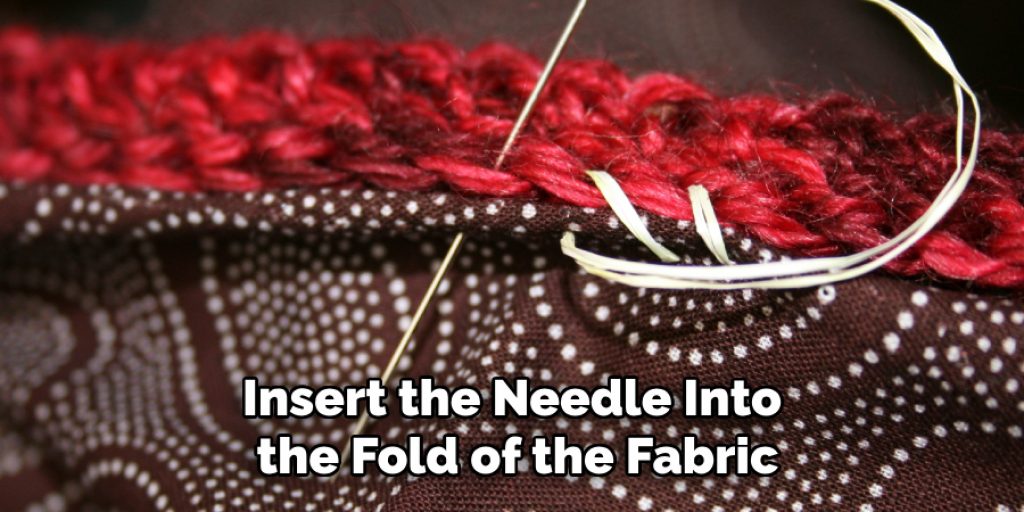
Method 4: Begin the Invisible Stitch
Insert the needle into the fold of the fabric, close to the edge. Pull the thread through until the knot catches on the inside of the fabric. This initial stitch will be hidden within the fold.
Method 5: Create the Ladder Stitch
Now, insert the needle through the fold of the opposite side of the fabric, directly across from the initial stitch. Pull the thread through, but do not tighten it completely. Leave a small loop or gap between the stitches.
Method 6: Repeat the Ladder Stitch
Continue the ladder stitch by alternating between the two sides of the fabric. Insert the needle through the fold of one side, then across to the other side, creating a ladder-like pattern of stitches. Ensure that the stitches are evenly spaced and do not pull too tightly.
Method 7: Maintain Consistent Tension
To achieve an invisible seam, it is crucial to maintain consistent tension throughout the stitching process. Avoid pulling the thread too tightly, as it can cause puckering or distortion of the fabric. Aim for stitches that lie flat and blend seamlessly into the fabric.
Method 8: Secure the Stitch
Once you have sewn along the entire length of the seam or hem, make a small backstitch or knot at the end to secure the stitch. Insert the needle through the fold of the fabric and make a small loop before pulling the thread through. Repeat this process a few times to reinforce the stitch.
Method 9: Trim the Excess Thread
Carefully trim any excess thread, leaving a small tail. Take care not to cut the fabric itself. Tucking the tail into the seam or hem will ensure that it remains hidden.
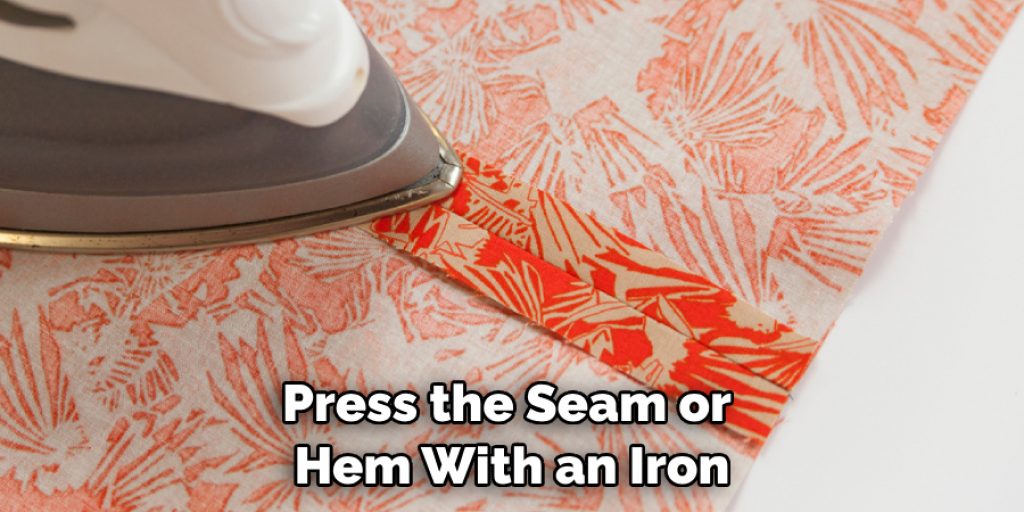
Method 10: Press the Seam
Finally, press the seam or hem with an iron on a low heat setting. This step helps set the stitches and gives your pants a polished look. Be cautious not to apply excessive heat, especially if your pants are made of delicate or synthetic fabrics.
Things to Consider When Doing an Invisible Stitch on Pants
1. Choose the Right Thread Color:
The most important element when it comes to doing an invisible stitch on pants is choosing the correct thread color. Make sure to use a thread that matches the fabric’s hue as closely as possible. If you cannot find an exact match, then use a slightly lighter shade of thread for better invisibility.
2. Consider the Thickness of the Fabric:
Before you begin stitching, make sure to assess the thickness of the fabric. Use a thin thread if you’re sewing on lightweight fabrics and a thicker thread for heavier-weight materials. This will help ensure that your stitches look as invisible as possible.
3. Invest in Good Quality Needles:
Using a good quality needle is essential when it comes to achieving an invisible stitch. Invest in needles that have small eyes and sharp points for easy piercing through the fabric with minimal damage.
4. Practice Makes Perfect:
It takes practice to perfect the art of doing an invisible stitch on pants. Before you start stitching on your pants, practice the technique on a scrap piece of fabric first so you can get comfortable with the motion and also learn any specific techniques that may be necessary.
Some Common Mistakes When Doing an Invisible Stitch on Pants
One common mistake that people make when doing an invisible stitch on pants is not properly preparing the fabric. It is important to make sure that the fabric is pre-washed and pre-shrunk so that the stitching will not be affected by any changes in size or shape.
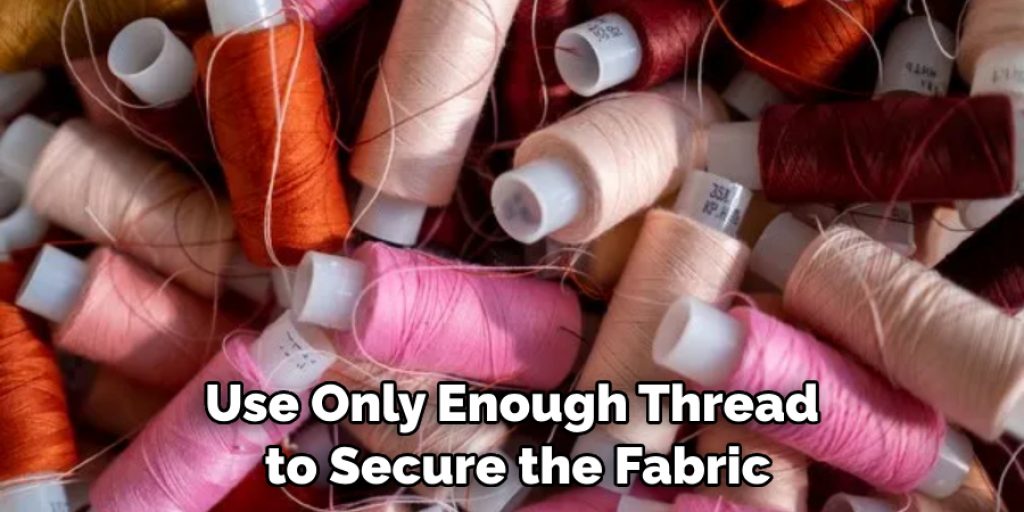
Another common mistake is to use too much thread when sewing. Too much thread can cause the stitch to become loose and visible, as well as make it difficult to close off the stitches properly. It is important to use only enough thread to secure the fabric without making it too bulky or noticeable.
It is also important to ensure that all of your seams are sewn securely. Some people may try to rush through this process, but if you do not take time and care with each seam, then it could result in a sloppy invisible stitch on pants that looks neither neat nor professional.
Conclusion
It can be daunting to learn how to do an invisible stitch on pants, but the tips and information in this blog post should make it much easier. With a bit of practice, learning this skill will become easier and more natural. A perfectly stitched patch or ripped seam will help your pants last longer while still having that streamlined aesthetic that makes them stand out from the crowd.
Remember: Use a sturdy thread that won’t fray easily, ensure each stitch is precisely placed, and finish off with a knot for extra security. Knowing how to do an invisible stitch is a valuable wardrobe skill that can help rejuvenate any pair of pants, so start practicing today!
Nancy Behan
Nancy is an embroidery artist, fashion blogger and a full time editor at DIY quickly. Nancy edits the fashion section on DIY quickly, focusing on the embroidery and cross stitch articles, alongside with fabric and other costume design elements. She graduated from the University of Michigan with a Bachelor of Arts in Art History. She loves to work on her own projects, read books and watch romantic movies in her spare time.


