How to Dry Out Water in Ceiling
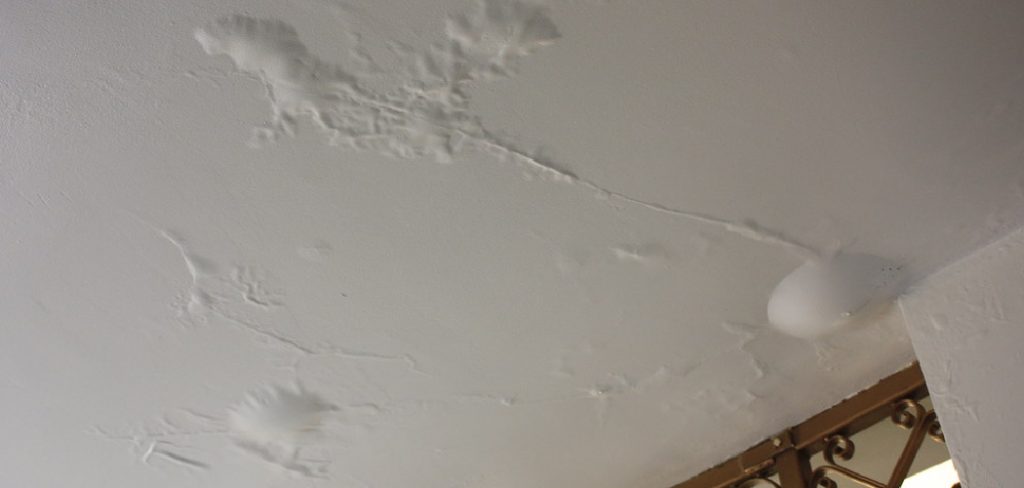
If you’re dealing with a leaky roof or plumbing issue, you may find yourself wondering to dry out water in ceiling. The truth is, water damage can lead to serious structural issues and even health hazards if not taken care of properly. That’s why knowing to dry out water in ceiling is so important.
One of the main advantages of knowing to dry out water in ceiling is that it can prevent further damage to your ceiling and walls. If not addressed promptly, water leaks can lead to mold growth and structural damage. By drying out the water in your ceiling, you can prevent these issues from occurring. In this blog post, You will learn in detail how to dry out water in ceiling.
Step-by-Step Instructions for How to Dry Out Water in Ceiling
Step 1: Inspect the Source
First and foremost, you need to inspect the source of the water in your ceiling. This could be a leaky roof, a burst pipe, or even condensation from an air conditioning unit. Identifying the source will help you determine how to dry out the water in your ceiling.
Step 2: Turn off Electricity
Safety should always come first. Before attempting to dry out the water in your ceiling, make sure to turn off the electricity in that area. This will prevent any accidents or electric shocks. Water leaking from the ceiling can damage your furniture and other belongings. Move them out of harm’s way or cover them with plastic sheets to protect them during the drying process.
Step 3: Drain the Water
If there is a significant amount of water in your ceiling, you will need to drain it out. Use buckets or a wet/dry vacuum to remove as much water as possible. Anything that has been damaged by the water needs to be removed from the affected area. This includes wet insulation, drywall, and carpeting. Removing these materials will help speed up the drying process.

Step 4: Use Fans and Dehumidifiers
Air circulation is crucial in drying out water in a ceiling. Place fans around the affected area to help circulate air and use dehumidifiers to reduce moisture levels. Even after drying out the water, there is still a chance of mold growth. Inspect the affected area for any signs of mold and use appropriate cleaning solutions to get rid of it.
Step 5: Fix the Source
Now that you have dried out the water and taken care of any potential mold growth, it’s time to fix the source of the water. Whether it’s a leaky roof or a burst pipe, addressing the source will prevent future water damage.
Step 6: Repair Ceiling
If your ceiling has been damaged by the water, you will need to repair it before it can be painted or finished. This may involve replacing drywall or patching up any holes or cracks. Once everything is dry and repaired, you can finally paint and finish your ceiling. Consider using mold-resistant paint to prevent any future mold growth.
By following these steps, you can effectively dry out water in your ceiling and prevent any further damage to your home. Remember to always prioritize safety, address the source of the water, and properly repair any damage to ensure a successful outcome.
Tips for How to Dry Out Water in Ceiling
- Always turn off electricity before attempting to dry out water in the ceiling.
- Wear protective gear such as gloves and goggles when handling water-damaged materials.
- Use caution when climbing ladders or working in high areas.
- Avoid using electrical appliances near standing water or wet surfaces.
- Properly dispose of any damaged materials to prevent mold growth and potential health hazards.
- Follow instructions and safety guidelines for any cleaning solutions or products used during the process.
- In case of severe water damage, seek professional help to ensure proper and safe restoration.

What Causes Water to Accumulate in the Ceiling?
There are several reasons why water may accumulate in your ceiling. Some common causes include:
- Roof leaks: This is one of the most frequent causes of water accumulation in a ceiling. Heavy rain or melting snow can seep through cracks or damaged shingles, leading to water damage.
- Leaky Pipes: A burst pipe or faulty plumbing can also cause water to build up in your ceiling. This is especially common in areas with freezing temperatures.
- Condensation: In humid environments, condensation can form on the ceiling and eventually lead to water damage.
- Air Conditioning Issues: Improperly installed or maintained air conditioning units can result in water leaks that can cause damage to your ceiling.
Understanding the source of the water will help you address the problem effectively and prevent future water damage.
How to Prevent Water Damage in Ceilings
- Regularly inspect your roof for any leaks or damage.
- Keep gutters and downspouts clean and free of debris to prevent water from accumulating on the roof.
- Insulate pipes in areas with freezing temperatures to prevent them from bursting.
- Properly maintain air conditioning units and address any issues promptly.
- Install a dehumidifier in humid environments to reduce moisture levels.
- Monitor humidity levels in your home and use proper ventilation to prevent condensation from forming on the ceiling.
- Have a professional inspect your home for potential water damage risks and address them accordingly.

By taking these preventive measures, you can minimize the chances of water damage in your ceilings and avoid the hassle of drying out water and repairing any damage. Remember, early detection and prevention are key to protecting your home from water damage.
What Are Some Common Mistakes People Make When Attempting to Dry Out Water in Their Ceiling?
When water leaks into your ceiling, it can cause serious damage to your home and belongings. It is important to act quickly to dry out the water in order to prevent mold growth and further structural damage. However, there are some common mistakes people make when attempting to dry out water in their ceiling that can actually make the situation worse. One of the most common mistakes people make is trying to dry out the water using a hairdryer or fan. While these tools may seem like a quick and easy fix, they can actually do more harm than good.
The hot air from a hairdryer can cause the moisture in your ceiling to evaporate too quickly, which can lead to cracks and warping. Similarly, fans may not be powerful enough to effectively dry out the water and can also spread mold spores throughout your home. Another mistake people make is not properly assessing the extent of the water damage. It may seem like only a small portion of your ceiling is affected, but there could be hidden pockets of water that you are unable to see. This can lead to further damage and mold growth if not properly addressed.
Can You Prevent Future Water Damage in the Ceiling by Taking Certain Preventative Measures?
Water damage in the ceiling can cause major headaches for homeowners. Not only is it unsightly, but it can also lead to costly repairs and potential health hazards if not addressed promptly. If you’ve recently experienced water damage in your ceiling, you may be wondering how to dry out the affected area and prevent future instances from occurring. The first step in drying out water in the ceiling is to identify the source of the leak and fix it.
This could be a leaky roof, burst pipe, or even condensation buildup in your attic. Once the source has been addressed, you can begin the process of drying out the affected area. One method for drying out water in the ceiling is to use fans and dehumidifiers. Fans help circulate air and remove excess moisture, while dehumidifiers help extract water from the air. It’s important to note that this method may only work for smaller areas of water damage. If the affected area is larger or if there is significant water accumulation, it may be necessary to use professional-grade equipment.
How Do You Properly Clean and Disinfect a Ceiling After It Has Been Affected by Water Damage?
After the water has been completely dried out, it’s important to thoroughly clean and disinfect the affected area. This will not only remove any remaining water residue, but also prevent the growth of mold or bacteria. To properly clean a ceiling after water damage, start by using a mild soap or detergent and warm water to gently scrub the surface.
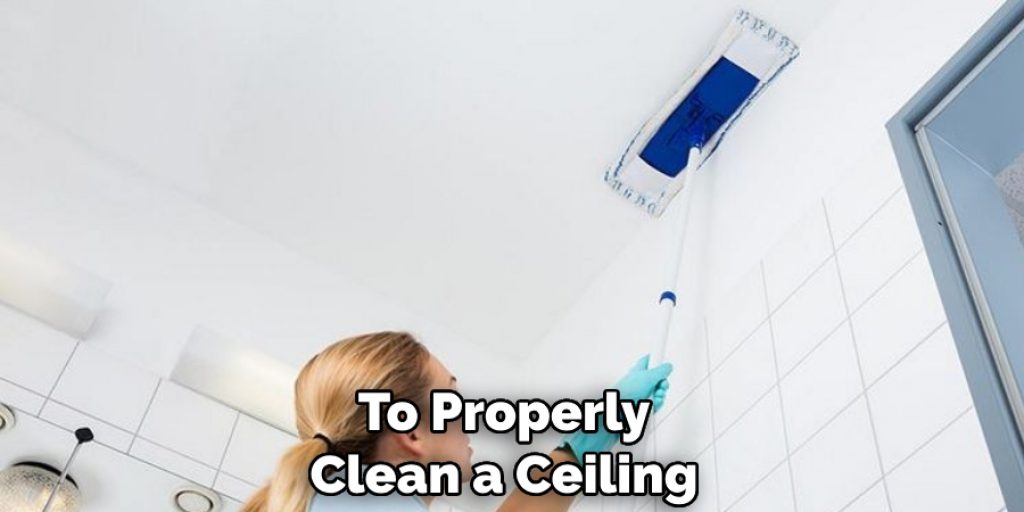
Be careful not to use too much water, as this can further damage the area. Once the surface is clean, use a disinfectant solution to kill any remaining bacteria. When using a disinfectant, be sure to follow the manufacturer’s instructions and wear protective gear such as gloves and goggles. It’s also important to properly ventilate the area while cleaning and disinfecting.
Conclusion
In conclusion, a ceiling leak can be an overwhelming and inconvenient situation for homeowners. However, by following the steps outlined in this blog post, you now have the knowledge and tools to effectively dry out water in your ceiling. Remember to first identify the source of the leak and fix it before beginning any drying process. Then, use a combination of towels, fans, dehumidifiers, and even professional services to thoroughly dry out the affected area. It is important to act quickly in these situations, as mold growth can occur within 24 hours of water exposure. I hope this article has been beneficial for learning how to dry out water in ceiling. Make Sure the precautionary measures are followed chronologically.

