How to Make a Ceiling Flower Arrangement
If you are looking for a fun and creative way to add some style and elegance to any room in your home, then a ceiling flower arrangement may be just the thing. Not only does this design element provide visual interest and beauty, but it can also be an incredible conversation starter.
Whether you’re creating something entirely new or giving an old classic a modern update, making a ceiling flower arrangement is a great way to let your personality shine through in your decorating choices.
In this guide, we’ll not only provide the instructions on how to make a ceiling flower arrangement for how to create your own custom floral masterpiece, but also offer tips on various ways in which you can customize it based on the individual needs of each room!
Why Make a Ceiling Flower Arrangement?
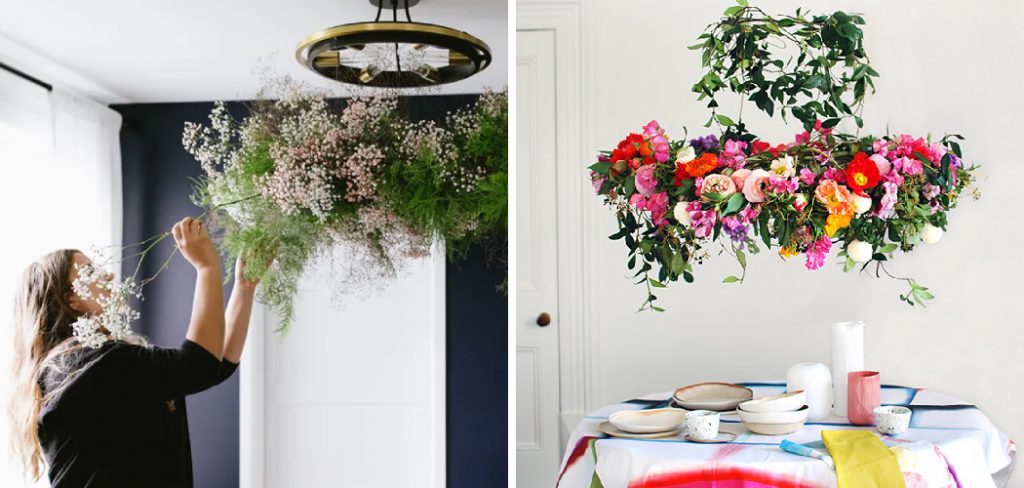
While traditional flower arrangements are beautiful and have their place in the home, ceiling flower arrangements offer something different. They add a unique touch to any space by utilizing an often overlooked area – the ceiling!
This not only creates visual interest but also draws the eyes upward, making any room feel larger and more open. Adding flowers to your ceiling can also add a touch of whimsy and playfulness to your decor. It’s a great way to add personality and character to any room in your home.
Materials Needed
Before getting started on your ceiling flower arrangement, make sure you have the following materials:
- A Sturdy Hook or Hanger to Support the Weight of Your Arrangement
- Floral Foam or Oasis Block
- Wire Cutters
- Floral Wire
- Fresh Flowers and Greenery of Your Choice
- Ribbon or String for Hanging (Optional)
11 Step-by-step Guides on How to Make a Ceiling Flower Arrangement
Step 1: Choose Your Flowers and Greenery
The type and color of flowers you choose will depend on personal preference, as well as the color scheme and style of your room. It’s important to choose flowers and greenery that complement each other and create a cohesive look. Some popular options for ceiling arrangements include roses, carnations, baby’s breath, and eucalyptus.

Step 2: Prep Your Flowers
Before starting your arrangement, prepare your flowers by trimming the stems at an angle and removing any excess leaves or thorns. This will not only help them fit better into the foam but also keep your arrangement looking clean and tidy. But don’t throw away those trimmed stems just yet! You can use them to create a garland or additional greenery for your arrangement. This will add extra dimension and interest.
Step 3: Soak Floral Foam
If you’re using floral foam or oasis, make sure to soak it in water for at least half an hour before starting your arrangement. This will ensure that the foam is completely saturated and can properly support your flowers. You may also want to cut the foam into smaller pieces to make it easier to work with. But be careful not to cut it too small, as it needs enough surface area to hold the flowers in place.
Step 4: Attach Floral Wire
Using wire cutters, attach a piece of floral wire to the back of your foam or oasis block. This will serve as an anchor point for attaching your arrangement to the hook or hanger. It’s best to use a few pieces of wire and criss-cross them for added stability. It’s important to make sure the wire is securely attached to the foam, as you don’t want your arrangement falling down after all your hard work! This step is especially important for larger or heavier arrangements.
Step 5: Start with the Largest Flowers
Begin by inserting your largest flowers into the foam. These will serve as the focal point of your arrangement and should be evenly spaced around the foam to create balance. Make sure to push them in firmly so they are secure. It’s also a good idea to vary the height of your flowers for added interest.
Step 6: Add Greenery
Next, add greenery around the larger flowers. This will not only help fill in any gaps but also add texture and depth to your arrangement. Make sure to vary the types of greenery you use, such as leaves and smaller sprigs, for a more natural look. Otherwise, it can start to look too uniform and artificial. It’s also a good idea to use different shades of green for added dimension.
Step 7: Insert Smaller Flowers
Now it’s time to add in your smaller flowers. These will help fill out the arrangement and add pops of color. Make sure to vary the placement and height of these flowers as well, to create a more dynamic look. But be careful not to overcrowd the arrangement, as it can start to look too busy and cluttered. Otherwise, your focal flowers won’t stand out as much.

Step 8: Fill in Any Gaps
After adding the smaller flowers, take a step back and assess your arrangement. If there are any noticeable gaps, use any leftover greenery or filler flowers to fill them in. You can also add more wire if needed to keep everything securely in place. It’s important to take your time with this step and make sure everything looks balanced and cohesive.
Step 9: Add Ribbon or String (Optional)
If you want to add a decorative touch, you can tie ribbon or string around the foam block. This will not only hide any exposed foam but also add some extra flair to your arrangement. You can use any color or pattern of ribbon that complements your flowers and room decor. It’s also a great way to add a personal touch and make your arrangement unique.
Step 10: Hang Your Arrangement
Once you’re happy with how your arrangement looks, it’s time to hang it up! Use the hook or hanger of your choice and securely attach it to the wire on the back of your foam block. Make sure to test the weight and stability of your arrangement before fully hanging it, especially if it’s on the heavier side. You don’t want to risk any accidents or damage to your ceiling.
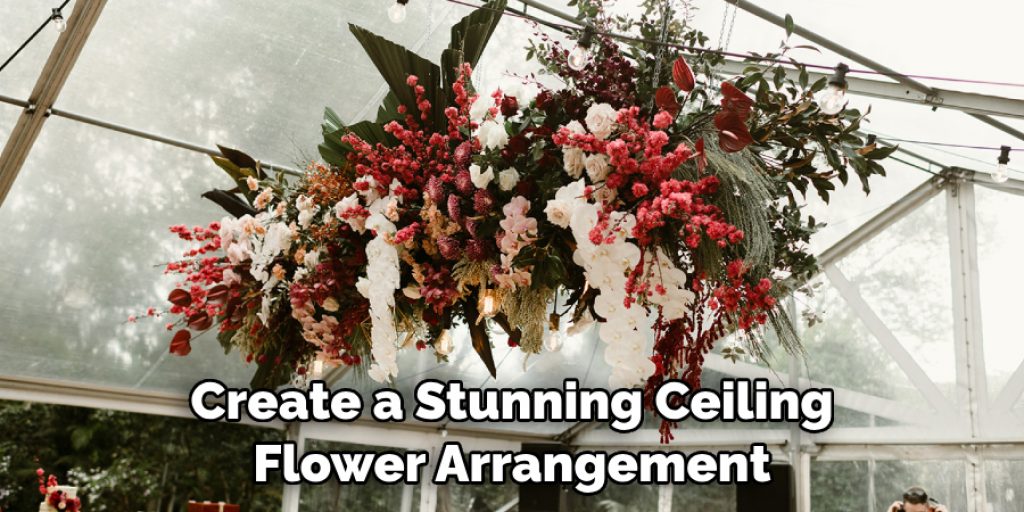
Step 11: Enjoy Your Ceiling Flower Arrangement!
Finally, step back and admire your beautiful creation! A ceiling flower arrangement can instantly elevate any room and add a touch of elegance and charm. Not only that, but it’s a fun and creative way to showcase your love for flowers and gardening. So sit back, relax, and enjoy the visual masterpiece you’ve created!
Following these 11 steps on how to make a ceiling flower arrangement will help you create a stunning ceiling flower arrangement that will be the envy of all your friends and family. Remember to have fun and let your creativity shine through! Happy arranging!
Tips for Maintaining Your Ceiling Flower Arrangement
- Change Out Any Wilted or Dead Flowers Regularly to Keep Your Arrangement Looking Fresh.
- Mist Your Flowers and Greenery With Water Every Few Days to Keep Them Hydrated and Looking Vibrant.
- Avoid Hanging Your Arrangement in Direct Sunlight or Near Heat Sources, as This Can Cause the Flowers to Dry Out and Wilt Faster.
- Have Fun With Different Color Combinations and Flower Types to Switch Up the Look of Your Arrangement Throughout the Year.
- Don’t Be Afraid to Experiment With Different Shapes and Sizes for a Unique and Personalized Ceiling Flower Arrangement.
- Consider Using Artificial Flowers if You Want a Longer Lasting Arrangement, but Make Sure They Are High Quality and Look Realistic.
- Take Your Time When Creating Your Arrangement and Don’t Be Afraid to Make Adjustments as Needed. Remember, Practice Makes Perfect!

Frequently Asked Questions
Q1: How Long Will My Ceiling Flower Arrangement Last?
A: The lifespan of your arrangement will depend on the types of flowers used, the environment it is in, and how well you maintain it. Typically, arrangements can last anywhere from a few days to a couple of weeks. Regular maintenance and changing out any wilted flowers can help prolong the lifespan of your arrangement.
Q2: Can I Use Any Type of Flowers for a Ceiling Flower Arrangement?
A: Yes, you can use any type of flower for your arrangement. However, it’s important to consider the weight of the flowers and how well they will hold up when hung from the ceiling. It’s also a good idea to choose flowers that complement each other in color and texture for a cohesive look.
Q3: Do I Have to Use a Foam or Oasis Block for My Arrangement?
A: While using a foam or oasis block is the most common method for creating a ceiling flower arrangement, you can also use alternative methods like floral tape or wire to secure your flowers. Just make sure that it is secure enough to hold the weight of the flowers and is not visible once the arrangement is complete. Overall, have fun with your ceiling flower arrangement and let your creativity flow!
Q4: Can I Use Fresh or Artificial Flowers for My Arrangement?
A: Both fresh and artificial flowers can be used for a ceiling flower arrangement. Fresh flowers will give your arrangement a natural and fragrant touch, but may not last as long. Artificial flowers can provide a longer-lasting option and come in many different varieties, but make sure to choose high-quality ones that look realistic.

Conclusion
With the right materials and steps, anyone can make a beautiful ceiling flower arrangement that will add an extra special touch to any room. Whether you’re making a cozy atmosphere for a family gathering, an elegant centerpiece for a formal dinner party, or simply wishing to add some visual charm to your home décor, this type of flower display is sure to please.
So take these ideas on how to make a ceiling flower arrangement and get creative! Add your own unique style to your masterpiece and bring out the artist within you. Don’t be afraid of prestige either—you may even find that something so simple can have such a dynamic impact on the beauty of your space. Invite friends and family over and enjoy the warmth of fresh blooms in your home.
Angela Ervin
Angela is the executive editor of DIY quickly. She began her career as an interior designer before applying her strategic and creative passion to lifestyle and home. She has close to 15 years of experience in creative writing and online content strategy for housekeeping, home decorations as well as other niche efforts. She loves her job and has the privilege of working with an extraordinary team. She lives with her husband, two sons, and daughter in Petersburg. When she's not busy working she spent time with her family.