
How to Fix a Bad Ceiling Texture Job
Bad ceiling texture jobs can be an eyesore. This blog post will show you how to fix a bad ceiling texture job using a few readily available tools and materials. Follow these simple steps to restore the appearance of your ceiling and have them look like new again!
If you have noticed that your ceiling has textures that don’t quite match or if the texture is just plain wrong, then it’s time to fix it. This guide will show you how to do a quick and easy fix to make your ceiling look smooth and uniform. Follow these simple steps, and you’ll be able to improve the look of your home in no time!
12 Ways on How to Fix a Bad Ceiling Texture Job
1. Soak Ceiling Texture Brush
After applying a light coat of texture, take the brush and hold the bristles flat in one hand. Pour some water over the top of your hand and brush, but not too much; we don’t want to make the ceiling soggy! Swish the paint around until it creates a nice thick paste, and then start ‘swiping’ the brush over the texture. This will help to mix it better and make it easier to apply.
2. Use a Gamo Brush
A Gamo brush is a special ceiling texturing brush with a rigid outer shell with flexible bristles. This allows you to get into all the nooks and crannies and results in a much better texture finish.
3. Try a Roller
If your ceiling is exceptionally high, using a roller might be the best way to go. It’ll help speed up the process and give you a much smoother finish. You will probably need to go over it a couple of times with the texturing brush and some water to help mix and blend, but this is far easier than trying to do the entire ceiling by hand.
4. Fixing Holes
If you have a hole in your ceiling, it will be difficult to fill in with a roller. If the hole is bigger and you can see the joists or studs, you will need to fill it in first. Some textures will not stick to metal, so you will need to apply joint compound with a taping knife before applying your texture.
5. Cheap Technique
For small repairs of small areas, you can use a cheap technique. All you need is some sandpaper and a putty knife. First, sand the area down until it’s nice and smooth, then apply a thin layer of joint compound with the putty knife. Let it dry, then add your texture.
6. Fixing Bubbles
If you’ve got bubbles in your texture, don’t panic! Instead, just take a needle or pin and carefully puncture the problem area. This should allow them to pop up into the light so you can cut them out with your knife. If this doesn’t work, go over it again in exactly the same way with the second layer of texture.
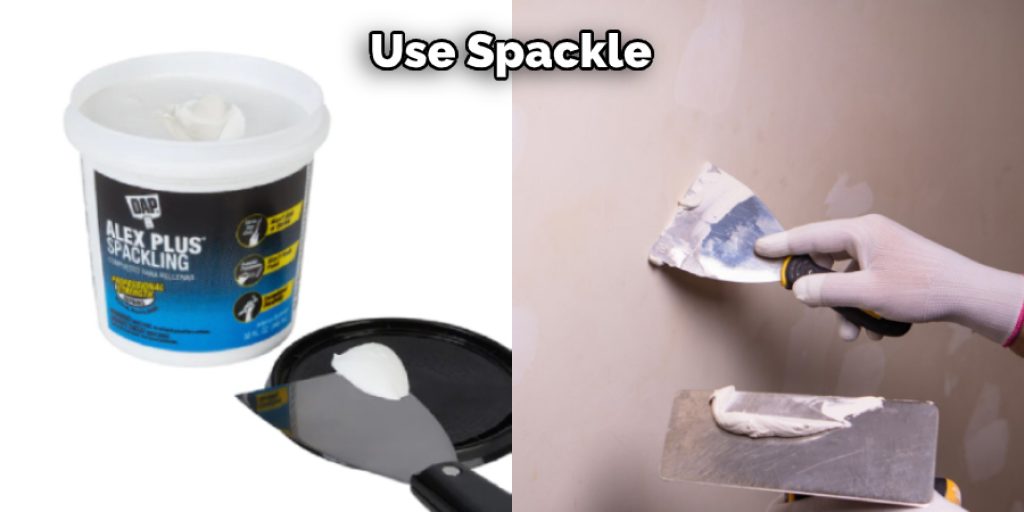
7. Using Spackle
Spackling is the best way to fix small holes or errors in your texture job, but if you can’t find any spackle, then use the joint compound you used on the walls; just make sure it’s dry first! It won’t be as hard as real spackling paste, but it’ll do the same thing.
8. Force It In
If you’ve got a small hole, don’t panic! You can force some texture into the hole by using a putty knife or a toothpick to pack it in really tight. Then go over it with your brush and water again to make sure everything is blended. This technique works well in small areas.
9. Apply Joint Compound
If you’re repainting the ceiling, then one way of covering up your mistakes is to put a layer or two of joint compound over it. This will seal in the texture and cover any small holes or errors you’ve made. Of course, it won’t look as smooth as a new coat of paint would have done, but it’s better than nothing.
10. Use Drywall Mud
If you’re not repainting your ceiling, then drywall mud is another way of covering up any mistakes. It’s just like a joint compound, but it’s made for textured ceilings. It comes in various colors, so you can choose the right tone for your ceiling. It will give you better results than just painting over the joint compound. It is possible to paint over drywall mud, but it won’t have the same texture as when you use drywall mud from the start.
11. Fixing Cracks
If you want to cover up a big crack in your ceiling, you were then using a putty knife, and the joint compound is the best way to do it. First, try to get the compound as close to the crack as possible, and then use a brush or your finger to smooth it out. Don’t worry if it’s imperfect; you can always go over it again with more joint compounds. One of the best ways to improve your home is to change the paint. A new coat of paint can make a big difference in the way a room looks. If you want to make sure that the paint job looks its best, it’s a good idea to hire a professional painter.
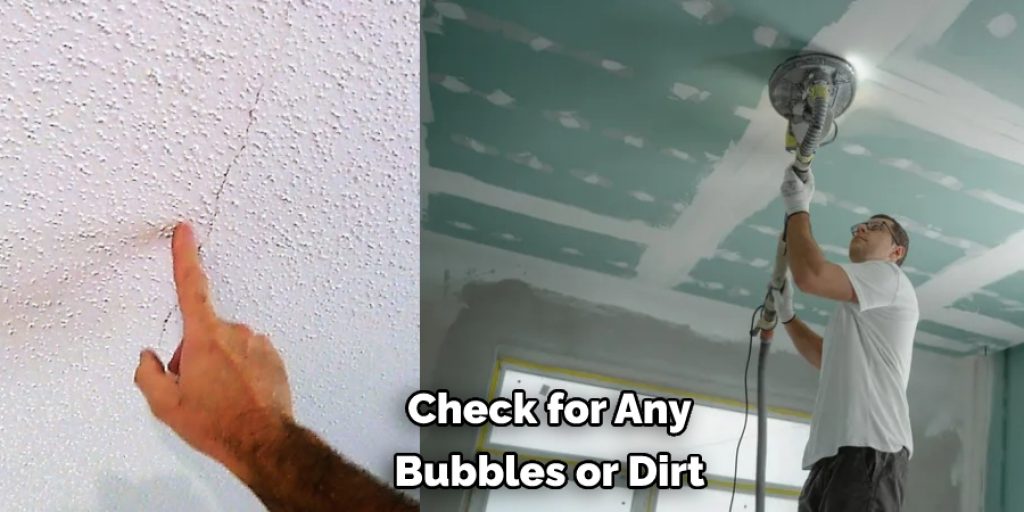
12. Let It Dry
Once you’ve finished fixing all the problems in your ceiling, make sure to let it dry fully. Check for any bubbles or dirt, and carefully puncture them with a needle or pin. If there are no more problems, you can go ahead and paint over it. It might be best to leave the holes until after you’ve painted your ceiling so that they blend in better.
How To Patch a Textured Ceiling?
As you know, painting is one of the most frequent home improvement tasks. And it’s not surprising because by painting your walls you can make a room brighter and more modern. But, if you are planning to update your old textured ceiling with new paint and want to know how to fix a bad ceiling texture job, some essential factors need to be considered first.
1. Patch a Drywall Ceiling
When you are going to paint a ceiling, you need to make sure that the surface is smooth. Otherwise, the paint will not look good. If the ceiling is bumpy or has spots where the plaster is missing, you will need to repair it before you can start painting.
2. Apply Primer
After you’ve patched the holes and smoothened the surface, it’s time to prime it before painting. Prime the ceiling first because drywall absorbs paint very quickly. If you want to achieve good results in your painting job, priming is necessary.
3. Choose the Right Paint
Not all paints are created equal. So, to make sure that your new textured ceiling paint will last long, it’s important to choose the right one. Acrylic latex paint is good for textured ceilings because it adheres well and dries quickly.
4. Apply Paint in Layers
When painting a textured ceiling, it’s best to apply the paint in layers. This will help you hide any imperfections and give your ceiling a more professional look. Start by applying a thin layer of paint and letting it dry. Then, apply another coat until you are happy with the results.
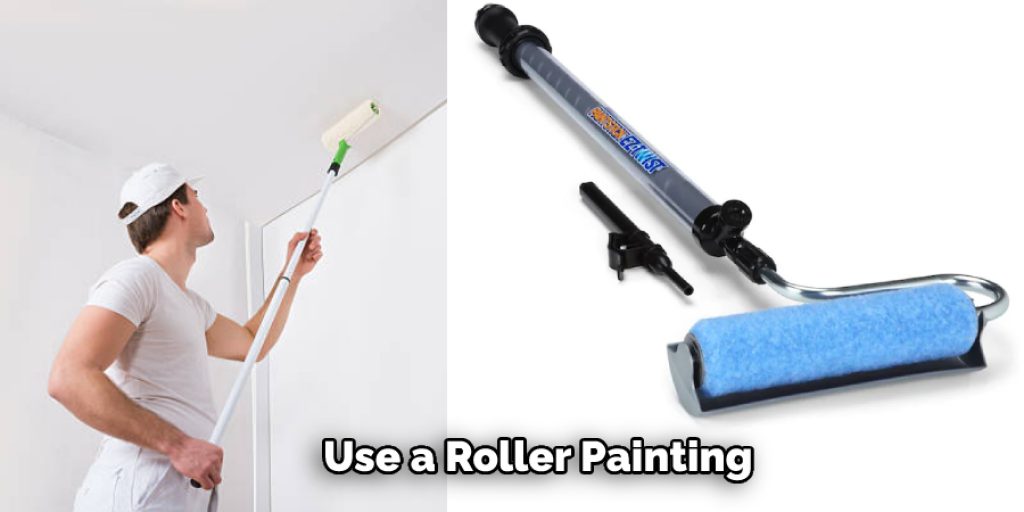
5. Use a Roller
Textured ceilings can be really tricky to paint with a brush. So, it’s much easier and faster to use a roller when painting your ceiling. A good option is 5/8 inch nap roller since they are easy to control and spread paint well. You can save more time by buying the right size brushes for your job. Also, don’t forget to change your roller cover regularly when painting textured ceilings.
What Is the Best Way to Fix a Bad Ceiling Texture Job?
If your ceiling has big blobs of drywall compound or lumpy texture, it could be dangerous. Water could get inside through cracks in the ceiling, which could cause problems with electrical wiring or attract rodents. It’s important to fix these problems right away.
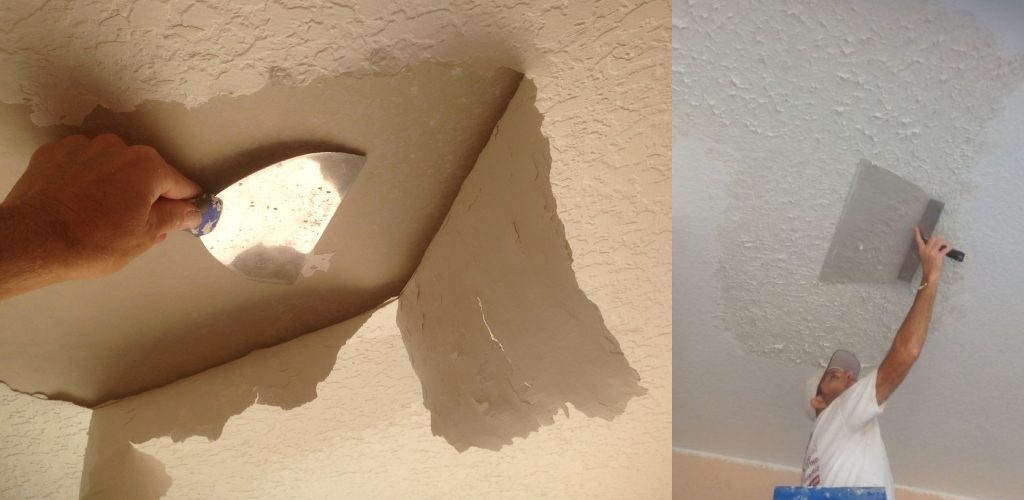
The first step is to remove the texture. This can be done by scraping it off with a wide putty knife, scoring it with a wire brush, and then peeling it off. Once the texture is gone, use a vacuum cleaner to clean up the dust and debris. You may also need to wash the surface with a detergent and water solution to remove any residue from the texture.
Conclusion
If you’re wondering how to fix a bad ceiling texture job, the first step is identifying what needs to be fixed. Often, it can seem like there are so many problems with your ceiling that it’s hard to know where to start fixing them all! But once you identify which areas need help, it becomes much easier for you or an expert contractor to take on the task.
We hope this blog post has given you some helpful information on how to fix a bad ceiling texture job. If your home needs help with any other aspects of its interior or exterior, please reach out, and we will be happy to provide more advice.


