
How to Fix a Loose Floor Tile Without Removing It
If you’ve heard the pattern of your floor tile shifting every time you walk across it, some of the tiles are likely to lose. There are many ways to fix this issue without having to rip up your entire floor, but one way is by using a strong adhesive like epoxy or construction glue on the backside of each loose tile.
If done correctly, this will stop the motion and keep your floors looking good for years! These blog posts will walk you through how to fix a loose floor tile without removing it. The best way to fix a loose floor tile is to remove the grout around it and insert an adhesive. This will ensure that the tile stays in place permanently. Read on to know more information!
10 Reasons Why Floor Tiles Get Loose:
1. Water Damage:
The most common cause of loose tiles is water damage, either from a flood or normal wear and tear over time. Tiles are especially susceptible to water damage because of the mud or mortar used beneath them. When this mud gets wet, it expands and makes the tile harder to remove.
2. Shifting Soil:
Another reason tiles become loose is shifting soil. If the area around your tile has expanded or contracted due to weather changes, removing the tile may be more challenging. Tiles can also come loose if soil shifts beneath them, usually due to erosion or tree roots growing underneath the house.
3. Laid Incorrectly:
Loose tiles are often due to the tiles being laid incorrectly in the first instance or if someone later removed them for whatever reason and did not replace them correctly, either using mortar or adhesive.
4. Poor Installation:
If the tiles were laid by someone who did not have the necessary skills or experience to do a good job, they might be slanted, resulting in loose tiles. If your floor is starting to feel lost, it could also be that the installer has overlapped them slightly when they are meant to butt into each other.
5. Damage During Installation:
Damaged tiles during installation can be caused by various factors, such as dropping them on the floor or someone stepping on them while moving equipment around the room. Furthermore, if tiles are not laid on a flat surface or the cement is uneven, this can result in the tiles becoming loose over time.
6. Temperature Change:
Another possible reason for loose floor tiles is temperature change. Small expansions and contractions in the material underneath the tile can cause it to loosen, especially if your home experiences extreme temperature changes such as those in winter and summer.
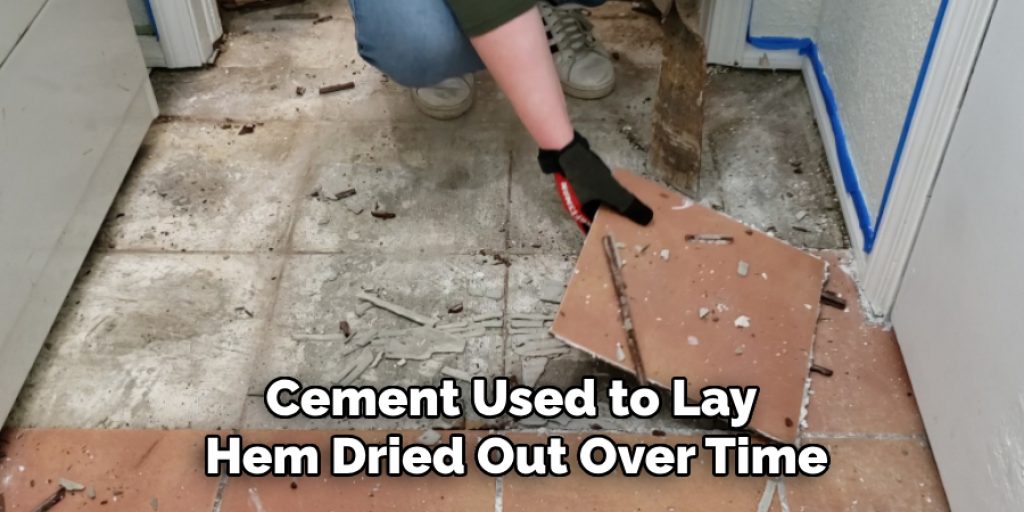
7. Drying Out:
If your tiles start to feel loose when they haven’t been damaged by water or any other means, it’s possible that the cement used to lay them dried out over time. Since adhesives can also dry up, this usually happens due to a lack of moisture in the area.
8. Settlement:
Another possible cause for loose tiles is the settlement of the house. This can be due to a change in soil level around the property or if there was previously a structure next to your home that has now been demolished, leaving lower foundations than before. If you’ve just moved into a new property, check for any problems; they may cause your tiles to feel loose.
9. Poor Quality Tiles:
If your tiles are of poor quality, they could become more susceptible to becoming loose more quickly. This is especially true if the tiles you chose are thinner or lighter than other thicker, heavier options.
10. Buildup of Grime:
Buildup can also cause grout-between-tile joints to weaken slightly, so they do not adequately support one or more tiles. This causes the tile to become loose, usually because the grout around it has deteriorated or too much dirt, sand, or mud built up around them, making them less stable.
Tools and Supplies You’ll Need:
- Floor Tile Mastic
- Sponge, Wire Brush, or Sand Paper
- Putty Knife
- Grout
- Grout Float
Step by Step Guide: How to Fix a Loose Floor Tile Without Removing It
Step 1:
First, you need to turn the power off that feeds your floor surface. Then, turn it back on after you are done with your repairs. You can also use a voltage tester to double-check that no current flows through the tiles.
Step 2:
Remove any objects within range of your repair area. For example, if you have something secured to the floor, such as a heavy piece of furniture, you will have to move it so that you can work.
Step 3:
Take off all of the loose pieces of grout. You can do this by lightly running your putty knife over the cracks, using a wire brush or sandpaper, or with a sponge and water. If there are still some small pieces of grout leftover, you can use your finger to rub them off.
Step 4:
Make sure the surface is smooth and even by using a wood block to sand down anything remaining. Then, run it up and down so that any roughness will be removed from the floors.
Step 5:
Use the putty knife to scrape off any leveling compound. You can do this by starting in one section and scraping it towards you if more significant portions of the mixture are left on the floor. If it is just a bit, go over it with your finger or a wet sponge to remove the excess.
Step 6:
Clean the surface with a damp, clean rag. If any areas could still use some touching up, you can use a bit of tile grout to fix them by running it over the holes and cracks with a putty knife. After this step is complete, your floor should be in perfect condition again without having to remove the tiles for replacement.
Step 7:
Turn the power back on, and test your floor by running your foot over it to see if everything is even. If some areas still need work, you can use more grout or sandpaper to fix them. You can also use a damp rag to clean up any excess grout left behind.
Step 8:
Once everything is as it should be, allow the grout to dry overnight and wipe it up the next day with a clean damp rag. You can now return any furniture or appliances back to their usual places.

For example, floor tiles may become loose for many reasons: movement in the structure causing the tiles to separate or if excess water causes them to swell or buckle. It could be that the adhesive used when putting the tiles down was too weak for this particular area, or even that your floor got wet and never dried properly before you put in your tiles.
Tips and Suggestions:
- Loose tiles which are not broken can be hammered down.
- If the tile is broken, remove grout around loose pieces using a chisel and hammer or grout saw. Then, remove loose pieces of the tile.
- Apply latex-based household cement to the subfloor to reestablish a solid surface for the new tile.
- Glue replacement tiles into place using latex-based adhesive specifically meant for floor tiles. When the glue is dry, apply another coat of cement over the entire floor area to ensure that it adheres to the new tile and the rest of the floor.
- Let it dry for a few days before walking on it again, then apply grout around the tiles and let that dry as well.
- Finally, re-apply a sealer to protect your new tiles from damage due to high-traffic areas.
- If a tile cannot be hammered down or glued back into place, you can drill a hole in each tile corner and use decorative metal screws to attach it from below.
Here we have given some tips and suggestions on fixing a loose floor tile without removing it.
Conclusion:
When you have a loose floor tile, knowing the best course of action can be challenging. You want to ensure that your repair will work for years without any problems and won’t cost too much money in materials or labor. The blog article has provided some helpful tips for fixing a loose floor tile without removing it. Choose one of these methods when you need to select a single tile next time!
You can use the same method for fixing a broken grout line and just put some adhesive under the edges of the tile with an old credit card or business card, making sure that you’re covering all four sides. When it dries, test your repair by tapping on the top of the repaired area; if everything’s dry and stuck down tightly, then congratulations! Your tile has been saved from destruction. We hope this blog has given you some helpful information about fixing loose floor tiles on your own!
Angela Ervin
Angela is the executive editor of DIY quickly. She began her career as an interior designer before applying her strategic and creative passion to lifestyle and home. She has close to 15 years of experience in creative writing and online content strategy for housekeeping, home decorations as well as other niche efforts. She loves her job and has the privilege of working with an extraordinary team. She lives with her husband, two sons, and daughter in Petersburg. When she's not busy working she spent time with her family.


