
How to Lift Windshield Wipers
It’s happened to all of us. You go to clean your windshield, and the wipers won’t budge. Before you know it, you’re elbow-deep in soapy water, wrestling with your windshield wipers. This article will show you how to lift windshield wipers without any struggle. Unfortunately, it gets cold during the winter months, and if you live in a place with freezing weather, your windshield wipers will inevitably freeze up. We’ll tell you how to solve this problem and get on your way again.
Many people will attempt to remove the windshield wipers to clean them during this time of year. However, removing an entire wiper blade is much too tricky. So instead, you can easily remove just the rubber part to give it a thorough washing without hassle.
A Short Guide on How to Lift Windshield Wipers
Method 1: Replacing Wiper Blades Only
This process involves removing the wiper arms from your vehicle and replacing only the blade itself with a new one. As you might expect, this type of repair will only work if you have a broken wiper arm. In other words, the blade should be the only part that needs replacing for this method to succeed.
1. First, place your fingers between the wiper arms and the windshield wipers to release the tension holding them into place. Then remove these components from your vehicle entirely by hand or with pliers.
2. Next, take off the old blades using pliers and replace them with new ones in their exact location on your car’s bodywork. Make sure any pinching systems are intact before reattaching the wiper arms to your car’s chassis through one final tugging motion with your hands or pliers, depending on your comfort level.
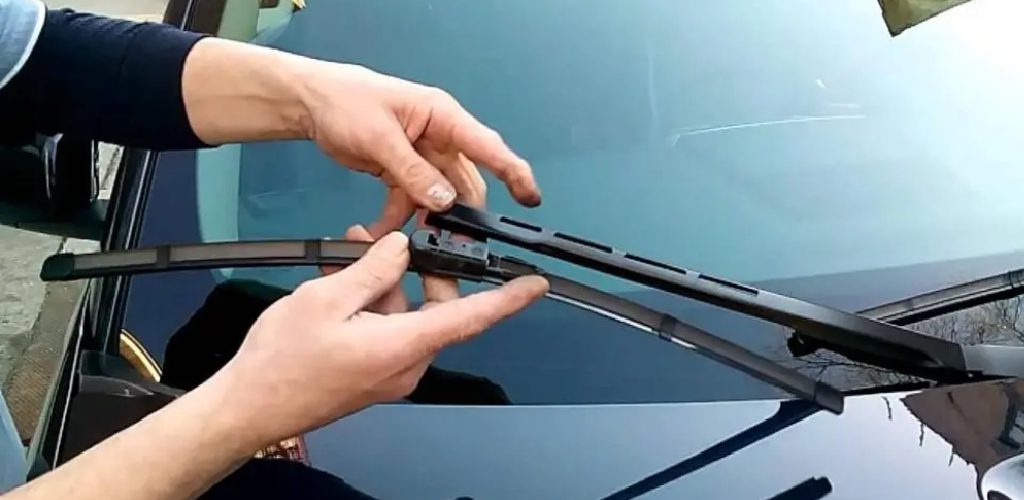
Method 2: Removing a Clip-On Windshield Wiper
This is a simpler alternative to Method 1 and will only work if you have a broken clip-on windshield wiper. The removal process for this type of component is similar to that of removing a regular double-sided blade. The main difference here is that you must be sure not to lose the pinching system before disassembly, as it tends to fall off during the removal process.
1. First, grip firmly around your wiper arm’s entrance point with one hand, then place your other hand on top of the protective clip covering its inner workings. For safety purposes, make sure that both hands are locked in their final position before proceeding to avoid cutting yourself on any exposed parts or injuring yourself during this process.
2. Now, pop the clip of your wiper arm as quickly as you can and pull it away from its resting place on your car’s exterior without further delay.
3. Finally, replace the old windshield wiper with a new one by simply placing it in its original position and pushing it firmly back down to lock it into place.
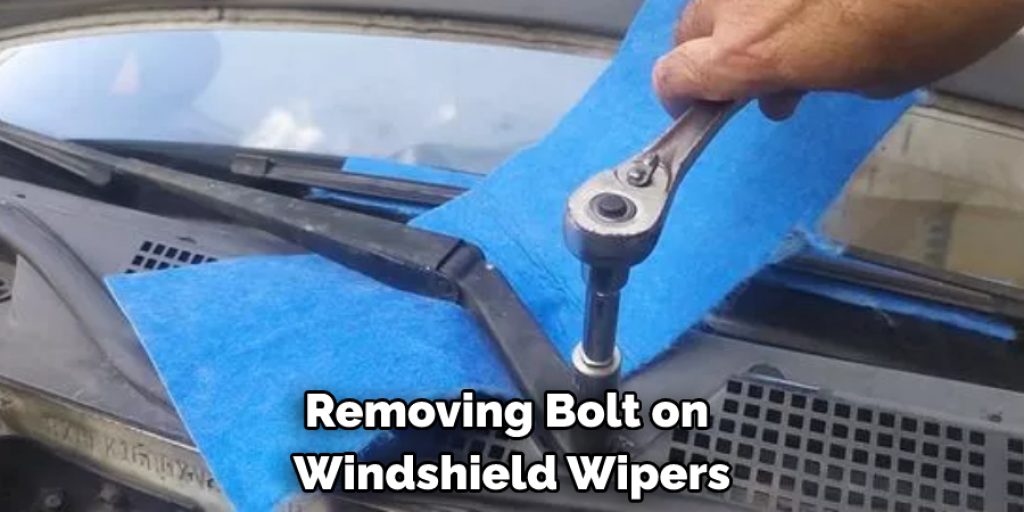
Method 3: Removing Bolt-On Windshield Wipers
The removal process for bolt-on windshield wipers is very similar to that of the previous wiper styles mentioned above. The main difference here is that two pins have been added to hold these types of blades into place instead of just one. Therefore, to successfully remove a bolt-on wiper, you must pull both pinching systems and tug the wiper arm away from your vehicle’s chassis until it is completely detached.
1. First, grip each of your wiper arms’ entrance points with one hand and place your other hands on top of their protective covers. As with Method 2, make sure that both hands are securely holding onto these components before proceeding, as this is the only protection method against any injuries.
2. Now, pull each of your wiper arms away from their resting places on your vehicle’s exterior until they are entirely removed from its chassis.
3. Once you have completed Step 2, use pliers to remove both pinching systems before replacing them with new blades using the same process as before.
Method 4: Preparing to Change Windshield Wipers
This is the most straightforward process since it only involves preparing your car’s wiper assembly for its eventual replacement. To begin, remove the wiper arms from your vehicle slowly and with caution while turning them slightly to avoid tightening their grip around any pinching systems they might have. Once you are sure that both arms are free from physical constraints, place them either in a safe place or to the side of your vehicle so as not to lose track of them.
1. Now, use pliers to remove both pinching systems from your windshield wiper assembly by tugging them away from their resting places on your car’s chassis with one forceful yank.
2. Finally, replace the old wiper blades with new ones by simply inserting them into their original positions and pushing them firmly back down to lock in place.
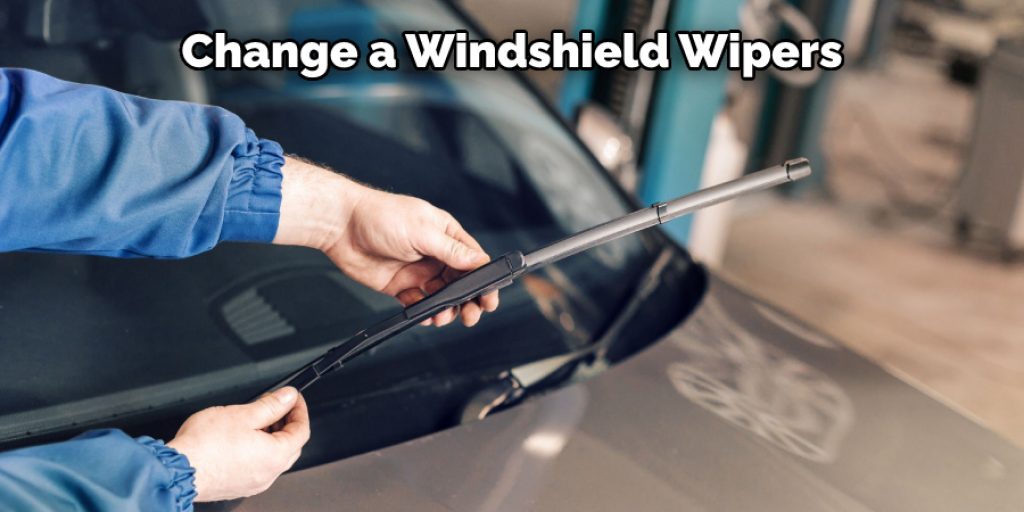
Method 5: Installing the Replacement Windshield Wiper
The replacement process for any wiper arm is relatively easy and contains just a few basic steps. First, grip your wiper arm firmly and hold it in place while introducing the new blade to its original resting spot using the freehand.
1. First, slowly remove your old windshield wiper by gripping at the very top of its exterior with one hand and sliding your other hand down the length of this arm until you reach its resting point.
2. Now, slowly insert the new blade into place by inserting it in the same manner as the old one until it is securely in its original position.
3. Finally, tighten both pinching systems firmly with pliers to complete your new wiper arm replacement.
Conclusion
It’s essential to know how your wipers work to take care of them. Here are some valuable methods on how to lift windshield wipers, lower the windshield wiper blades, and clean them out if they’re clogged with dirt or debris.
Louis Wein
Louis has always been fascinated by cars. He loves the way they look, the sound of the engine, and how they make him feel when he's driving. He is always keen to learn more about different mechanics of cars and how the engine contributes to other aspects of the car. As an automotive technician with over 10 years of experience, he knew how they worked and loved taking them apart to see how they went back together. He was especially interested in the mechanics of combustion engines and loved finding ways to make them more efficient. He loves to work on cars and help people keep their vehicles running smoothly. As a senior editor, he enjoys contributing to Diy quickly because it allows him to share his knowledge and expertise with others.


