
How to Make a Christmas Cone
Are you looking for a fun and festive way to decorate your home for the holidays? Look no further than a Christmas cone! These easy-to-make decorations are perfect for adding some holiday cheer to any corner of your house.
How to make a christmas cone is a delightful and festive way to enhance your holiday décor or to surprise loved ones with a charming gift. This easy and fun craft project allows you to unleash your creativity while adding a personal touch to your celebrations. Whether you’re using it as a centerpiece, a treat holder, or a festive ornament, making a Christmas cone can bring joy to your holiday preparations.

In this guide, we’ll walk you through the simple steps needed to craft your Christmas cone, along with tips on decoration and customization to make it uniquely yours.
What Will You Need?
Before we begin, let’s gather some supplies! Here are the basic materials you’ll need to make a Christmas cone:
- Cardstock or sturdy paper
- Scissors
- Ruler
- Pencil or pen
- Glue stick or double-sided tape
- Decorative items such as ribbons, stickers, glitter, etc.
Now that we have everything we need, it’s time to start making our Christmas cone.
10 Easy Steps on How to Make a Christmas Cone
Step 1: Cut the Cardstock
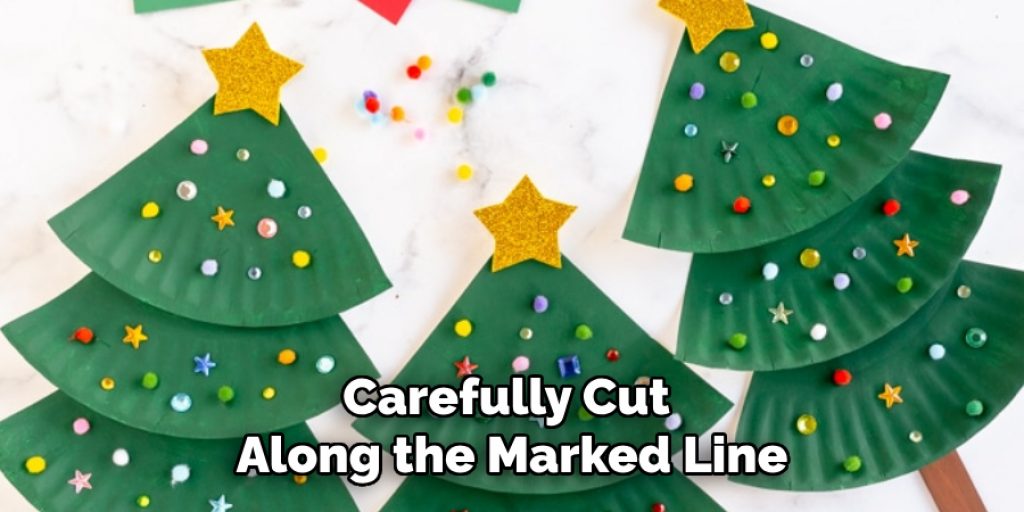
Using a ruler and pencil, begin by measuring and marking a semicircle on the cardstock. The size of the semicircle will determine the height and width of your cone; for a standard cone, aim for a radius of about 7 to 10 inches. Carefully cut along the marked line to create a perfect semicircle. Once you have your semicircle, you’ll need to roll it into a cone shape, aligning the straight edges together at the bottom. Leave some space at the top for any decorative elements you wish to add later. Use a glue stick or double-sided tape to secure the edges, ensuring that the cone holds its shape. This foundational step sets the stage for all the creativity in the decoration process.
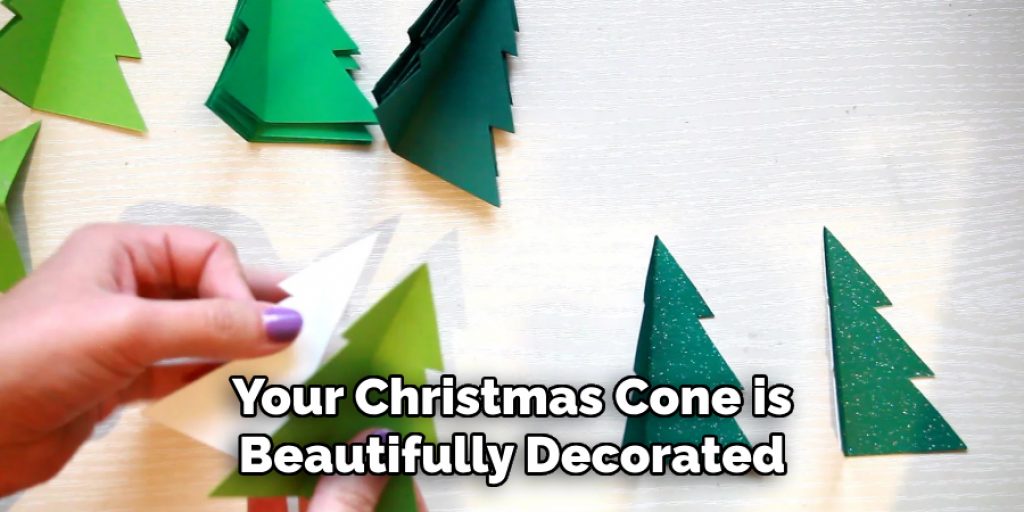
Step 2: Decorate Your Cone
Now comes the fun part—decorating your cone! Use your preferred decorative items such as ribbons, stickers, and glitter to give your cone a festive flair. Be creative in your approach; create patterns with ribbons, add glitter for sparkle, or use stickers that reflect the holiday spirit. If you’re feeling bold, you might even choose to paint your cone with festive colors or patterns. Make sure to let each layer dry if you’re adding paint or glue so your design remains intact. This is your opportunity to make the Christmas cone unique and personalized, so don’t hesitate to let your imagination shine!
Step 3: Add Finishing Touches
Once your cone is fully decorated, it’s time to add the finishing touches that will elevate your creation. Consider incorporating pine cones, dried fruit, or faux snow for a more traditional holiday feel. You can also use twine or ribbon to create a loop at the top for easy hanging, turning your cone into a delightful ornament. If you’re using it as a treat holder, fill the inside with small candies or holiday treats before securing the top with a decorative bow. These final details will make your Christmas cone a polished look and a delightful addition to your holiday decor!
Step 4: Find the Perfect Placement
Now that your Christmas cone is beautifully decorated and has the finishing touches, it’s time to find the perfect spot in your home. Consider placing your cone as a centerpiece on the dining table, where it can capture the attention of your guests during festive meals. Alternatively, you could adorn a mantelpiece, a windowsill, or an entryway table to welcome visitors with holiday cheer. If you’re using it as a treat holder, placing it near your holiday snack station will invite everyone to indulge in the sweet surprises. Be sure to position your cone in a way that allows its festive charm to shine, enhancing your overall holiday décor!
Step 5: Create Variations
To keep the spirit of creativity alive, consider making variations of your Christmas cone! Use different colors of cardstock for each cone to create a vibrant display. You could also experiment with various sizes—small cones can serve as table place settings, while larger ones could be used as floor decorations. Combining different shapes or styles, such as a cone topped with a star or one resembling a Christmas tree, can add a whimsical touch to your holiday décor. Don’t hesitate to try unconventional materials, like wrapping paper or fabric, to give your cones a distinctive look.
Step 6: Involve the Family
Making Christmas cones can be a fun family activity! Gather your loved ones and let each person design their own cone. This collaborative effort can unite everyone, fostering a sense of holiday spirit and bonding. Encourage children to express their creativity freely by providing a variety of materials and tools. You can turn the session into a mini-competition for the most creative or festive cone, with small prizes awarded for accomplishments. This shared experience will produce beautiful decorations and create cherished memories with your family.

Step 7: Share the Joy
Once your Christmas cones are complete, consider sharing the joy with friends and neighbors. You can create a small gift package with a beautifully decorated cone filled with holiday treats or goodies to brighten someone’s day. Alternatively, host a cone-making workshop in your community or with friends to share your crafting skills and spread holiday cheer. Remember, giving and sharing your creations will enhance the holiday spirit, fostering connections and spreading joy far and wide.
Step 8: Store for Future Celebrations
After the holiday season, carefully store your Christmas cones to keep them in excellent condition for next year. Use clear plastic bins to protect them from dust and damage. Consider wrapping your decorations in tissue paper for extra protection if your decorations are delicate. Label the storage containers to easily find your festive decorations when the holidays roll around again. This thoughtful preservation allows you to enjoy the fruits of your creative labor for many seasons.
Step 9: Experiment with New Techniques
Each year presents a new opportunity to innovate! As you make your Christmas cones, consider exploring new crafting techniques. Try techniques like decoupage, where you can embellish your cones with Christmas-themed paper or images for a unique touch. You might also explore combining your cones with other materials, such as fabric or dried flowers, to create hybrid decorations with a more sophisticated aesthetic. The holiday season is perfect for letting your creativity run wild and discovering new crafting possibilities.
Step 10: Enjoy the Holiday Spirit
Lastly, take a moment to step back and enjoy your beautifully crafted Christmas cones. Celebrate the festive atmosphere they bring to your home and the joy of creativity that comes with making them. As the holiday season approaches, let each cone remind you of the love, warmth, and joy that fill the air during this particular time. Cherish the memories you’ve created while making them, and take pride in your handiwork as you share the spirit of Christmas with others.
By following these steps, you can create beautiful and unique Christmas cones to enhance your holiday decor and spread festive cheer.
5 Things You Should Avoid
- Using Low-Quality Materials: Avoid cheap or flimsy materials that can compromise the structure and appearance of your Christmas cone. Invest in sturdy cardstock and decorative elements to ensure your creation stands the test of time.
- Skipping the Planning Stage: Rushing into crafting without a straightforward design can lead to a chaotic outcome. Sketch your ideas or plan your colour scheme beforehand to achieve a cohesive look.
- Overloading with Decorations: While it can be tempting to adorn your cone with every festive element available, cluttering can detract from its charm. Aim for a balanced design that showcases essential decorations without overwhelming the viewer.
- Neglecting Adhesive Application: Properly securing your decorations is crucial for a polished finish. Avoid using insufficient glue or tape, which may lead to decorations falling off over time. Make sure to apply your adhesive generously and let it dry adequately.
- Forgetting About Safety: When using tools such as scissors or hot glue guns, ensure everyone involved in the crafting process understands proper safety techniques. To prevent accidents, avoid allowing young children to handle sharp tools or heated equipment without supervision.

Conclusion
In conclusion, how to make a christmas cone is not just a delightful crafting project but also an opportunity to express your creativity and bring the holiday spirit into your home.
By following the steps outlined—from gathering your materials to sharing the joy of your creations—you can craft beautiful cones that enhance your holiday décor. Remember to involve your family in the process for shared memories, and don’t hesitate to explore new techniques each year. With a bit of planning and thoughtful execution, your Christmas cones will serve as cherished decorations, embodying the warmth and joy of the festive season for years to come.
Embrace the magic of creating and let your Christmas cones shine brightly during every celebration!
Elizabeth Davis
Elizabeth is a creative writer and digital editor based in the United States. She has a passion for the arts and crafts, which she developed from a young age. Elizabeth has always loved experimenting with new mediums and sharing her work with others. When she started blogging, she knew that DIYquickly would be the perfect platform to share her tutorials and tips. She's been writing for the blog from the beginning, and her readers love her helpful advice and easy-to-follow instructions. When she's not writing or editing, Elizabeth enjoys spending time with her family and friends.


