
How to Cut Pine Cones in Half
When you brighten your property value to sell your property better, it is essential to have a wreath at the front gate. If your price residence is an old house in a townhouse complex or a 100-acre farmstead, your front gate is one vision purchasers will undoubtedly start noticing.
There they’re standing observing the front entrance. Was there anything tactile that can please their eyes and inspire them right before they walk in? If not, otherwise, you overlooked an opportunity to capture their attention.
A wreath is the most comfortable piece of outdoor decoration taking on at the entrance. Everyone can get one through DIY. You already own anything you like. Smooth or sophisticated, artistic or conventional, minimalist or vibrant — that’s your choice, and it all relies on your interior decoration and the impression you need customers to receive.
I adore the rectangular wreath appear. That’s only sufficiently unique to be fascinating. I created this pine cone wreath as an autumn display, and if this house hasn’t sold by then, it should remain up until the holidays! I’m going to turn the bow to red satin, then put in a few light decorations.
Instructions

Assemble your items. I reside where pine trees flourish and pulling them up is only something of cleaning daily yards. When the natural world doesn’t give them to you, you should purchase pine cones. It is required to cut the heads off the cones. I prefer tin snips since they’re fast and reliable. I included loppers and hand pruners for landscape design too.
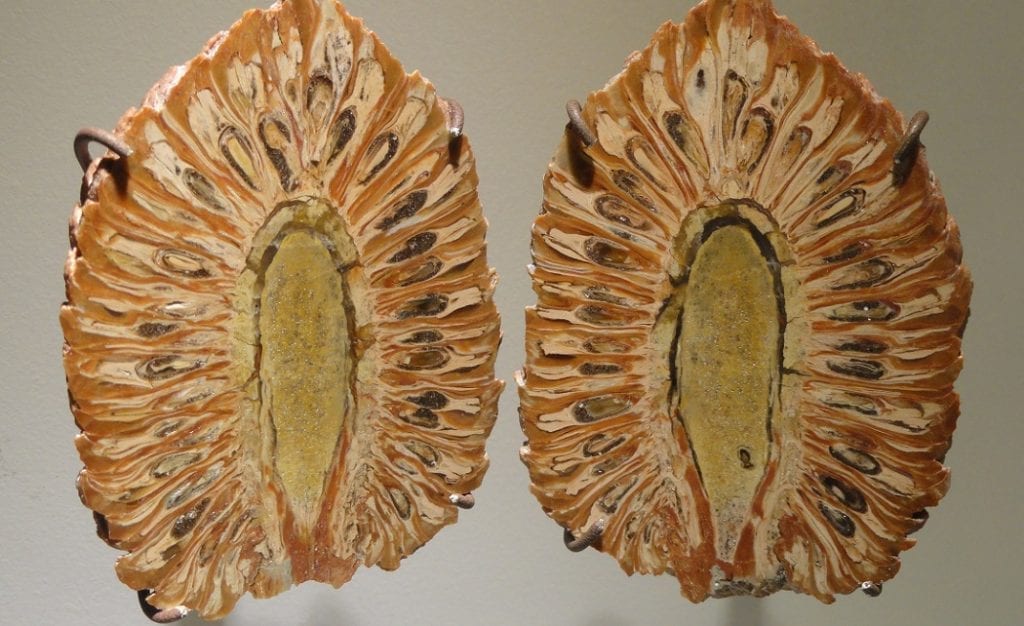
These extend broader than hand pruners to have more control. And using them to chop off all your pine cones just a few inches from the lower part. The cuts needn’t be exact, or particularly tidy. Your wreath should appear more reasonable than polished, so inconsistencies are perfect.
Slicing off a pine cone at the base with tin snips is just like chopping a flower from its stem. The bottom part of the pine cone is the “flower,” which will shape your bouquet. Having the whole pine cone to work with will allow you to adjust the pine cone and chop from three or four different angles into the central area. Work on a rough surface, such as a cutting board, so that the tin snips can be braced against it for better traction while chopping.
If you cut the top off a pine cone, you will usually find a small “flower” on the upper surface. If the cone is cut at the base or at the peak, this flower will be more pronounced.

When the cones are clean, they open themselves up to appear very much like flowers. I tried to give my pine cones a brighter color, so I dissolved them in one portion mix of water and four parts bleach. I tied them down with a bit of rigid plastic and a plant bowl because the cones appeared to float. We drank all night. I washed them well enough in freshly freshwater and helped them to drain.
I lined two aluminum foil baking paper, placed the pine cones on the paper, and placed them up for two hours in a 300-degree furnace. The foil covers pine syrup droplets from the baking parchment. It took a long time to make them fully dry, and they released. Bleaching and drying your pine cones are unnecessary, particularly if you’re going to mist your wreath after it has been placed together.


