
How to Make a Christmas Topiary
Creating a Christmas topiary is a delightful way to add festive cheer to your holiday decorations. This artful arrangement transforms basic materials into a stunning centerpiece that showcases your creativity and adds a touch of elegance to your seasonal decor.
Topiaries can be designed in various shapes, from traditional cones to whimsical figures, and can be adorned with ornaments, ribbons, and seasonal greenery. In this guide on how to make a christmas topiary, we will walk you through the steps to craft your very own Christmas topiary, ensuring that you can impress your guests with a charming piece that embodies the spirit of the holidays.
Why Make a Christmas Topiary?
Topiaries have been used as decorative elements for centuries, and with good reason. These eye-catching features add visual interest, bring nature indoors, and are versatile enough to complement any decorating style. Whether you prefer classic or contemporary decor, there is a topiary design that will suit your taste.
Not only do christmas topiaries make beautiful centerpieces for your holiday tablescape, but they also make wonderful gifts for friends and loved ones. Imagine the joy on someone’s face when they receive a handmade topiary adorned with their favorite festive colors and ornaments!
Materials You Will Need
To make a Christmas topiary, you will need:
A Foam Cone or Ball:
The base of your topiary will be made from a foam cone or ball, which you can purchase at any craft store. The size and shape of the foam will depend on the design you are going for.
Greenery:
You can use artificial greenery such as pine, holly, or fir branches to create the lush appearance of a real tree without worrying about it drying out.
Ornaments and Decorations:
Choose ornaments in coordinating colors and sizes to add texture and interest to your topiary. You can also add ribbons, bows, berries, or anything else that suits your design.
Glue Gun:
A glue gun is essential for securing the greenery and decorations to the foam base.
Scissors or Wire Cutters:
You will need scissors or wire cutters to trim and shape the greenery and ornaments.

8 Step-by-step Guides on How to Make a Christmas Topiary
Step 1: Select Your Foam Base and Greenery
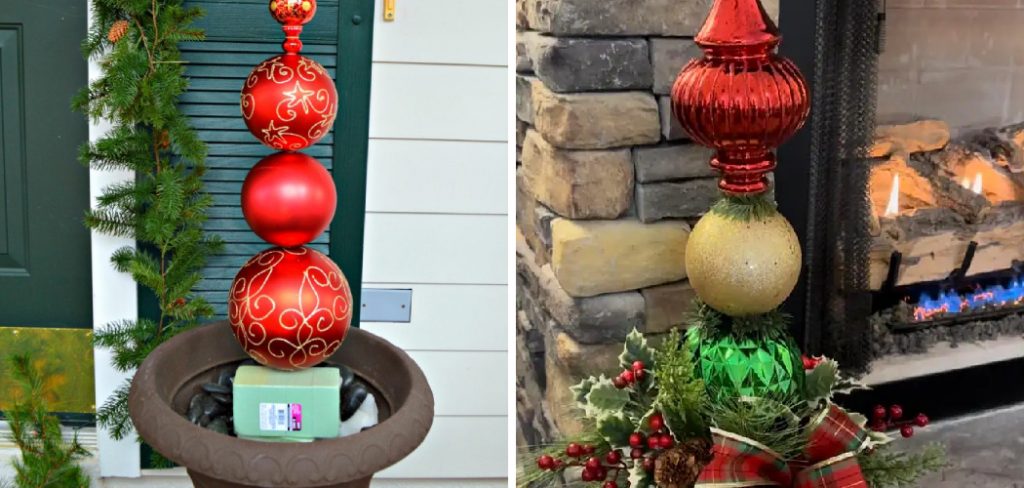
Begin by choosing the appropriate foam base for your topiary. Consider the height and shape you’d like your finished piece to take. A foam cone works well for a traditional tree shape, while a round foam ball can create a delightful globular design.
Once you’ve selected your base, it’s time to pick the greenery. Opt for artificial pine, holly, or fir branches that match your desired aesthetic. Ensure the greenery is full and lush to create a realistic appearance. For a personal touch, consider mixing in different types of greenery to add depth and variety to your topiary.
Step 2: Secure Your Foam Base
Once you have selected your foam base and greenery, it’s time to secure the foam to prevent it from shifting while you work. Start by placing the foam cone or ball in the center of your chosen display area. To provide additional stability, you might want to anchor your foam to a decorative plate or a pot using hot glue.
If using a foam cone, ensure it stands upright; for a foam ball, consider using a small piece of dowel or a skewer to stake it into a more stable base. This step is crucial, as a well-secured foundation will make the decorating process much easier and result in a more polished final product. Once your base is secure, you can begin attaching your greenery.
Step 3: Start Attaching the Greenery
To create a full and lush topiary, you will need to cover every visible inch of your foam base with greenery. Begin attaching branches at the bottom of your foam cone or ball using hot glue. Overlap each piece slightly to ensure there are no gaps. Once you have covered the entire base, it’s time to move on to the next layer.
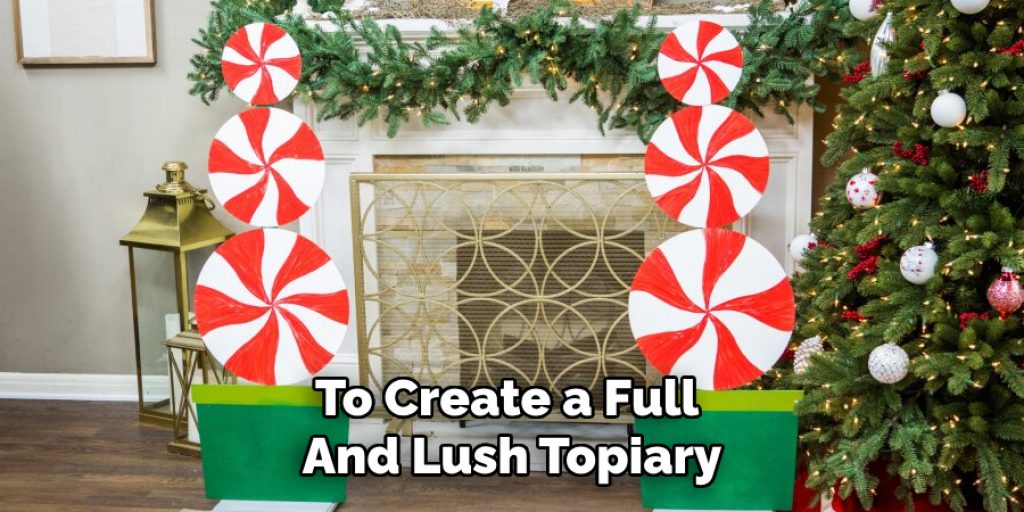
You can switch up the direction of your branches to create a more natural appearance. Continue adding layers until you reach the top, making sure to cover any gaps or exposed foam with additional greenery.
Step 4: Add a Second Layer of Greenery
To give your topiary depth and dimension, add a second layer of greenery, using a different type or shade of green. This layer will help create a more realistic and full appearance. Repeat the same process as before, starting at the bottom and working your way up.
It’s okay if the greenery overlaps or covers parts of the previous layer; this will add to the overall fullness and texture of your topiary.
Step 5: Secure Your Decorations
Once you have covered the entire base with greenery, it’s time to add some festive decorations. Use a glue gun to attach ornaments, ribbons, bows, berries, or any other decorations you desire. You can place them in between layers of greenery or on top for a more whimsical look.
The key is to distribute the decorations evenly, ensuring they are securely attached. If you are using larger ornaments, consider securing them with a small piece of wire for extra support.
Step 6: Add Final Touches
To add an extra touch of elegance to your topiary, consider adding some glitter or fake snow to the greenery. You can also tie a bow around the base or use a string of lights to create a warm and festive glow.
But remember, less is more. Don’t go overboard with the decorations as it can take away from the natural beauty of the topiary.
Step 7: Display Your Topiary
Once all decorations have been added and secured, it’s time to display your beautiful creation! Place it on your mantle, as part of your table centerpiece, or in any other area that could use some holiday cheer.
For added charm, place multiple topiaries of varying sizes and designs together to create a stunning holiday display.
Step 8: Maintain Your Topiary
To ensure your topiary stays looking fresh throughout the holiday season, lightly mist it with water every few days. This will help prevent the greenery from drying out and losing its shape.

After the holidays are over, you can remove the decorations and store your topiary in a cool, dry place to be used for future years. And there you have it – a beautiful handmade Christmas topiary that will add charm and festive spirit to any space. Happy crafting!
Additional Tips
- Experiment with different color schemes to create unique and personalized topiaries.
- Use varying sizes and shapes of foam bases to create an entire topiary scene, including a tree, snowman, reindeer, and more.
- Add a touch of natural fragrance by using real greenery instead of artificial. Just be sure to mist it regularly to keep it looking fresh.
- Don’t limit yourself to just greenery and ornaments; you can also use small figurines, candy canes, or other holiday-themed items to decorate your topiary.
- Use a clear sealant spray once your topiary is complete to help preserve its beauty and protect it from dust. Overall, have fun with the process and let your creativity shine through!
With these step-by-step guides and additional tips on how to make a christmas topiary, you’ll be well on your way to creating beautiful Christmas topiaries that will impress all your holiday guests. Happy crafting!
Frequently Asked Questions
Q: Can I Use Real Greenery for My Topiary?
A: Yes, you can use real greenery instead of artificial. Just be sure to mist it regularly to keep it looking fresh. It’s best to choose hardy greenery that can withstand warm, dry indoor conditions.

Q: How Long Will My Topiary Last?
A: With proper maintenance, your topiary can last throughout the holiday season. After that, you can remove the decorations and store them for future use.
Q: Can I Use Different Types of Ornaments and Decorations on My Topiary?
A: Absolutely! Get creative and use any ornaments or decorations that fit your desired aesthetic. Just make sure they are securely attached to prevent falling off. So don’t be afraid to experiment with different colors, textures, and sizes to create a one-of-a-kind topiary masterpiece.
Q: Can I Make Topiaries for Other Occasions Besides Christmas?
A: Yes, you can use this same technique to create topiaries for any holiday or occasion. Simply switch out the colors and decorations to match your theme. You can also use different types of greenery and materials to create topiaries for other seasons such as spring or fall.
Conclusion
Creating a Christmas topiary is a delightful craft that not only adds a festive touch to your home but also serves as a unique expression of creativity. By following the detailed steps on how to make a christmas topiary outlined above and embracing your personal style with decorations, you can craft a stunning centerpiece that captures the spirit of the season.
Remember, the key is to enjoy the process and let your imagination run wild. With proper care, your topiary will remain a cherished part of your holiday decor for years to come. Happy crafting, and may your holidays be filled with joy and creativity!
Elizabeth Davis
Elizabeth is a creative writer and digital editor based in the United States. She has a passion for the arts and crafts, which she developed from a young age. Elizabeth has always loved experimenting with new mediums and sharing her work with others. When she started blogging, she knew that DIYquickly would be the perfect platform to share her tutorials and tips. She's been writing for the blog from the beginning, and her readers love her helpful advice and easy-to-follow instructions. When she's not writing or editing, Elizabeth enjoys spending time with her family and friends.


