How to Put Ribbon on a Real Christmas Tree
ing ribbon to a real Christmas tree is a festive way to elevate your holiday decor and introduce a touch of elegance and charm. Whether you prefer the classic look of a neatly wrapped tree or the whimsical feel of cascading ribbons, this guide on how to put ribbon on a real christmas tree will walk you through the steps to achieve your desired aesthetic.
Not only does ribbon add color and texture to your tree, but it also offers a unique opportunity to unify your holiday theme and color scheme. Before we dive into the techniques and tips for ribbon decoration, it’s important to select the right type of ribbon and prepare your tree, ensuring a stunning and joyful display.
What is Ribbon?
Ribbon is a versatile fabric material that comes in various widths, textures, and patterns. It’s commonly used for gift wrapping, crafts, and sewing projects but can also be an excellent addition to Christmas tree decorations.
Traditionally made from silk or satin, ribbons are now available in a range of materials such as organza, velvet, burlap, and even paper. When choosing the right ribbon for your tree, consider its color, texture, and width to complement your overall holiday theme.
You can find ribbons in craft stores, department stores, and online retailers. You may also repurpose leftover ribbon from previous events or gifts to add a personal touch to your tree. Remember that you’ll need approximately 9 feet of ribbon per foot of tree height.
Why Put Ribbon on a Real Christmas Tree?
While traditional methods of decorating a tree with ornaments and lights can create a beautiful display, adding ribbon takes your tree to the next level. Here are some reasons why you should consider using ribbon for your real Christmas tree:
Dimension and Texture:
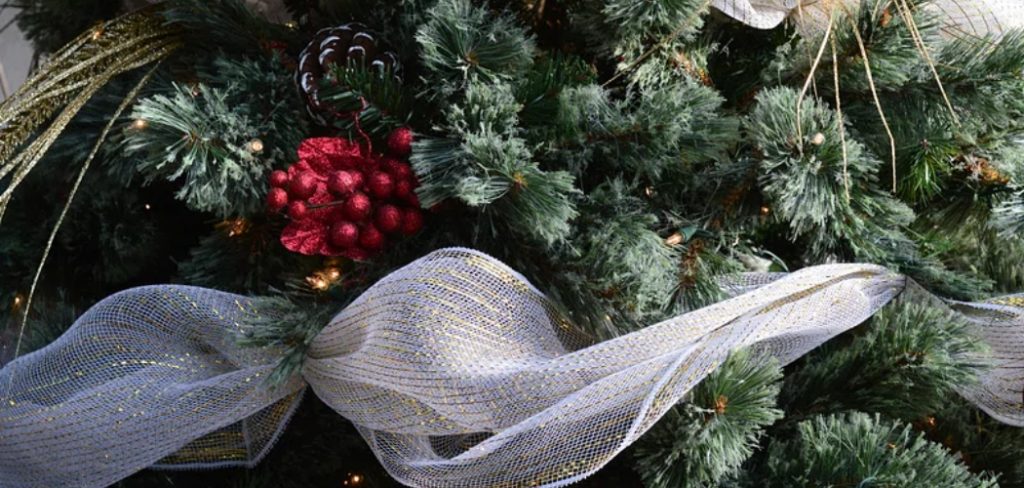
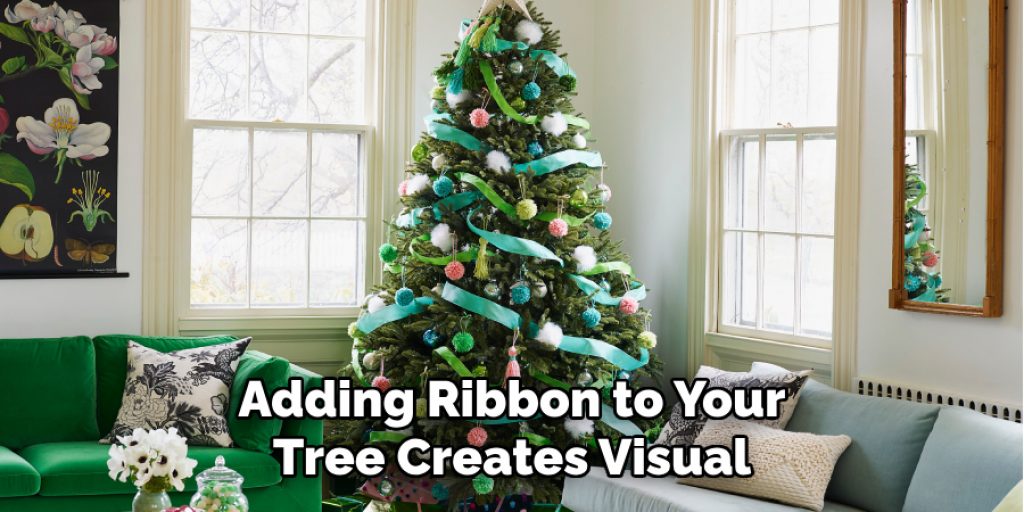
Adding ribbon to your tree creates visual interest and adds dimension and depth. It breaks up the monotony of ornaments and lights and offers a luxurious touch to your tree.
Color and Pattern:
Ribbon comes in a variety of colors, patterns, and textures, providing endless possibilities for decorating your tree. You can choose a ribbon that complements or contrasts with your existing holiday decor, creating a cohesive look.
Easy to Customize:
Ribbons are easy to manipulate around branches and can be cut to desired lengths, making them suitable for any tree size or shape. You can also use multiple ribbons of different widths and textures to achieve a unique and personalized look.
Necessary Materials
To start, gather the following materials:
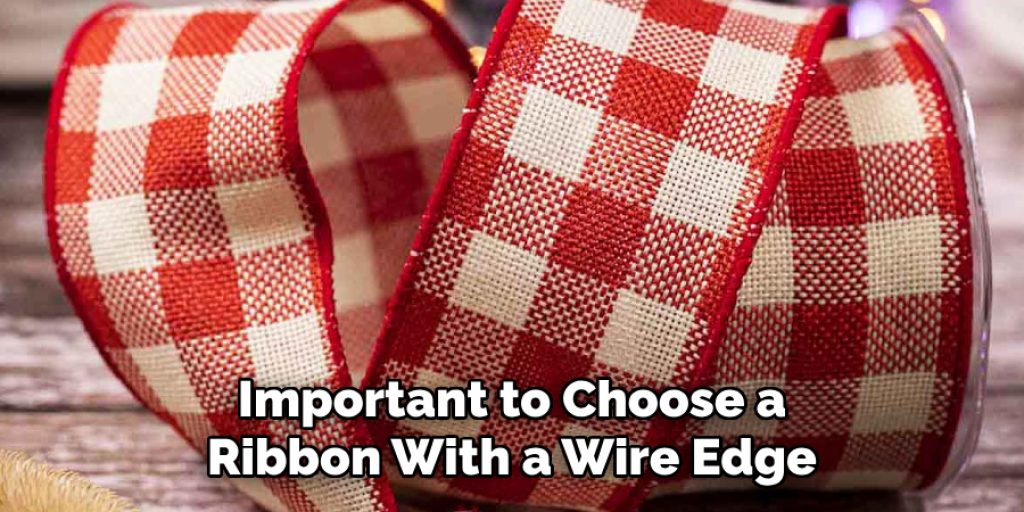
Ribbon (Preferably Wired):
Choose a ribbon that is wired or has a sturdy edge to hold its shape and make it easier to work with.
Scissors:
Sharp scissors will be necessary for cutting the ribbon to desired lengths and creating clean edges.
Floral Wire or Twist Ties:
These will be used to secure the ribbons to your tree branches. Floral wire is a better option as it blends in with the tree and is easier to hide.
Zip Ties or Ornament Hooks:
If you plan on using cascading ribbons, zip ties or ornament hooks will come in handy for attaching the ribbon to the top of your tree.
10 Step-by-step Guidelines on How to Put Ribbon on a Real Christmas Tree
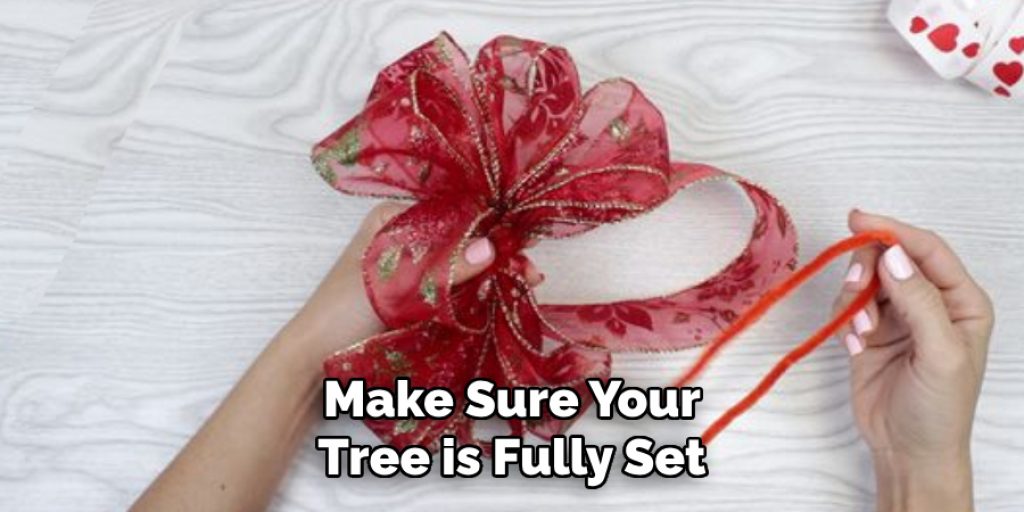
Step 1: Prep Your Tree
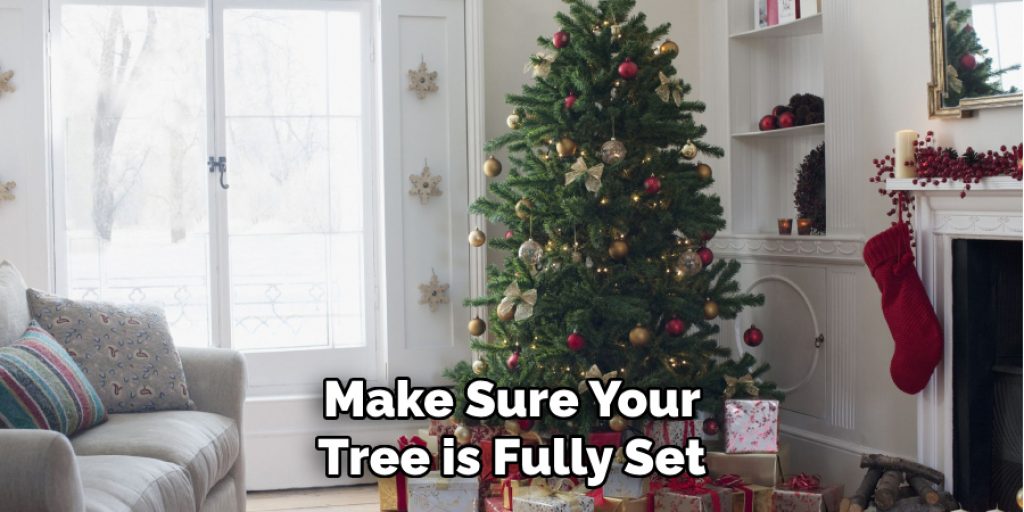
Before adding the ribbon, make sure your tree is fully set up and fluffed. Remove any unwanted branches or foliage that may get in the way. It’s also helpful to have a ladder or step stool nearby if you have a tall tree. It’s best to add the ribbon before any ornaments or lights are placed on the tree. You can also opt to add ribbon after decorating your tree for an extra layer of texture and color.
Step 2: Cut the Ribbon
Cut long pieces of ribbon in approximately 10-inch lengths. You can always trim them shorter later, so it’s better to start with longer pieces. The number of ribbons you’ll need will depend on the size and fullness of your tree. You can also cut the ribbon in shorter lengths if you prefer a more layered look. But for cascading ribbons, it’s best to use longer pieces. You can also use multiple ribbons of varying widths, textures, and colors for a more unique and dynamic look. The number of ribbons you’ll need will depend on the size and fullness of your tree.
Step 3: Create Folds
To add dimension to your tree, create folds by accordion-folding the ribbon back and forth along the length. You can also leave the ribbon flat for a more classic look. But adding folds will give your tree more texture and volume. You can use a ruler to help create uniform folds. It’s best to have a mix of folded and flat ribbons for a more interesting display. The number of folds will depend on the length and width of your ribbon. You can also experiment with different fold sizes to see what looks best on your tree.
Step 4: Secure the Ribbon
Using floral wire or twist ties, secure the folded ribbon in the center. Make sure to fluff out any folds and adjust them as needed. Repeat this step for all your ribbons. Otherwise, use a single wire for flat ribbons. It’s best to attach the wire close to the center of the ribbon so it doesn’t weigh down one side. The wire will also make it easier to attach the ribbon to branches without damaging them. You can also use zip ties to secure the ribbon to the top of your tree if you plan on having cascading ribbons.
Step 5: Attach Ribbon to the Tree Top
If you plan on having cascading ribbons from the top of your tree, attach the ribbon using a zip tie or ornament hooks. Make sure to attach it securely so that the ribbon doesn’t fall off when adding more layers. Otherwise, you can start at the top of your tree and work your way down. It’s best to start with a long piece of ribbon at the top and then gradually use shorter pieces as you move down. But you can also use shorter ribbons from the top to create a more layered look.
Step 6: Start at the Top of Your Tree
Start by attaching your first ribbon near the top of your tree, either using zip ties or floral wire. You can attach it to a branch close to the trunk for added security. Let the ribbon cascade down to create a diagonal line. Make sure to fluff out any folds and adjust the ribbon’s placement as needed. You can also use several ribbons at the top for a fuller look. It’s best to have a mix of folded and flat ribbons for added texture. But you can also stick to one style if preferred.
Step 7: Work in Sections
Continue attaching ribbons in sections around your tree, moving down and outward from the center of your tree. Leave some space between each ribbon to allow room for ornament and light placement. Don’t worry about making the ribbons too perfect or symmetrical; the goal is to add texture and dimension to your tree. The number of ribbons you’ll need will depend on the size and fullness of your tree. For a fuller look, use more ribbons. You can also alternate between folded and flat ribbons for added interest.
Step 8: Vary Ribbon Lengths
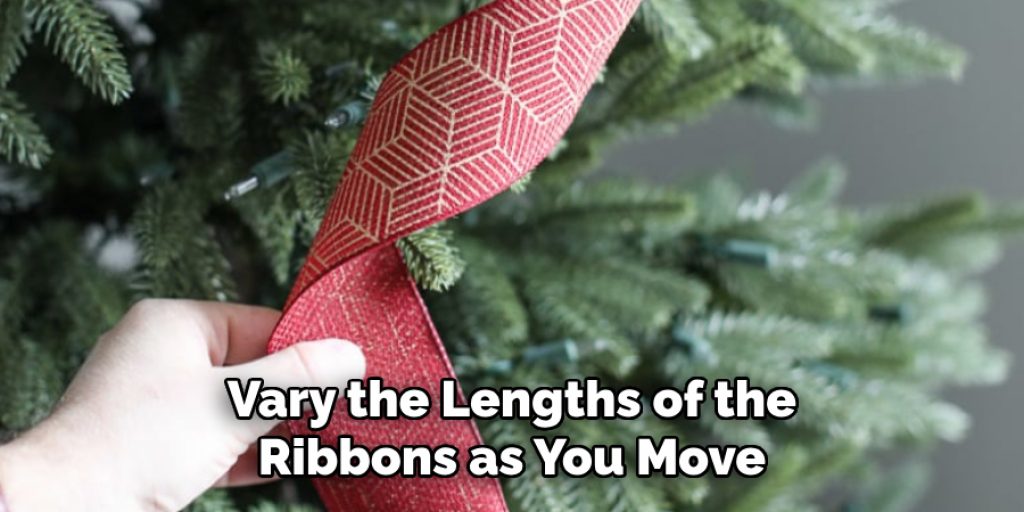
To create a more natural look, vary the lengths of the ribbons as you move down and around your tree. This will give a cascading effect that mimics how a ribbon would naturally fall on a tree branch. Longer ribbons can also be tucked behind branches for added depth and texture. You can use this technique to fill in any gaps or bare spots on your tree. It’s also okay to have some ribbons that are longer or shorter than others for a more organic look.
Step 9: Add More Ribbons
Once you have completed one round of attaching ribbons, take a step back and assess your tree’s look. If you feel like it needs more ribbons, go ahead and add them in the same manner. You can also adjust and reposition any existing ribbons to create a more balanced look. Don’t be afraid to experiment with different ribbon lengths, styles, and placements until you are happy with the overall appearance.
Step 10: Add Ornaments and Lights
Once all your ribbons are in place, you can start adding ornaments and lights to your tree. The ribbons will add a beautiful backdrop for your decorations and help tie everything together. You can also weave the ribbons around or through your ornaments for added visual interest. If you have any extra ribbon left, you can use it to tie a bow and place it at the top of your tree as a finishing touch. And that’s it! You now have a beautifully decorated Christmas tree with perfectly placed ribbons.
Following these steps will help you achieve a professional and elegant look for your Christmas tree. But feel free to get creative and add your own personal touches to make it uniquely yours. Remember, decorating is all about having fun and expressing yourself, so don’t be afraid to experiment and have fun with it!
Maintenance and Care
To make sure your ribbons stay in place and look their best throughout the holiday season, here are a few maintenance tips:
- Check and adjust ribbons periodically to ensure they are secure and evenly distributed.
- Avoid using hot or heavy ornaments that can weigh down the ribbons and cause them to droop.
- Keep an eye out for any fraying or damage to the ribbons and replace them as needed.
- When dismantling your tree, carefully remove the ribbons to avoid any tangling or tearing. Store them in a cool, dry place for future use.
- Have fun and enjoy your beautifully decorated Christmas tree!
- So, get ready to impress your friends and family with your expertly decorated tree using these simple tips for adding ribbons. Happy decorating!
- Remember, even the smallest details can make a big difference when it comes to creating a festive and inviting holiday atmosphere. So don’t underestimate the impact that well-placed ribbons can have on your Christmas tree’s overall appearance. And with a little bit of patience and creativity, you’ll have a stunningly decorated tree that will bring joy to everyone who sees it.

Personalization and Creativity
While these are general steps for adding ribbons to your Christmas tree, don’t be afraid to add your own personal touch and get creative. You can mix and match different ribbon styles, colors, and lengths to create a unique look that reflects your personality and style. You can also incorporate other decorative elements like beads, bows, or even natural elements like pinecones or dried oranges. The possibilities are endless, so have fun and let your creativity shine!
You can also use these same steps to add ribbons to other holiday decorations like wreaths, garlands, and mantel displays. The key is to have fun and let your imagination guide you in creating a beautiful and festive atmosphere for the holidays. Happy decorating!
How Much Will It Cost?
The cost of adding ribbons to your Christmas tree will depend on the size and type of ribbon you choose, as well as how many you decide to use. You can find a variety of affordable ribbon options at your local craft store or online. Plus, by reusing the ribbons each year and taking proper care of them, you’ll save money in the long run.
And the joy and beauty they will bring to your holiday decorations are priceless! So don’t be afraid to invest a little in adding ribbons to your Christmas tree – your effort and creativity will pay off in creating a stunning centerpiece for your holiday celebrations.
Frequently Asked Questions
Q: How Many Ribbons Do I Need for My Tree?
A: The number of ribbons needed will depend on the size and fullness of your tree. It’s best to have a few extra ribbons on hand in case you need to fill in any gaps or adjust the placement of your ribbons. You can also use different ribbon widths and textures to add dimension. It’s always better to have too many ribbons than not enough.
Q: How Do I Choose the Right Ribbon for My Tree?
A: When choosing ribbon for your tree, consider the color scheme and overall aesthetic you want to achieve. You can use a single color or mix and match different colors and patterns for a more unique look. It’s also important to choose a ribbon with a wire edge as it will hold its shape better and be easier to work with. And don’t forget to consider the size and fullness of your tree when choosing ribbon widths. You can also use different ribbon textures like satin, velvet, or burlap for added visual interest.
Q: Can I Use Different Types of Ribbon?
A: Absolutely! You can use various types of ribbon, such as satin, velvet, or burlap, for added texture and interest. Just make sure they all have a wire edge for easier manipulation and shaping. Mixing different types of ribbon can also give your tree a more dynamic look. But remember to stick to a cohesive color scheme for a more polished finish.
Q: Can I Change the Ribbon Every Year?
A: Of course! Decorating your Christmas tree is all about personal preference, so if you want to change up your ribbon every year, go for it! It’s a great way to keep your tree looking fresh and updated. You can also reuse ribbons from previous years or repurpose them for other decorations, such as wreaths or garlands. The possibilities are endless!
Q: How Do I Store My Ribbon After the Holidays?
A: To keep your ribbons in good condition for future use, make sure to store them in a cool, dry place away from any direct sunlight. You can also wrap them around a cardboard tube or use a ribbon organizer to keep them tangle-free and easy to access for next year’s decorating. And don’t forget to label each ribbon with its color and size for easier identification.
Conclusion
Decorating your Christmas tree with ribbons is a wonderful way to add elegance, texture, and depth to your holiday decor. By following the steps on how to put ribbon on a real christmas tree outlined in this guide, from choosing the right ribbons to attaching them in a way that enhances your tree’s natural beauty, you can achieve a stunning and professional-looking display. Remember, the key to a beautifully decorated tree is not just in the techniques used but also in the joy and creativity you bring to the process.
Whether you stick to a traditional color scheme or experiment with various types and lengths of ribbons, the most important aspect is that it reflects your personal style and the festive spirit of your home. Happy decorating, and may your holiday season be as bright and cheerful as your beautifully adorned Christmas tree!
Angela Ervin
Angela is the executive editor of DIY quickly. She began her career as an interior designer before applying her strategic and creative passion to lifestyle and home. She has close to 15 years of experience in creative writing and online content strategy for housekeeping, home decorations as well as other niche efforts. She loves her job and has the privilege of working with an extraordinary team. She lives with her husband, two sons, and daughter in Petersburg. When she's not busy working she spent time with her family.