
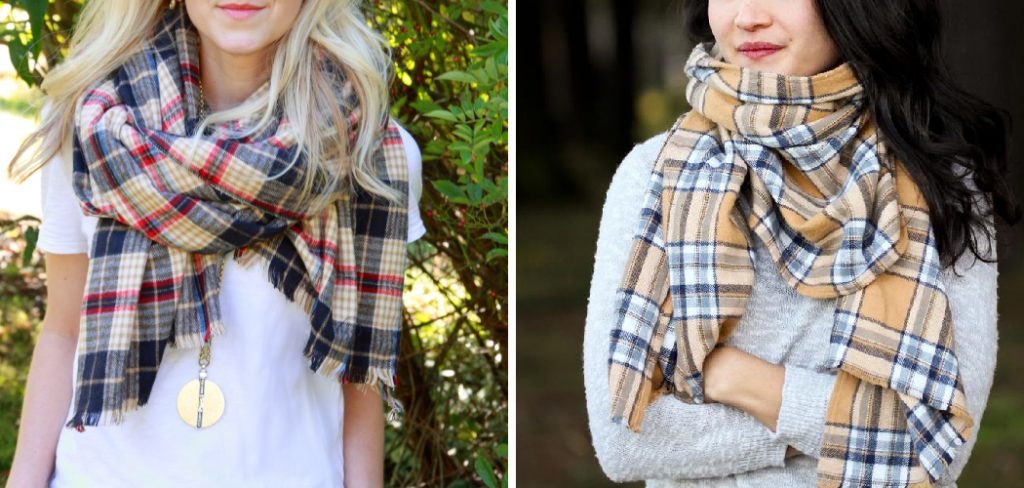
How to Make a Flannel Scarf
Flannel scarves are cherished for their inviting charm and comforting warmth, making them a staple accessory for cooler months. The soft texture and vibrant flannel patterns bring style and function to any outfit, elevating simple attire while keeping you snug. One of the greatest advantages of making your own scarf is its customization level; you can select the fabric, patterns, and dimensions that perfectly suit your personal taste. Additionally, crafting your own flannel scarf is a cost-effective alternative to purchasing ready-made options, allowing you to enjoy a high-quality product without breaking the bank. In this guide, we will explore how to make a flannel scarf, detailing the essential materials and a step-by-step approach to creating your very own stylish accessory.
Materials Needed
To successfully craft your flannel scarf, you’ll need the following materials:
- Flannel Fabric: Opt for a soft, high-quality flannel in various patterns and weights. Recommended sizes typically range from 1 to 1.5 yards, depending on your desired scarf length and width. A lighter flannel is ideal for a cozy but lightweight scarf, while a heavier option offers a more substantial feel suitable for colder climates.
- Scissors or Rotary Cutter: Choose sharp fabric scissors or a rotary cutter for precise cuts. A rotary cutter on a self-healing cutting mat allows for cleaner edges and quicker cutting, particularly for straight lines and intricate shapes.
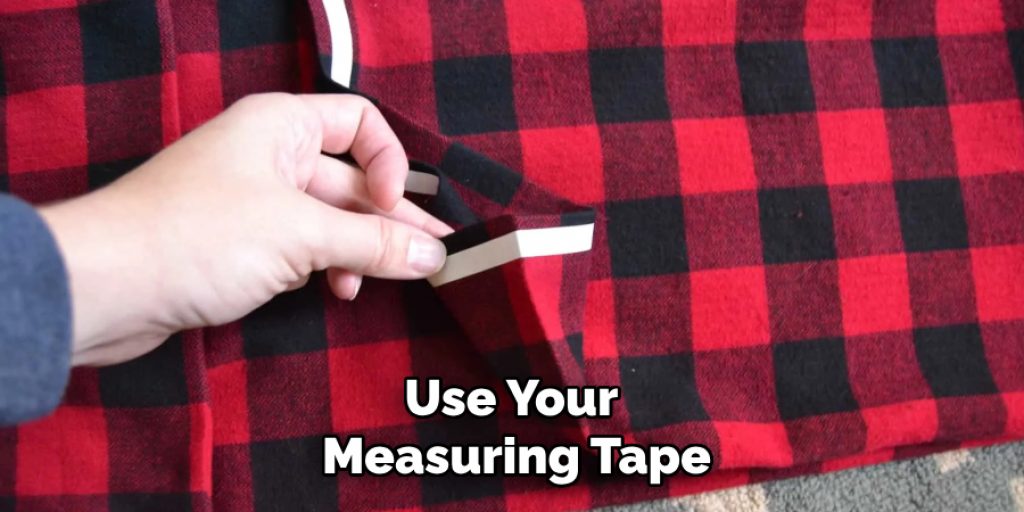
- Measuring Tape or Ruler: Accurate measurements are essential, so use a flexible measuring tape for fabric or a clear ruler to ensure straight cuts and placements.
- Sewing Machine or Needle and Thread: A sewing machine significantly speeds up the sewing process; however, hand sewing is perfectly acceptable if you prefer a more traditional approach. Use strong, suitable thread that matches your fabric.
- Pins or Fabric Clips: These tools are crucial for holding pieces of fabric together securely while you sew, preventing any shifting that could result in uneven seams.
- Iron: Pressing your fabric before and after sewing is important for creating smooth, professional-looking edges and seams. This step enhances the overall quality of your finished scarf.
Measuring and Cutting the Fabric
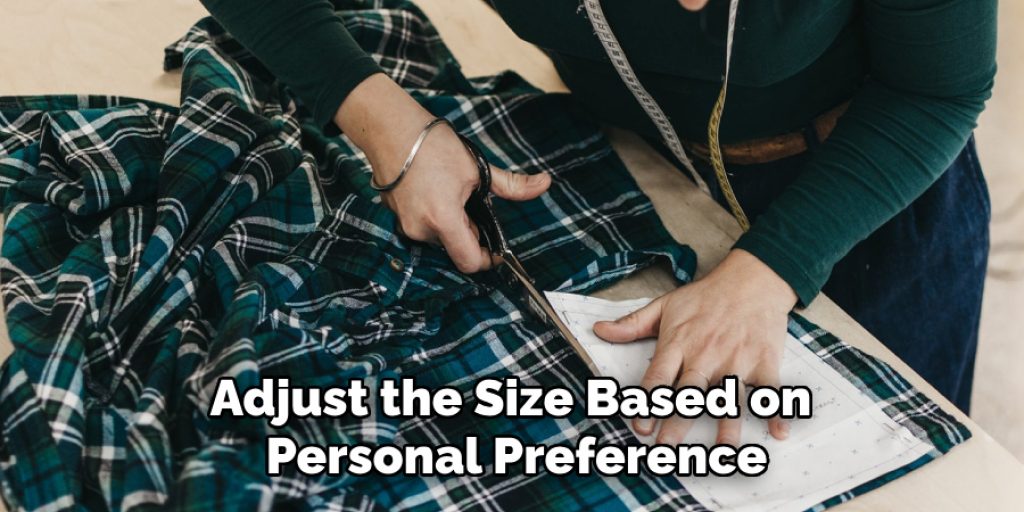
Determining the Scarf Size
The first step when crafting your flannel scarf is determining the appropriate size. Standard dimensions for a flannel scarf typically measure about 60 inches in length and 8 to 12 inches in width. These measurements provide a versatile and comfortable fit for most users, ensuring that the scarf can be easily wrapped around the neck. However, feel free to adjust the size based on personal preference; for example, you might prefer a wider scarf for extra warmth or a shorter length for a more petite style. It’s essential to consider seam allowances—generally around 1/4 inch to 1/2 inch—when calculating your fabric needs, as well as any potential shrinkage during washing, which could affect the final dimensions of your scarf.
Cutting the Fabric
Once you’ve decided on the scarf size, it’s time to cut the fabric accurately. Begin by laying your flannel fabric flat on a clean, smooth surface. Use your measuring tape or ruler to measure and mark your determined dimensions, ensuring a straight edge. A chalk pencil or fabric marker works well for marking, as it can be easily brushed off after cutting. A rotary cutter is recommended for clean, precise edges, especially for long straight cuts. If you’re using scissors, ensure they are sharp to avoid fraying. While working with flannel, remember that the fabric can shift easily; therefore, using pins to secure the fabric while cutting can help maintain accuracy and prevent unintended slips.
Preparing the Edges
After your fabric is cut, preparing the edges before moving on to sewing is crucial. You’ll need to decide on the edge finish you prefer, whether it’s a hemmed edge for a polished look, fringed edges for a casual aesthetic, or leaving the edges raw for a more rustic feel. If you choose to hem the edges, fold the fabric edges inward about 1/4 inch, pinning them in place to hold them while you sew. For fringing, simply cut slits along the edges to the desired length, being mindful not to cut too deep. Before starting any sewing, iron the fabric to smooth out wrinkles, as this will facilitate an even sewing surface and contribute to a more professional finish. Ironing will also help eliminate any tension from cutting, ensuring that your flannel is flat and looks its best during crafting.
How to Make a Flannel Scarf: Sewing the Scarf
Hemming the Edges
Hemming the edges is a critical step in crafting a flannel scarf, as it enhances its appearance and prevents fraying. Start by folding the edge of the fabric inward about 1/4 inch, and pin it in place to secure the fold. If you’re using a sewing machine, you can set it to a straight or zigzag stitch, providing a strong, clean finish. For hand sewing, a simple running stitch or slip stitch works well; just make sure to keep your stitches even for a professional finish. When stitching, maintain a consistent tension to avoid puckering along the hem. Both techniques yield effective results, although using a sewing machine can greatly speed up the process and provide a more durable outcome. If you’re new to sewing, practice on scrap fabric to gain confidence before you continue with your scarf.
Adding Fringes
Adding fringes to your flannel scarf is a fun option if you prefer a more casual look. To create fringes, cut small slits along the edges of the scarf at your desired intervals—typically about 1 inch apart and approximately 4 to 5 inches long. This method offers an effortless, bohemian style. To secure the fringes and prevent fraying, you may choose to sew a straight stitch along the very edge of the scarf before cutting the slits, which will reinforce the fabric. Alternatively, applying a small amount of fray check along the edges can help maintain their integrity while allowing you to customize the length and appearance of your fringes. Experimenting with different lengths can result in a unique scarf that showcases your personal style.
Final Touches
Once the sewing and fringe work are complete, it’s important to check the overall finish of your scarf. Examine the edges and seams for any uneven spots or loose threads, and make corrections as needed to ensure everything appears neat and aligned. Ironing your finished scarf is crucial for achieving a polished look—set your iron to the appropriate fabric setting and gently press the fabric to smooth any creases or wrinkles. This step enhances the visual appeal and helps set the fabric so it drapes beautifully when worn. If desired, add embellishments such as buttons, patches, or embroidery to further personalize your creation. This attention to detail will elevate your flannel scarf, making it a true reflection of your style and craftsmanship.

Caring for Your Flannel Scarf
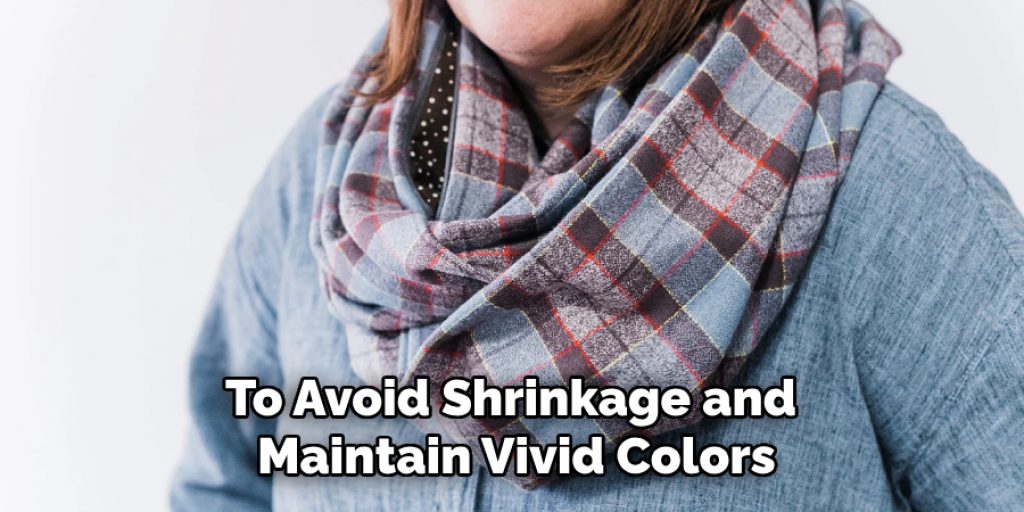
Proper washing and drying techniques are essential to maintaining the quality of your flannel scarf. Always wash your scarf in cold water on a gentle cycle to prevent fabric damage. Avoid bleach, as it can fade colors; instead, use a mild detergent specifically designed for delicate fabrics. When it comes to drying, opt for air drying by hanging the scarf flat or on a clothing line, as heat from dryers can cause shrinkage. If machine drying is necessary, select a low heat setting.
To avoid shrinkage and maintain vivid colors, consider pre-washing your flannel before crafting your scarf, as this allows for any initial shrinkage to occur. For storage, keep your scarf in a cool, dry place, preferably folded within a drawer or laid flat in a storage bin to prevent creasing. Avoid hanging it for long periods, as this can stretch the fabric. By following these care tips, your scarf will remain beautiful and retain its original charm for years to come.
Creative Variations
When crafting a flannel scarf, the possibilities are virtually endless, especially regarding patterns and colors. Opt for bold plaids or soft ginghams to suit your personal style, or even mix and match different flannel patterns for a unique, eclectic look. Another exciting way to personalize your scarf is by incorporating embellishments; think of patches, embroidery, or appliqué that reflect your interests or sentiments. Stitching on a meaningful patch can transform a simple scarf into a statement piece.
Additionally, don’t shy away from experimenting with different fabric types. Although flannel is beloved for its warmth and softness, fabrics like cotton, velvet, or lightweight wool can create scarves with distinct textures and appearances. Each fabric yields its own charm, tailoring the scarf to various seasons or occasions. As you explore these variations, your creativity can shine, making each scarf a one-of-a-kind accessory that complements your wardrobe.
Conclusion
In summary, learning how to make a flannel scarf involves careful cutting, edge preparation, sewing, and personal touches. With each step, you create a scarf and a piece infused with your unique style and craftsmanship. There’s great satisfaction in handmade items, as they reflect personal expression and creativity. As you embark on this crafting journey, let your imagination lead you to try different styles and embellishments. Enjoy the process, and remember that each scarf you create is functional and a beautiful representation of your individuality.
Nancy Behan
Nancy is an embroidery artist, fashion blogger and a full time editor at DIY quickly. Nancy edits the fashion section on DIY quickly, focusing on the embroidery and cross stitch articles, alongside with fabric and other costume design elements. She graduated from the University of Michigan with a Bachelor of Arts in Art History. She loves to work on her own projects, read books and watch romantic movies in her spare time.


