
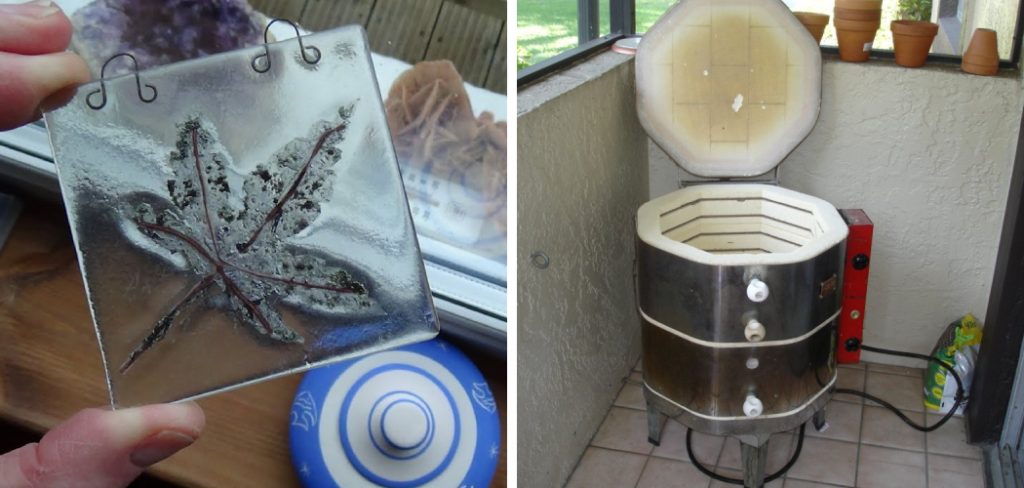
How to Make a Kiln for Glass
Breaking the Channels: Slice the platforms into it as a 3/8 inch thick u-shaped. I found around an inch, at one and a half-inch from the side and peak of the “U” so that the items weren’t too near to the furnace door. Sweep the channels and use a 3/8 “piece with your device. I used my dad’s old drill and a quarter-inch bit. Every time, I have tried to use a smaller bit but can’t get it long enough to reach into the channel without going right through the side. Now you should be able to see the channels.
To create the rear wall of your firebrick container, you will need to break down each of your burning blocks into a rectangle 4 1/2″ wide and path two consecutive lines out for the rear. These are the dimensions of the fire blocks. You will need two blocks for the ground, with a total width of 9″. The kiln would be too large to build if you include the wall (4 1/2″) in the calculation, so the final dimensions of your firebrick container should be 9 1/2″ wide by 2 1/2″ tall.
In order to make the wall level with the roof beams, you would have to remove a 1/2 inch from the top right. I rasped a 1/2 inch off. The saw could split such blocks; they’re quite delicate. I began with the factor, which was 24 inches in length. Differentiate the object’s coils since they’re not touched. If you’re confused about how to do it, and at the ceramic shop, you could still ask customers. This extended my product to 29 1/2 inches.
If you build the firebrick container with the measurements of the fire blocks, the kiln would be too large. To render the wall’s level with the roof beams, you would have to cut a 1/2″ from its right-hand side. The saw could split such blocks; they’re quite delicate.
I began with the component, which was 24 is in length. Differentiate the object’s coils since they’re not touched. If you’re confused about how to do it, and at the ceramic shop, you could still ask the workers. This extended my product to 29 1⁄2 in. This is a lot of slack.
Create a framework.
The framework that I made it pulls everything together. Cut 4 14 “angled iron pieces to the edges with your hacksaw. At the rim, put 2 nine “pieces. Such two parts support the ground and balance on the underside of two 10 “screws.
Join the nuts—4 at the top, four at the lower. Two of the lower part nuts keep the ground up; the others only wedge the entire wall with each other to keep the borders on. Note to add two blocks on board for the structure. You could also see that I have only 3 inches of the entire design off the ground. Security piece of advice — do not use it or any other furnace on a ground that is not fire-resistant. I do this in my driveway hard slab at all times.
Make the Gate.
Split your metal surface into the form of rectangular. I was using the measurements to create an inches frame. The main square is 6 “and 1 1/2” buttons. (Begin 9 “by 9” in squares and take the ends out). I used a specialized metal split to stretch the metal (meaning my fingertips and a wooden scrap).
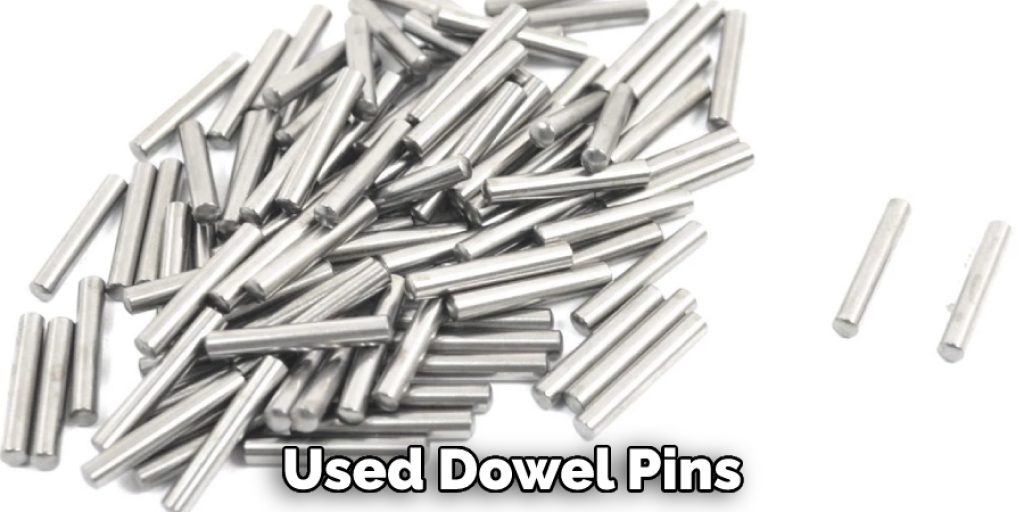
Fold the lines to the bottom, so you have 1/2, “and the gate itself is 1” wide. Split a 6 “x 6” 1 “thickness Kaowool squared and press as seen within the sheet. Choose tiny hinges to connect the bolt. I have before the-drilled several gaps in the framework and used dowel pins to lock it into the framework.
You May Also Read – How to Fuse Glass Without a Kiln
Elizabeth Davis
Elizabeth is a creative writer and digital editor based in the United States. She has a passion for the arts and crafts, which she developed from a young age. Elizabeth has always loved experimenting with new mediums and sharing her work with others. When she started blogging, she knew that DIYquickly would be the perfect platform to share her tutorials and tips. She's been writing for the blog from the beginning, and her readers love her helpful advice and easy-to-follow instructions. When she's not writing or editing, Elizabeth enjoys spending time with her family and friends.


