
How to Make a Large Decorative Bow
Learning to make a large decorative bow can be a fun and rewarding experience. Not only will you have the satisfaction of creating something beautiful with your own hands, but you will also have a unique decoration that can be used for various occasions such as weddings, holidays, or special events.
The main advantage of making a large decorative bow is that it allows you to customize the size and style of your bows according to your preferences. By creating your own bows, you can choose the colors, patterns, and materials that best suit your project or event. This not only gives you creative freedom but also saves you money from buying pre-made bows. You can find step-by-step instructions on how to make a large decorative bow in this blog article.
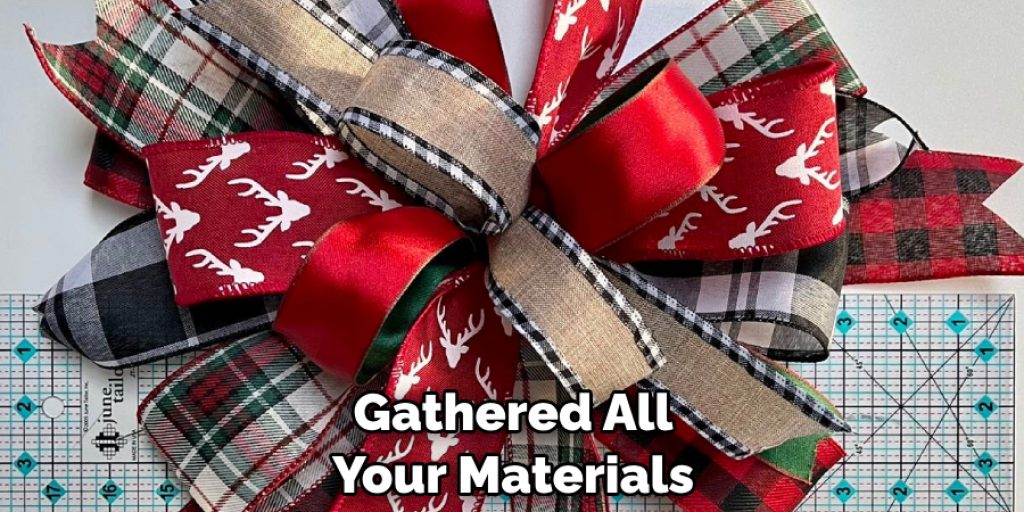
Materials You Will Need
- Ribbon
- Scissors
- Measuring tape
- Hot glue gun and glue sticks
- Wire or pipe cleaners (for added sturdiness)
- Optional: embellishments like beads, flowers, or feathers
- Optional: hair clip or safety pin to attach the bow to your desired surface
- Clear tape (to hold ribbon in place while creating the bow)
- A flat surface to work on
- Patience and determination.
Step-by-step Instructions for How to Make a Large Decorative Bow
Step 1: Inspect Your Ribbon
Before you begin, make sure your ribbon is in good condition with no snags or tears. You can use any type of ribbon for this project, but try to avoid thin and flimsy ribbons as they may not hold the bow shape well.
Step 2: Cut a Long Piece of Ribbon
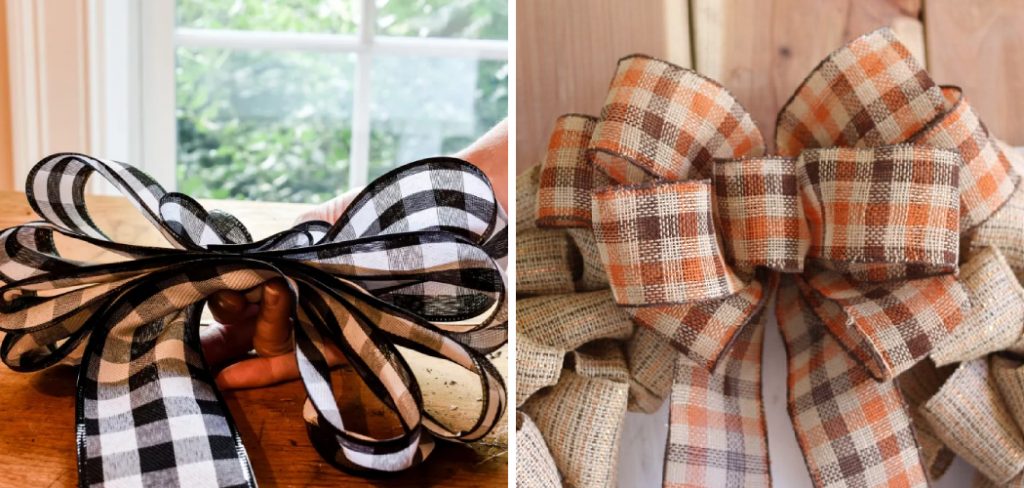
Measure and cut a long piece of ribbon according to the desired size of your bow. Keep in mind that the longer the ribbon, the bigger and fluffier your bow will be. Fold one end of the ribbon over to create a loop. Hold this loop between your thumb and pointer finger.
Step 3: Make Another Loop
Create another loop next to the first one by folding the ribbon over. Hold it with your other hand. Continue making loops until you reach the desired fullness of your bow. You can make as many or as few loops as you like, but for a large decorative bow, aim for at least 6-8 loops on each side.
Step 4: Secure the Middle
Once you have completed the desired number of loops, secure the middle of your bow with a wire or pipe cleaner. This will help keep the loops in place while you prepare to shape and fluff them. Trim the ends of your ribbon at an angle for a clean finish.
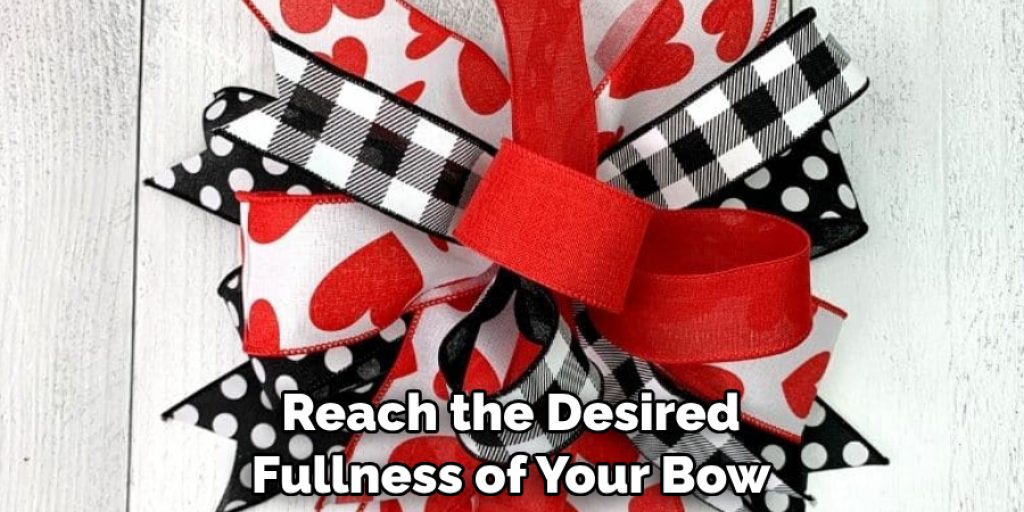
Step 5: Shape and Fluff
Gently shape and fluff each loop to create a full and rounded bow. You can also trim any uneven or excess ribbon at this stage. If desired, you can add embellishments like beads, flowers, or feathers to your bow using hot glue.
Step 6: Attach Hair Clip or Safety Pin
To attach the bow to your desired surface, you can use a hair clip or safety pin. Simply attach it to the back of your bow with hot glue. For added sturdiness, secure your bow onto the desired surface using hot glue gun or clear tape.
Now you can use your new skill to add a personal and unique touch to your gifts, decorations, or accessories. With practice, you can experiment with different ribbon types, sizes, and embellishments to create bows for any occasion.
Safety Tips for How to Make a Large Decorative Bow
- Always supervise children when using scissors or hot glue guns.
- Be careful not to burn yourself with the hot glue gun.
- Use caution when working with sharp tools such as scissors.
- Make sure your workspace is clear and organized to prevent accidents.
- If you are allergic to any materials, wear gloves or protective gear while crafting.
- Do not use flammable materials in your bows.
- When attaching the bow to a surface, make sure it is secure and will not easily fall off.
By following these safety tips, you can enjoy the process of creating a large decorative bow without any accidents or mishaps.

How Long Does It Take to Make a Large Decorative Bow From Start to Finish?
Making large decorative bows can be a fun and creative way to add a personal touch to any gift or decoration. Whether you are making bows for your holiday wreath, adding a finishing touch to a present, or simply want to learn a new crafting skill, knowing how long it takes to make a large decorative bow can help you plan your project accordingly.
The time it takes to make a large decorative bow can vary depending on the complexity of the design and your level of experience. If you are new to bow making, it may take longer as you familiarize yourself with the techniques and materials. However, with practice, you can quickly become a pro at creating beautiful bows in no time.
The first step in making a large decorative bow is gathering all the necessary materials. This typically includes ribbon, scissors, wire or thread, and any other embellishments you may want to add. You will also need a flat surface to work on and some patience as you master the art of tying the perfect bow.
Are There Different Methods for Making a Large Decorative Bow?
There are various methods for making a large decorative bow, each with its own unique style and level of difficulty. Some popular techniques include the classic looped bow, the layered bow, and the pom-pom bow. Each method requires different steps and materials, so it may be worth experimenting with a few to find which one works best for you.
Moreover, the type and width of the ribbon used can also affect how long it takes to make a large decorative bow. Thicker and stiffer ribbons may require more time and effort to manipulate, while thinner and more pliable ribbons may be easier to work with.
Once you have chosen your method and gathered all your materials, it’s time to start making your bow. Depending on the size and complexity of your design, the actual process of tying the bow may only take a few minutes. However, if you are adding additional embellishments or arranging multiple layers, this can add extra time to the overall project.
What Are Some Creative Ways to Incorporate a Large Decorative Bow Into Your Home Decor or Gift Wrapping?
Aside from adding a beautiful touch to gifts or wreaths, there are many other creative ways to use large decorative bows in your home decor. You can attach them to doorknobs, curtain rods, or even on the backs of dining chairs for a festive and elegant look. They can also be used as garlands by stringing multiple bows together and hanging them across a mantle or wall.
When it comes to gift wrapping, a large decorative bow can take any present from basic to impressive. You can use different colored ribbons to match the occasion or add small ornaments in the center for an extra special touch. Additionally, you can experiment with different textures and patterns of ribbon to create unique and eye-catching bows.
The time it takes to make a large decorative bow may vary depending on the method and materials used, but with practice and patience, you can create beautiful bows in no time. Whether for home decor or gift wrapping, incorporating these bows into your projects is sure to add a touch of elegance and personalization.
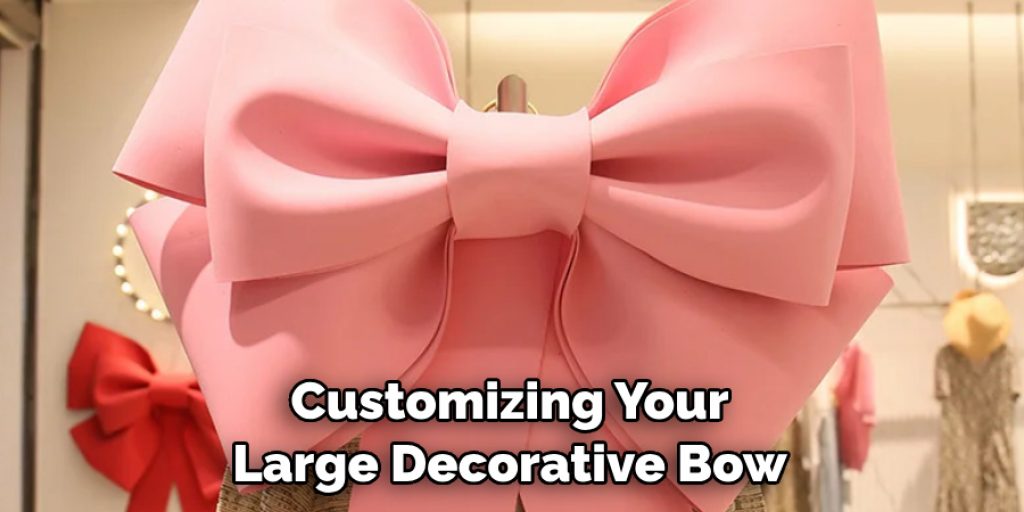
How Can You Customize Your Large Decorative Bow to Fit a Specific Theme or Color Scheme?
Once you have mastered the art of making a large decorative bow, it’s time to take your skills to the next level by customizing your bow to fit a specific theme or color scheme. This allows you to create unique and personalized bows that can be used for various occasions such as weddings, birthday parties, and holidays. Here are some tips on how you can customize your large decorative bow to fit a specific theme or color scheme:
1. Choose the Right Materials
The first step in customizing your large decorative bow is to choose the right materials. Make sure to select fabrics, ribbons and embellishments that match the theme or color scheme you have in mind. For example, if you’re creating a bow for a Christmas party, opt for red and green fabrics, ribbons with snowflake designs and add some sparkly embellishments for a festive touch.
2. Experiment with Different Shapes
Instead of sticking to the traditional bow shape, try experimenting with different shapes to fit your theme. For instance, if you’re creating a bow for a beach-themed party, consider shaping it into a seashell or starfish.
3. Add Personalized Touches
Nothing makes a bow more special than adding personalized touches to it. You can do this by using letters or numbers to spell out the recipient’s name or age, or even use their favorite characters as part of the design.
4. Use Different Textures
Incorporating different textures into your large decorative bow can add depth and visual interest. For example, you can mix satin and sheer ribbons or combine a glittery fabric with a matte one to create a unique look.
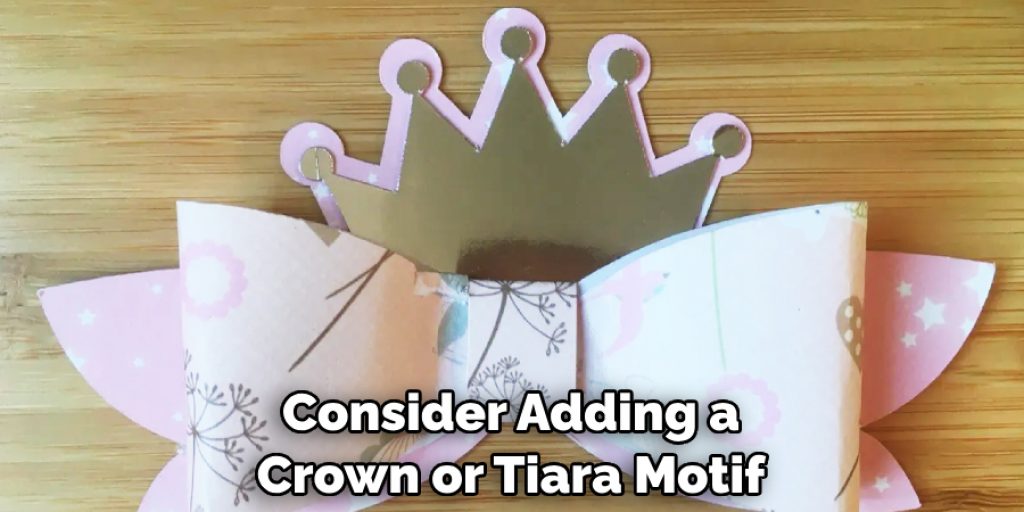
5. Incorporate Symbols or Motifs
Symbols or motifs are great ways to tie in your theme or color scheme into the bow design. For example, if you’re creating a bow for a princess-themed party, consider adding a crown or tiara motif to the center of the bow.
By following these tips, you can easily customize your large decorative bow to fit any theme or color scheme.
Conclusion
In conclusion, making a large decorative bow is not as complicated as it may seem. With the right materials and techniques, you can easily create a beautiful and stunning bow for any occasion or decoration.
Firstly, make sure to choose the appropriate ribbon for your desired bow size. A wired ribbon works best as it allows you to shape and manipulate the bow according to your preference. Additionally, choosing a ribbon with a festive or patterned design can add an extra touch of elegance and uniqueness to your bow.
Next, follow the step-by-step instructions for creating a basic bow. These include forming loops, securing them in place, and fluffing out the bow to create fullness. Remember to leave enough length at the end for the tails of the bow. I hope this article has been beneficial for learning how to make a large decorative bow. Make Sure the precautionary measures are followed chronologically.
Angela Ervin
Angela is the executive editor of DIY quickly. She began her career as an interior designer before applying her strategic and creative passion to lifestyle and home. She has close to 15 years of experience in creative writing and online content strategy for housekeeping, home decorations as well as other niche efforts. She loves her job and has the privilege of working with an extraordinary team. She lives with her husband, two sons, and daughter in Petersburg. When she's not busy working she spent time with her family.


