
How to Make a Moss Ball
Are you looking for a unique and natural way to decorate your home or office space?
Moss balls, also known as kokedama, are beautiful, natural decorations that bring a touch of greenery into any space. These living sculptures consist of a ball of soil and moss, often adorned with additional plants or flowers. Making a moss ball is a rewarding DIY project and an excellent way to connect with nature and enhance your home décor.
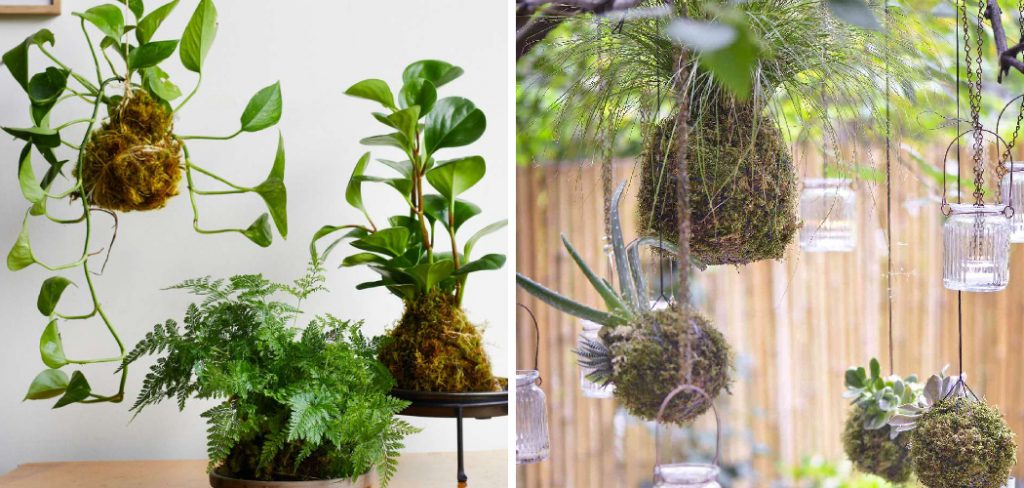
In this guide on how to make a moss ball, we will explore the necessary materials, techniques, and steps involved in creating your very own moss ball, allowing you to unleash your creativity while nurturing a unique piece of art. Whether you are a seasoned gardener or a novice, this project is accessible to anyone eager to add a bit of life to their surroundings.
What Will You Need?
The materials required to make a moss ball are relatively easy to acquire and can be found at most gardening or craft stores. Before you begin, ensure you have the following supplies:
- Moss (sphagnum or sheet moss)
- Bonsai soil or potting mix
- Water
- Fishing line or twine
- Scissors
- Optional: small plants or flowers such as succulents, ferns, or orchids for added decoration.
Once you have gathered all the necessary materials, it’s time to get your hands dirty and create your moss ball.
10 Easy Steps on How to Make a Moss Ball
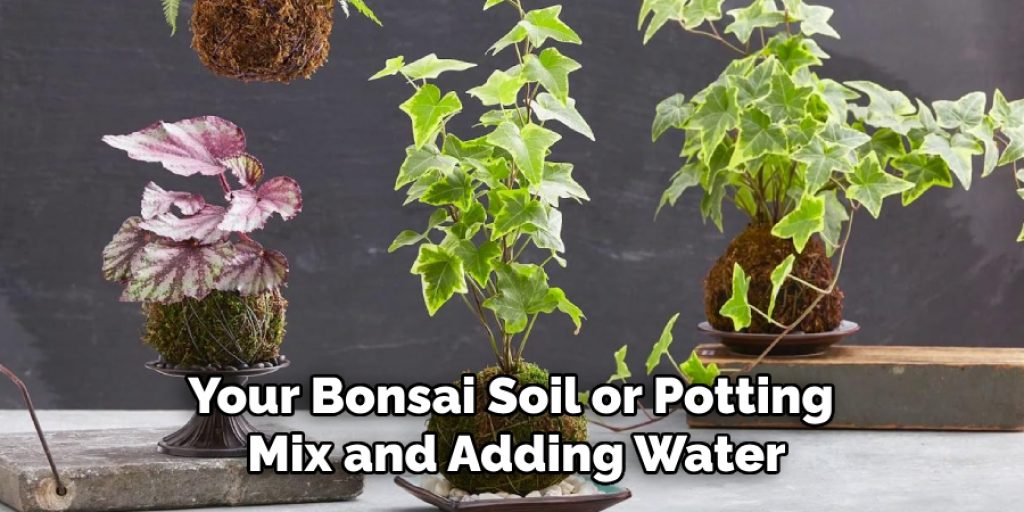
Step 1: Prepare the Soil
Begin by taking your bonsai soil or potting mix and adding water to it gradually until it reaches a moist consistency but is not overly soggy. This will help tobind the soil together and make it easier to shape into a ball. Ensure that the mixture is well combined with no dry clumps, as this could affect the stability of your moss ball. Once the soil is prepared, set it aside and rest for a few moments. This preparation is crucial, as the right soil consistency will support plant growth and help maintain the overall structure of your moss ball, making the subsequent steps more effortless and more effective in crafting your living art piece.
Step 2: Create the Soil Ball
Take a handful of the prepared soil mixture and start shaping it into a ball in the palm of your hand. Aim for a diameter of about 3 to 4 inches, but you can adjust the size according to your preference. Press the soil firmly yet gently to ensure it holds together securely. If the soil is crumbling or falling apart, add a little more water to the mix and reshape it until you achieve a solid form. This soil ball will serve as the foundation for your moss ball, so focus on getting the shape and consistency just right. Once you have formed a solid soil ball, set it aside on a clean surface while you prepare the moss.
Step 3: Add the Moss
Now that your soil ball is ready, it’s time to wrap it with moss. Take your moss and gently separate it into manageable pieces, ensuring it is damp but not soaking wet. Start by placing the moss over the soil ball, allowing it to cover the entire surface. Use your fingers to shape and mold the moss around the soil, ensuring it adheres well and completely encases the ball. You can slightly overlap the moss pieces’ edges to create a seamless look. Once the soil ball is covered, use your fishing line or twine to secure the moss.
Wrap it around the moss ball several times, tying it off securely to maintain its shape and ensure the moss stays intact. This step enhances the appearance of your moss ball and helps retain moisture, promoting the health of the moss and any additional plants you may wish to include.
Step 4: Incorporate Additional Plants
If you wish to add extra greenery or visual interest to your moss ball, now is the time to incorporate small plants or flowers. Gently push the roots of your chosen plants into the moss ball, creating small openings where they can nestle. Pair them evenly for a balanced look, and avoid crowding too many plants into one moss ball. Once the plants are secured, carefully wrap a bit of moss around their bases to give them additional support and blend them harmoniously with the existing moss. This optional step enhances the aesthetic appeal of your moss ball and contributes to a diverse ecosystem that can thrive within this living piece of art.

Step 5: Watering Your Moss Ball
After incorporating your additional plants, it’s crucial to water your moss ball properly to ensure the moss and any added plants remain healthy. Gently mist the surface of the moss using a spray bottle, ensuring that the moss is evenly damp but not drenched. It’s essential to establish a consistent watering routine; a good rule of thumb is to mist your moss ball every few days or more frequently if the environment is arid. Additionally, you can soak the moss ball in water for about 10-15 minutes once a week, allowing it to absorb moisture thoroughly before letting it drain. This nurturing step helps maintain the vibrant green color of the moss and supports the health of any plants included, creating a lush and lively display in your home or office.
Step 6: Placement and Light Conditions
Choosing the right location for your moss ball is essential for its continued health and growth. Place your moss ball in an area where it can receive indirect sunlight, as direct sunlight can cause the moss to dry out and lose its vibrant hue. A bright, filtered light environment is ideal, such as near a window covered by sheer curtains or in a well-lit room. Ensure the space has adequate humidity, as moss thrives in moist conditions. If your home environment tends to be dry, consider using a humidity tray or occasionally misting the air around the moss ball to maintain its lush appearance.
Step 7: Maintenance and Care
Regular maintenance is key to keeping your moss ball looking its best. Check the moss ball weekly for any signs of dryness or wilting. If the moss feels dry to the touch, increase the misting frequency or consider a more thorough soaking. Additionally, remove dead leaves or debris that may accumulate on the surface to prevent rot and promote healthy growth. If you notice any plants struggling, evaluate their light and moisture needs, adjusting their care accordingly.

Step 8: Enjoying Your Moss Ball
Once your moss ball is established and thriving, take the time to enjoy its beauty and the sense of tranquility it brings to your space. Place it in a prominent location where you can appreciate its lush green texture and the vibrant life it houses. Consider sharing your creation with friends or family, as moss balls can also make unique and thoughtful gifts. Observing the growth and changes in your moss ball over time can be a rewarding experience, allowing you to connect more deeply with nature in your everyday life. Embrace the opportunity to watch your living art piece evolve, and don’t hesitate to experiment with different plant combinations or decorative elements to keep your moss ball fresh and intriguing.
By following these steps, you can create your own beautiful and low-maintenance moss ball to add a touch of greenery and natural beauty to any space.
5 Things You Should Avoid
- Using Dry Moss: Avoid using dry or brittle moss, as it is less likely to thrive and will not adhere properly to the soil ball. Always ensure the moss you select is fresh and damp to promote successful integration and growth.
- Overwatering: While keeping your moss ball moist is crucial, overwatering can lead to rot and decay. Be cautious not to soak the moss ball excessively, especially if you’re misting frequently. Always check the moisture level before watering.
- Direct Sunlight: Placing your moss ball in direct sunlight can cause the moss to dry out and lose its vibrant color. Stick to areas with indirect light to ensure the health and longevity of your moss ball.
- Crowding Plants: Avoid crowding them too close together when incorporating additional plants. Each plant needs adequate space to grow and thrive; otherwise, they may compete for resources, leading to poor overall growth.
- Neglecting Maintenance: Regular maintenance is essential for your moss ball’s health. Pay attention to it by not checking for dryness or dead leaves. Keeping an eye on its condition will help you address any issues before they escalate.

By avoiding these common mistakes, you can ensure your moss ball’s successful growth and maintenance, allowing you to enjoy its beauty and benefits for years to come.
Conclusion
How to make a moss ball is a delightful and fulfilling project that not only enhances the aesthetic of your living space but also fosters a connection with nature.
By following the steps outlined, from selecting the suitable materials and incorporating additional plants to ensuring proper watering and placement, you can craft a unique and low-maintenance living decoration. Remember to perform regular maintenance and care to ensure your moss ball remains vibrant and healthy.
Enjoy the process of nurturing your moss ball and take pride in watching it flourish, transforming it into a captivating centerpiece that brings a touch of greenery and tranquility to your home or office.
Elizabeth Davis
Elizabeth is a creative writer and digital editor based in the United States. She has a passion for the arts and crafts, which she developed from a young age. Elizabeth has always loved experimenting with new mediums and sharing her work with others. When she started blogging, she knew that DIYquickly would be the perfect platform to share her tutorials and tips. She's been writing for the blog from the beginning, and her readers love her helpful advice and easy-to-follow instructions. When she's not writing or editing, Elizabeth enjoys spending time with her family and friends.


