
How to Make a Tulle Christmas Tree
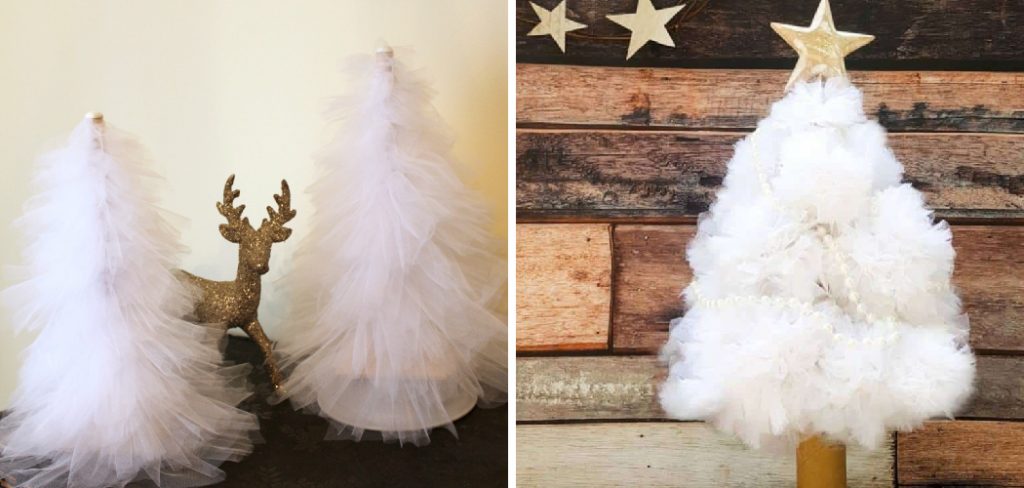
Tulle Christmas trees are a delightful and festive addition to any holiday decor, bringing a touch of whimsy and elegance to your celebrations. With their soft, flowing layers of tulle, these trees can be customized in countless ways, making each one unique and personal. Creating a tulle Christmas tree is both enjoyable and rewarding, as it allows for creativity and expression through color choices and decorative elements. You’ll need basic materials to craft your own, including tulle fabric, a cone base, and a few embellishments, such as ornaments and lights. This article will guide you through the essential steps of how to make a tulle Christmas tree, detailing the necessary tools, techniques, and creative options available, ensuring your tree becomes a stunning centerpiece for your holiday festivities.
Materials and Tools Needed
To create your tulle Christmas tree, you’ll need the following materials:
- Tulle Fabric: Choose a variety of colors and textures to achieve the desired look; typically, you’ll need several yards depending on the size of your tree.
- Cone Base: Foam or cardboard cones work well as a sturdy foundation for your tulle. Select the height that fits your decorating needs.
- Ornaments: Small baubles, stars, or thematic decorations can be used to embellish your finished tree.
- Ribbon: Use a ribbon for additional detailing or to create a tree topper.
- Lights: Battery-operated string lights are an excellent way to add sparkle to your tree.
For the tools, ensure you have:
- Scissors: For cutting tulle into strips.
- Hot Glue Gun: Essential for securing tulle and decorations in place.
- Measuring Tape: To measure lengths of tulle and ensure consistency.
- Pins: These are helpful for temporarily securing layers as you work.
Optional embellishments might include glitter for added sparkle, beads for texture, or any other decorative elements that inspire you.
Choosing the Right Tulle and Cone Base
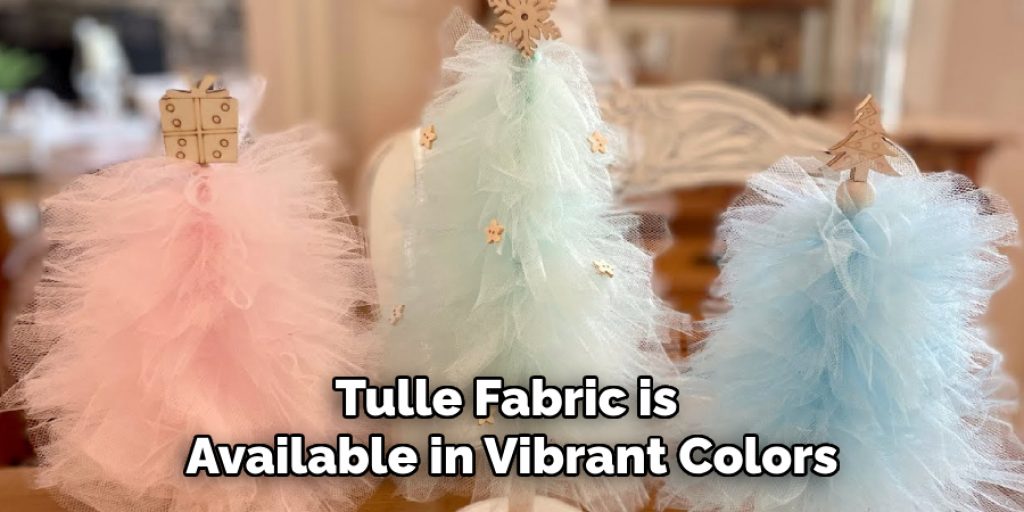
When selecting tulle for your Christmas tree, consider the color, texture, and width to achieve the desired aesthetic. Tulle fabric is available in vibrant colors, allowing you to coordinate with your holiday theme. For a classic look, opt for traditional colors like white, red, or green, while pastels or metallics can offer a modern twist. The texture of the tulle can also play a significant role; softer, more delicate tulle imparts an elegant feel, whereas stiffer varieties can create a voluminous appearance. In terms of width, most tulle comes in rolls ranging from 6 to 54 inches; narrower widths are ideal for layering, while broader selections can provide more coverage with fewer strips.
Choosing the right cone base is crucial for the stability of your tulle tree. Foam cones are lightweight and easy to work with, making them popular. Cardboard cones are another option, providing sturdiness at a lower cost. Ensure the cone’s height suits your decorating needs; taller cones create a more dramatic effect, while shorter ones might be easier to manage. Stability is essential regardless of the base you select, so be sure it can adequately support the weight of your layered tulle and decorations.
Preparing the Tulle
The first step in creating your tulle Christmas tree is measuring and cutting the tulle into strips. Start by determining the length of the strips based on the size of your cone base and the desired fullness of your tree. A common length is around 12 to 14 inches, but feel free to adjust according to your preferences. Using a measuring tape, measure out the tulle and make markings to ensure uniform cuts.
Once marked, use sharp scissors to cut along these lines, creating multiple strips. Aim for consistency in the lengths, as uniformity will help achieve a harmonious layering effect when you attach the tulle to the cone. Depending on how full you want your tree to appear, you may want to cut more strips than you initially think necessary.
Consider adding glitter or other decorative elements to the tulle strips before attaching them to the cone for an additional touch of elegance. You can sprinkle fine glitter over a layer of glue on the tulle to create a sparkling effect or perhaps attach small embellishments like sequins or beads along the edges. This step is optional but can elevate the overall visual appeal of your tree, making it even more festive and unique. With your tulle strips prepared, you can now attach them to the cone base, setting the stage for a stunning holiday decoration.

How to Make a Tulle Christmas Tree: Attaching the Tulle to the Cone Base
Starting at the Bottom
Begin by securing your first row of tulle strips at the base of the cone. Fold one of your prepared strips in half to create a loop, then pin or use a hot glue gun to attach it to the cone. Be sure to place the loops closely together, creating an even and consistent base layer. This foundational layer sets the stage for the rest of your tree, so it’s essential to ensure that the spacing is uniform. For a more stable structure, consider also making a few additional loops with each strip as you attach them. Continue adding the tulle strips around the cone, working your way around to maintain consistent coverage. As you complete the first row, check for any gaps or uneven spaces that might need additional strips for a fuller look.
Layering Upwards
Once the bottom layer is complete, work upwards in rows, attaching additional strips of tulle. Each new row should overlap slightly with the previous one, allowing for a seamless transition and a fuller appearance. This layering technique enhances the visual appeal and provides a more robust structure for your tree. To achieve a tapered look while heading towards the top, consider adjusting the length of the tulle strips as you ascend. Shorter strips can be used as you near the peak of the cone, giving your tree a distinct taper that mimics the natural shape of traditional Christmas trees. Continue this process until you reach the top, ensuring the final layer is well secured, creating a stunning and cohesive tulle Christmas tree that will serve as a centerpiece for your holiday décor.

Adding Decorations
Once your tulle Christmas tree is fully assembled, it’s time to bring it to life with decorations. Start by choosing your ornaments; small baubles, stars, and thematic decorations can introduce charming details to your tree. To attach them, use a hot glue gun or pins to secure the ornaments in place, distributing them evenly across the tulle layers for a balanced appearance. Consider varying the size and color of the ornaments to create visual interest, focusing on colors that complement your tulle selection.
Incorporating ribbon or garlands can further enhance your tree’s texture and design. You might choose to weave ribbon around the tree or create bows that can be placed strategically throughout. For an added festive touch, use garlands made from beads or other decorative materials, threading them through the tulle layers to create depth.
To top off your creation, include battery-operated string lights. These lights offer a gentle glow and are also convenient, as they can be easily tucked between the layers of tulle without concern for unsightly cords. Begin wrapping the lights from the base and work your way up, ensuring an even distribution to illuminate your tree beautifully. With these final touches, your tulle Christmas tree will radiate holiday cheer and become a stunning centerpiece.

Creating the Tree Topper
The tree topper is the crowning jewel of your tulle Christmas tree, adding a final touch of charm and personality. Popular ideas for tree toppers include traditional stars, elegant bows, whimsical angels, or even themed ornaments that reflect your unique style. A simple yet stunning choice is to create a bow topper from ribbon. To make this, cut a length of ribbon—approximately 24 inches will do—then create loops by folding the ribbon back on itself and securing the center with a twist tie or a piece of wire. Fluff the loops for volume and adjust them to your liking.
To secure the topper to the cone base, gently push the wire or twist the tie into the top, ensuring it is stable and upright. If needed, add a dab of hot glue for extra security. With the topper in place, your tulle Christmas tree is now complete, radiating festive spirit and adding sparkle to your holiday décor.
Final Touches and Adjustments
Now that your tulle Christmas tree is fully decorated, it’s time for the final touches to ensure a polished and cohesive appearance. Start by fluffing the tulle layers to create volume and dimension. Gently tug each strip, spreading the fabric to achieve a uniform look across the entire tree. This process enhances the tree’s texture and helps hide any visible gaps that may have formed during assembly.
Once you are satisfied with the fluffiness of the tulle, take a moment to inspect all decorations. Carefully check that each ornament, bow, and garland is securely attached, as no one wants a decoration falling off during the festive season. If you find any loose pieces, use a hot glue gun to reinforce their placement.

Additionally, examine the tree’s overall structure for any gaps that may need filling. If you spot areas that appear sparse, consider adding more tulle strips or additional decorations to create a fuller effect. Lastly, give your tulle Christmas tree one last look to ensure everything appears harmonious and inviting. With these final adjustments, your tree will be ready to dazzle and spread holiday cheer in your home.
Displaying Your Tulle Christmas Tree
Choosing the right spot for your tulle Christmas tree can elevate your holiday décor. Ideally, place it in a location that captures attention, such as a prominent corner of your living room or near a window where it can be seen from outside. Incorporate complementary decorations like matching wreaths or cozy throws to enhance your tree’s presence.
Ensure the tree’s stability, particularly if you have added lights. Secure the base to prevent tipping, and if using string lights, make sure the cords are neatly tucked away to minimize hazards.
Conclusion
In summary, mastering how to make a tulle Christmas tree is both a rewarding and enjoyable DIY project. The process, from layering the tulle to carefully decorating, brings joy and a sense of accomplishment. Don’t hesitate to experiment with various colors and decorations to create a tree that reflects your unique style. A tulle Christmas tree adds charm to your festive décor and is a beautiful reminder of the creativity and love that adorn this joyful season.
Elizabeth Davis
Elizabeth is a creative writer and digital editor based in the United States. She has a passion for the arts and crafts, which she developed from a young age. Elizabeth has always loved experimenting with new mediums and sharing her work with others. When she started blogging, she knew that DIYquickly would be the perfect platform to share her tutorials and tips. She's been writing for the blog from the beginning, and her readers love her helpful advice and easy-to-follow instructions. When she's not writing or editing, Elizabeth enjoys spending time with her family and friends.


