How to Make a Yarn Christmas Tree
Creating a yarn Christmas tree is a delightful and festive project that adds a personal touch to your holiday decorations. This charming craft not only brings the spirit of Christmas into your home but also provides a wonderful opportunity for creativity and relaxation.
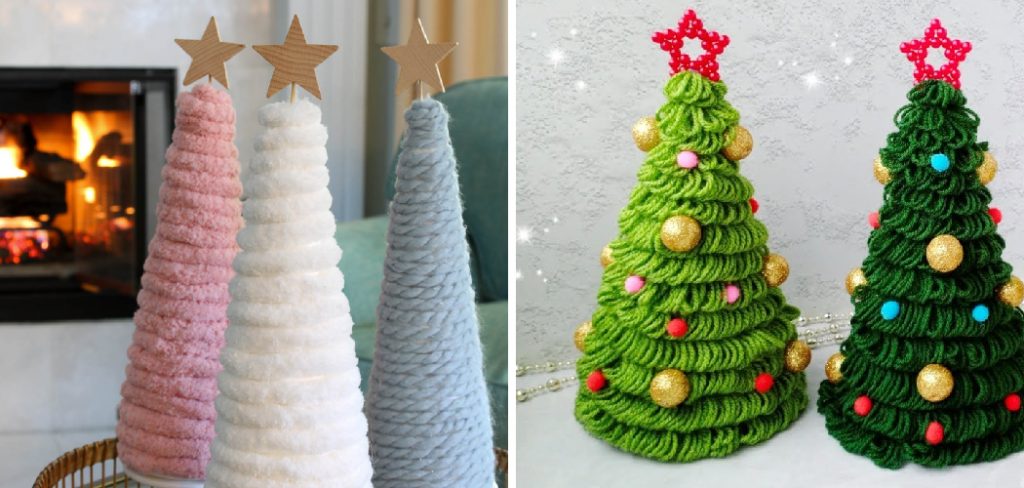
Whether you’re an experienced crafter or a novice looking to try something new, this step-by-step guide will walk you through the simple process of how to make a yarn christmas tree. Gather your materials, unleash your imagination, and get ready to brighten your holiday season with this fun and easy decoration!
Importance of DIY Christmas Decorations
DIY Christmas decorations hold significant value beyond mere aesthetics; they foster creativity, bring families together, and offer a personal touch to the holiday season. By engaging in crafts like making a yarn Christmas tree, individuals can express their unique style and preferences, transforming their homes into personalized winter wonderlands.
Additionally, these projects encourage collaboration among family members, providing a fun and interactive way to bond during a busy season. Most importantly, creating decorations by hand often reflects love and effort, making them cherished keepsakes that carry sentimental value for years to come.
10 Methods How to Make a Yarn Christmas Tree
1. Traditional Yarn Wrapped Cone
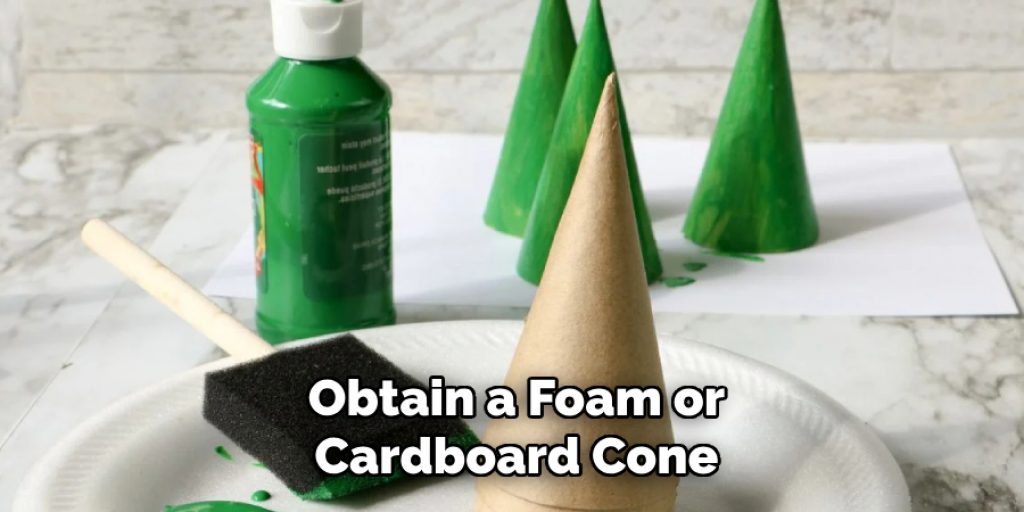
The traditional yarn-wrapped cone method is a classic and straightforward approach to making a yarn Christmas tree. Start by obtaining a foam or cardboard cone, which will serve as the base of your tree. Secure the end of your chosen yarn at the base of the cone with a dab of hot glue. Begin wrapping the yarn tightly around the cone, working your way up to the top.
Ensure the yarn covers the cone completely and evenly, applying more glue as needed to hold the yarn in place. Once you reach the top, secure the yarn with another dab of glue. This method creates a simple yet elegant yarn Christmas tree that can be decorated further with ornaments, beads, or glitter for added sparkle.

2. Pom-Pom Yarn Tree
A pom-pom yarn tree adds a fun and textured element to your holiday decor. Start by making a variety of yarn pom-poms in different sizes and colors using a pom-pom maker or by wrapping yarn around your fingers or a piece of cardboard. Once you have a sufficient number of pom-poms, obtain a foam or cardboard cone as your base.
Use hot glue to attach the pom-poms to the cone, starting at the base and working your way up. Arrange the pom-poms close together to ensure there are no gaps. This method creates a fluffy and whimsical yarn Christmas tree that is perfect for a playful holiday theme.
3. Twine Wrapped Tree
For a rustic and natural look, consider making a twine-wrapped yarn Christmas tree. Begin with a foam or cardboard cone and secure the end of the twine at the base with hot glue. Wrap the twine tightly around the cone, ensuring even coverage as you work your way to the top. Apply glue as needed to hold the twine in place.
Once the cone is completely covered, secure the end of the twine with more glue. This method results in a charming, rustic tree that can be embellished with small wooden ornaments, pinecones, or berries for an earthy holiday decor.
4. Yarn Tassel Tree
A yarn tassel tree offers a unique and elegant take on the traditional yarn Christmas tree. Begin by making several yarn tassels in your chosen colors. To make a tassel, wrap yarn around your hand or a piece of cardboard several times, tie the top with a piece of yarn, and cut the bottom loops to create the tassel.
Next, obtain a foam or cardboard cone as your base. Starting at the bottom, glue the tassels to the cone in rows, ensuring the tassels hang down and overlap slightly. Continue adding tassels until the entire cone is covered.
5. Crochet Yarn Tree
For those skilled in crochet, creating a crochet yarn tree is a rewarding and intricate project. Start by crocheting a series of circles or motifs in various sizes, using a pattern of your choice. Once you have enough motifs, obtain a foam or cardboard cone as your base. Use hot glue to attach the crochet pieces to the cone, starting at the base and working your way up.
Overlap the motifs slightly to create a layered effect. This method results in a delicate and detailed yarn Christmas tree that showcases your crochet skills and adds a handmade charm to your holiday decorations.
6. Macramé Yarn Tree
A macramé yarn tree offers a bohemian and textured look for your holiday decor. Start by creating a series of macramé knots and patterns using yarn or twine. You can use basic knots like square knots, lark’s head knots, or more intricate designs, depending on your skill level. Once you have a sufficient length of macramé, obtain a foam or cardboard cone as your base. Wrap the macramé around the cone, securing it with hot glue as needed.
Ensure the knots and patterns are evenly distributed to cover the cone completely. This method creates a beautifully textured and unique yarn Christmas tree that adds a boho touch to your festive decorations.
7. Felted Yarn Tree
A felted yarn tree combines the softness of felt with the texture of yarn for a unique holiday decoration. Begin by felting yarn using a felting needle or by wet felting. To wet felt, wrap yarn around a foam ball or any shape, then soak it in warm soapy water and rub until the fibers bind together. Once you have several felted yarn pieces, obtain a foam or cardboard cone as your base.
Use hot glue to attach the felted pieces to the cone, arranging them in a way that covers the entire surface. This method results in a soft, tactile tree that can be embellished with tiny felt ornaments or beads for added charm.

8. Layered Yarn Strands Tree
The layered yarn strands tree method creates a layered and textured look. Start by cutting several strands of yarn in varying lengths and colors. Obtain a foam or cardboard cone as your base. Starting at the bottom, glue the strands of yarn around the cone in layers, allowing them to hang down. Overlap the strands slightly to ensure full coverage.
Continue adding layers of yarn until you reach the top of the cone. This method creates a cascading effect with the yarn strands, resulting in a dynamic and visually interesting yarn Christmas tree.
9. Beaded Yarn Tree
A beaded yarn tree adds a touch of sparkle and elegance to your holiday decor. Begin by stringing beads onto your chosen yarn. Use a variety of beads in different colors and sizes for a more festive look. Obtain a foam or cardboard cone as your base. Secure the end of the beaded yarn at the base of the cone with hot glue. Wrap the beaded yarn tightly around the cone, ensuring the beads are evenly distributed. Continue wrapping until the entire cone is covered.
10. Yarn and Wire Tree
The yarn and wire tree method allows for more flexibility in shaping and designing your tree. Start by creating a cone shape using flexible wire. Secure the wire ends to maintain the shape. Next, take your chosen yarn and wrap it around the wire frame, starting at the base and working your way up. Secure the yarn with hot glue as needed.
This method allows you to create a more open and airy design, with the wire frame visible through the yarn. You can also add small ornaments, beads, or lights to the wire frame for added decoration.
Common Mistakes to Avoid
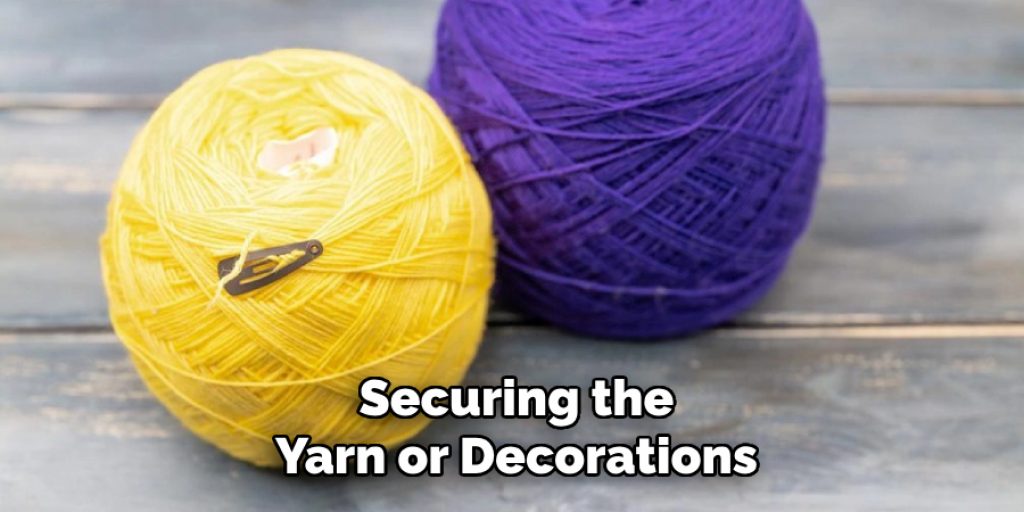
When creating your yarn Christmas tree, it’s easy to encounter some common pitfalls that can affect the final result. One frequent mistake is not securing the yarn or decorations adequately, which may lead to pieces falling off once the tree is displayed. Always ensure that you are using enough hot glue to keep everything in place.
Another issue is not estimating the amount of yarn required; running out midway can be frustrating, so it’s best to buy a little extra to prevent interruptions. Additionally, be cautious with density; overcrowding the yarn or decorations can create a cluttered appearance, while too sparse a design may seem unfinished. Lastly, failing to consider the tree’s stability can result in a top-heavy structure that tips over easily, so balance your design as you work.
Conclusion
Creating yarn Christmas trees is a fun and versatile craft project that allows for endless customization. Each of these ten methods offers a unique approach to making these festive decorations, catering to different skill levels and styles. From the traditional yarn-wrapped cone to more intricate designs like crochet and macramé, these detailed methods provide a comprehensive guide to crafting beautiful yarn Christmas trees. Thanks for reading, and we hope this has given you some inspiration on how to make a yarn christmas tree!
Elizabeth Davis
Elizabeth is a creative writer and digital editor based in the United States. She has a passion for the arts and crafts, which she developed from a young age. Elizabeth has always loved experimenting with new mediums and sharing her work with others. When she started blogging, she knew that DIYquickly would be the perfect platform to share her tutorials and tips. She's been writing for the blog from the beginning, and her readers love her helpful advice and easy-to-follow instructions. When she's not writing or editing, Elizabeth enjoys spending time with her family and friends.