How to Sew Together Crochet Pieces
Are you tired of sewing together crochet pieces and ending up with a wonky, uneven final product? Fear not, because we have tips and tricks to help you achieve a professional-looking finish every time.
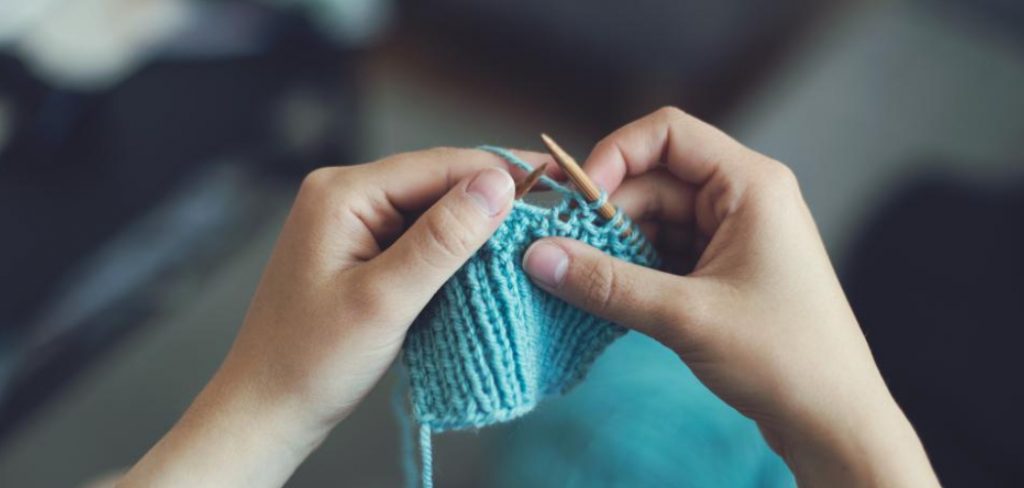
Sewing together crochet pieces is a skill that transforms individual crocheted items into beautiful, cohesive projects. Whether you’re joining squares to create a blanket, attaching sleeves to a sweater, or assembling amigurumi parts, understanding the basics of sewing crochet pieces together is essential. This guide will walk you through the necessary tools, techniques, and tips to ensure your crocheted creations come together seamlessly and beautifully.
From selecting the right type of needle and yarn to mastering various stitching methods, we’ll cover everything you need to know about how to sew together crochet pieces and bring your imaginative designs to life.
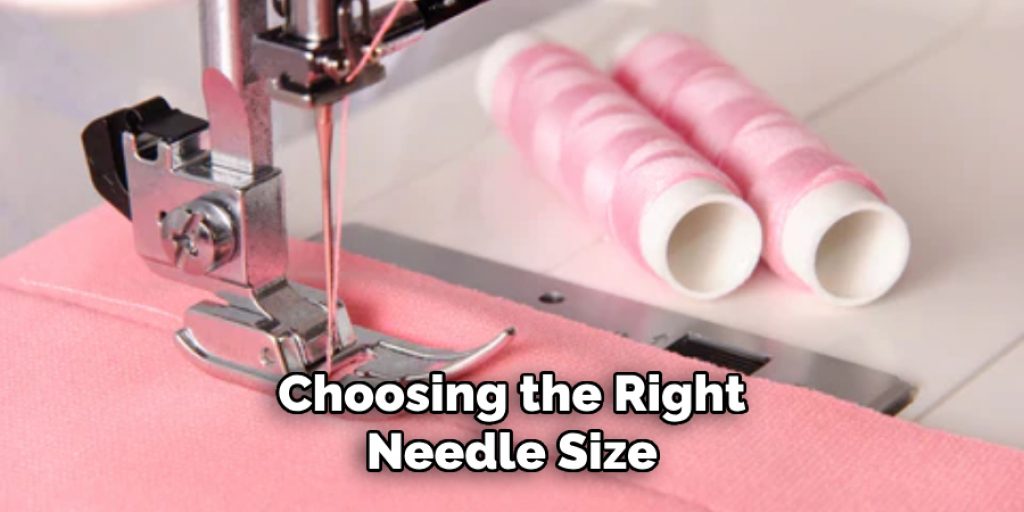
What Type of Needle Should You Use?
When it comes to sewing together crochet pieces, the type of needle you use is crucial. Choosing the wrong needle can result in puckering, uneven stitches, or even damage your crocheted piece. Here are a few types of needles that are commonly used for joining crochet pieces:
- Tapestry Needle: These blunt-tipped needles are ideal for sewing together crochet pieces made with thicker yarn or those that have a looser tension. The large eye makes it easier to thread the yarn and prevents it from splitting.
- Steel Hook: This type of needle has a hook on one end, making it perfect for joining pieces using slip stitches or chain stitches. It’s best suited for lightweight yarn and tight stitching.
- Yarn Needle: Similar to a tapestry needle, this type of needle has a larger eye and blunt tip, making it suitable for bulky yarn and loose stitching.
Choosing the right needle size according to your project’s yarn weight and stitch tension is essential. Using a too large needle can create loose stitches, while using one too small can make sewing difficult.
What Type of Yarn is Best for Sewing Crochet Pieces?
Similar to needles, the type of yarn you use for sewing together crochet pieces can make a significant difference. Consider using the same yarn you used to create your crochet pieces, as it will ensure uniformity in texture and color. However, if you want to add some contrast or embellishments, select a yarn of the same weight or slightly thicker.
It’s also crucial to consider the fiber content of your yarn when sewing pieces together. For example, if you’re working on a delicate project such as a lace shawl, using a wool or acrylic yarn for sewing can create unnecessary tension and damage your piece. Instead, opt for cotton or silk yarn to prevent any potential stretching or distortion.
What Will You Need?
In addition to a suitable needle and yarn, here are some other tools that will come in handy when sewing together crochet pieces:
- Scissors: A good pair of scissors is essential for cutting the yarn and tidying up any loose ends.
- Pins: Pins can be used to hold pieces together before sewing or for marking specific points on your project.
- Stitch Markers: These are useful for keeping track of the right side of your work or marking stitch counts.
- Ruler or Measuring Tape: Measuring tools can help ensure your project is symmetrical and evenly sewn together.
Once you have all your materials ready, it’s time to start sewing! Let’s dive into some tips and techniques for joining crochet pieces.
10 Easy Steps on How to Sew Together Crochet Pieces
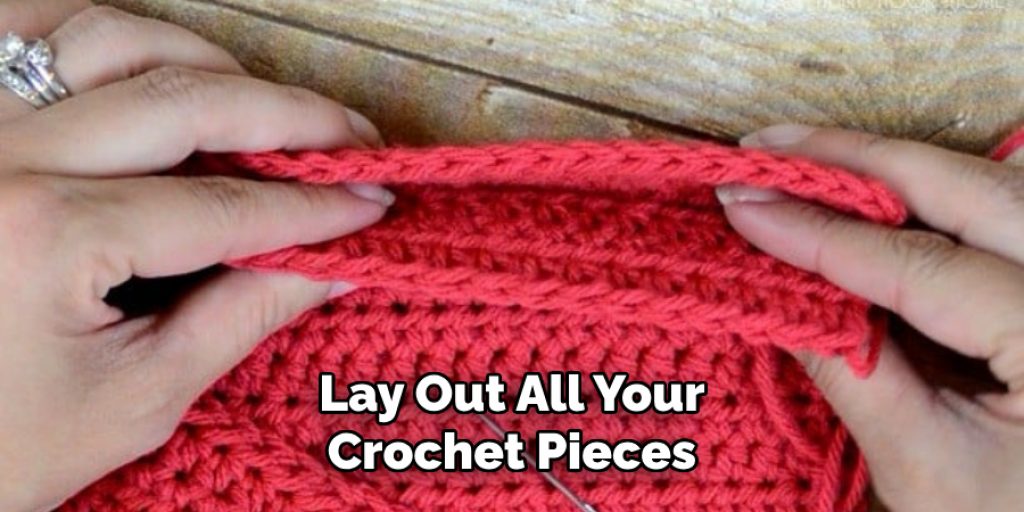
Step 1. Lay Out Your Pieces:
Before you start sewing, lay out all your crochet pieces according to the final design. This will help you visualize the finished product and ensure that each piece is in the correct order and orientation. Make any necessary adjustments to avoid any surprises once everything is sewn together. This step is crucial for projects like blankets or garments where the alignment and positioning of each piece affect the overall look and fit.
Step 2. Secure Your Pieces in Place:
Secure the pieces together using pins or stitch markers to prevent them from shifting while you sew. This step is especially crucial for large or intricate projects with multiple pieces. Carefully align the edges or specific points you marked earlier, ensuring the pieces match up exactly as planned.
This meticulous preparation will make the sewing process smoother and ensure a neat, aligned finished product. Whether joining squares for a blanket or attaching sleeves to a sweater, this step guarantees your pieces will stay put, making your sewing efforts more precise and effective.
Step 3. Choose Your Stitch:
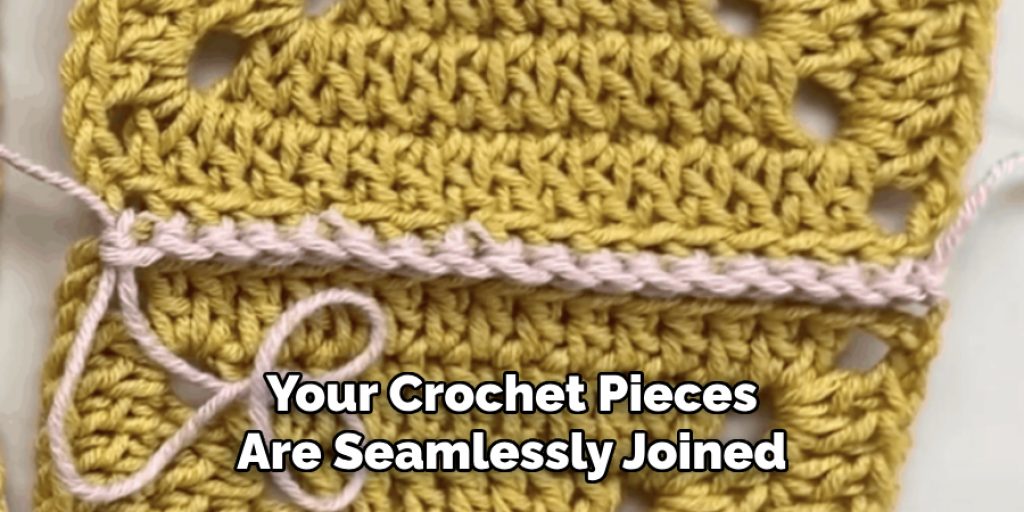
Selecting the right stitch is essential for seamlessly joining your crochet pieces. The whip stitch and the slip stitch are commonly used techniques offering a stronghold and a neat finish. The whip stitch is great for a nearly invisible seam on the wrong side of your work, while the slip stitch can provide a decorative edge if done on the right side. Consider your project’s final appearance and structural needs when choosing your stitch. Testing both stitches on a small sample can help you make the best choice for your specific crochet pieces.
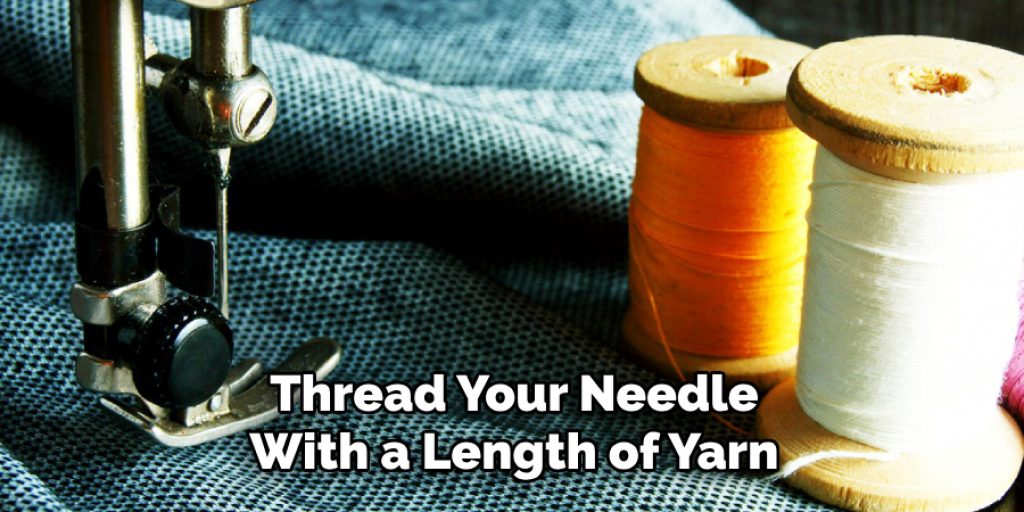
Step 4. Thread Your Needle:
Once you’ve selected your stitch, thread your needle with a length of yarn that is comfortable to work with, typically around 18-24 inches. A longer piece of yarn may seem efficient, but it can get tangled easily, slowing your progress. To thread the needle, fold a short section of yarn over the needle’s eye and pinch tightly, then push the folded end through the eye. If the yarn frays or is difficult to thread, try moistening the end or using a needle threader. Threading your needle correctly will ensure a smooth start to your sewing process.
Step 5. Start Sewing:
Begin by aligning the edges of your crochet pieces exactly as you want them joined. Insert your needle either from the back to the front or vice versa, based on whether you want your seam to be visible. Start from the wrong side of your work for a more invisible seam. Pull the yarn through, leaving a short tail you’ll secure later.
Proceed with your chosen stitch, pulling each stitch snugly but not too tight to avoid puckering the fabric. Stitch size and tension consistency are key to a neat and even seam. Keep sewing until you’ve reached the end of your joining pieces.
Step 6. Tie Off and Weave in Ends:
Upon completing your seam, it’s important to securely tie off the end of your yarn to prevent the stitching from unraveling. Make a small knot by inserting the needle under the last stitch and looping the yarn through before pulling it tight. For a more discreet finish, you can weave the end of the yarn back through several stitches on the wrong side of your work.
Use your yarn needle to thread the yarn tail through, mimicking the path of the stitches for several inches, then cut off any excess yarn. This method not only secures your work but also ensures that the ends are neatly hidden, contributing to the overall polished appearance of your project.
Step 7. Inspect Your Work:
After sewing your pieces together and weaving in the ends, take a moment to carefully inspect your work. Check for evenness in the stitches, ensure that all ends are securely hidden, and confirm that the pieces are aligned as intended. If you notice any discrepancies or loose stitches, now is the time to make adjustments. This step is crucial for maintaining the quality and durability of your finished project. A thorough inspection guarantees the perfection of your current project and helps you refine your technique for future endeavors.
Step 8. Stretch and Block Your Work:
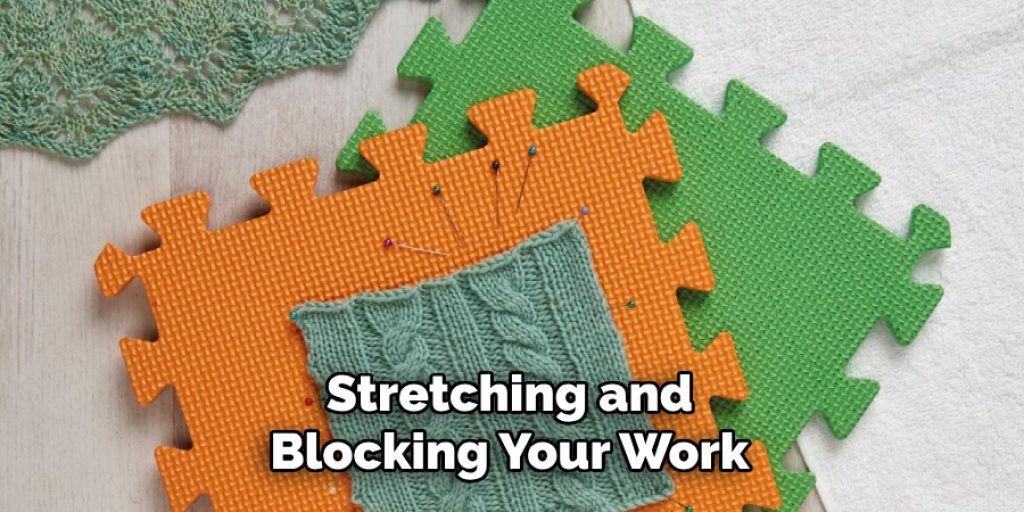
After joining your crochet pieces, stretching and blocking your work is often beneficial, especially for garments or blankets. Blocking helps to align your stitches, define the shape, and even out any discrepancies across the joined sections. Lay your project flat on a blocking board or a clean towel, gently shaping it to its final dimensions.
Use pins to hold the edges in place if necessary, and spray lightly with water or apply steam without touching the fabric directly with the iron. Allow your project to dry completely before removing it from the blocking setup. This step will enhance the appearance and drape of your finished piece, making all the careful sewing worthwhile.
Step 9. Final Touches:
With your project stretched, blocked, and dry, it’s time to add any final touches that will elevate your creation. This may include attaching buttons, beads, embroidery, or other decorative elements that complement the design. Ensure each addition is secured properly, taking into account the wear and care your project will receive.
Reflect on the craftmanship and effort you’ve put into your project, admiring the outcome of your hard work. Finally, if your piece is intended as a gift, consider adding a personal note or label that includes care instructions and a heartfelt message. This personalizes your creation and provides a cherished keepsake for the recipient.
Step 10. Enjoy Your Creation:
With all the details accounted for and your project finally complete, take a moment to truly appreciate and enjoy your creation. Whether it’s a cozy blanket, a stylish sweater, or a unique decorative item, remember that this piece is a testament to your creativity, patience, and skill. Share your work with family and friends, or share images of your project in online crafting communities to inspire others.
Each stitch embodies a part of your crafting journey, making it not just an item but a story woven from yarn. Celebrate your accomplishment and consider your next project, armed with the knowledge and experience gained from this one.
Following these steps ensures that your crochet pieces are seamlessly joined with a professional finish. Each project may present unique challenges, but with the right techniques and attention to detail, you can create beautiful and durable pieces that will be treasured for years to come.
5 Additional Tips and Tricks on How to Sew Together Crochet Pieces
- Use a Tapestry Needle: A blunt-tip tapestry needle is your best friend when it comes to sewing crochet pieces together. Its large eye is perfect for threading yarn, and the blunt tip won’t split fibers as you sew.
- Match Your Yarn: Use the same yarn to sew pieces together as the one you crocheted them with for a seamless look. If that’s not possible, choose a matching color and weight yarn.
- Learn the Mattress Stitch: The mattress stitch is ideal for joining crochet pieces side-by-side with a nearly invisible seam. It works by weaving in and out of the stitches on both pieces, pulling them tightly together.
- Block Before Joining: Blocking your crochet pieces before sewing them together can align and stretch the edges, making it easier to match stitches and create even seams.
- Practice Tension Control: Keep your yarn tension consistent while sewing to prevent puckering or overly loose seams. You may need to practice a bit to find the right balance, but it will make a significant difference in the appearance of your finished piece.
With these additional tips and tricks, you can sew together crochet pieces with ease and achieve a polished, professional look. Remember to take your time and pay attention to details for the best results.
5 Things You Should Avoid
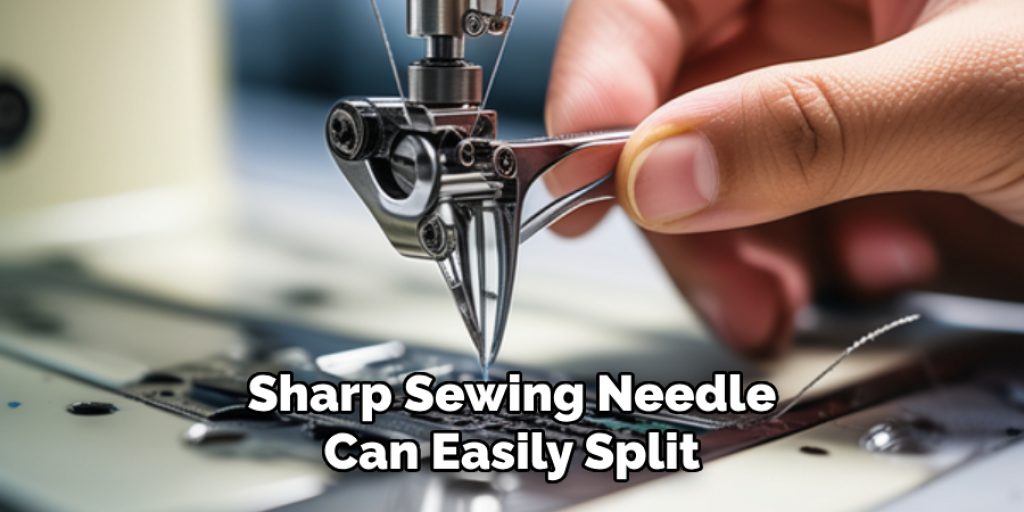
- Avoid Using a Sharp Needle: Unlike fabric sewing, a sharp sewing needle can easily split the yarn fibers into crochet pieces, potentially damaging the work. Stick to blunt-tip needles like tapestry needles to safeguard your creations.
- Don’t Rush the Process: Combining crochet pieces requires patience and precision. Hastily rushing through the process can lead to uneven seams or mismatched patterns, diminishing the overall look of the finished product.
- Avoid Mismatched Yarn: Using yarns of different weights or textures to sew pieces together can result in a disjointed appearance. Strive for uniformity by selecting a yarn that matches the crochet pieces in color and weight.
- Beware of Incorrect Stitch Methods: Each crochet project may call for a specific stitch method for assembly, such as the mattress stitch for a seamless look. Using the wrong stitch method can lead to visible seams and a less polished finish.
- Don’t Neglect Blocking: Skipping the blocking step before joining pieces can result in misaligned edges and a less professional appearance. Even if the pieces match up, blocking ensures a perfect fit and a neater final appearance.
By avoiding these common mistakes, you can ensure a smooth and successful process when sewing together crochet pieces.
5 Different Ways to Customize Your Crochet
- Change Up the Stitch: Experiment with different crochet stitches, such as the shell stitch or basket weave stitch, to add texture and interest to your projects.
- Add Embellishments: Use buttons, ribbons, beads, or other decorative elements to give your crocheted pieces a unique and personalized touch.
- Mix and Match Yarn Colors: Be bold and match colors in your crochet projects. You can create stunning designs by using complementary or contrasting colors.
- Try New Techniques: Expand your skills by trying out new techniques, such as tapestry crochet or Tunisian crochet, to add variety to your creations.
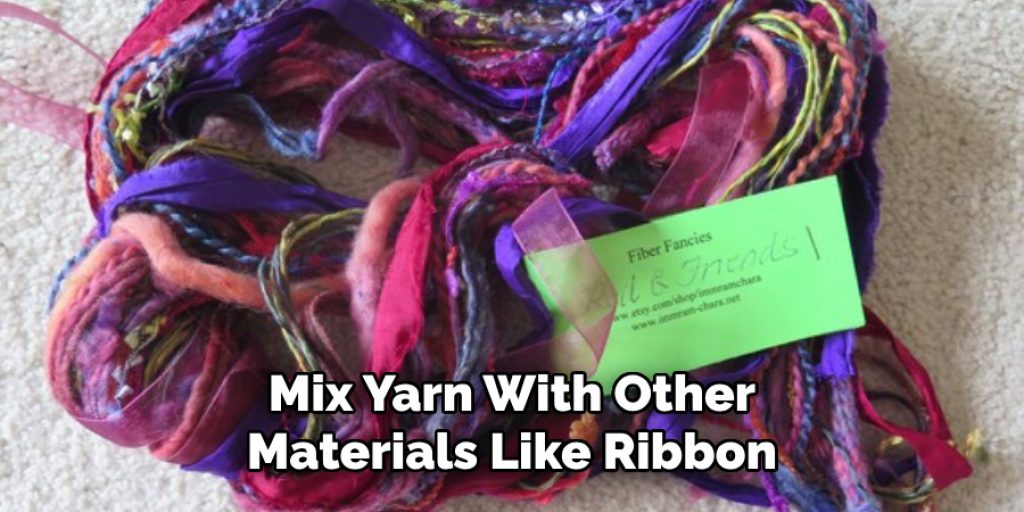
- Incorporate Different Materials: Mix yarn with other materials like ribbon, lace, or fabric to add dimension and interest to your crochet pieces. Don’t be afraid to experiment and let your creativity flow!
By customizing your crochet projects, you can create unique pieces that reflect your unique style and personality. The possibilities are endless for making each project truly your own.
How Do You Join Two Pieces of Yarn Together?
There are a few different methods for joining two pieces of yarn together, depending on the type of project and the desired outcome. Here are three common techniques:
- The Knot Method: This is the simplest and quickest way to join yarn. Simply tie a knot at the end of one piece of yarn and then tie another with the other piece around it. Make sure the knots are tight and secure.
- The Russian Join: This method creates a seamless join without any bulky knots. It involves threading one piece of yarn through the other and then weaving it back into itself to create a sturdy join. There are many tutorials available online for this technique.
- The Magic Knot: Similar to the Russian Join, this method also creates a seamless join without any knots. It involves intertwining two strands of yarn and then pulling them through each other to create a tight knot. Again, there are many tutorials available online for this technique.
Whichever method you choose, make sure to secure the join properly to prevent your project from unraveling.
Conclusion
How to sew together crochet pieces is an essential skill that can dramatically improve the finish and overall look of your projects. Each technique plays a crucial role in achieving a polished appearance, from employing the right tools, such as blunt-tip tapestry needles, to mastering seamless stitches like the mattress stitch. Patience and attention to detail, like matching yarn types and blocking pieces before joining, will ensure that your crochet creations come together beautifully and withstand the test of time.
By avoiding common pitfalls and exploring various methods for joining yarn, crocheters at any skill level can produce work that is both sturdy and aesthetically pleasing. Remember, the art of sewing crochet pieces is as much about the process as it is about the final product.
Take your time, enjoy the craft, and continually strive to refine your techniques for even better results in your future crochet endeavors.
Nancy Behan
Nancy is an embroidery artist, fashion blogger and a full time editor at DIY quickly. Nancy edits the fashion section on DIY quickly, focusing on the embroidery and cross stitch articles, alongside with fabric and other costume design elements. She graduated from the University of Michigan with a Bachelor of Arts in Art History. She loves to work on her own projects, read books and watch romantic movies in her spare time.