How to Make Alpaca Yarn
Alpaca yarn is sought after for its exceptional softness, warmth, and lightweight qualities. Sourced from the luxurious fleece of alpacas, this fiber is not only durable but also hypoallergenic, making it an ideal choice for a variety of knitting and crocheting projects.
In this guide, we will explore the steps involved in how to make alpaca yarn, highlighting the techniques and tools needed for each stage of the process, from shearing the alpacas to spinning and dyeing the fibers. Whether you’re a seasoned crafter or a curious beginner, learning to make alpaca yarn opens up a world of creative possibilities.
What is Alpaca Yarn?
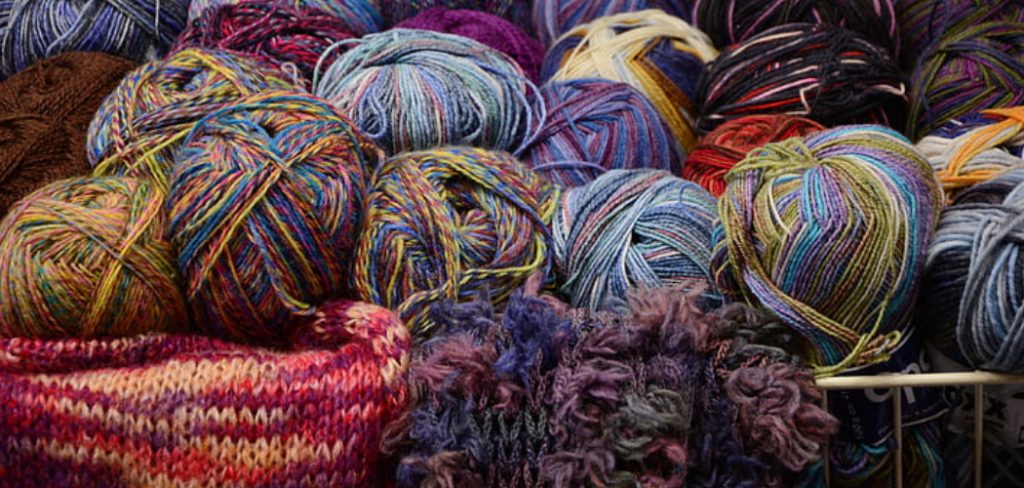
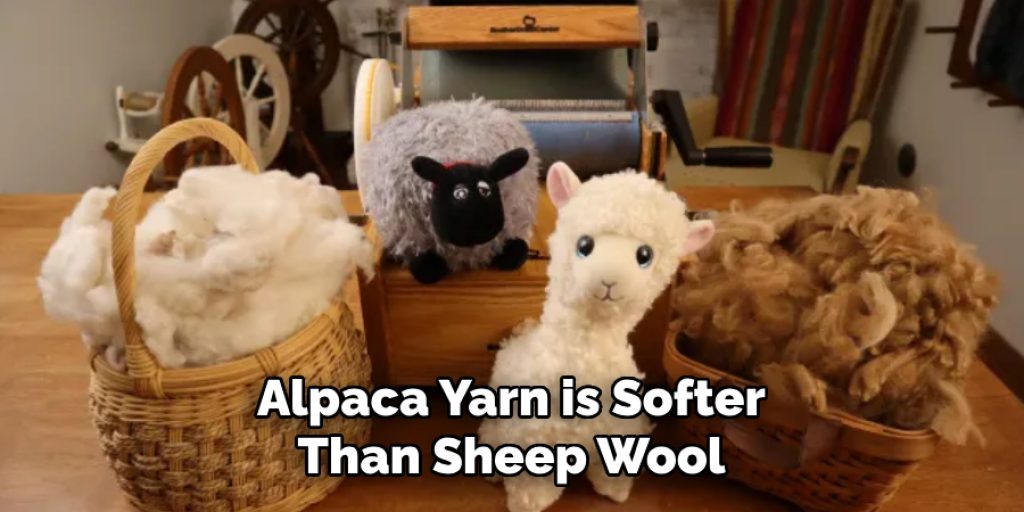
Alpaca yarn is a natural fiber made from the fleece of alpacas, a domesticated species of South American camelids. Known for its luxurious texture, alpaca yarn is softer than sheep wool and has a unique sheen, giving finished garments a stylish appearance. The fiber comes in a variety of natural colors, ranging from white and beige to rich browns and greys, which allows for creative options without the need for dyeing. Alpaca yarn is also lightweight yet exceptionally warm, making it a popular choice for sweaters, scarves, and other cold-weather accessories. Additionally, its hypoallergenic properties mean it can be worn comfortably against the skin without causing irritation, making it suitable for all types of knitted and crocheted projects.
Why Make Your Own Alpaca Yarn
Creating your own alpaca yarn can be a rewarding endeavour for several reasons. Firstly, it allows you complete control over the quality and characteristics of the yarn, enabling you to select specific fleece from alpacas that meet your preferences for softness, colour, and texture. Additionally, the process of making yarn can be deeply satisfying, providing a tangible connection to your craft as you transform raw fleece into a usable product. Making your own yarn also fosters a greater appreciation for the artisanship involved in knitting and crocheting, as you gain firsthand experience of each step from shearing to spinning.
Furthermore, homegrown yarn can inspire unique and customized projects, allowing crafters to unleash their creativity while ensuring that the yarn they use is ethically sourced and free from synthetic additives. Ultimately, making your own alpaca yarn not only enhances your crafting skills but also deepens your relationship with the materials you work with.
10 Methods How to Make Alpaca Yarn
1. Selecting the Right Alpaca Fiber
The first step in making alpaca yarn is selecting high-quality alpaca fiber. Alpacas produce two types of fiber: the fine, soft undercoat (known as “baby alpaca”) and the coarser outer coat. Baby alpaca is particularly sought after for its softness and is ideal for making luxurious yarn. When selecting alpaca fiber, consider the fineness, uniformity, and length of the fibers. Avoid fiber that is matted or has a lot of guard hair, as this can affect the softness and quality of the yarn. Working with reputable breeders or farms that practice good animal husbandry can help ensure the fiber’s quality.
2. Washing the Fiber
Once you have selected the alpaca fiber, the next step is to wash it to remove any dirt, grease, and debris. Fill a basin with lukewarm water and add a gentle, fiber-friendly detergent. Submerge the fiber in the water and let it soak for about 30 minutes. Avoid agitating the fiber too much, as this can cause felting. After soaking, carefully lift the fiber out and rinse it in clean, lukewarm water until all the detergent is removed. Lay the washed fiber on a drying rack or towel to air dry completely. Clean fiber ensures that the yarn will be soft and free of impurities.
3. Sorting and Grading the Fiber
After washing, the fiber needs to be sorted and graded. Sorting involves separating the fibers by length, fineness, and quality. Longer, finer fibers are more suitable for making high-quality yarn, while shorter or coarser fibers can be used for more rugged, durable yarns. Grading the fiber helps in achieving uniformity in the final yarn. It also allows you to blend different grades of fiber to achieve the desired texture and quality. Taking the time to sort and grade the fiber meticulously ensures that the yarn will have consistent properties throughout.

4. Carding the Fiber
Carding is the process of aligning the fibers and removing any remaining debris. This step is crucial for preparing the fiber for spinning. Use hand carders or a drum carder to card the fiber. Begin by placing small amounts of fiber onto the carding cloth and gently brushing the fibers until they are aligned. Carding creates a uniform batt or roving that is easier to spin. For a more blended yarn, you can mix fibers of different colors or qualities during the carding process. Properly carded fiber results in smoother, more consistent yarn.
5. Preparing the Fiber for Spinning
Before spinning, the carded fiber needs to be prepared into a form that is easy to work with. This can be done by creating rolags, batts, or roving, depending on your preferred spinning method. Rolags are small rolls of fiber created by rolling the carded fiber off the hand carders. Batts are larger sheets of carded fiber that can be rolled or split into strips. Roving is a long, continuous strand of carded fiber. Preparing the fiber in this way makes it easier to handle during spinning and helps in achieving a consistent thickness in the yarn.
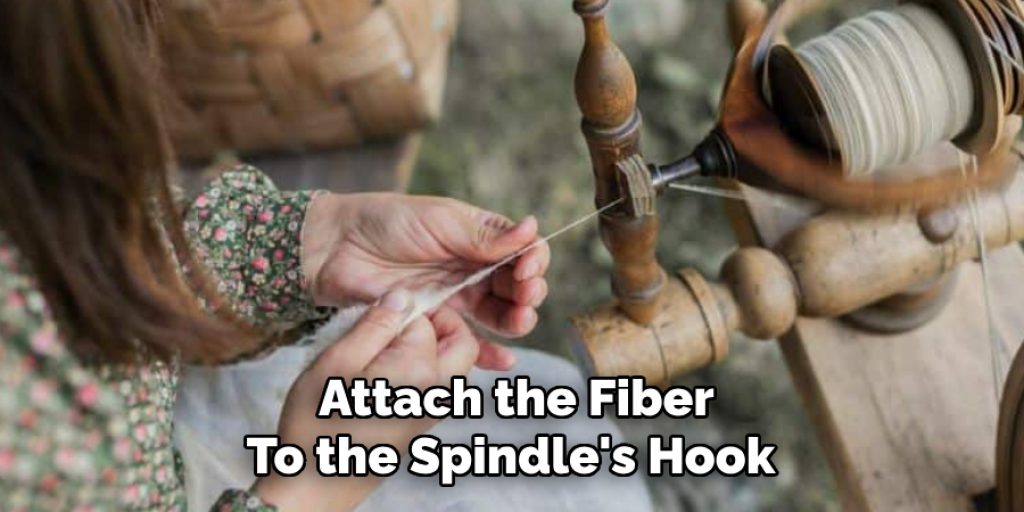
6. Spinning the Fiber
Spinning is the process of twisting the prepared fiber into yarn. You can use a spinning wheel or a drop spindle for this step. If using a spinning wheel, start by attaching the fiber to the leader yarn and begin treadling to spin the wheel. Feed the fiber onto the wheel, allowing the twist to travel up into the fiber. Control the thickness of the yarn by adjusting the amount of fiber you feed into the twist. For a drop spindle, attach the fiber to the spindle’s hook and spin the spindle to twist the fiber. Continue drafting and twisting the fiber to create yarn. Practice and consistency are key to achieving even, balanced yarn.
7. Plying the Yarn
Plying involves twisting two or more singles together to create a balanced, stronger yarn. After spinning the singles, wind them onto bobbins or a lazy kate. Attach the ends of the singles to the leader yarn and begin spinning the wheel or spindle in the opposite direction to the initial spinning direction. This counter-twisting balances the yarn and adds strength. The number of plies can vary depending on the desired thickness and texture of the final yarn. Plying creates a more durable yarn with less tendency to curl or unravel.
8. Setting the Twist
After spinning and plying, the yarn needs to be set to stabilize the twist. This is done by washing the yarn in lukewarm water with a gentle detergent, similar to how the raw fiber was washed. After washing, gently squeeze out the excess water and hang the yarn to dry with a weight attached to the bottom to prevent curling. This step helps to relax any over-twisted sections and sets the twist in place, resulting in a balanced yarn that is ready for knitting or weaving.
9. Finishing the Yarn
Finishing the yarn involves several steps to enhance its appearance and texture. Once the yarn is dry, you can thwack it against a hard surface to fluff up the fibers and remove any remaining stiffness. This also helps to even out the twist throughout the yarn. Some spinners also steam the yarn to further relax the fibers and set the twist. If desired, you can dye the yarn at this stage using natural or synthetic dyes. Finishing the yarn adds the final touches that make it soft, smooth, and ready for use.
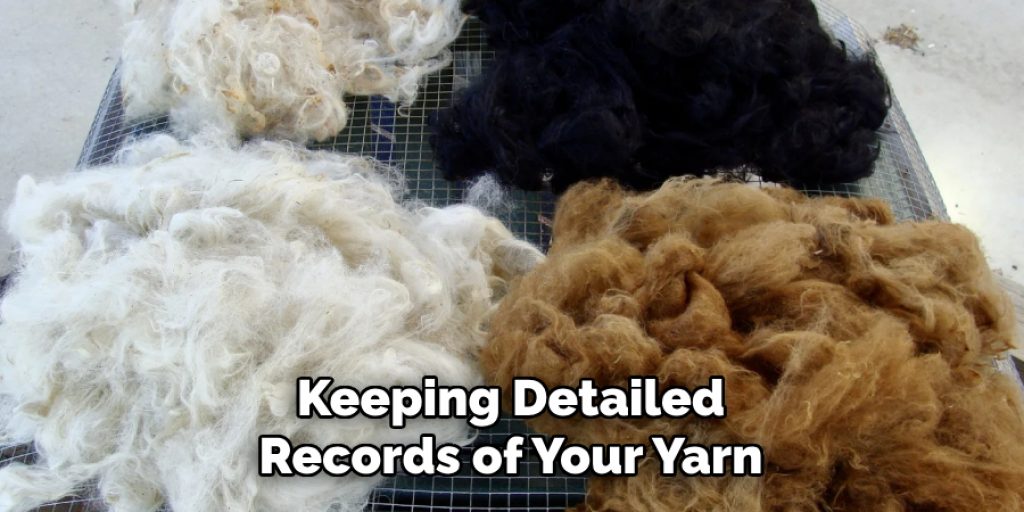
10. Storing and Labeling the Yarn
Proper storage and labeling of your finished alpaca yarn are essential for preserving its quality and usability. Store the yarn in a cool, dry place, away from direct sunlight and pests. Use breathable containers, such as cotton bags or plastic bins with ventilation holes, to prevent moisture buildup. Label each skein with important information, including the fiber content, weight, yardage, and any special care instructions. Keeping detailed records of your yarn ensures that you can easily identify and use it for future projects, and it helps in maintaining the yarn’s quality over time.
Conclusion
In conclusion, making alpaca yarn is a detailed process that requires careful selection, preparation, and handling of the fiber. By following these ten methods—selecting the right fiber, washing, sorting and grading, carding, preparing for spinning, spinning, plying, setting the twist, finishing, and storing—you can create high-quality alpaca yarn that is luxurious, soft, and perfect for a variety of crafting projects. Each step plays a crucial role in ensuring the yarn’s quality and consistency, allowing you to fully enjoy the unique properties of alpaca fiber in your handmade creations. Be sure to follow all instructions on how to make alpaca yarn carefully, and always consult an expert when in doubt.
Check it out to Adjust Knitting Gauge
Elizabeth Davis
Elizabeth is a creative writer and digital editor based in the United States. She has a passion for the arts and crafts, which she developed from a young age. Elizabeth has always loved experimenting with new mediums and sharing her work with others. When she started blogging, she knew that DIYquickly would be the perfect platform to share her tutorials and tips. She's been writing for the blog from the beginning, and her readers love her helpful advice and easy-to-follow instructions. When she's not writing or editing, Elizabeth enjoys spending time with her family and friends.