
How to Make Bubble Candles
Creating bubble candles is a fun and rewarding craft project that allows you to add a touch of whimsy to your home decor. These delightful candles not only serve as beautiful decorative pieces but also fill your space with warmth and comforting scents.
In this guide, we’ll walk you through the materials needed and the step-by-step process of how to make bubble candles, ensuring a creative experience that is both engaging and satisfying. Whether you’re a seasoned candlemaker or a beginner looking to explore a new hobby, this project is perfect for bringing a unique flair to your candle collection.
What Are Bubble Candles?
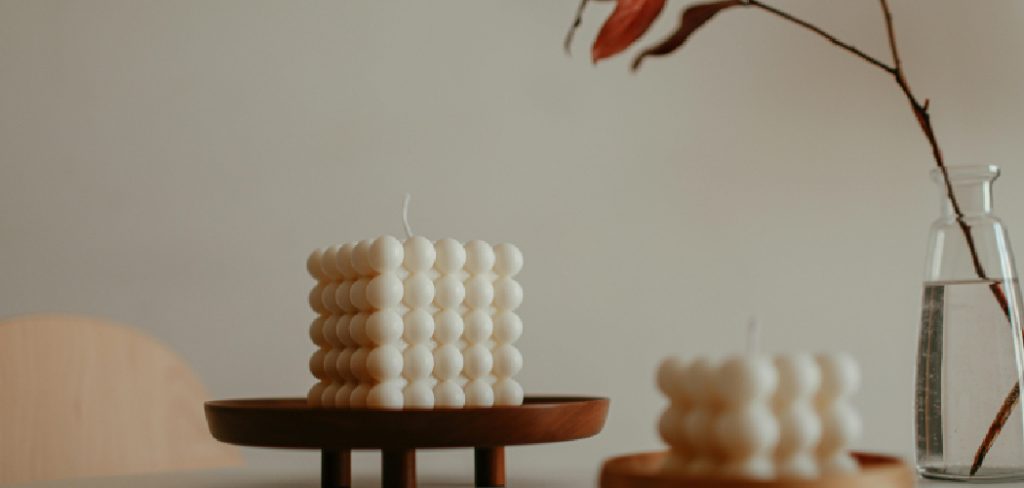
Bubble candles are a trendy and artistic style of candle that features a unique, spherical design resembling clusters of bubbles. They are typically crafted from high-quality wax and come in various shapes, sizes, and colours, allowing for endless customization options. This playful aesthetic not only makes them visually appealing but also provides a creative outlet for makers to experiment with different scents and colour combinations.
Bubble candles are designed to be both functional and decorative, making them perfect for adding a pop of personality to any room or serving as a thoughtful gift for loved ones.
Materials and Tools Needed
To create your very own bubble candles, you’ll need the following materials and tools:
Materials
- Candle Wax: Use high-quality paraffin, soy, or beeswax for best results.
- Wicks: Choose wicks that fit the size of your candle; cotton or wood wicks work well.
- Fragrance Oils: Select your preferred scents to add a personal touch to your candles.
- Dye: Candle dye or colour blocks to achieve the desired colours for your bubbles.
Tools
- Double Boiler: To melt the wax safely without direct heat.
- Thermometer: To monitor the wax temperature.
- Pouring Pitcher: For easy pouring of melted wax into moulds.
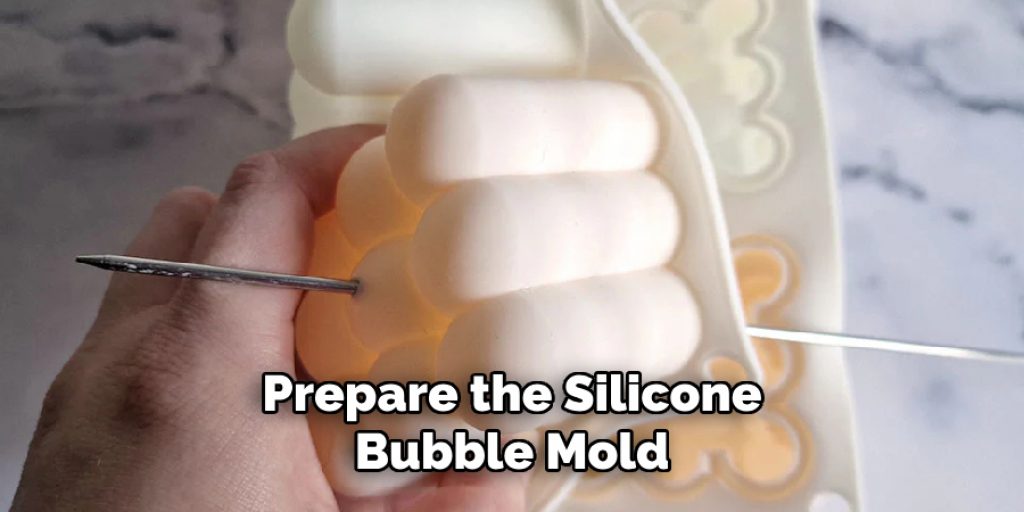
- Silicone Moulds: Look for bubble candle moulds in different sizes or create your own custom shapes.
- Stirring Utensil: A wooden spoon or silicone spatula for mixing in scents and dyes.
- Heat Source: A stovetop or hot plate for the double boiler setup.
- Scissors: To trim wicks to the appropriate length once the candles have cooled.
Gathering these materials and tools will set you on the right path to creating beautiful bubble candles that brighten up your space!
10 Methods How to Make Bubble Candles
1. Basic Bubble Candle with Silicone Molds
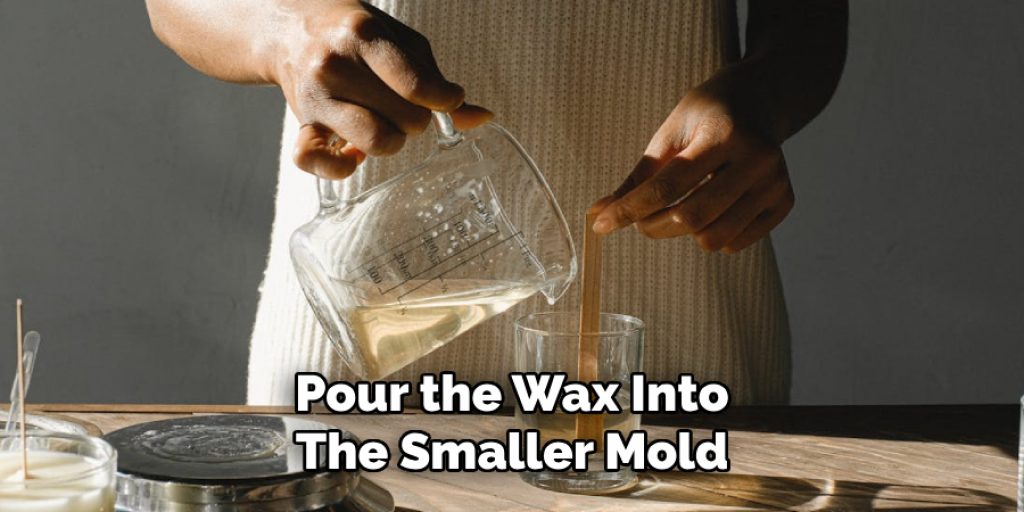
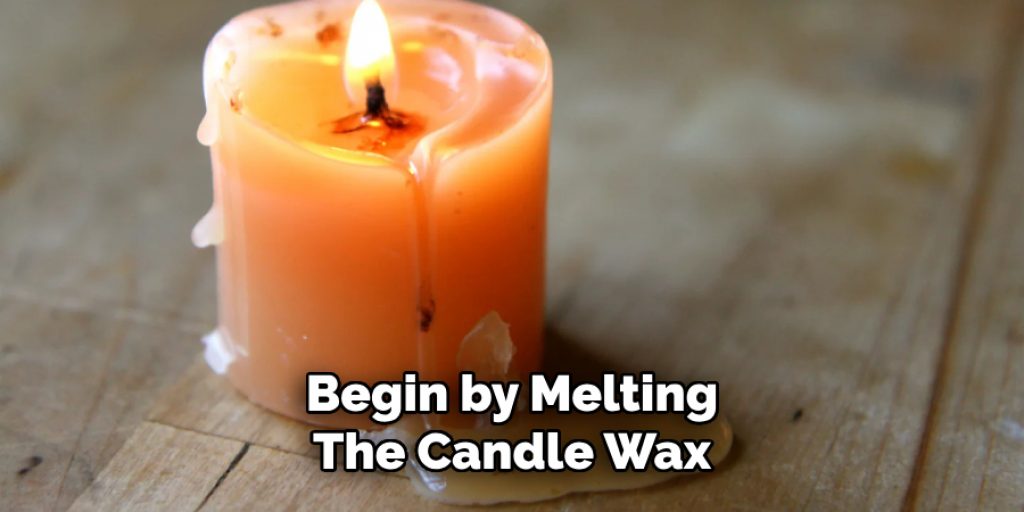
The basic method for creating bubble candles involves using silicone molds specifically designed for bubble candles. Start by melting candle wax in a double boiler until it reaches a smooth, liquid consistency. Add your desired color and fragrance to the melted wax, stirring thoroughly to combine. While the wax is melting, prepare your silicone bubble mold by placing a pre-waxed wick in the center. Pour the melted wax into the mold, ensuring the wick stays centered.

Allow the wax to cool and harden completely before removing the candle from the mold. This method provides a straightforward way to create perfectly shaped bubble candles with minimal effort.
2. Layered Bubble Candle
For a more visually interesting bubble candle, consider creating a layered effect with different colors. Begin by selecting two or more colors of wax. Melt the first color in a double boiler and pour a layer into the silicone bubble mold, allowing it to cool and harden slightly before adding the next layer. Repeat this process with the remaining colors, pouring each subsequent layer carefully to avoid mixing the colors.
Ensure that each layer cools enough to support the next one. This method results in a beautiful, multi-colored bubble candle that adds a dynamic and vibrant touch to your decor.
3. Embedding Objects
Embedding small objects within your bubble candle can add an element of surprise and interest. Begin by melting your candle wax and adding color and fragrance as desired. Pour a small amount of wax into the silicone bubble mold, just enough to cover the bottom. Place small, heat-resistant objects such as dried flowers, shells, or tiny gemstones into the mold. Carefully pour more wax over the objects, filling the mold to the top.
Ensure the wick is centered and straight. Allow the wax to cool and harden completely before removing the candle from the mold. This method creates a unique and personalized bubble candle with embedded treasures.
4. Double Bubble Effect
To achieve a double bubble effect, use two different bubble molds of varying sizes. Start by melting the wax for the inner, smaller bubble candle and preparing the mold with a centered wick. Pour the wax into the smaller mold and allow it to cool and harden completely. Once the inner candle is ready, melt the wax for the outer, larger bubble mold. Place the smaller, hardened bubble candle in the center of the larger mold and pour the melted wax around it, ensuring it fills the mold evenly.
Allow the wax to cool and harden before removing the completed double bubble candle from the mold. This method creates a striking candle with a bubble within a bubble effect.
5. Marbled Bubble Candle
Creating a marbled effect in your bubble candle adds a sophisticated and artistic touch. Begin by melting two or more colors of wax in separate containers. Pour a small amount of each color into the silicone bubble mold in a random pattern, swirling them together gently with a wooden skewer or toothpick. Be careful not to overmix, as you want to maintain distinct color patterns.
Add the wick and continue pouring the melted wax, alternating colors and swirling as needed, until the mold is filled. Allow the wax to cool and harden completely before removing the candle from the mold. This method results in a stunning marbled bubble candle with unique, flowing patterns.
6. Scented Bubble Candle
Enhancing your bubble candle with fragrances can create a delightful sensory experience. Begin by selecting your desired fragrance oils. Melt the candle wax in a double boiler and add the fragrance oil to the melted wax, following the recommended usage rate for the oil. Stir thoroughly to ensure the fragrance is evenly distributed. Pour the scented wax into the silicone bubble mold, ensuring the wick is centered.
Allow the wax to cool and harden completely before removing the candle from the mold. This method produces beautifully scented bubble candles that can fill your space with delightful aromas.
7. Glitter Bubble Candle
Adding glitter to your bubble candles can create a dazzling, sparkling effect. Begin by melting the candle wax in a double boiler. Add your desired color and a generous amount of fine glitter to the melted wax, stirring thoroughly to combine. Pour the glittery wax into the silicone bubble mold, ensuring the wick is centered.
Allow the wax to cool and harden completely before removing the candle from the mold. This method results in a shimmering bubble candle that catches the light beautifully, adding a touch of glamour to your decor.
8. Beeswax Bubble Candle
Using beeswax instead of traditional candle wax can create a natural, eco-friendly bubble candle. Begin by melting beeswax in a double boiler until it reaches a smooth, liquid consistency. Add a natural dye, if desired, and stir thoroughly to combine. Pour the melted beeswax into the silicone bubble mold, ensuring the wick is centered. Allow the beeswax to cool and harden completely before removing the candle from the mold.
9. Ombre Bubble Candle
Creating an ombre effect in your bubble candle can add a gradient of color that transitions smoothly from light to dark. Begin by melting wax and dividing it into three or more containers. Add varying amounts of dye to each container to create different shades of the same color. Pour the lightest shade into the silicone bubble mold and allow it to cool slightly.
Add the wick and pour the next shade on top, allowing it to blend slightly with the previous layer. Repeat with the remaining shades, pouring each layer carefully to achieve a smooth gradient. Allow the wax to cool and harden completely before removing the candle from the mold.
10. Hand-Dipped Bubble Candle
For a more hands-on approach, consider making hand-dipped bubble candles. Begin by melting the wax in a large, deep container. Prepare the silicone bubble mold by placing a pre-waxed wick in the center. Dip the mold into the melted wax, allowing it to fill partially, then remove it and allow the wax to cool slightly. Repeat the dipping process several times, allowing each layer to cool slightly before the next dip.
Conclusion
Making bubble candles at home is a creative and enjoyable process that allows for endless customization. Each of these ten methods offers a unique approach to crafting bubble candles, from basic silicone mold techniques to more advanced designs like layered, marbled, and hand-dipped candles. Whether you prefer adding color, fragrance, glitter, or embedded objects, these detailed methods provide a comprehensive guide to creating beautiful and unique bubble candles. Thanks for reading, and we hope this has given you some inspiration on how to make bubble candles!
Elizabeth Davis
Elizabeth is a creative writer and digital editor based in the United States. She has a passion for the arts and crafts, which she developed from a young age. Elizabeth has always loved experimenting with new mediums and sharing her work with others. When she started blogging, she knew that DIYquickly would be the perfect platform to share her tutorials and tips. She's been writing for the blog from the beginning, and her readers love her helpful advice and easy-to-follow instructions. When she's not writing or editing, Elizabeth enjoys spending time with her family and friends.


