
How to Make Giant Peppermint Candy Decorations
Are you tired of the same old holiday decorations? Do you want to add a touch of whimsy and playfulness to your home during the festive season? Look no further because we have just the project for you: how to make giant peppermint candy decorations!
Transform your holiday decor with a whimsical twist by creating giant peppermint candy decorations. These oversized candies bring a touch of whimsy and a dash of nostalgia, perfect for enhancing your festive atmosphere. Whether displayed on your front lawn to welcome guests or used as a bold centerpiece for your holiday parties, these sweet replicas are both eye-catching and surprisingly simple to make.
In this guide, we’ll walk you through the steps to craft these delightful decorations using materials easily found at home or at your local craft store. Get ready to add an unforgettable touch to your holiday celebrations with these charming, giant peppermints.
What are the Benefits of Making Giant Peppermint Candy Decorations?
Aside from being a fun and unique addition to your holiday decor, making giant peppermint candy decorations has several other benefits.
Firstly, it’s an affordable project that won’t break the bank. You can easily find all the materials needed at your local craft store or even repurpose items you already have at home.
Secondly, it’s a great way to engage in a fun and creative activity with your family and friends during the holiday season. Gather everyone around the crafting table for some quality time while making these festive decorations.
Lastly, giant peppermint candy decorations are versatile and can be used in various ways. They make excellent outdoor decorations, but they can also be placed on mantles, tables, or even hung on walls for a unique touch.
What Will You Need?
Before you get started, it’s essential to gather all the necessary materials. Here’s a list of what you’ll need:
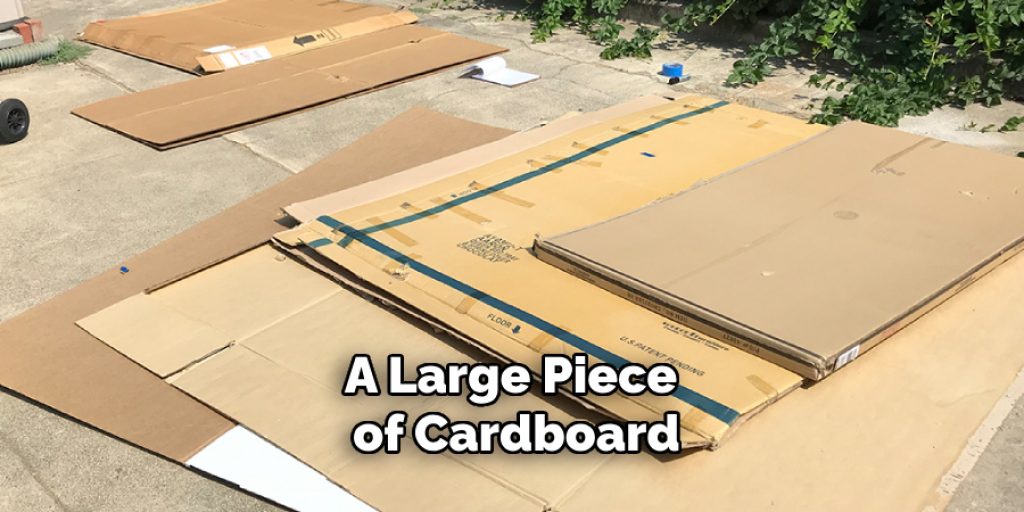
- A large piece of cardboard
- Red and white acrylic paint
- Paintbrushes
- Scissors or box cutter
- Ruler or measuring tape
- Pencil
- Clear sealant spray (optional)
Once you have all your materials assembled, let’s get to work!
10 Easy Steps on How to Make Giant Peppermint Candy Decorations
Step 1: Create a Circle Template
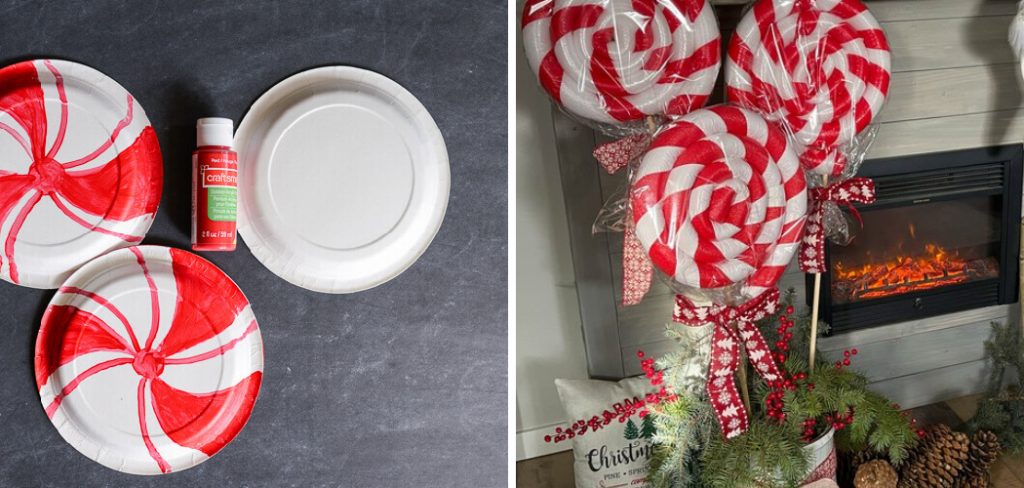
Using a large piece of cardboard, trace a circle using a pencil and a round object such as a plate or bowl. This will serve as the template for your giant peppermint candy. Next, cut out the circle using scissors or a box cutter.
If you’re planning on making multiple candies, creating a couple of templates of different sizes for variety might be helpful. Ensure the edges are smooth and even for the best appearance of your finished decoration.
Step 2: Paint Your Base Layer
Once your cardboard circle is cut out, it’s time to paint the base layer of your peppermint candy. Start by painting the entire circle white, which will serve as the background for your red stripes.
Allow the paint to dry completely before moving on to the next step. This may take a few hours, so it’s a good opportunity to prepare other circles or plan out the rest of your decoration setup. A solid, white base will ensure that the red stripes stand out and give your candy decoration a bright, vibrant look.
Step 3: Draw the Red Stripes
After your base layer has dried, it’s time to add the iconic red stripes that make peppermint candies instantly recognizable. Use a pencil and a ruler to lightly mark where you want your stripes to go. Peppermint candies typically have evenly spaced stripes that narrow as they reach the center of the circle, so try to replicate this pattern on your cardboard template.
Next, use your red acrylic paint to carefully paint over your pencil marks. You might need a couple of coats to get a bold, even color. Allow the paint to dry completely before moving on to the next step. This step requires a steady hand and a bit of patience, but it’s what brings your candy decoration to life!
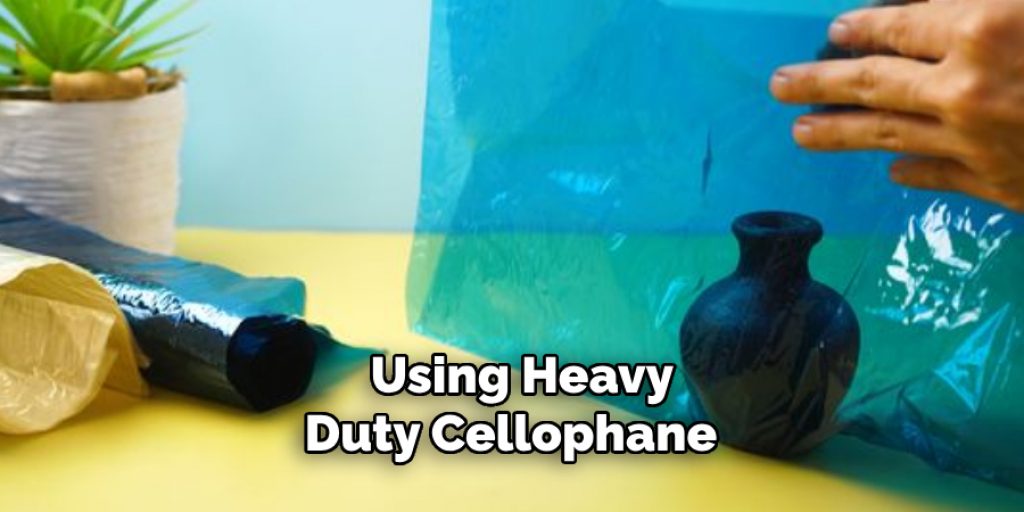
Step 4: Add a Plastic Wrap Effect

To give your giant peppermint candy decorations an authentic look, mimicking the shiny plastic wrap of real candy is a must. Once your painted stripes are completely dry, you can achieve this by using clear cellophane wrap. Measure and cut a piece of cellophane large enough to completely cover your cardboard circle, allowing for the excess on the sides to create a wrapped effect.
Carefully wrap the cellophane around your painted circle, securing it at the back with tape or glue. For an added touch, gather and twist the excess cellophane at opposite sides and secure it with a ribbon or twist tie. This will not only secure the wrap but also mimic the classic wrapped candy look.
Step 5: Seal Your Decoration (Optional)
Applying a clear sealant spray is a wise final step for those planning to display their giant peppermint candy decorations outdoors or in areas prone to moisture. This will help protect your decoration from the elements and ensure it remains vibrant and intact throughout the holiday season.
Ensure your painted stripes and cellophane wrap are completely dry before applying a light coat of sealant. Hold the can approximately 6 to 8 inches away from the surface, and spray in a steady back-and-forth motion to cover the entire decoration.
Allow the sealant to dry completely, according to the manufacturer’s instructions, before displaying your peppermint candy. This step will add durability to your whimsical outdoor decoration, making your crafting effort last longer.
Step 6: Display Your Giant Peppermint Candy Decorations
Now that your giant peppermint candy decorations are complete, it’s time to display them! There are numerous ways to showcase these festive pieces.
If you’re planning to use them as outdoor decorations, consider placing them along your walkway or hanging them on trees to create a whimsical winter wonderland. For indoor displays, these candies can make a great addition to your holiday mantle, as part of a table centerpiece, or even attached to your holiday wreath.
Be creative and think about how best to incorporate them into your holiday décor to add a splash of color and joy. Remember, these decorations are lightweight, so securing them in windy conditions might require additional support or weights.
Step 7: Share Your Creations with Friends and Family
After all your hard work and creativity, don’t forget to share your giant peppermint candy decorations with friends and family. Take photos of your beautifully crafted candies and share them on social media or send them through a holiday newsletter.

Not only will this showcase your skill and creativity, but it might also inspire others to start their own DIY holiday projects. Remember, the joy of the holiday season is not just in the decorations themselves but in the shared experience of creating and celebrating together.
Your unique decorations are sure to be a conversation starter and might even become a beloved tradition for years to come.
Step 8: Experiment with Different Colors and Patterns
Once you’ve mastered the classic red and white peppermint candy decoration, why not experiment with different colors and patterns? This is your opportunity to get creative and add a personal touch to your holiday décor.
Try using different shades of paint to create candies that match your home’s color scheme or the holiday theme you’re going for this year. You could also play with glitter, metallic paints, or even glow-in-the-dark options for a more whimsical or elegant touch.
Additionally, consider varying the patterns on your candies – apart from the traditional stripes, you might want to try polka dots, stars, or even snowflake designs. These variations can make each candy unique and enhance the overall look of your holiday display. Remember, there’s no limit to creativity, so feel free to explore and have fun with this project!
Step 9: Reflect on Your Project and Plan for Next Year
After completing your DIY peppermint candy decorations and enjoying them throughout the holiday season, take some time to reflect on the project.
What worked well? What challenges did you face, and how did you overcome them? This reflection is crucial for improving your crafting skills and making the process even smoother next year.
Consider jotting down notes or creating a small portfolio of your work, including photos and descriptions of each step. This can serve as a valuable reference and inspiration for future holiday projects.
Additionally, think about potential themes or new decoration ideas you’d like to try next year. Planning ahead can spark creativity and give you something special to look forward to. Remember, the beauty of DIY projects lies in the opportunity to learn, adapt, and create something truly unique each year.
Step 10: Clean Up and Store Your Supplies
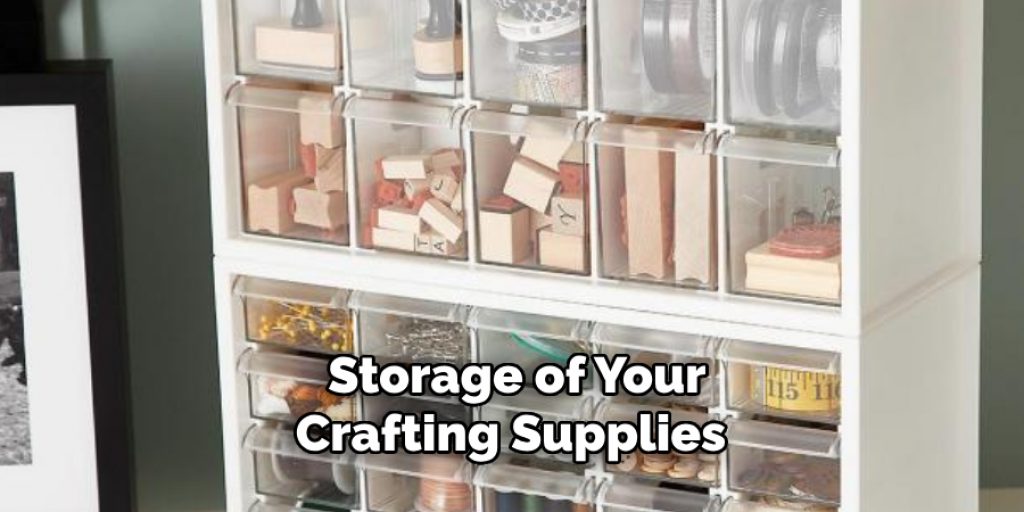
Proper cleanup and storage of your crafting supplies are essential steps to ensure their longevity and readiness for future projects.
Begin by thoroughly cleaning your brushes, palettes, and any other tools used during the crafting process. Allow everything to dry completely before storing them to prevent mold and mildew growth. Organize your supplies, categorizing them in a way that makes sense for you, and label them if necessary for easy identification next time.
For your leftover materials like paint, cellophane, and ribbons, consider using clear, airtight containers to keep them dust-free and organized. Store all your crafting supplies in a cool, dry place away from direct sunlight or extreme temperatures, which can damage the materials.
Taking the time for proper cleanup and storage will not only make your next crafting session more efficient but also ensure that your supplies remain in good condition, saving you time and resources in the long run.
By following these steps, you can create your own giant peppermint candy decorations and add a unique touch to your holiday décor that will bring joy and cheer year after year.
5 Additional Tips and Tricks
- Use Clear Weatherproofing: To ensure your giant peppermint candies stand up to the elements, apply a clear weatherproofing spray or sealant. This is especially important if you’re displaying them outdoors. It’ll help keep the colors vibrant and protect the materials from rain or snow.
- Incorporate LED Lights: For an enchanting nighttime display, consider embedding small LED lights within your candies before wrapping them. The light will illuminate the translucent parts of your decorations, creating a glowing effect that’s sure to captivate.
- Choose High-Quality Materials: When crafting your candies, opt for durable, high-quality materials. For example, using heavy-duty cellophane instead of thin plastic will make your decorations last longer and better withstand windy conditions.
- Play with Sizes: Don’t limit yourself to one size of candy decoration. Creating a variety of sizes can add depth and interest to your display. Consider hanging smaller peppermint candies from trees or railings and placing larger ones around your yard or entryway.
- Secure Properly: Ensure your giant candies are securely attached or anchored. If hanging, use sturdy ropes or chains that can bear the weight. For ground displays, you should anchor them with stakes to prevent them from being blown away or toppled over by the wind.
With these additional tips and tricks, your giant peppermint candy decorations are sure to impress and bring the holiday spirit to your home.
5 Things You Should Avoid
- Avoid Using Non-Weatherproof Materials: Neglecting to use weatherproof materials for outdoor decorations can lead to quick deterioration. Materials that aren’t designed to withstand rain, snow, and wind will fade, tear, or disintegrate, leading to a disappointing display.
- Don’t Skimp on Quality: While it might be tempting to go for the cheapest options, using low-quality materials can result in decorations that look lackluster and don’t last. Investing in higher-quality materials ensures your candies look great and can be reused for years.
- Steer Clear of Complicated Assembly: Making your decorations overly complicated can lead to frustration and wasted materials. Stick to designs that are easy to assemble and dismantle, ensuring you’re not spending the holiday season grappling with instructions instead of enjoying the festivities.
- Avoid Ignoring Safety Precautions: When incorporating elements like LED lights, always adhere to safety guidelines. Improperly handled electrical components can pose a fire risk. Additionally, ensure that your installations don’t create tripping hazards or obstruct pathways.
- Don’t Forget to Plan for Storage: Large decorations require significant storage space. Avoid creating pieces that are too cumbersome to store or that cannot be dismantled into smaller parts. Planning for off-season storage will keep your decorations safe and make setting up and taking down decorations much easier.

By avoiding these common mistakes, you’ll be well on your way to creating stunning and durable giant peppermint candy decorations for all to enjoy.
How Do You Wrap Peppermint Candy?
Wrapping peppermint candy is a simple and fun process that can add an extra touch of creativity to your decorations. Here’s a step-by-step guide on how to wrap peppermint candy:
- Choose Your Materials: To wrap your peppermint candies, you’ll need cellophane or plastic wrap, ribbon or twine, scissors, and any additional decorative elements (such as glitter or stickers).
- Cut Your Cellophane: Lay out a sheet of cellophane or plastic wrap and cut it into a square or circle, depending on the size of your candy.
- Place Candy in Center: Place your peppermint candy in the center of the cellophane square.
- Gather the Corners: Bring all four corners of the cellophane together and twist them to create a gathered top.
- Secure with Ribbon or Twine: Tie a ribbon or twine around the gathered top to secure it in place. You can also add additional decorative elements, such as tying on a small ornament or attaching a personalized tag.
- Add Finishing Touches: For an extra touch of flair, you can add glitter or stickers to the wrapped candy.
- Repeat Steps for Additional Candies: Repeat this process for all your peppermint candies, using different colors of cellophane or ribbons for a variety of looks.
With these simple steps, you’ll have beautifully wrapped peppermint candies that are ready to be displayed or gifted. Get creative and have fun with different wrapping styles and materials!
How Can You Flavor Giant Peppermint Candies?
Creating giant peppermint candies doesn’t have to be limited to the traditional red-and-white striped design. You can use various flavors and colors to create a unique and delicious twist on this classic holiday decoration. Here are a few ideas for flavoring your giant peppermint candies:
- Experiment with Different Extracts: Instead of using just peppermint extract, try adding other flavors like vanilla, almond, or cinnamon to create a more complex and interesting taste.
- Use Natural Ingredients: For a healthier option, you can use natural ingredients like beet juice for red coloring or spinach powder for green stripes.
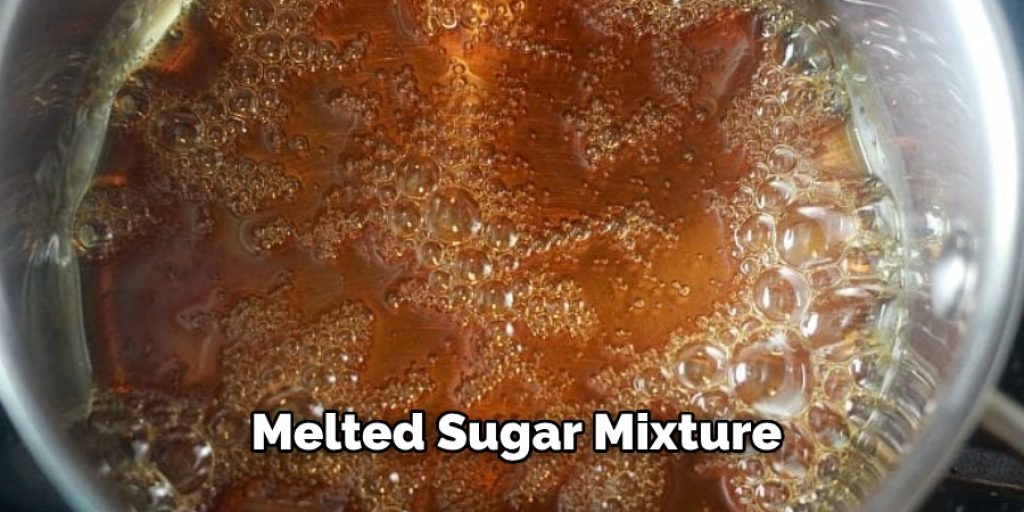
- Get Creative with Candy Canes: Crush up candy canes and mix them into the melted sugar mixture before shaping your candies. This will give them a crunchy texture and add extra peppermint flavor.
- Mix in Crushed Cookies: For a fun twist, try mixing crushed chocolate or vanilla cookies into the melted sugar mixture before shaping your candies. The added crunch and burst of flavor will delight your taste buds.
Experiment with different flavors and have fun creating your own unique giant peppermint candies.
Conclusion
How to make giant peppermint candy decorations is a fun and festive way to add a touch of whimsy and holiday cheer to your home or event.
By following the detailed guide and adhering to the tips and tricks provided, you can ensure that your decorations not only look stunning but are also durable and weather-resistant. Remember to prioritize selecting the right materials, adhering to safety precautions, and choosing simple assembly methods for the best results.
Additionally, steering clear of common pitfalls will help keep your decorating process smooth and enjoyable.
With a bit of creativity and care, your giant peppermint candies will become a captivating centerpiece of your holiday decorations, bringing joy and color to any setting.
Angela Ervin
Angela is the executive editor of DIY quickly. She began her career as an interior designer before applying her strategic and creative passion to lifestyle and home. She has close to 15 years of experience in creative writing and online content strategy for housekeeping, home decorations as well as other niche efforts. She loves her job and has the privilege of working with an extraordinary team. She lives with her husband, two sons, and daughter in Petersburg. When she's not busy working she spent time with her family.


