How to Make Olla Pottery
Olla pottery, with its rich history and unique functionality, has been a staple in various cultures for centuries. Originating from the indigenous peoples of the Americas, these earthenware pots are traditionally used for cooking and storage, showcasing a blend of artistic expression and practical utility. The design and crafting of olla pottery not only reflect the cultural heritage of the communities that produce them but also embody techniques passed down through generations.
In this guide on how to make olla pottery, we will explore the process of making olla pottery, delving into the materials, techniques, and creative possibilities that this ancient craft offers.
Why Make Olla Pottery?
There are many reasons why one might choose to make olla pottery. One of the most prominent reasons is its strong cultural significance. For indigenous communities, olla pottery is not simply a utilitarian object but also carries spiritual and cultural symbolism. Through creating their own olla pottery, individuals can connect with these traditions and preserve their heritage.
Another reason to make olla pottery is the sheer pleasure of working with clay. The tactile experience of molding and shaping the clay into a functional object can be therapeutic and meditative. It allows for self-expression and offers a sense of accomplishment as you create something beautiful and useful.
Lastly, making your own olla pottery allows for customization and personalization. You have control over every aspect of the process, from choosing the type of clay to adding intricate designs and patterns. This creates a truly unique piece that reflects your individual style and creativity.
Materials Needed
To make olla pottery, you will need the following materials:
Clay:
The type of clay used for olla pottery is usually a mix of sand and fine silt. Traditional clays used by indigenous communities include red clay and kaolin clay. You can purchase these clays from pottery supply stores or even make your own if you have access to the necessary materials.
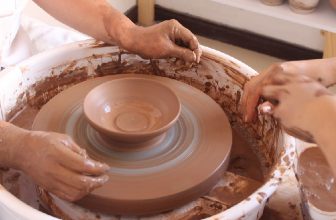
Pottery Wheel:
A pottery wheel is an essential tool for creating olla pottery. It allows for precise shaping and smoothing of the clay, resulting in a more uniform and symmetrical pot.
Tools:
Various tools are used in the process of making olla pottery, including wire cutters, ribs, sponges, carving tools, and brushes. These tools aid in shaping and detailing the clay.
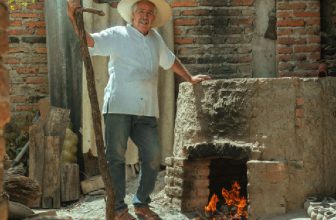
Firing Equipment:
After shaping and drying your olla pot, it must be fired in a kiln to harden it. You will need access to a kiln and the necessary equipment for firing, such as shelves, stilts, and cones.
8 Steps on How to Make Olla Pottery
Step 1: Wedge and Prepare Your Clay
Before you begin creating your olla pottery, it’s crucial to prepare your clay properly. Start by wedging the clay, which involves kneading it thoroughly to remove any air bubbles and ensure a consistent texture. This process also helps to align the clay particles, making it easier to shape later. To wedge your clay, place it on a clean, flat surface and use the heel of your hand to push down and forward, folding it over itself repeatedly.

Once the clay is well-wedged, form it into a ball and let it rest for a short while, covered with a damp cloth to prevent it from drying out. This preparation step is essential for achieving a workable consistency and will set a solid foundation for the creation of your olla pot.
Step 2: Center the Clay on the Pottery Wheel
Place your clay ball in the center of the pottery wheel and begin to center it by pressing down firmly with one hand while gradually increasing the speed of the wheel. Use your other hand to steady and shape the clay as it spins, creating a symmetrical form.
It’s essential to center the clay properly, as this will determine the overall shape and balance of your olla pot. Take your time with this step, and make sure that the clay is evenly centered before moving on.
Step 3: Begin Shaping Your Pot
Using your hands and various tools, start shaping your clay into a pot form. This can be done in multiple ways, depending on the design you have in mind. Some may choose to pinch and pull the clay into shape, while others may use coils or slabs of clay to build up their pot.
A crucial aspect of making olla pottery is creating a wide opening at the top of the pot and gradually tapering it towards the base. This shape allows for efficient heat distribution and steam circulation when cooking.
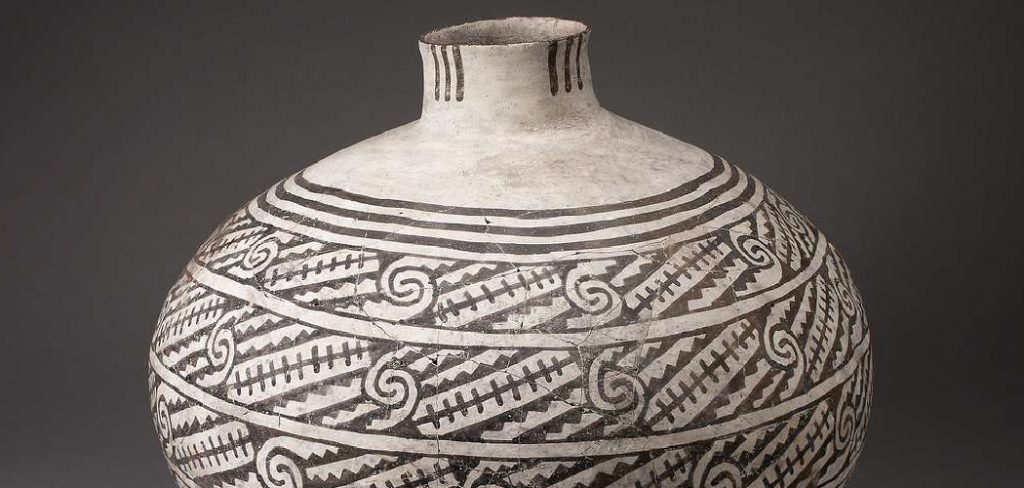
Step 4: Add Decorative Details
Once you have achieved your desired pot shape, you can add decorative details to make it unique. These details can include carving designs, adding handles or spouts, or using different techniques to create texture on the surface of the pot.
Remember to leave enough room between any added decorations and the opening of the pot to ensure proper functionality.
Step 5: Let Your Pot Dry
After completing your olla pottery’s shaping and decorating, let it dry before firing in the kiln. The drying process can take anywhere from a few days to a couple of weeks, depending on the size of your pot and the humidity levels in your environment. It’s crucial to let the pot dry completely to prevent any cracking or warping during firing.
The drying process can be sped up by placing your pot in a warm and well-ventilated area or using a fan. Just make sure to rotate the pot occasionally for even drying.
Step 6: Bisque Fire Your Pot
Once your pot is completely dry, it’s ready for its first firing – bisque firing. This firing process hardens the clay and prepares it for glazing. You can either fire your olla pot in a kiln or use alternative methods such as pit firing.
During the bisque firing, the temperature is slowly increased to approximately 1800-2000 degrees Fahrenheit and then gradually cooled. This process removes any remaining moisture from the pot and strengthens it for glazing.

Step 7: Glaze Your Pot
After bisque firing, you can choose to apply a glaze to your olla pot for added functionality and aesthetic appeal. Glazes come in various colors and finishes, so you can get creative with how you want your pot to look.
Remember to use food-safe glazes if you plan on using your olla pot for cooking or storing liquids.
Step 8: Final Firing
The final step in making olla pottery is the glaze firing. This process heats the pot to its final temperature, usually between 2100-2300 degrees Fahrenheit, and is done in a kiln. The high temperatures cause the glaze to melt and fuse onto the pot’s surface, creating a durable and waterproof finish.
Once your pot has been fired and cooled, it’s ready for use or display! Congratulations, you have successfully made your own Olla pottery. Following these steps on how to make olla pottery may take practice, but with time and patience, you can create beautiful and functional olla pots to use for cooking or as decorative pieces. So gather your materials, fire up the pottery wheel, and let your creativity flow!
Additional Tips
Use Quality Clay:
Selecting the right type of clay is vital for achieving optimal results. Consider using earthenware clay for its suitability in making olla pottery, as it allows for better heat retention and is easier to shape.
Practice Patience:
Pottery-making requires time and patience. Don’t rush through any of the steps, especially the drying and firing processes, as this could lead to cracks or defects in your final product.

Experiment with Techniques:
Don’t be afraid to try out different shaping, decorating, and glazing techniques. Each method can yield unique results and provide a chance to discover your artistic style.
Maintain Proper Moisture:
Keep your clay covered with a damp cloth while working to prevent it from drying out. If you notice it starting to dry, use a spray bottle to lightly mist the surface.
Safety First:
When handling glazes and firing equipment, always wear appropriate safety gear, such as gloves and a mask to protect against dust and fumes, ensuring a safe workspace.
Join a Community:
Connecting with fellow pottery enthusiasts can provide support, inspiration, and helpful tips. Consider joining a local pottery class or online forums to exchange ideas and experiences.
Stay Organized:
Keep your workspace tidy and organized. Having all your tools and materials within reach will enhance your efficiency and help you maintain focus during the pottery-making process.
Following these additional tips on how to make olla pottery can help improve your olla pottery-making skills and bring even more enjoyment to the process. Remember, practice makes perfect, so keep experimenting and honing your craft.
Conclusion
Making olla pottery is a rewarding experience that allows you to connect with ancient traditions while expressing your creativity. By following these steps on how to make olla pottery and using quality materials, you can create beautiful and functional pieces of art that will be cherished for generations to come. Keep practicing, experimenting, and honing your skills to perfect the art of olla pottery. Happy creating! So, let your imagination run wild and see what unique designs you can create with this ancient technique.
Elizabeth Davis
Elizabeth is a creative writer and digital editor based in the United States. She has a passion for the arts and crafts, which she developed from a young age. Elizabeth has always loved experimenting with new mediums and sharing her work with others. When she started blogging, she knew that DIYquickly would be the perfect platform to share her tutorials and tips. She's been writing for the blog from the beginning, and her readers love her helpful advice and easy-to-follow instructions. When she's not writing or editing, Elizabeth enjoys spending time with her family and friends.