
How to Oil Clipper Blades
If you’re a barber, you know the importance of keeping your clipper blades oiled. Clipper blades work best when properly lubricated, which helps them cut hair more smoothly. In addition, maintaining clipper blades oiled is an integral part of grooming your pet.
Not only does it help the blade cut more smoothly, but it also helps keep the blade cool. This blog post will show you how to oil clipper blades properly. We’ll also provide some tips on keeping them in good condition for as long as possible.
8 Benefits of Oiling Clippers
There are lots of benefits of oiling clipper blades. First, there is that new-blades feeling on your hand when you first use them. They feel smooth and fast. There’s nothing like it! However, without proper lubrication, you’ll quickly lose this quality, as dust and small pieces of hair will accumulate in the mated surfaces of your blades, creating friction and slowing them down.
Friction in blades causes heat, which will discolor the blade’s surface and wrap it over time. Oiling clippers reduces this friction along with its associated problems. Here are eight more benefits of oiling clipper blades:
1. Cleaner Clips:
Oiling your blades leaves less hair in the blade cavity for you to clean afterward, resulting in cleaner clips that are easier to finish.
2. Healthier Pets:
Hair and dander that you cannot see accumulate on the blades over time; the best way to get rid of them is by oiling the blades and wiping them clean.
3. Reduces Heat:
Oiling your clipper blades reduces heat, contributing to a longer blade life and better-looking clips; clippers can cut much hotter when they run dry.
4. Smooth Cuts:
Oil on the blade reduces friction, which creates a smooth cut that is more comfortable for your pet.
5. Prevents Rust:
When blades are not oiled, they can rust in humid conditions; this leads to dull blades and poor clipping performance.
6. More Blades for Your Buck:
If you oil your clipper blades every time you groom, they will last much longer.
7. Consistent Cuts:
Oiled blades are less likely to snag or pull your pet’s coat, which results in better-looking clips that stay sharp longer.
8. Easier Cleanup:
Oiled blades leave less hair to be cleaned up after clipping, and the hair left behind is not as caked on.
Step by Step Guide: How to Oil Clipper Blades
Step 1: Push the Cutter
The first and most important step in oiling clipper blades is to push the cutter blade into a firm, non-stretched state. To do this, hold the clipper upright and attach the comb up with one hand. Next, place your other hand on top of the clipper body and press down lightly so that you feel some resistance from the cutters.
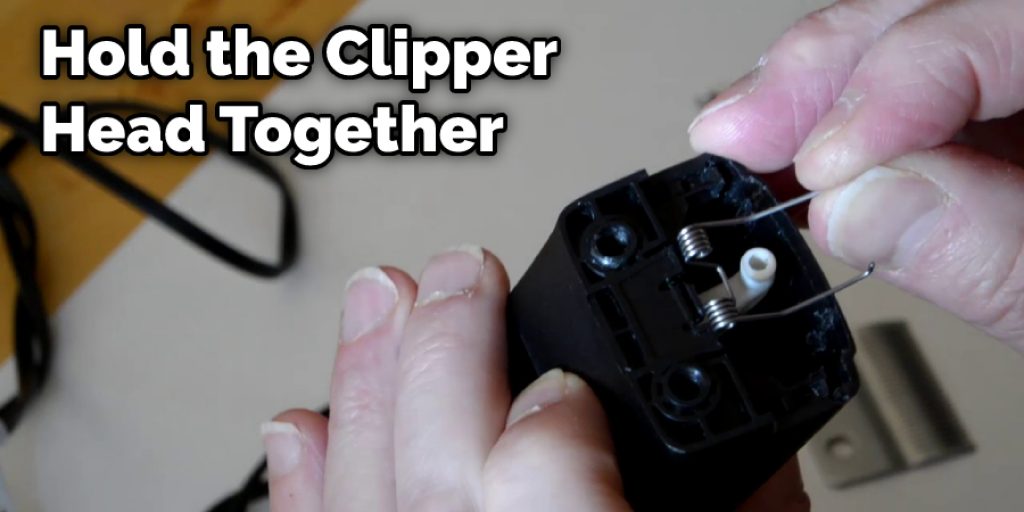
Step 2: Open the Lid
You can find a small screw or latch on most clippers that hold the clipper head together. If your clipper has this type of screw, turn it counter-clockwise to release and separate the top blade from the bottom blade. If your clipper does not have this, you will have to pry the top blade away from the bottom edge by inserting a flat head screwdriver between the two blades.
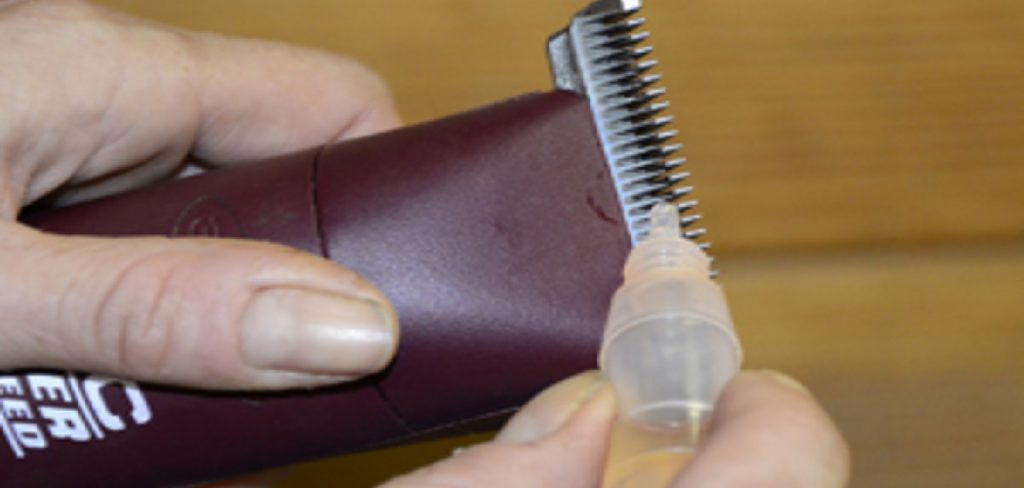
Step 3: Apply oil
Once you have released both clipper blades, you can apply oil to either one of them. Most manufacturers recommend using oil onto the side of the clipper with teeth, but it does not make a big difference.
Step 4: Oil on the Rear Rails
There is often oil that comes with your clipper; if this is the case, you can apply oil to the rear rails on both blades. However, if no oil came with your clipper and there was none in its packaging, you may need to purchase some separately.
Step 5: Oil the Groove in the Top of Your Clipper
Most clipper models on the market have a groove in the top of their clippers. If your model has this feature, you will need to put oil into it immediately after applying oil to the underside of each blade. This ensures that all parts of the blades touch equally and there is no resistance when cutting hair.
Step 6: Oil on the Clipper Teeth
After opening your clipper and oiling the underside of each blade, the next step is to put oil on the teeth. Most manufacturers recommend putting just a few drops onto each tooth and then working them back and forward until all the oil has been removed. However, you mustn’t use too much oil or leave it on the teeth for too long as it could run into your pet’s eyes and ears.
Step 7: Drop the Oil into the Center of the Blade
After you have oiled the front and back of both blades, there should still be some oil left. Drop this oil into the center of each blade; typically, pet owners recommend three drops at a time onto the inside edge of the top blade and one drop onto the inside edge of the bottom blade.
Step 8: Oil Around Interior of Clipper
If there is leftover oil after applying it to the blades, you may choose to put some on the interior of your clipper. This is entirely optional and will not make a difference if you do not do it, but it may keep your clippers clean in the long run.
Step 9: Turn the Clippers
Keeping the clippers pushed forward, gently turn it to be oiled all around. Make sure you use light pressure and rotate the clipper with your fingers, not your entire arm. Do this until the oil is dispersed evenly on all of its surfaces.
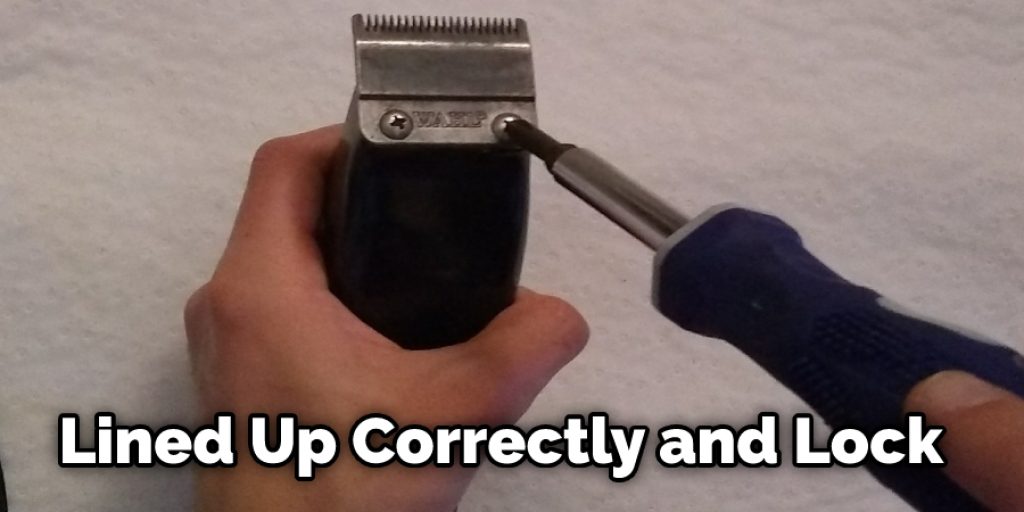
Step 10: Replace Blades
Once you have finished oiling both blades, it is time to replace them with the clippers. First, make sure that they are lined up correctly and lock securely in place. Then, you can screw on the lid and continue with your grooming routine.
Some Clipper Maintenance Tips and Suggestions
Here are some tips and suggestions on how to oil clipper blades.
1. Clean blades after every grooming
2. Clean under blade and pivot points as well as the clipper blades if they come off for a thorough cleaning
3. Oil the blades before you start grooming for smoother performance and extended blade life
4. Make sure to oil between all blades, not just those that are visible when clipping
5. Keep a rag or damp, clean paper towels to wipe the blades with before oiling
6. Oil both sides of the blade and on top of the blades by running it up and down at least three times for proper lubrication and maximum performance
7. Make sure you use a high-quality blade oil that is made for high heat and friction
How Do You Clean Your Clipper Blades?
Cleaning your clipper blades is very important to keep them in top-notch shape. There are many possible ways to clean your clipper blades, but oiling them with the right product can be just as beneficial for your clippers. Clipper blades are sometimes known to come with a cleaning brush, but the blade itself can also be used for this purpose.
You may notice the hair or dried-on fur sticking around your blade after clipping your pet’s hair. To remove these particles on the blade, simply run it back and forth along the side of an old comb. This is an excellent way to remove fur and debris from your blade without chemicals or solvents.
What Oils Are Good to Use on a Clipper Blade?
There are many types of clipper blades out there, and good blade oil for one person may not be the same as a good blade oil for another. Therefore, every clipper brand should come with a packet containing its special oil, or if it doesn’t have oil with it already, you can purchase a packet of the blade oil from your favorite brand.
If no oil is included with the clipper, you can use mineral oil, baby oil, or even olive oil. You can buy large bottles of mineral oil at your local pharmacy store. If you want to know the steps on how to oil clipper blades consider this full blog post.
Can You Use WD-40 to Oil Your Clipper Blades?
WD-40 is a petroleum by-product and will destroy your clippers. In addition, this lubricant can cause the metal surfaces to corrode, leaving you with dull blades that need sharpening regularly. Petroleum can also cause your clippers to overheat and damage the motor. There is one and only one lubricant made specifically for cutting blades: blade oil.
This “grease” type of oil contains mineral oil, which helps prevent rust and corrosion on your metal blades and allows better movement between each side of the clipper blade. In addition, blade oil is not sticky like WD-40 and can be applied to your blades with a clean rag, which will also help prevent any excess from getting on the table or into your dog’s eyes.
Conclusion
When oiling your clipper blades, use a quality blade lubricant. It is essential that the lubricant not contain any silicone or other chemicals because these will ruin the clipper’s performance and cause it to overheat faster.
Be sure to read the instructions on how much of the lube should be used per application this can range from 1/4 teaspoon up to one tablespoon depending on the frequency of use and type of blade being oiled.
For best results, apply new lube every time before using your clippers again. We hope this blog post on how to oil clipper blades has been helpful. If you have any questions or want to know more, then feel free to comment below!


