
How to Organize Resistors
Organizing resistors can be a tricky task. Resistors are often labeled with numbers or letters that correspond to the resistance value. This labeling makes it difficult for people who have never seen this before to know which resistor goes wherein an organized circuit board.
Luckily, there are several ways you can organize resistors based on their tolerance, color codes, or even by how they were made. In this blog post, we are going to show you how to organize resistors. So let’s get started!
5 Benefits of Organizing Resistors:
- Less mess: Resistors can be messy and disorganized! The smallest ones are often the most difficult to keep track of, so it’s best to leave them all in one place where they’ll be safe and will not get lost.
- Same resistors repeatedly used: If you have a misplaced or lost resistor, you can find it by skimming through your organized resistor collection.
- Easy access to resistors: Resistors are often used in projects and experiments, so having them ready is beneficial (and time-saving!).
- Discussing resistors is easier: When talking about resistor usage or collecting with someone else, it’s easy to compare and contrast the amount, color bands and other details.
- No more resistor hunting!: Resistors can often be hard to find when you’re working on a project. Organizing resistors makes them easier to locate, which saves time!
10 Ways on How to Organize Resistors:
1. Find a container:
When you are looking for a container, consider what type of resistor your collection has. Resistors come in different sizes. So just buying any container may not work well depending on the size of your resistors. It is best to find one that can fit all types of resistors well.
2. Group by value:
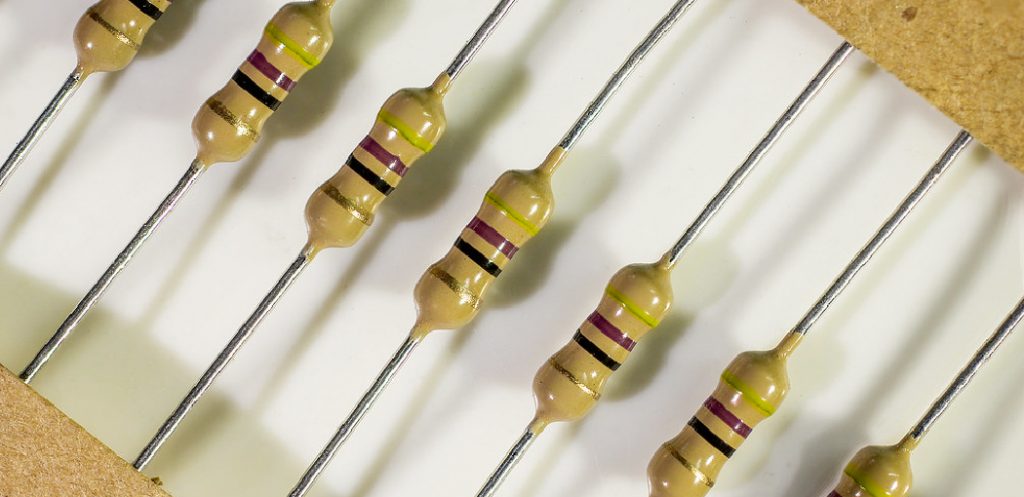
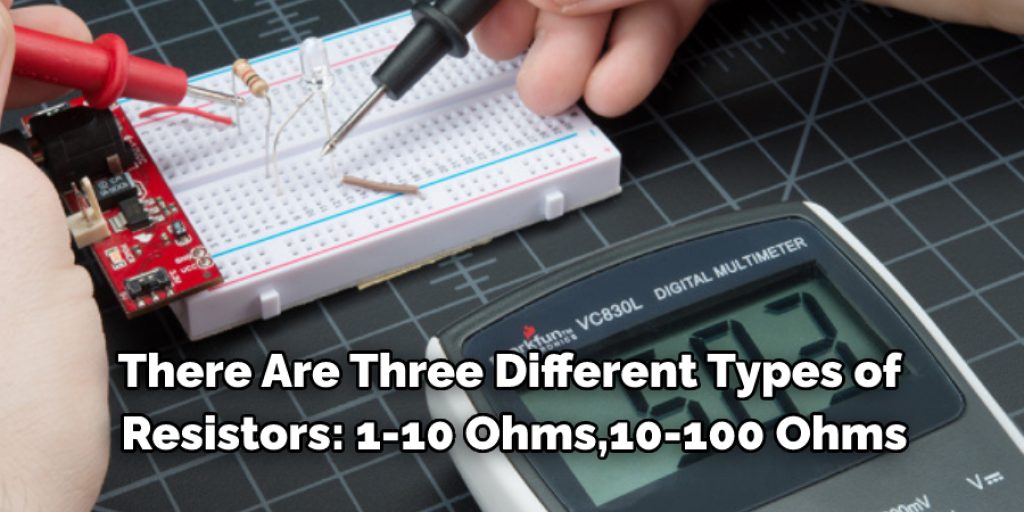
There are three different types of resistors: 1-10 Ohms, 10-100 Ohms, and 100+ Ohms. Once you have decided on what range of values your resistor collection has, it’s time to group them by value. Again, it’s most efficient to store them in ascending order so that you can find the suitable resistor for your circuit more easily. Now that you have your resistors sorted, let’s take a look at how to read the resistor color code. The vast majority of resistors use a four-band color code; the exception being some power resistors, which will use a five-band code.
3. Make a scale:
Creating a resistor value chart is not difficult at all! All you need to do is find the appropriate colored bands to match each range of values and write down the corresponding resistor value on your container or card that has space for this information. If you are storing small resistors in envelopes, it may be better to draw your scale. The first thing you need to do is find the appropriate colored bands to match each range of values. You can find a resistor color code chart online or in many electronics books.
4. Store them vertically:
Don’t try to put them in a box horizontally if they don’t fit! Resistors are small and should be stored vertically so that you can easily take out one at a time or access the resistor you need without too much trouble. Do not use a black marker to label your resistors. The ink from the marker will rub off on your fingers and eventually get in your eyes. Do not put resistors on top of each other, as this can damage the leads.
5. By Color code:
Another way to organize resistors is by color code. Resistors have stripes of different colors to indicate their value in ohms. But keep in mind that the colors will be slightly off when there are ten or more resistors of one color in a single container. You can also organize resistors by size. The smaller the resistor, the higher the precision. So, if you need a very precise resistor, you would want to choose a small one.
6. Mark them:
Don’t forget to mark down their resistance value on the container or envelope. This will save you from that moment when you have to check it for its value, wasting valuable time before your soldering iron gets hot!
7. Use a storage bin:
Many kinds of storage bins are available for purchase online if you can’t find one at your local supermarket. Search for storage boxes that are the appropriate size to house your resistors well. Large jewelry boxes, wine cases and tackle boxes can be good choices. Make sure that your selected storage box has compartments for each size of resistor, so you don’t have to search through a large pile to find the right one.
8. Mark them on your resistor value chart:
Take the time to mark down which color represents which value of resistance before you start transferring your resistors into their new container or envelope so that you won’t get confused.
9. Label each container:
It is a good idea to label each container you have with a marker so that it will be easy to identify which resistor is in which container. This also makes it easier for you to find the right resistor when you need them badly.
10. Test them:
Don’t forget to test the resistors before using them! Then, if there are any duds in your collection, just cut off the defective bit and keep the rest of the resistor as a spare.

Some Tips and Tricks:
- Make sure the board is thin enough to fit in a book spine.
- Cover the board with something opaque, so nothing shows through.
- Make sure all component legs go past one side of the board and are even before you do anything else (this will make it easier to finish).
- If you organize by color and value, number each row so they stay put and don’t get jumbled up when flipping through pages.
- If you organize by type, number the rows, so they stay put and don’t get jumbled up when flipping through pages.
- Make sure your book is labeled with what’s inside! If you wrote it down on paper, keep that paper in there too.
- Store the book somewhere safe where it won’t get messed with or damaged.
Things to Consider When Organizing Resistors:
- The first resistor is the easiest one to organize because no others can be connected into series or parallel.
- Resistor values follow a specific scheme: 1,2,3, and so on.
- Resistors can be organized by value in ascending order: 1k, 2k3, and so on until you reach the size resistors sold in your area [for instance, 1 M(Mega)Ohm would be at the end]. If you have more resistors than your scheme, start over.
- Make sure that your resistors are laid out and organized in a way that makes sense!
- When it comes to resistors, you can use a standard storage method: horizontal or vertical.
- If your resistors are bulky, consider using a resistor book as an organization and safety from damage and shorting/connections to other components.
- To identify the value of a resistor, place it between two probes of a multi-meter and read the value.
- When storing your resistors, keep them away from any sources of heat or moisture.
All Electronics Resistor Polarity
There is something to keep in mind, though: all electronic components have a polarity. This means that positive and negative terminals exist, and current flows through the element from one terminal to the other.
Many resistors display this polarity on their bodies by using color bands or a white arrow pointing at their terminals. Resistors with a white arrow pointing at their terminals have polarity, while resistors with bands of color around them do not.

How to Lay Out Your Resistors?
For the well-known resistors in our lab, we can use a breadboard or perfboard to lay them out. However, if you’re new to the world of electronics and such components, such as resistors, are not on your immediate supply list (if at all), then you certainly will need to obtain some before anything else.
The best way to get a standard resistor is to buy a kit or package of resistors together. This usually includes a variety of sizes and power ratings, so you shouldn’t have any trouble finding what you’re looking for.
How Often Should You Organize Your Resistor?
Organizing your resistor is an important part of electronics maintenance and repair. The frequency at which you should organize your resistor depends on your specific type and how often you use it.
For resistors that are used regularly, it is recommended to organize them once every few months. Suppose you use the resistor occasionally or are not exposed to extreme temperatures or environments; organizing it once a year should suffice. Taking the time to clean and store these components properly can help keep them in good shape for years to come.
Do Resistors Need to Go a Certain Way?
Resistors do not have a top and bottom. No, resistors do not need to go a certain way. You can put them in your circuit however you want with no change in their value or how they work. This is the case for most components such as capacitors, diodes, or LEDs.
Conclusion:
Resistors are an important component of many electronic devices, and knowing how to organize resistors is essential for any electronics engineer. This article has just touched on some of the key points that you should know about resistors to keep your work organized.
We encourage you to learn more by checking out our blog section with more information about resistor organizations. If at any point in time you have questions or need assistance organizing resistors, please get in touch with us!


