
How to Paint Air Force Ones With Acrylic Paint
Paint Air Force Ones is a DIY project that will take your shoes from basic to extraordinary. With these instructions, you’ll be able to paint your pair of sneakers with acrylic paints in no time at all! There are many ways to customize your pair of AirForce Ones using paint or markers. However, the best way is to use acrylic paint because it will not damage the rubber soles.
Acrylic paints can be purchased at most craft stores and come in various colors, so you’ll have no problem finding one that matches your style! This article has step-by-step instructions on how to paint air force ones with acrylic paints, as well as other tips for successful painting projects.
Why Should You Paint Air Force Ones With Acrylic Paint?
Paint your Air Force Ones with acrylic paint for a simple, durable design. Acrylic paint is resistant to chipping and fading, so it’s the perfect choice for footwear. So many other shoes are made of leather or suede that chips easily, not good if you like showing off your creativity. Plus, painting on sneakers is usually less expensive than buying a new pair.
You can paint your Air Force Ones using different colors and techniques to make them unique. No one else will have the same pair of sneakers as yours, mainly if these are limited edition shoes. Air Force Ones and other sneakers look best when you paint on the entire shoe.
What You Will Need
- Black or white paint
- Paper towels or a rag to apply the paint.
- A disposable bowl to mix the paint.
- A brush to apply the paint.
- An angled tip nylon bristle brush for cleaning
Instructions: How to Paint Air Force Ones With Acrylic Paint
Step 1:
Put on gloves and layout newspapers or old sheets to cover your workspace. This will help protect your surfaces from any accidental spills or splatters.
Step 2:
To paint like a professional, you will need to buy some supplies. You will need to purchase several colors of acrylic paint, some thinning agents, and several different-sized paintbrushes. The brushes need to be synthetic, so they don’t shrink when they dry.
Step 3:
Pour out some of the thinning agents into separate cups, and mix them to form the colors you’d like to use. Pick bright colors for this project! Once you’re happy with your palette, put each color into its cup or jar.
Step 4:
Make sure your sneakers are clean and all the laces have been removed. Hold them upside-down and, using a paintbrush, apply 3-4 coats of white primer. Make sure to let each coat dry completely before applying another.
Step 5:
Now comes the fun part! Dip your brush into one of the color mixtures, and paint various designs onto your sneakers. Again, make sure to use contrasting colors (such as black over white) for best results.
Step 6:
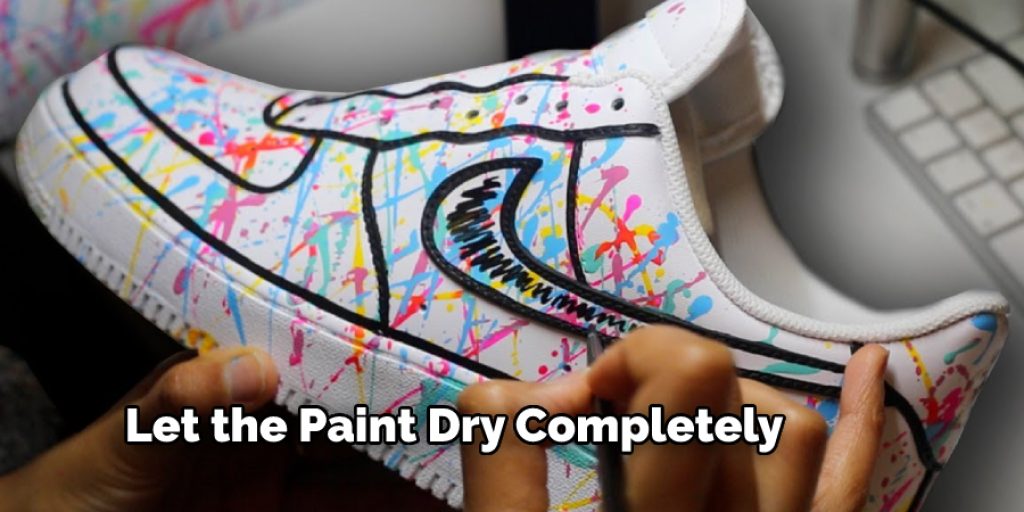
After you’ve finished painting your designs, let the paint dry completely. Pour another coat of white primer onto each shoe to make everything stand out more.
Step 7:
Once all the paint is dry, apply a clear acrylic sealer onto the shoes using small strokes in random directions. This will prevent any color transfer while also keeping them shiny! If the sealer feels too thick, add a little more of the thinning agent until you get the desired consistency.
Step 8:
Enjoy your new sneakers! Just make sure not to wear them in any heavy rain or puddles, as that will cause the paint to run and smear.
Tips and Tricks:
1. Use a drop cloth to make sure to protect the surface underneath.
2. Shake the bottles of paint before use.
3. Be aware that acrylic paints differ from fabric paints. They will not shrink or stretch with heat and can take a long time to dry properly. If you want your Air Force Ones to last more than one season, we would recommend hand washing them and letting them fully dry before wearing them.
4. Acrylic paints are water-soluble, so it’s best to protect any undamaged leather with petroleum jelly like Vaseline over the paintbrush, then press lightly on the surface of each panel, or be very delicate when painting around the perforations in the toe boxes. This is to prevent the paint from seeping through.
5. You can use a toothpick or scissors to scrape up extra paint if you mess up the design on your shoes, so don’t worry too much! It’s just acrylic paint; after all, it can be fixed.
6. You can also use acrylic paint on your shoes. If they are black or made of other solid colors leaving out the white.
Things to Consider:
1. This DIY is for anyone who has purchased Air Force Ones (or what I like to call any shoe that is completely white with a gum sole) and wears them often.
2. If you want to take a can of paint and turn your new shoes into a completely different color, this DIY may not be the best option for you.
3. You need patience!!! Like with anything, it takes time! It will look messy if you try to do too much at once.
4. Planning is always good. If you don’t have a plan, it will turn out horrible! You need to be able to visualize it before doing anything.
5. If you paint them and they look terrible, you can always attempt a 2nd time or try a different way of painting them without damaging the shoe itself.
6. White paint on white shoes is hard to do. There may be some noticeable brush strokes unless you are great at painting.
Frequently Asked Questions:
Q: How to Take Care of Your Painted Sneakers?
A: Wipe your Air Force Ones clean with a damp sponge before you start painting. Use a tiny detail brush to remove dirt from crevices and an eraser to remove scuff marks. If the dye from your painted sneakers rubs off on your clothes or hands, wipe with a dry cloth.
A few coats of clear gloss protectant spray will help keep your paint job looking fresh and clean. Then, refresh the look as needed by touching up scuffs and smudges with an opaque satin acrylic paint in the appropriate color and finish (matte or glossy).
Q: How to Decide What Colors to Use?

A: Use short strokes, instead of long ones, for a better result. Always use two coats of paint until the base coat is fully dry before applying the second layer. If you want to add some glitter, mix it with the paint before applying. Let your imagination fly and have fun while painting them!
Q: How to Prepare Shoes Before Painting?
A: Clean the shoes by removing dirt and dust, then wipe them with a damp cloth. Protect your work surface by covering it with newspapers or plastic sheeting. Next, remove any laces from sneakers since you’ll be painting over them. If the shoes have stitching, cover this area with painter’s tape. Next, use fine-grit sandpaper to rough up the surface. Finally, dust the shoes with a tack cloth or small brush.
Tape off any areas that don’t need paint, such as laces, stitching, and brand logos/labels. Use painter’s tape if necessary, but avoid using Scotch Tape as it’s not as durable as other types of tape. Next, prime the shoes with a white primer, then let them dry. Two coats of white primer are recommended to ensure even coverage. Let the shoes dry for 24 hours before moving on to the next step.
Conclusion:
While it is time-consuming, painting your Air Force One shoes with acrylic paint can be done successfully. With the right supplies and patience, you will have a fantastic new pair of kicks to show off! Also, since acrylic paint is very inexpensive and easy to find in stores, you can be no less than proud of your new shoes.
If you’re looking for a fun project with great results, follow our steps on how to paint air force ones with acrylic paint, and we know that you will be satisfied with the finished product! Now that you understand better painting Air Force Ones with acrylic paints, try it out on your pair! This is a great DIY project for the summer and can be done in just one day.
Elizabeth Davis
Elizabeth is a creative writer and digital editor based in the United States. She has a passion for the arts and crafts, which she developed from a young age. Elizabeth has always loved experimenting with new mediums and sharing her work with others. When she started blogging, she knew that DIYquickly would be the perfect platform to share her tutorials and tips. She's been writing for the blog from the beginning, and her readers love her helpful advice and easy-to-follow instructions. When she's not writing or editing, Elizabeth enjoys spending time with her family and friends.


