
How to Remove Battery From Cordless Drill
If you have a cordless drill, you will need to remove the battery at some point. This is a quick guide on how to remove battery from cordless drill. First, find the release button. It is usually near the base of the drill or on the side. Push the button and hold it while you pull out the battery.
If it doesn’t come out easily, try wiggling it a bit. Be careful not to lose any screws or other small pieces when removing the battery. Once you have removed the battery, put it somewhere safe until you are ready to reattach it. Read on for more information.
Step by Step Process: How to Remove Battery From Cordless Drill
Step 1: Locate the Screws That Hold the Battery.
On the underside of the drill, you will find several screws that hold the battery in place. Remove these screws using a Phillips head screwdriver.
Step 2: Release the Battery.
Once the screws are removed, you can release the battery by pulling it out of the drill. Some batteries are held in place with a clip, so you may need a prying tool to loosen them. Be very careful not to damage the battery or the surrounding wires.
Step 3: Disconnect the Wiring.
There will be two wires connected to the terminals on the battery. Disconnect these by carefully pulling them apart. On some drills, a third wire connects the battery to the drill. If this is the case with your drill, disconnect it as well. Now that the wiring is disconnected, you can remove the battery from the drill.
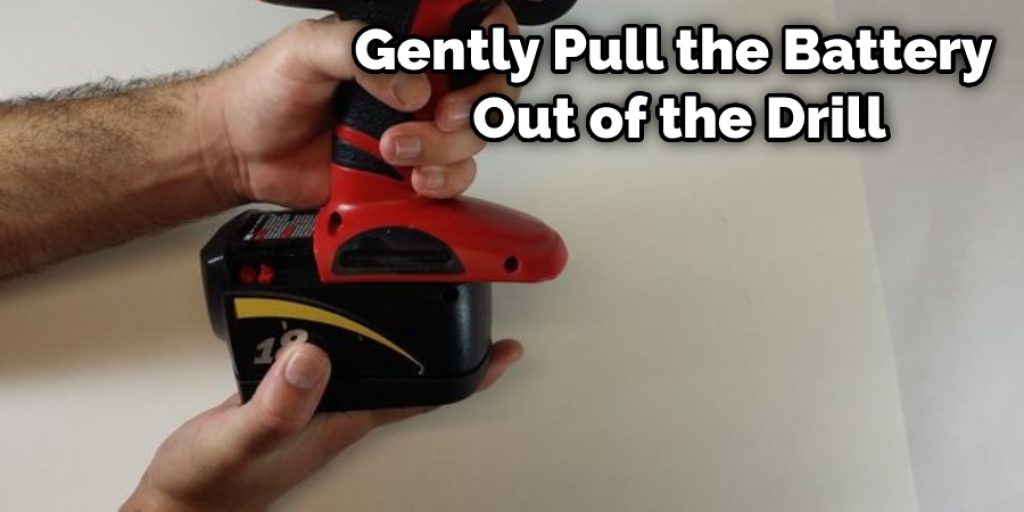
Step 4: Remove the Battery.
Once the screws have been removed, gently pull the battery out of the drill. Be careful not to damage the wiring. If the battery is difficult to remove, try using a screwdriver or a knife to pry it loose. Once the battery is removed, you can store it in a safe place until you are ready to use it again.
When removing the battery from your cordless drill, be careful not to damage the wiring or the battery itself. If you have difficulty removing the battery, try using a screwdriver or a knife to pry it loose. Once the battery is removed, you can store it in a safe place until you are ready to use it again.
Some Helpful Tips and Suggestions
- Before you start, be sure to unplug the drill from the power source.
- If the battery is removable, remove it by gently prying it out of its housing.
- If the battery is not removable, use a screwdriver to remove the screws that hold the battery cover in place.
- Carefully remove any wires or cables attached to the battery.
- Set the battery aside and dispose of it properly.
- Now, you can replace the cover and reattach the wires or cables.
- Plug in the drill and test it to ensure it’s working correctly.
Removing the battery from a cordless drill can be tricky, but it can be done with a little patience and carefulness. First, before you start, be sure to unplug the drill from the power source. Then, if the battery is removable, remove it by gently prying it out of its housing.
Safety Precautions and Advice
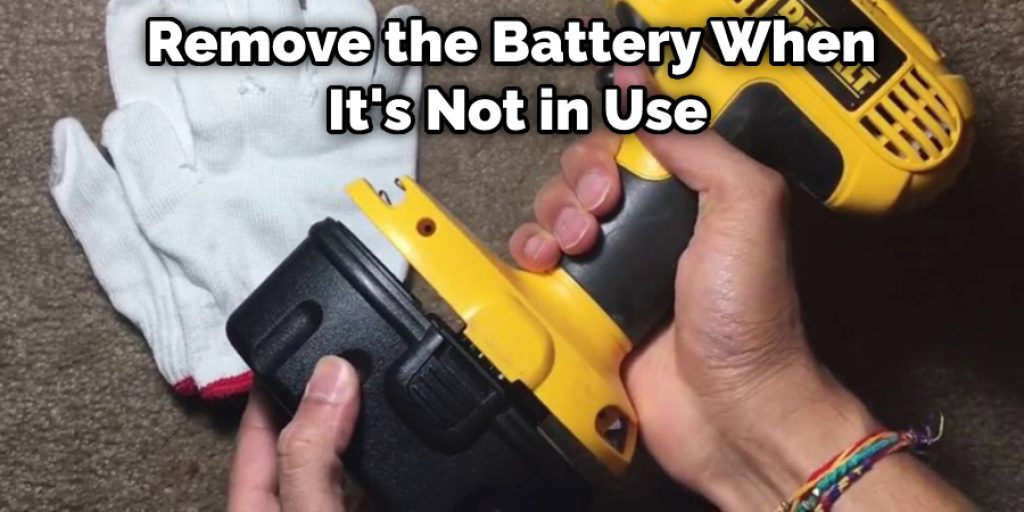
1. Always remove the battery from a cordless drill when not in use. This will help to prevent accidental starts, which could cause injury.
2. Always wear safety goggles when using a cordless drill. Bits can fly out of the drill and hit you, possibly causing injuries.
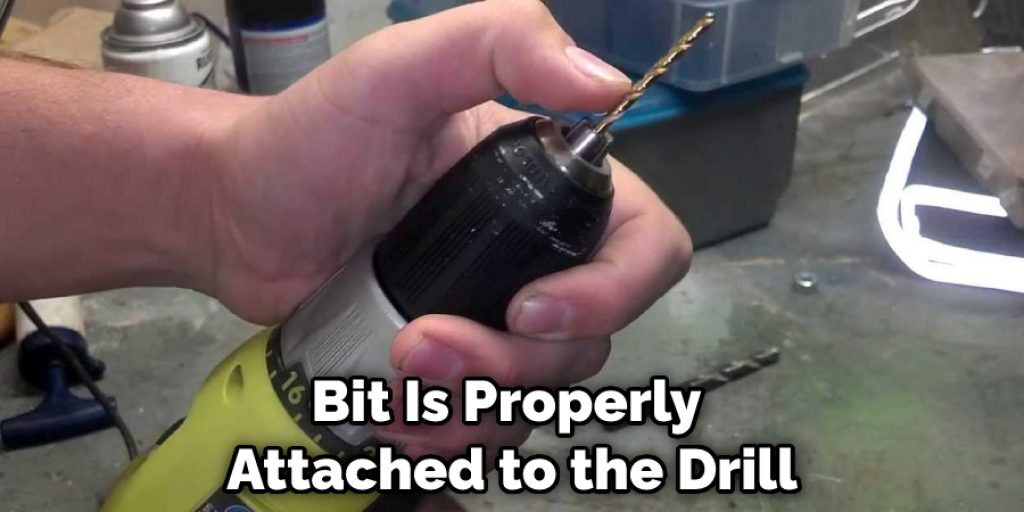
3. Make sure the bit is properly attached to the drill before use. Improperly attached bits can fly out of the drill and cause injuries.
4. Do not overload the drill. Doing so could cause it to malfunction and possibly injure you.
5. Keep the cordless drill clean and free of debris. This will help to prevent accidental starts and keep the drill functioning properly.
6. Be aware of your surroundings when using a cordless drill. Ensure nothing behind or in front of the target could be hit with the drill bit.
7. Always use the correct drill bit for the job. Using the wrong bit could cause the drill to break and injure you.
8. Make sure the battery is fully charged before using the cordless drill. A low battery could cause the drill to malfunction.
When Should You Remove Battery From Cordless Drill
There are a few reasons why you might want to remove the battery from your cordless drill. One reason is if you’re not using the drill for an extended period. This will help to extend the life of the battery.
Another reason is if the drill is acting up or not working properly. You might try removing the battery and putting it back in to see if that fixes the issue. And lastly, you might want to remove the battery for safety reasons. If you’re not using the drill and it’s plugged in, there’s a risk of electrocution. So it’s always a good idea to remove the battery when it’s not in use.
What Happens If You Don’t Remove Damaged Battery For a Long Period
If you don’t remove a damaged battery from your cordless drill, the battery will eventually leak. This can cause damage to the drill, and it could even start a fire. So it’s always important to remove the battery when it’s not in use. And if the battery is damaged, don’t try to fix it yourself. Instead, take the drill to a professional to have the battery replaced.
Conclusion
Battery removal is a straightforward process that most people can complete in just a few minutes. The first step is to remove the screws from the drill housing. There are usually two or three screws located on the bottom of the drill. Once these are removed, you can flip the drill over and open it up like a book. The battery will be located in the upper portion of the drill, and it will be held in place by two metal clips.
You need to squeeze these clips together and pull the battery out of its compartment to release the battery. Be careful not to touch any of the electrical contacts on either end of the battery while still connected to the drill. We hope this blog post on how to remove battery from cordless drill has been helpful. If you have any questions or want to know more, then feel free to comment below!


