
How to Remove Plastic Lug Nut Covers
Have you ever been driving down the road and noticed that your lug nut covers have fallen off? Maybe it happened when you went over a pothole, or perhaps another driver kicked them off as they passed. The good news is that this problem can easily be fixed! Read on to learn how to remove plastic lug nut covers if they come loose from your car.
The first step in removing plastic lug nut covers is ensuring the wheels are clean and dry. If there’s dirt or grease on them, it will be much harder for the new cover to stay put, so wipe them down with an old rag until they’re shiny again. Read on to know more!
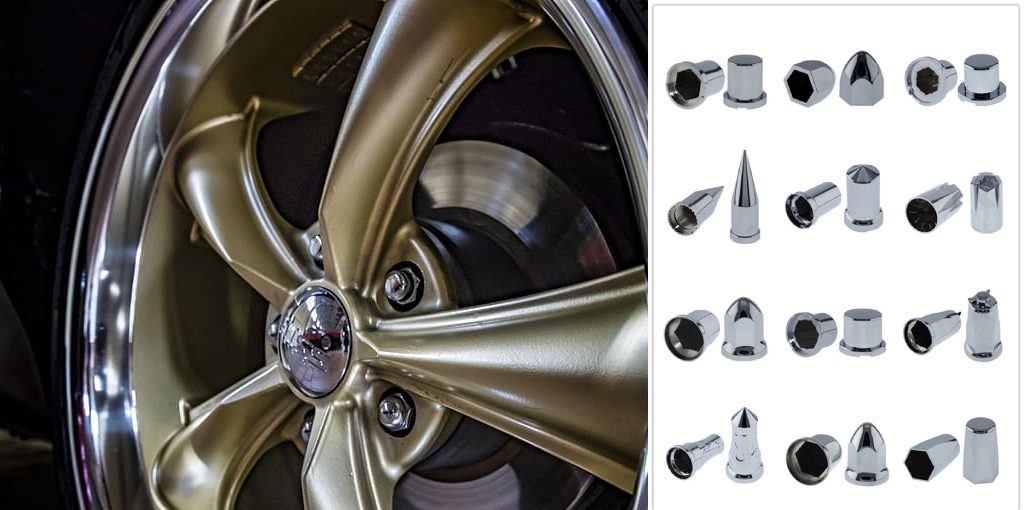
How Does a Plastic Lug Nut Cover Work?
The lug nuts on your wheel attach it to your car’s axle. You tighten the lug nuts to their appropriate specification, which pulls the wheel down onto the axle and secures it in place. However, weathering and wear can damage your car’s wheels and tires over time. Eventually, your plastic lug nut covers will break or crack under this pressure and need replacement.
A plastic lug nut cover is a thin piece of plastic that fits over and protects your lug nuts. Because they are light, lug nut covers usually feature a hollow center through which you drive the wheel’s bolts to attach it. Often, lug nut covers are made from the same plastic used to make milk jugs. This means they can easily split under pressure but can also easily cut yourself with a sharp pair of scissors or tin snips.
10 Reasons Why You Should Remove Plastic Lug Nut Covers:
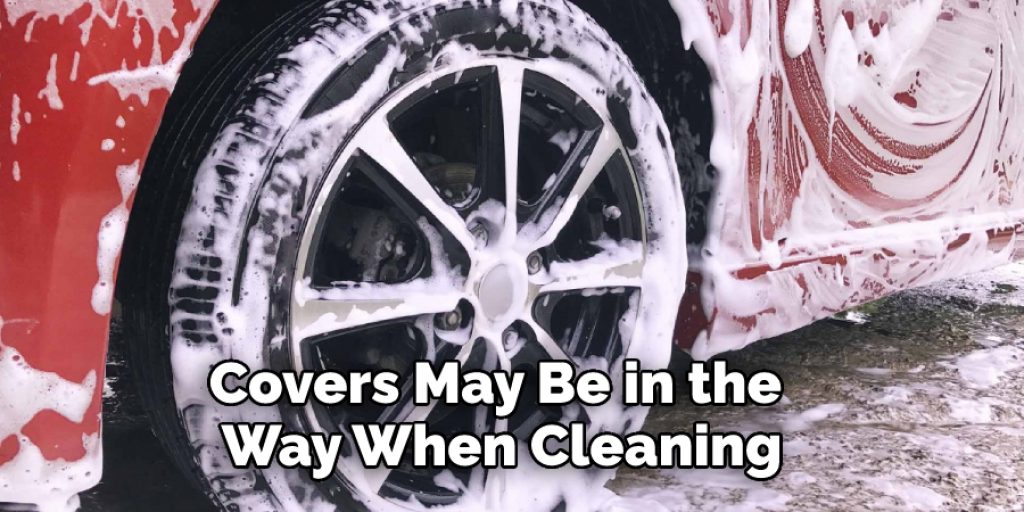
- You can clean the face of your wheel
- You can see which lug nuts are not tight enough for a “tug test.”
- You can ensure that your lugs are secure with an accurate torque wrench
- If you have upgraded/changed wheels, they may not fit over the covers perfectly and will need to be removed before installation.
- You can get more accurate torque readings with a lug nut socket than with the included lug key.
- Your wheels will look cleaner without the lugs cluttered by covers.
- Covers may be in the way when cleaning or polishing your rims/wheels.
- If you have a flat tire and the lug nut is too tight to break free with your fingers, removing the cover may make it easier to remove.
- You can keep them as a backup if one of your lugs does not tighten properly (threads strip/strip out, etc.) and needs replacing.
- They will be easier to see if they fall off, so you can avoid getting a flat tire!
12 Ways on How to Remove Plastic Lug Nut Covers:
1. Hot Water:
Apply hot water to the plastic lug nut cover and let it soak in for a few minutes. You can do this by either using heat from a lighter or boiling the water on the stove.
2. Freezing:
Apply cold water to the plastic lug nut cover and let it freeze entirely before attempting to remove the plastic lug nut cover.
3. Chemical:
Apply a chemical to the plastic lug nut cover and let it soak in for a few minutes before attempting the removal process.
4. Sandpaper:
Use sandpaper or a wire brush on the plastic lug nut cover until you have enough of a grip on the cover to be able to remove it via pulling.
5. Pry Bar:
Use a pry bar to bend the plastic lug nut cover until it snaps in two, making removing the cover easy. Be careful not to scratch your wheels.
6. Hammer and Nail Punch:
Hammer a nail punch into one of the holes on top of the plastic lug nut cover and hammer it in deeper and deeper until enough of it is beneath the cover to give you something to grip with pliers.
7. Hacksaw:
Use a hacksaw to cut off as much plastic lug nut cover as possible before trying other removal methods, such as pulling or heating.
8. Heat Gun:
Heat the plastic lug nut, cover it up with a heat gun, and then try to pull it off.
9. Tire Iron:
Pry the edges of the plastic lug nut cover with a tire iron until you have enough of a grip on it to be able to pull it off. Be careful not to scratch your wheels.
10. WD-40 or Spray Degreaser:
Spray the plastic lug nut cover with WD-40 or another spray degreaser and let it soak in for a while before trying to remove it.
11. Soap and Water:
Apply a thick mixture of soap and water to the plastic lug nut cover and let it soak in for a while before trying to remove it.
12. Pickle or Meat Tenderizer:
Spread a layer of pickle or meat tenderizer on the plastic lug nut cover and let it sit for a few hours before trying to remove it.
You Can Check It Out to Torque a Nut Without a Socket
Some Tips and Suggestions:
1. When using power tools, it is advisable to wear safety goggles and gloves.
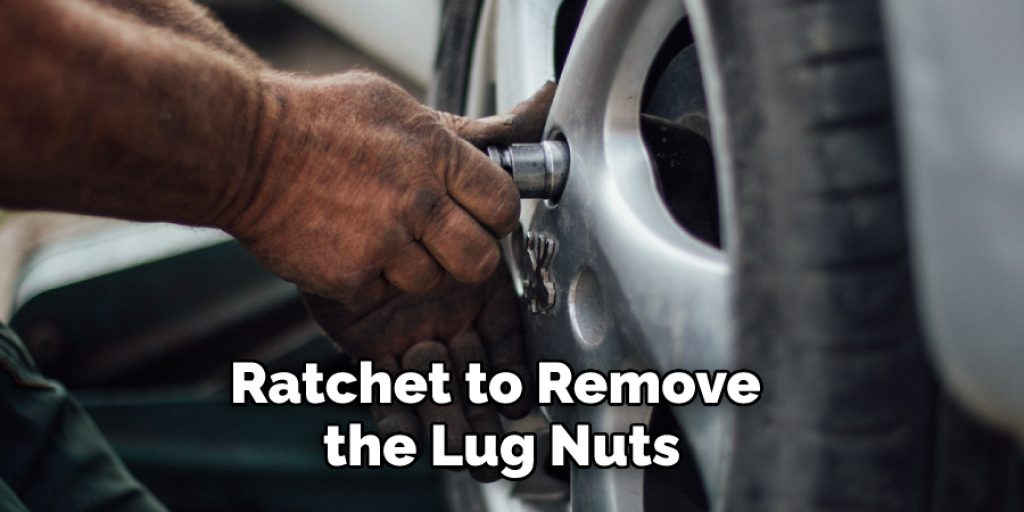
2. Use a drill with a cylindrical attachment (available at crafts stores), or you can use an 8mm socket and ratchet to remove the lug nuts.
3. A hammer and a chisel (or screwdriver) will come in handy when removing any stubborn plastic cover.
4. A measuring tape or ruler can be used to check whether the plastic covers fully cover your lug nuts.
5. Rubber gloves are recommended for this procedure since you’ll be working with power tools. It’ll protect your hands from accidents and chemicals.
6. Wear safety goggles or glasses to protect your eyes.
7. Be careful when using power tools. If you’re unsure how to use something, ask an adult for help. For example, if you’re using a screwdriver or chisel, make sure it’s sharp, and be mindful of the direction in which you are hitting them with it.
What Is a Capped Lug Nut?
A capped lug nut is a chrome or aluminum cover. They are usually painted to match the car’s color. Some vehicles have a colored strip that lights up when a turn signal is active on that side of the vehicle. Capped lug nuts are a type of aftermarket accessory. They look great, but they make it impossible to remove the lug nuts with a standard lug wrench.
There is a unique key that comes with most capped lug nut sets. You can use them one-handed because you do not need to hold the lug wrench in place while you turn the key. However, if you do not have the lug wrench in place, you will not get torque readings for your wheel lug nuts.
Conclusion:
By following the steps, you should be able to remove plastic lug nut covers with ease. Of course, you must wear gloves and safety goggles to avoid any potential accidents or injuries during this process. If there are still stubborn lugs that refuse to come off after using your preferred method, go ahead and drill them out. That way, the metal will not rust away over time if it is left exposed for too long without a protective cover of some kind.
We hope this article has helped provide insight into how to remove plastic lug nut covers from around your vehicle’s wheel nuts so they can no longer give you problems! Also, let us know in the comments below what other tips you have found helpful when removing lug nut covers!
Louis Wein
Louis has always been fascinated by cars. He loves the way they look, the sound of the engine, and how they make him feel when he's driving. He is always keen to learn more about different mechanics of cars and how the engine contributes to other aspects of the car. As an automotive technician with over 10 years of experience, he knew how they worked and loved taking them apart to see how they went back together. He was especially interested in the mechanics of combustion engines and loved finding ways to make them more efficient. He loves to work on cars and help people keep their vehicles running smoothly. As a senior editor, he enjoys contributing to Diy quickly because it allows him to share his knowledge and expertise with others.


