
How to Remove Pop-Up Sink Plug
Introduction:
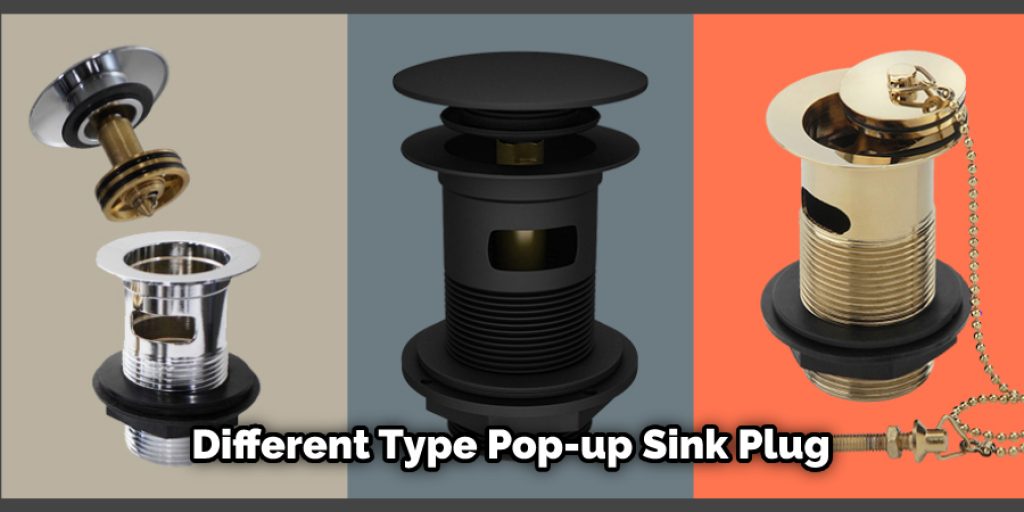
The pop-up sink plug is a component of a bathroom sink. It is a cylindrical shape that sits on the top of the drain and covers it. Sink plugs are usually made from rubber or metal, though some may be entirely plastic. They control how water flows into the sink, preventing overflows. When pulled up, they allow water to run freely down the drain pipe.
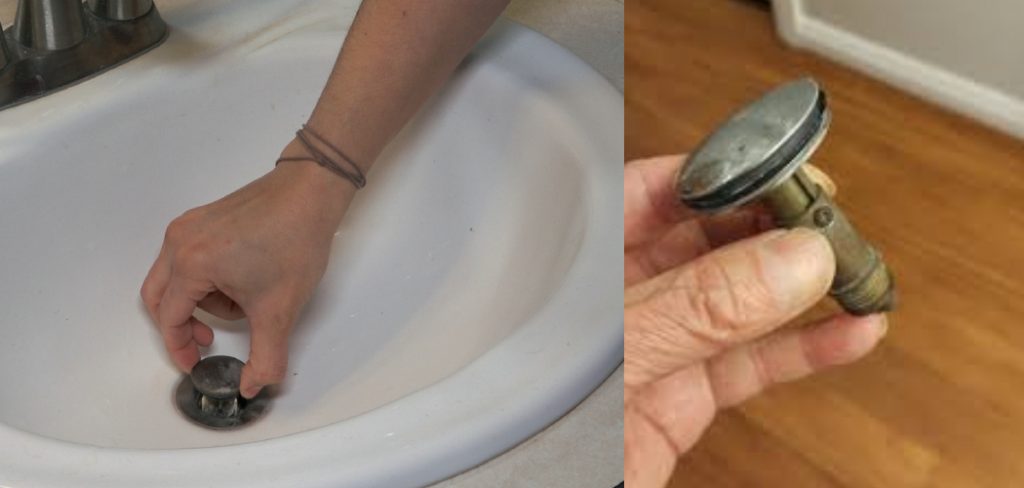
In most cases, you will find them in sinks where there isn’t any drainage hardware installed yet. For example, recently purchased cast iron tubs often lack these components initially; pop-up plugs fill this need until more permanent solutions can be found and implemented within your bathroom’s design scheme. In this article, I will discuss how to remove pop-up sink plug. So let’s get started.
A Detailed Stepwise Guide on How to Remove Pop-Up Sink Plug:
The process of removing the pop-up sink plug is straightforward; however, if you are new to it, then there can be a possibility that you might end up making a mess and damage the sink basin. To prevent such an eventuality, we have come up with precise steps to remove the pop-up sink plug without any hassle. If in case, you are looking for quick fixes or ideas which can make your kitchen look well equipped, then here is what you should check out online (at Kitchen Ideas UK ):
1) The first thing which needs to be done is to make sure that you turn off the water supply at the tap. This will ensure that there won’t be any water overflowing when you open up the drain.
2) The next thing you need to do is disconnect the hoses connected to the drainage pipe. These hoses will be at the back of your handbasin, and they can easily be removed by opening up a nut.
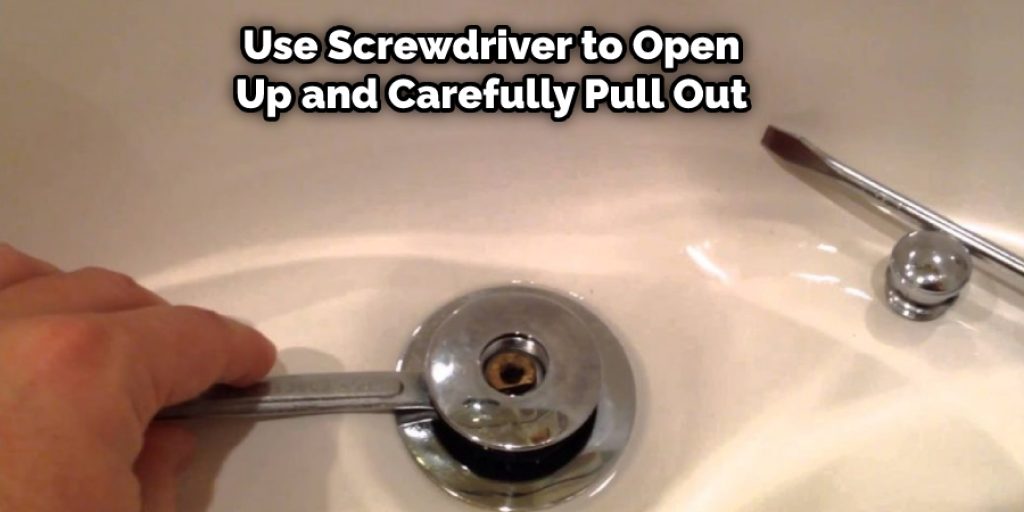
3) Now unscrew the screws at the bottom of the plug hole cover. You will find these screws attached to a small metal or plastic plate at the bottom of your basin. Use a screwdriver to open them up and carefully pull out all these plates as they could break if not handled properly and cautiously.
4) Once you have successfully pulled out this plate, there might be some water coming out from it; hence, wipe away all that water quickly and make sure that no water goes inside the plughole.
5) Now, you need to get hold of your Allen key and use it to remove all the screws present on the top of the pop-up drain assembly. After this, slowly pull out all these components; however, do this cautiously so that nothing gets broken or falls apart into your sink basin.
6) Now, look under the sink’s basins again and carefully lift one side of the rubber seal which is present there (towards the wall). Use a screwdriver for doing this part correctly.
7) Once you have entirely removed one-half of the rubber seal from its place, you will be able to see three more metal plates on the bottom side under the sink. These plates hold the plug and will only come out when you remove screws under them. At this stage, you need to handle everything carefully so that no damage is done to any of these parts or metal plates.
8) Now it’s time to reassemble all your removed components back into their original place; hence, make sure that every element goes at its respective position where you have found it in step number 6.
9) With this last step, you are all good to go ahead and turn on your water tap again. Do not forget to check whether all your working components are correctly connected or not before turning on the water supply completely.
Precautions While Removing Pop-Up Sink Plug:
1. Before loosening the pop-up drain stopper, turn off the water supply to your sink by closing the shutoff valves under the sink.
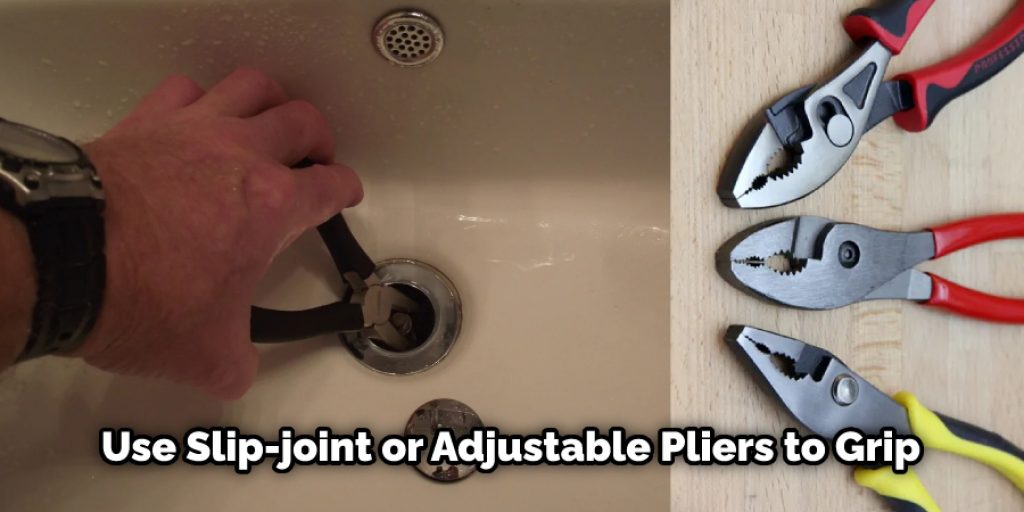
2. Use slip-joint or adjustable pliers to grip and hold the nut of the stopper’s arm at its end. Do not use a pipe wrench for this job because it can damage the nut if not carefully handled. A good choice is an 8-in long piece of 1/4-in Allen hex key inserted in an electric drill with 6 – 12 volts of power to spin it fast enough for easy removal.
If you don’t have one available, make sure that you hold tight enough on the metal piece not to let it slip, removing the screw with another wrench or pliers.
3. Pull the pop-up drain stopper to remove it by hand or with a puller or yanker if necessary, but be careful not to damage the sink’s drain hole when doing so. The simple metal wire type is easily removed, while plastic ones are more difficult because they are usually glued in place for better sealing.
4. When you have pulled out the old plug, don’t touch its chamber containing water that can come out suddenly when releasing its seal under pressure taken during the last flush of the commode above it through the waste pipe connection hidden in your sink, which could cause injury if not taking precautions against it especially near children playing nearby who will love to play with running water even though it’s not safe to do so.
5. Be careful to dry the inside of your sink entirely before replacing the plug seat cover because a minute amount of water left there can cause a ring around your new drain plug to form again in a short time if not immediately dried and sealed afterward.
Apply glue on its bottom first, then replace it by hand after inserting the hinge bolts to make sure it’s seated firmly enough not moving when bolted them tightly into place, as well as making sure that you’ve correctly aligned its slots over those of the top chamber before doing so as explained next.
6. When done, rinse all parts with plenty of clean water from each side both inside and outside until water comes out clean for at least two flushes, then dry them well with a clean cloth to prevent water stains inside or outside your new drain plug.
7. If you have a plastic pop-up plug stopper that was glued in place, it is possible that the glue used seals stronger than the sink’s hole allowing no way for it to be pulled out or pushed in any deeper after seating correctly.
The best alternative in this case, if disassembling the drain assembly still won’t work, is to cut out a small section of its top chamber with a sharp knife so you can reach inside and pull on its bottom lip while pushing up from below until it comes loose and falls by itself once lifted high enough above flush level. Do not push down too hard on the upper part of the plug when doing so, or your sink could become damaged instead.
8. After removing its old stopper, insert a new one if needed by hand after applying a thin coat of rubber-based glue on its bottom before putting it back inside from underneath and screwing up tightly to ensure that it has sealed correctly after flushing clean for two times both inside and outside to remove any excess glue.
9. If your drain plug does not seal entirely, even with a new rubber ring in place, you can add a thick layer of plumber’s putty around the top side of its lower rim to create a better seal by pressing it into place firmly enough while cleaning off any excess later on for at least an hour before sitting on the commode to fix the new pop-up stopper in place, and allowing it to dry for at least another hour before using again.
Conclusion:
I hope you have obtained a clear conception of how to remove pop-up sink plug. Ensure all the precautions are correct. Thank you and have a nice day!
Angela Ervin
Angela is the executive editor of DIY quickly. She began her career as an interior designer before applying her strategic and creative passion to lifestyle and home. She has close to 15 years of experience in creative writing and online content strategy for housekeeping, home decorations as well as other niche efforts. She loves her job and has the privilege of working with an extraordinary team. She lives with her husband, two sons, and daughter in Petersburg. When she's not busy working she spent time with her family.


