How to Replace Ductwork in Existing Wall
Are you looking to improve the efficiency of your home’s heating and cooling system? Installing new ductwork in existing walls can make a major difference. However, this is not an easy task; many contractors do not even attempt it due to the difficulty of the job. If you are willing to put in some effort and time to learn how to do it yourself, then replacing ductwork in existing walls could be a great DIY project that will save energy costs for years. In this blog post, we will provide step-by-step instructions on how to replace ductwork in existing wall.
If you’re a homeowner looking for an inexpensive way to improve your home’s ventilation and energy efficiency, then replacing the ductwork in existing walls is worth considering. Not only will it save electricity and reduce your heating and cooling bills, but it also can provide enhanced air quality that benefits everyone in the house. This post will explain what makes this project so beneficial, show you how to tackle DIY-style replacement of wall-based ductwork, and offer tips on selecting proper materials to ensure successful installation.
Why May You Want to Replace Ductwork in Existing Wall?
1. To Increase the Efficiency and Effectiveness of Your HVAC System
One of the main reasons to replace ductwork in an existing wall is to improve the efficiency and effectiveness of your HVAC system. Over time, ducts can become worn out or damaged, leading to a decrease in air flow, which reduces the overall performance of the system. Replacing old ducts with new ones can help ensure that your heating and cooling systems are running optimally.
2. To Update the Look of Your Home
Another reason for replacing ductwork in an existing wall is to update the look of your home. Old ducts can be unsightly and detract from the overall aesthetic of your home, so replacing them with newer, more modern materials (metal or plastic) can help improve the appearance of your home.
3. To Reduce Energy Wastage
Replacing ductwork in an existing wall is also a great way to reduce energy wastage and ensure that you’re not wasting money on costly electric bills. Newer materials are more energy-efficient, so replacing older, inefficient ducts with newer ones can help you save money in the long run.
How to Replace Ductwork in Existing Wall in 6 Easy Steps
Now that we’ve gone over some of the reasons why you may want to replace ductwork in an existing wall, let’s take a look at how to actually do it. The process will vary depending on what type of ducts you have and how they are installed, but here are some general steps to follow:
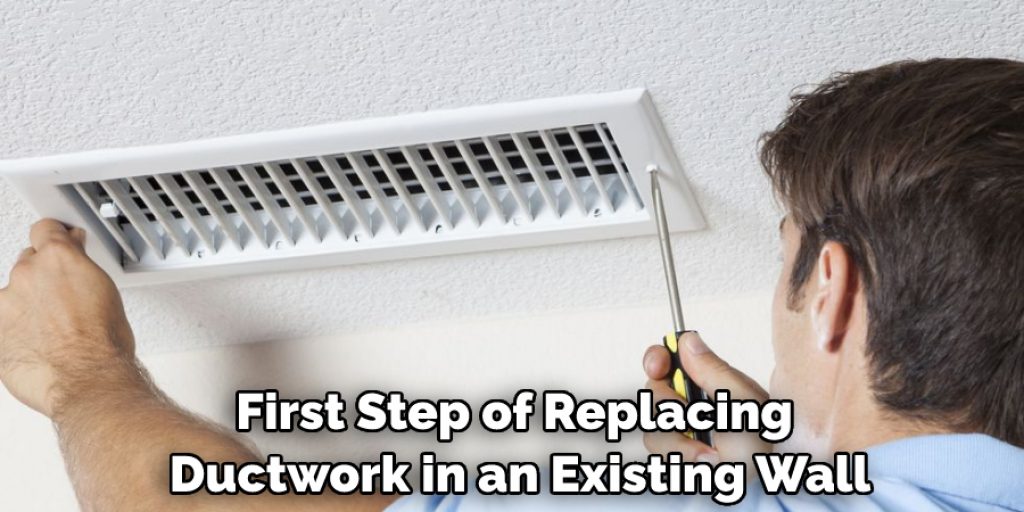
Step 1: Remove the Old Ductwork
The first step of replacing ductwork in an existing wall is to remove the old ones. Depending on how they are installed, you may need to use a hammer and chisel or other tools to remove them safely. Make sure to wear appropriate safety gear like gloves and face-protection when handling old screws, nails, or metal pieces.
Step 2: Clean the Duct Areas
Once you have removed all of the old ducts from the wall, it’s time to clean the areas where they were attached. Use a vacuum cleaner or shop vac to get rid of any dust, dirt, or debris that may have accumulated in the wall cavities. Also you have to make sure that there are no nails or screws left behind from the old ducts.
Step 3: Measure and Cut New Ducts
Now it’s time to measure and cut the new ducts. Be sure to measure carefully, as incorrect measurements can lead to air leakage or other problems in your HVAC system. Once you have the correct measurements, you can cut the new ducts to fit.
Step 4: Install the New Ductwork
Once you have your new duct pieces cut to size, it’s time to install them in the wall. First, secure them with screws or nails into place then seal any gaps between the duct and the wall with mastic or duct tape.
Step 5: Test the New Ductwork
Once you have your new ducts installed, it’s important to test them for proper air flow and temperature regulation. Check your HVAC system to make sure that the airflow is evenly distributed throughout the house and that there are no leaks in the ducts.
Step 6: Replace Air Filters and Enjoy
The final step is to replace the air filters in your system, if necessary. This will help keep your air clean and free of contaminants. Once everything is installed and checked, you’re ready to enjoy the benefits of having new, efficient ductwork in your home.
By following these steps, you can replace ductwork in an existing wall without too much difficulty. It’s important to remember that this process will vary depending on the type of ducts you have and how they are installed, so it is best to consult a professional if you have any questions or concerns.

Some Additional Tips to Replace Ductwork in Existing Wall
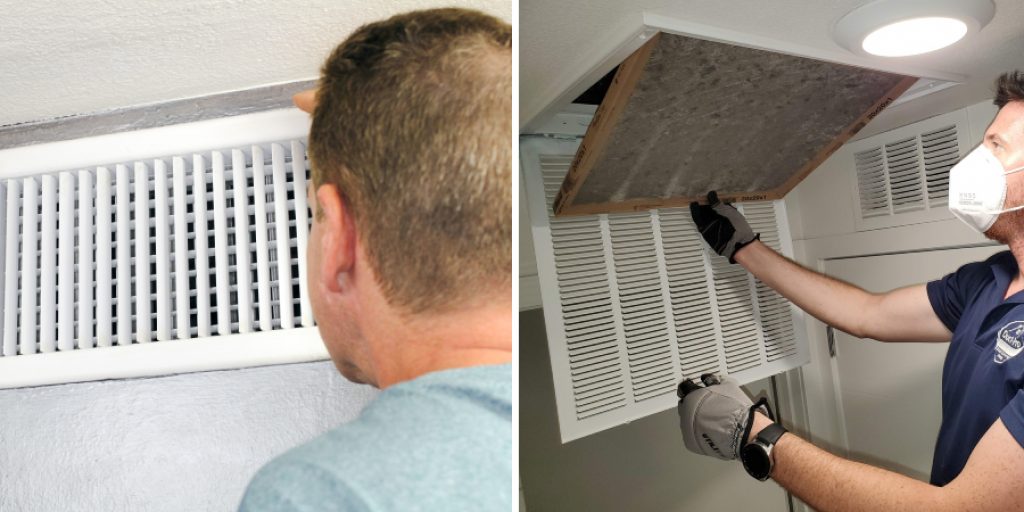
1. Do Not Forget To Wear Protective Gear
This is very important as during the process of replacing ductwork in existing walls, you may come in contact with hazardous materials like fiberglass or asbestos. To protect yourself from any harm, it is best to wear a face mask, gloves, and safety goggles.
2. Make Sure The Room Is Well Ventilated
The room needs to be adequately ventilated to provide a safe working environment. To do this, open windows and doors in the room before you begin your work. This will also help to keep dust out of the air and make the job easier.
3. Do Not Forget To Turn Off The Power
Before you start working on the ductwork in existing walls, make sure that all the electrical power to the area is turned off. This will ensure your safety and also prevent any damage to the wiring or appliances.
4. Have A Partner With You To Help
Replacing ductwork in existing walls can be difficult and it is recommended to have someone assist you while doing the job. This will make the process much easier, safer, and quicker.
5. Use The Right Tools
Having the right tools can mean the difference between success and failure when trying to replace ductwork in existing walls. Make sure that you have a good set of screwdrivers, a hacksaw, pliers, and other tools that can help you in getting the job done properly.

Frequently Asked Questions
What Precautions Should I Take When Replacing Ductwork in an Existing Wall?
When replacing ductwork in an existing wall, there are several precautions that should be taken to ensure the safety and efficiency of the installation. First, it’s important to make sure that your equipment is up-to-date and compatible with the new ducting system. Second, be sure to wear protective gear such as gloves and safety glasses when handling the ducting material.
Third, always make sure you understand the layout of the existing wall before proceeding with any work. Finally, be sure that all necessary permits have been obtained before beginning your project.
What Tools Will I Need When Replacing Ductwork in an Existing Wall?
When replacing ductwork in an existing wall, you will need a variety of tools to complete the job. This includes basic hand tools such as a screwdriver, pliers, and wire cutters. More specialized tools may also be required, depending on the extent of the project. These can include items like drills, saws, and a reciprocating saw. Additionally, safety equipment such as gloves, goggles, and dust masks should also be available.
What Are the Steps to Replacing Ductwork in an Existing Wall?
Replacing ductwork in an existing wall is no small project. The process typically includes several steps that must be completed in order. First, the existing wall must be inspected to ensure it is safe to proceed with the work. Next, old ductwork should be removed and any necessary repairs completed. Finally, new ducting material must be installed according to local codes and regulations.

Conclusion
Replacing ductwork in existing walls presents homeowners with a unique challenge as it requires diligent planning and precise execution. It is critical to be aware of the complexities associated with this task before getting started, but by following the steps outlined in this blog post, you will have taken a major step toward an efficient home heating system. As tedious as it may seem, taking the time to replace old or damaged ductwork is worth it for the long-term benefits that come with keeping your home warm and comfortable.
Now you know how to replace ductwork in existing wall! Remember to always be aware of building codes for safety purposes, partner up with a contractor if need be to ensure everything is handled properly, and look after any disclosed issues along the way – all of these factors will help make this project successful. With patience and some elbow grease, replacing your ductwork can prove to be an easy job!