How to Sand Hardwood Floors With Orbital Sander
Are you ready to upgrade your hardwood floors but hesitant about tackling the project yourself? It can be intimidating, but with the right tools and instructions, sanding your hardwood floor is a job that any DIY enthusiast can accomplish! Sanding will give your floors a fresh look while also providing protection and longevity.
In this article, we’ll provide in-depth guidance on how to sand hardwood floors with orbital sander. We’ll explain the process step-by-step from start to finish so that you can get started without feeling overwhelmed. From gathering supplies to refinishing the final product, you’ll be equipped with everything needed for success on this exciting home improvement project.
What Tools and Supplies You Will Need?
The first step when prepping to sand hardwood floors with an orbital sander is to gather the necessary supplies. Here’s a list of what you need:
- Orbital Sander
- Safety Goggles and Mask
- Sandpaper (in varying grits)
- Vacuum Cleaner with Hose Attachment
- Putty Knife or Scraper
- Dust Mop
- Stain (optional)
Step-by-Step Guide on How to Sand Hardwood Floors With Orbital Sander
Step 1: Preparing the Floor for Sanding
Before you begin sanding the hardwood floors, it’s important to prepare the space so that the job runs smoothly. Start by removing all furniture and rugs from the room and any pictures or wall hangings.
Make sure to cover any vents or openings with plastic sheeting so that no dust gets into other parts of the house. Next, properly clean the floor. Vacuum it thoroughly and use a putty knife or scraper to remove any debris or old glue from the surface. This will ensure that your sander has an even surface to work with and will prevent any unexpected bumps or dips.
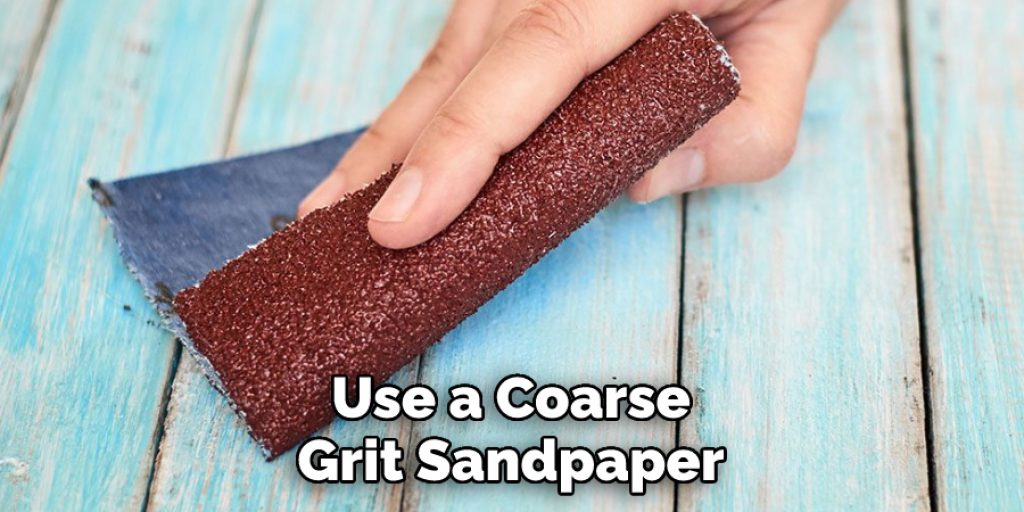
Step 2: Select the Right Sandpaper Grit
The type of sandpaper you use is crucial for achieving a smooth, polished finish. An orbital sander typically requires two types of sandpaper grits – coarse and fine. For the initial pass, use a coarse grit sandpaper with 40 to 60 grit. This will remove any large imperfections and prepare the surface for further refinement. Once you’ve completed the first pass, switch to a finer grit sandpaper (80-100) for a more polished look.
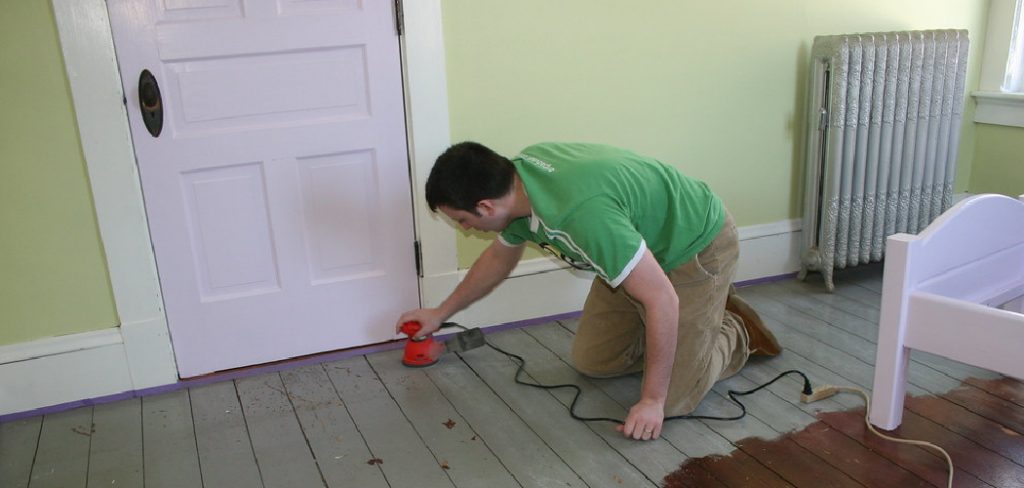
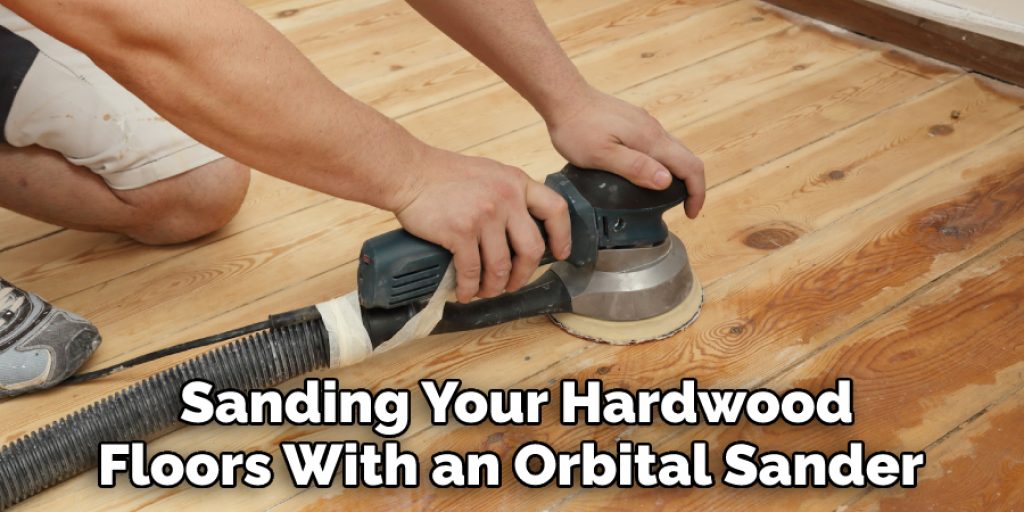
Step 3: Start Sanding
With your supplies gathered, the floor cleaned, and sandpaper selected, it’s time to start sanding. Begin in the corner of the room, slowly moving the sander in small circles along the wood grain. Ensure you keep consistent pressure on the sander and never stay in one spot for too long. Continue this process until you’ve covered the entire room, then vacuum all the dust off the floor.
Step 4: Refinish and Stain
Once you’ve finished sanding, you may choose to stain your hardwood floors for added protection and a unique look. Many types of wood stains are available on the market, so be sure to select one that matches your desired style. Apply the stain according to the instructions on the container and allow it to dry before proceeding with further steps.
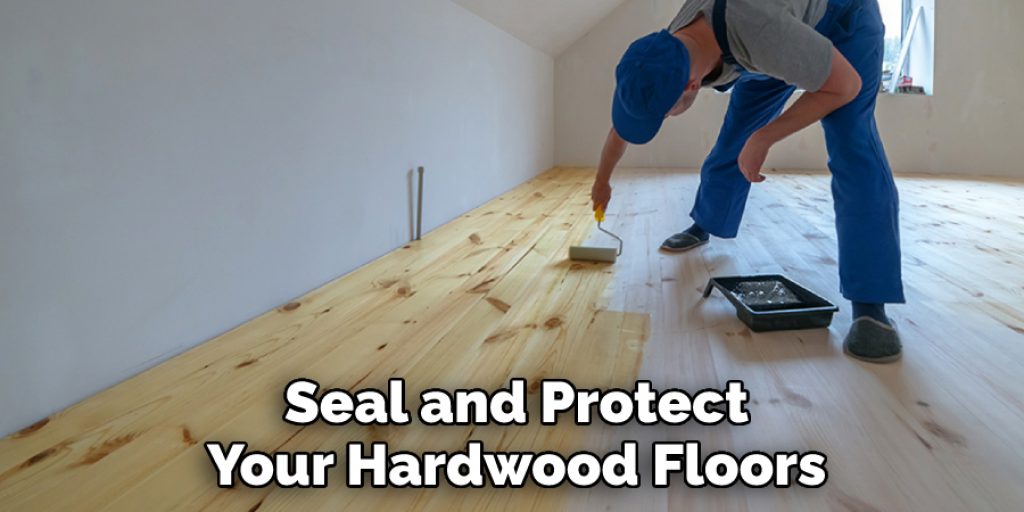
Step 5: Seal and Protect
The final step in the process is to seal and protect your hardwood floors. This will prevent dirt, dust, and other debris from damaging the surface of your freshly sanded floors. There are many types of sealants available that are designed to provide maximum protection for hardwood floors. Once you’ve selected the best product for your needs, apply it according to the instructions on the container and allow it to dry completely.
And that’s all there is to it! These steps will help you successfully sand hardwood floors with an orbital sander.
6 Benefits of Using Orbital Sanders
There are many advantages to using an orbital sander for sanding hardwood floors. Here are some of the top benefits:
1. Easy to Use
Orbital sanders make it easy for novice DIYers to achieve professional-level results when refinishing their floors. In addition, it helps eliminate the need for professional help to achieve a smooth finish.
2. Time Savings
Since they can cover large areas quickly, orbital sanders help to speed up the refinishing process. You can complete a floor refinishing project using orbital sanders in less time than other methods.
3. Versatility
Orbital sanders come with several different grits to achieve both coarse and fine finishes, giving you maximum control over the end result. So, no matter how you envision your Hardwood floors, you’ll be able to achieve it with an orbital sander.
4. Cost Savings
Orbital sanders are much more cost-effective than hiring a professional to do the job for you. Plus, buying the necessary supplies will pay for itself in the long run. You can use the same sandpaper and sander for multiple refinishing projects.
5. Safety
Orbital sanders are designed to reduce vibration, making them much easier and safer to handle than other power tools. This also helps to minimize fatigue while you work. It will make the job much more enjoyable.
6. Professional Results
You can achieve professional-level results with minimal effort and cost with an orbital sander. You’ll be able to restore your hardwood floors to their original beauty without the need for a pro!
Safety and Precautions You Should Consider Before Using an Orbital Sander
While orbital sanders are generally safe to use, there are a few safety precautions you should take before getting started. Here are some tips to keep in mind when using an orbital sander:
1. Wear Proper Safety Gear
Always wear protective eyewear, masks, and gloves to protect yourself from dust particles. It’s also important to wear a dust mask when working in poor ventilation. Keep in mind that dust can contain allergens, so taking the necessary precautions is always important.

2. Read and Follow Instructions
Before using an orbital sander, read through the instructions carefully. Make sure you understand all of the safety guidelines and how to properly operate your tool before starting a project. This is necessary to ensure your safety and get the best results.
3. Work in Well-Ventilated Areas
When sanding hardwood floors, it’s important to work in well-ventilated areas. This will help reduce the number of dust particles in the air and make the job much easier. Make sure you open windows and doors to provide enough fresh air.
4. Use the Right Grit
Depending on the type of hardwood floor you’re refinishing, make sure you use the correct grit of sandpaper. This will help ensure that you get a smooth finish without causing any damage to your floors. That’s why it’s important to read instructions carefully before getting started.
Following these tips and steps will help you sand your hardwood floors with an orbital sander like a pro! With the right process and tools, you’ll be able to achieve stunning results in no time.
How Often Can You Do Orbital Sanding?
When it comes to orbital sanding, the frequency with which you should do it depends on your preferences and the condition of your hardwood floors. For example, if you have recently installed a brand-new set of hardwood floors, then you may not need to sand them at all. However, if your feet have been in use for a while and are beginning to look dull and worn, then orbital sanding can be done every three to five years.
It’s important to note that the amount of wear and tear your hardwood floors receive will also influence how often you should do orbital sanding. For example, if your floors are subjected to heavy foot traffic daily, or if you have children or pets constantly running around, it may be necessary to do orbital sanding more frequently.
The best way to determine how often you should do orbital sanding is to look at your hardwood floors and evaluate their condition. For example, it might be time for a good orbital sanding if they appear dull and worn out. On the other hand, if your floors look relatively new and shiny, you can wait a few more years before doing another sanding.
Remember, you don’t want to overdo it when it comes to orbital sanding, as this can cause damage to your floors. So be sure to assess the condition of your hardwood flooring before deciding how often you should do orbital sanding. This way, you’ll be able to keep your floors looking great for years to come!
Conclusion
With the right tools and steps outlined, sanding your hardwood floors with an orbital sander can be a breeze. Once you have the desired smooth surface on the floorboards, your hardwood floors will look more attractive and vibrant.
So before you begin any major home improvement project, get informed first and ensure you have all the necessary tools and materials for success. For example, with proper preparation and knowledge on how to sand hardwood floors with orbital sander, you’ll get through a job that would otherwise be viewed as intimidating and overwhelming with ease!
Angela Ervin
Angela is the executive editor of DIY quickly. She began her career as an interior designer before applying her strategic and creative passion to lifestyle and home. She has close to 15 years of experience in creative writing and online content strategy for housekeeping, home decorations as well as other niche efforts. She loves her job and has the privilege of working with an extraordinary team. She lives with her husband, two sons, and daughter in Petersburg. When she's not busy working she spent time with her family.