
How to Set Westclox Alarm Clock
Westclox alarm clocks are a great way to wake up in the morning. This blog post will provide you with instructions on how to set westclox alarm clock for optimal results. To set your Westclox alarm clock, turn it upside down and locate the dial at the bottom of the faceplate. The dial is divided into 24 hours and 12 hours, with numbers 1-12 representing 12 hours each.
You can then use this as a guide when setting your time and date by moving either hand around these sections until they align with what you want them to represent. Once both hands are lined up correctly, you can make adjustments using the side buttons on top of the product, which will move one hour or a minute at a time. Read on to know more!

What You’ll Need?
To set your Westclox alarm clock, you will need:
- The alarm clock
- A Phillips head screwdriver
- A pen or pencil
- An alarm time
Step by Step Guide: How to Set Westclox Alarm Clock
Step One: Opening the Clock
To set your alarm, you must first open up the clock. Next, take out the screwdriver and undo the screws holding down the back panel of the clock. Once you have successfully removed them all, carefully lift off the back panel. Inside, there will be more screws on the back. Undo them, then remove that section of the clock. This will not harm your clock in any way, as it is just plastic and can be removed without damaging the inner workings.
Step Two: Setting the Alarm
Now that you have exposed the interior of your Westclox alarm clock, you are ready to set or change the alarm. First, locate the “Alarm” knob on the right side of the clock and rotate it to set the desired time. Be sure to rotate it in a clockwise motion; rotating it counter-clockwise will not work. If you have trouble selecting the alarm, be sure to turn it to the right.
Step Three: Setting the Current Time
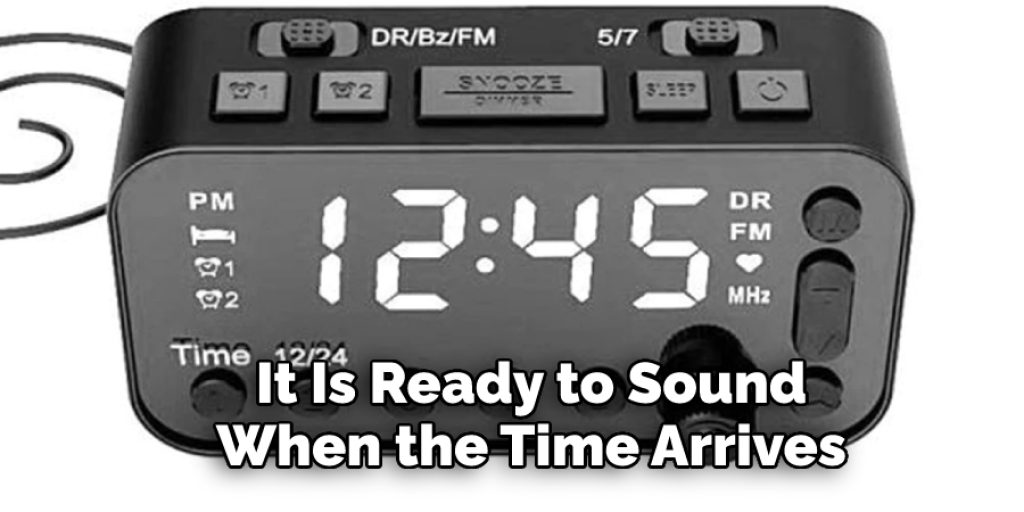
Once your alarm is set, you are ready to set the current time. Locate the “Hour” and “Minute” knobs on either side of the clock. Rotate them both in a clockwise motion until they stop at midnight. This step will also wind up your alarm system, so it is ready to sound when the time arrives.
Step Four: Putting It All Back Together
Now that you have set your alarm clock, it is time to put everything back together. First, replace the screws on the back panel and screw them in place. Make sure they are tight so the clock stays closed securely. Then replace the top of the clock and screw it in place. Be sure to replace the screws in the order they were removed, as this is how they are meant to go back together. Consult your clock’s instruction booklet if you have any trouble with this.
Step Five: Testing the Alarm
Once you have put the clock back together, it is time to test the alarm. Press down on the “OFF” button on the front of your alarm clock. The alarm will go off at the set time. If it does not, make sure that you turn both hour and minute knobs to midnight when setting the current time. If everything is working correctly, you are done setting your alarm! Congratulations on performing this simple task with ease.
Note: If your alarm clock has a battery, be sure to remove it before working on the clock. There is a small lever on the back of the clock that you must push down to remove the battery. This will prevent any accidental sparks from occurring while you are working inside.
Some Tips and Suggestions:
- To set the alarm, you will need to locate the “alarm” button. It is usually a large round button with an image of a bell on it.
- Once you have found the alarm button, press it and hold it down until the alarm clock starts beeping. This will activate the alarm.
- Now, use the “alarm” dial to adjust the time you would like for your alarm to go off.
- If you would like, you can set a snooze by pressing the “snooze” button located on the top right corner of the clock. You will have ten additional minutes of sleep before your alarm goes off again.
- If you have set a snooze, the alarm will go off again after 5 minutes. You can use the “snooze” button to adjust this interval time or just wait until it automatically turns off.
- To turn your alarm off without setting a snooze, simply press and hold down the “alarm” button until it turns off.
Things to Consider When Setting Westclox Alarm Clock:
- Check the time on your phone or watch to ensure you’re setting the alarm for the correct time.
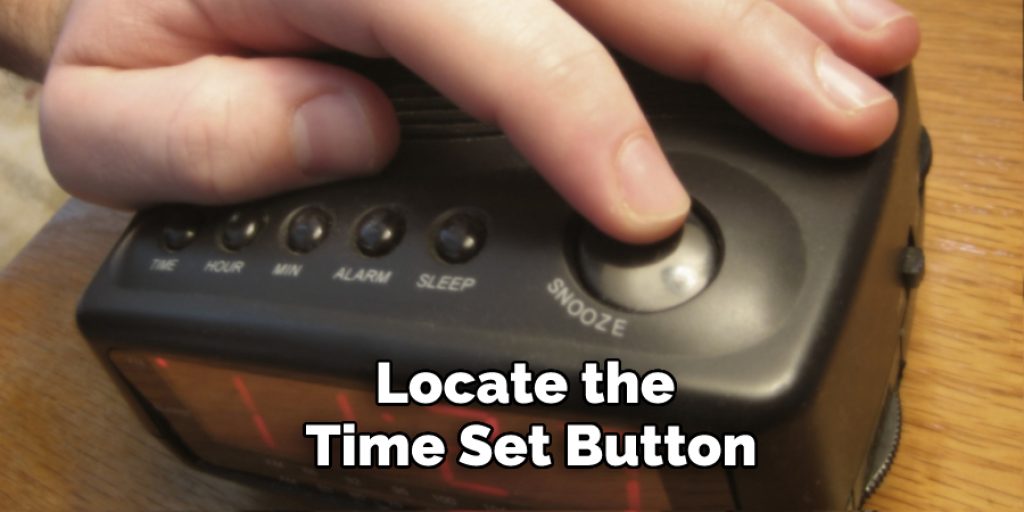
- Find the alarm clock and locate the time set button.
- Push the time set button until the correct time is displayed.
- Change any desired settings, such as volume or brightness.
- Find the snooze button and determine how many times you would like to be able to hit it before the alarm goes off again.
- Find the alarm on/off button and determine if you would like the alarm to sound every day, only on weekdays or only on weekends.
- If you have trouble sleeping, consider using a relaxation technique before bedtime.
Conclusion:
The Westclox alarm clock is a reliable product. It has been around for over 100 years, making it one of the most recognizable brands in America. So if you are looking to purchase an alarm clock that will last for many years to come, make sure you consider this model from Westclox!
Thanks for reading this article about how to set Westclox alarm clock. We hope you found it helpful! If you have any questions or feedback, please leave a comment below, and we will get back to you ASAP. And don’t forget to share with your friends on social media if the content was helpful in some way!


