How to Steam Block Crochet
Steam blocking is vital for crochet enthusiasts looking to achieve a polished finish for their projects. This method involves using steam to relax the fibers of your crochet work, allowing them to stretch and reshape into the desired form. The benefits of steam blocking are numerous; it enhances the appearance of your project by eliminating creases, smoothing out stitches, and helping the pattern to bloom, creating a professional look.
Understanding how to steam block crochet not only improves the aesthetic quality of your work but also contributes to the item’s longevity. This article will guide you through the steam blocking process, ensuring you have the skills and knowledge needed to effectively apply this technique to your crochet projects.
Materials and Tools Needed
To successfully steam block your crochet project, gather the following materials:
- Crochet Project: The item you wish to block, ensuring it is clean and free of loose ends.
- Steam Iron or Steamer: A reliable heat tool is essential for applying steam evenly across your work.
- Towel or Pressing Cloth: This will protect your project from direct heat and help distribute steam evenly.
- Blocking Mats or Surface: A flat surface where you can lay out your project, ideally designed for blocking to withstand moisture and heat.
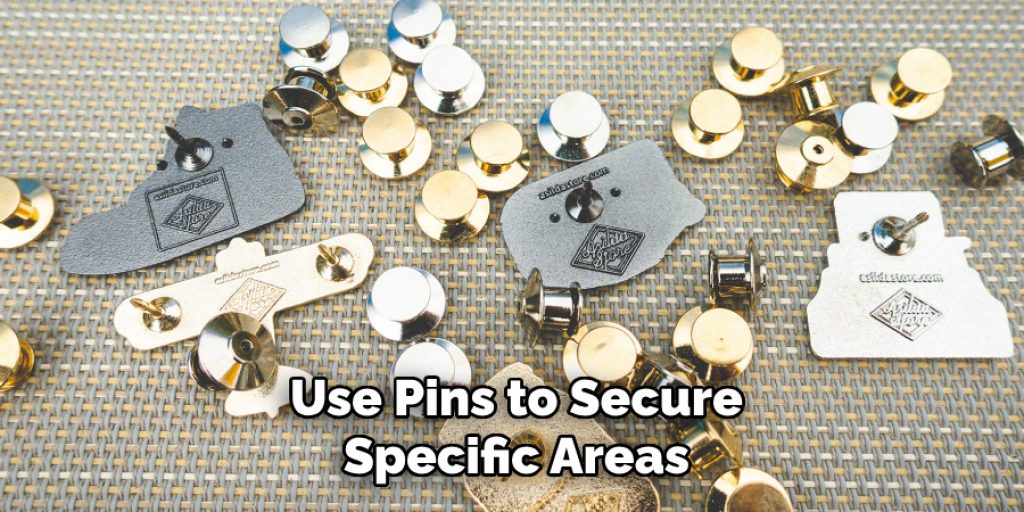
- Pins: These are used to secure your crochet project in the desired shape while it dries.
When using heat tools, remember to practice safety by keeping the iron or steamer safe from your work and avoiding direct contact with your skin to prevent burns. Always follow the manufacturer’s instructions for the steam appliance you are using.
Preparing Your Crochet Project
Before you dive into the steam-blocking process, it’s essential to adequately prepare your crochet project to ensure the best results. Start by inspecting your completed crocheted item for any loose ends. Trim any excess yarn and weave in the ends securely to prevent unraveling during the blocking process. Next, gently wash your project according to the care instructions for the yarn used. This can be done by hand or machine, depending on the yarn type, and is crucial for removing any dirt or oils, allowing the fibers to respond better to steam.
After washing, gently squeeze out excess water without wringing or twisting the fabric, as this can distort the shape. Lay your project flat on a clean towel to absorb moisture. Once it is damp but not soaking wet, carefully arrange it on your blocking mats or designated surface, shaping it to the desired dimensions. Use pins to secure specific areas needing particular attention or maintain the shape. Make sure you have everything in position before applying steam, as the goal is to work with a well-prepared canvas that will yield stunning results post-blocking.
Setting Up for Steam Blocking
Once your crochet project is prepared, it’s time to set up for steam blocking. Begin by selecting a well-ventilated area to work in, as steam can cause condensation and may lead to discomfort if not properly aired out. Ensure your workspace is clean and clutter-free to avoid distractions while you focus on the blocking process. Place your blocking mats or surfaces on a sturdy, flat table where you can easily access your materials.
Next, fill the steam iron or steamer with water and plug it in, allowing it to heat up while you arrange your project. As your iron is heating, consider the design of your item and identify areas that may need extra attention. Have your towel or pressing cloth ready to protect the fabric, as this will prevent direct contact with the heat source and help to evenly distribute steam over the surface of your crochet work.
Finally, gather your pins and keep them within reach, as you’ll need them to secure your project in place once it is shaped. With everything set up, you’ll be ready to start the steam-blocking process, ensuring a beautifully finished crochet project that showcases your hard work.
How to Steam Block Crochet: Steam Blocking Process
1.Placing the Project
Begin by laying out your crochet project on the prepared blocking mat or surface. Ensure the piece is flat and free from any wrinkles for the best results. Depending on the design and the desired final shape, you may need to pin the project into position. Use rust-proof pins to secure the edges and corners, carefully aligning them to achieve an even shape. For intricate patterns, take your time to ensure that every section is pinned appropriately. This initial step is vital for defining the final appearance of your work once it has been steam-blocked.
2.Applying Steam
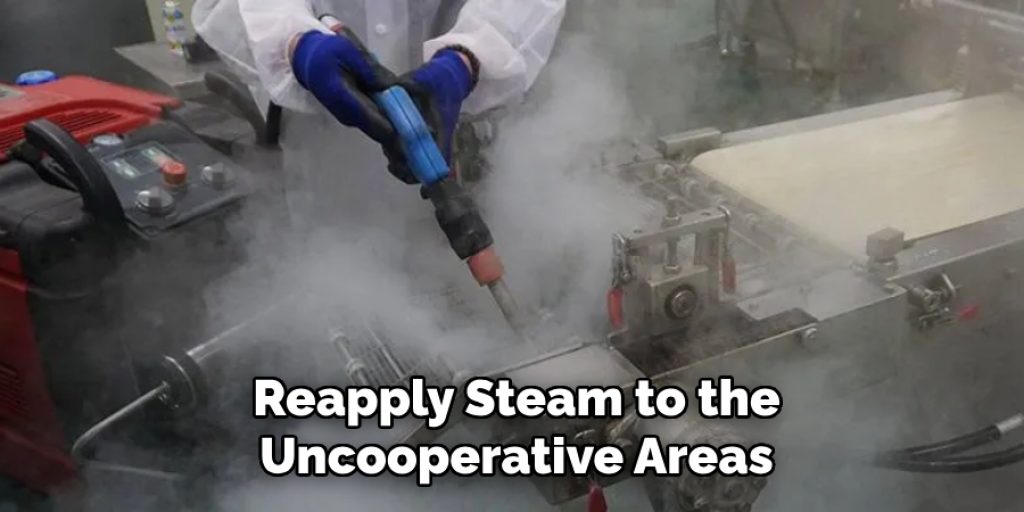
Once your project is properly positioned and pinned, it’s time to apply steam. Gently use the steam iron or steamer to release steam over the crochet piece, ensuring an even application across the entire surface. Maintain a safe distance of approximately 6 to 12 inches to prevent direct contact, which could potentially scorch or damage the fibers. Use a gentle, sweeping motion while applying the steam, allowing the moisture to penetrate the material without soaking it. This careful technique encourages the stitches to relax and reshape as intended.

3.Allowing to Dry and Set
After applying steam, leave your project on the blocking surface to dry completely. It’s essential not to disturb or move the piece during this drying phase, as this can lead to unwanted creases or distortions. Keep an eye on the project as it dries, checking for areas requiring additional steam. Patience is key here, as ensuring that the piece is thoroughly dried will help set your desired shape.
Post-Blocking Care
After your crochet project has dried completely, it’s important to handle it carefully to maintain the shape and beauty you’ve achieved through the blocking process. Begin by gently removing the pins, taking care not to tug or pull at the fabric, which could distort your hard work. Once the pins are out, inspect the piece for any remaining wrinkles or areas that need attention. If you spot any imperfections, applying a light touch of steam to those sections is perfectly fine, ensuring your project looks its best.
Regarding storage, consider how you want to preserve your newly blocked item. It’s often best to fold garments or delicate pieces neatly to avoid creases. Utilizing tissue paper or fabric barriers between layers can help maintain their shape. If you’re storing blankets, place them flat in a designated space to prevent any unwanted folding marks. For accessories like bags or hats, consider using forms or stuffing to maintain their structure. By taking these post-blocking care steps, you’ll ensure that your crochet masterpiece stays fresh and beautiful until it’s time to use or gift it.
Troubleshooting Common Issues
Even with careful execution of the steam-blocking process, you may encounter some common issues. One frequent problem is uneven edges or shapes, which can occur if the piece is not pinned securely. To rectify this, gently reapply steam to the uncooperative areas while adjusting and repinning them into the desired position. Keep an eye out for any lingering creases that refuse to lift; these may require additional steam or a more focused approach using a pressing cloth for protection.
Another issue might arise from over-steaming, which can sometimes drown the fibers and lead to a soggy, misshaped piece. If your project is taking on an undesirable texture, allow it to dry completely before assessing whether an additional round of light steam is necessary. Conversely, if your project appears too stiff post-blocking, consider lightly washing it again and then reshaping it while damp to regain a softer drape.
Lastly, if your yarn has significant memory and seems to bounce back to its original shape, look into using a yarn that holds steam better for future projects or increases the steam application time while keeping an eye on the distance to prevent damage. By identifying and addressing these issues, you can refine your blocking technique and achieve your desired beautiful, polished finish.
Frequently Asked Questions (FAQs)
1. How Long Does It Take for A Crochet Project to Dry After Steam Blocking?
The drying time can vary depending on the size and thickness of the crochet project and environmental conditions. Generally, it can take anywhere from 1 to 4 hours. To maintain its shape, it’s important to ensure the piece is completely dry before removing it from the blocking surface.
2.Can I Use Steam Blocking on All Types of Yarn?
While steam blocking is effective for many types of yarn, some fibers may react differently. Natural fibers like wool and cotton usually respond well to steam. However, synthetic yarns may not hold their shape as effectively. Always perform a small test on a scrap piece of the same yarn before applying steam to your entire project.
3. Is It Necessary to Pin My Crochet Project While Blocking?
Pinning is recommended, especially for intricate patterns or projects with specific shapes. It helps to define and secure the desired form during the steaming process. However, for simpler shapes and stitches, you may not need to pin as securely, as the steam can naturally help reshape the fibers.
4. Can I Steam Block My Crochet Items More Than Once?
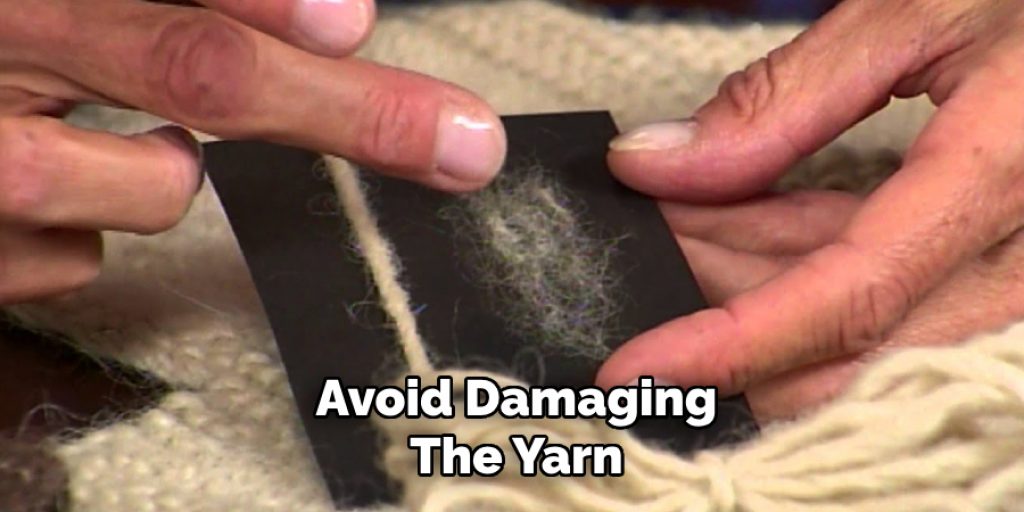
Yes, you can steam block your crochet items multiple times if needed. This is especially useful if you discover new wrinkles or if the piece has been handled or stored in a way that has altered its shape. Just ensure to follow the same careful techniques to avoid damaging the yarn.
Conclusion
In summary, learning how to steam block crochet projects unlocks a world of possibilities for enhancing the final appearance of your work. With patience and practice, the steam-blocking process can yield beautifully polished pieces that display the intricate details of your craftsmanship. As you refine your skills, remember that each attempt is a step toward mastery, ensuring your crochet creations are functional and stunning. Embrace the journey and enjoy the satisfaction of achieving a flawless finish!
Elizabeth Davis
Elizabeth is a creative writer and digital editor based in the United States. She has a passion for the arts and crafts, which she developed from a young age. Elizabeth has always loved experimenting with new mediums and sharing her work with others. When she started blogging, she knew that DIYquickly would be the perfect platform to share her tutorials and tips. She's been writing for the blog from the beginning, and her readers love her helpful advice and easy-to-follow instructions. When she's not writing or editing, Elizabeth enjoys spending time with her family and friends.