How to Store Air Dry Clay
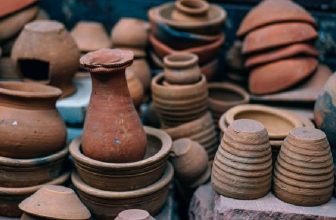
Air dry clay is a versatile and popular medium for artists, crafters, and hobbyists alike. Unlike traditional clay, it does not require firing in a kiln to harden, making it accessible for a wide range of projects from simple sculptures to intricate decorative items.
However, proper storage is essential to maintain its pliability and prevent it from drying out. In this guide on how to store air dry clay, we will explore effective methods to store air dry clay, ensuring that you can keep it fresh and ready for use whenever creativity strikes.
Why is Proper Storage Important?
Air dry clay is made of natural materials like clay, water, and bonding agents. These ingredients have a tendency to dry out over time, making the clay hard and unworkable. If not stored correctly, air dry clay will lose its moisture content and become brittle and useless.
Moreover, improper storage can also lead to contamination from dust or other particles in the surrounding environment. This can affect the quality of your finished project and may even cause health hazards if breathed in during the crafting process.
Therefore, it is crucial to store air-dry clay properly to maintain its texture, pliability, and overall quality.
Needed Materials
Ziploc Bags:
These plastic bags are excellent for storing air dry clay as they provide an airtight seal, preventing moisture loss. They are also easily accessible and come in various sizes to accommodate different amounts of clay.
Airtight Containers:
Similar to Ziploc bags, airtight containers also offer a protective barrier against moisture loss. These can be used to store larger quantities of air dry clay or if you prefer a sturdier storage option.
Cling Wrap:
Cling wrap is another effective way to store air dry clay as it provides a tight seal and prevents the clay from drying out. It is best used for smaller amounts of clay that need to be stored for short periods.
8 Steps on How to Store Air Dry Clay
Step 1: Prepare Your Workspace
Before you begin the storage process, it’s essential to set up a clean and organized workspace. Start by clearing a flat surface free of dust, debris, or any crafting materials that could contaminate the air dry clay. Have all your needed materials—Ziploc bags, airtight containers, and cling wrap—within easy reach to ensure a smooth and efficient storage experience.

Additionally, consider wearing clean gloves to avoid transferring oils or dirt from your hands onto the clay. A tidy workstation not only promotes good hygiene but also helps you focus on preserving your air dry clay effectively.
Step 2: Wrap the Clay
Once your workspace is prepared, take the portion of air-dry clay you wish to store and knead it briefly to restore its softness. Then, depending on the amount, you can either use cling wrap or place it directly into a Ziploc bag or airtight container. If using cling wrap, tear off a sufficient length and tightly wrap the clay, ensuring there are no gaps where air could enter.
Be sure to press out any excess air that may be trapped within the wrap. For larger quantities, transfer the wrapped clay into an airtight container, sealing it securely to maintain its moisture. This step is crucial in preventing the clay from drying out and preserving its workability for your future projects.
Step 3: Label the Storage Container
To avoid confusion or mixing up different types of clay, it’s essential to label your storage container. You can use a permanent marker to write the date and type of clay on the bag or container. This simple step will help you keep track of which clay is inside, how long it has been stored, and when it needs to be used by.
It’s also a good idea to include any specific instructions or notes about the clay on the label, such as its color, brand, or intended use. This information can come in handy when planning future projects and will save you time and effort in the long run.
Step 4: Store in a Cool and Dry Place
Once your air-dry clay is securely wrapped and labeled, it’s time to find an appropriate place for storage. The ideal location should be cool, dry, and away from direct sunlight or heat sources that could cause the clay to dry out prematurely.
A basement or closet shelf is often suitable for this purpose as it tends to have a consistent temperature and humidity level. Avoid storing the clay in areas with high humidity, such as a bathroom or kitchen, as this can cause mold growth and ruin the clay.

Step 5: Don’t Open Until Ready to Use
Once stored properly, it’s essential not to open the storage container until you’re ready to use the clay. Each time the bag or container is opened, it allows air and moisture into the environment, causing the clay to dry out. Therefore, it’s best to only open and remove the amount of clay you need for your current project.
You can use a spoon or knife to scoop out the clay, being careful not to introduce any foreign particles into it. Remember to reseal the storage container tightly after each use to maintain the proper moisture level.
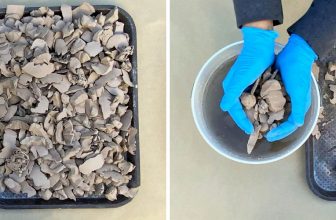
Step 6: Revive Dried Out Clay
If you happen to open your air-dry clay and find that it has dried out, don’t panic. There are ways to revive it and make it usable again. One method is to moisten a clean cloth with water and wrap it around the hardened clay. Leave it for a few hours, and then check if it has softened enough for use.
Another option is to sprinkle some water onto the hardened clay and then knead it until it becomes pliable again. Depending on the severity of dryness, you may have to repeat this process a few times.
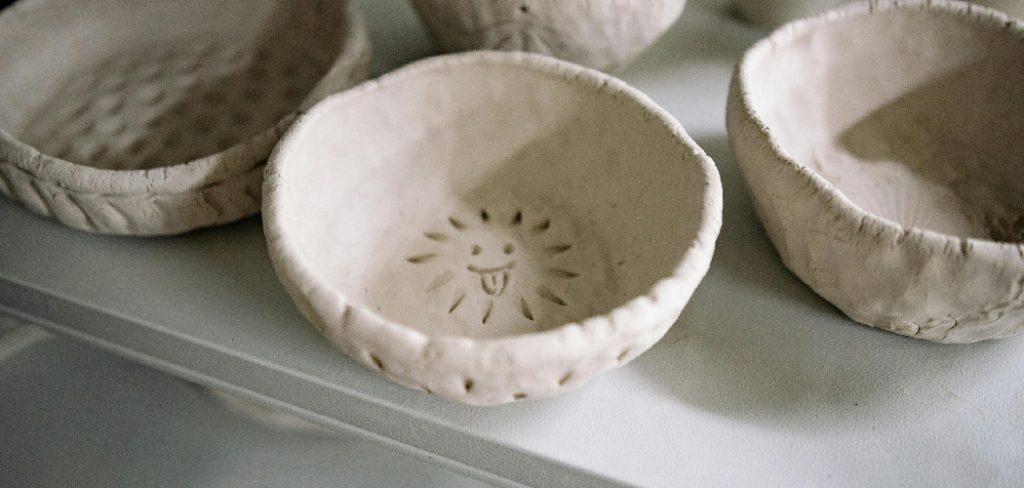
Step 7: Store Leftover Projects
Sometimes, we may not use up all the clay from a particular project and end up with small leftover pieces. To avoid wasting these scraps, wrap them tightly in cling wrap and store them in an airtight container or Ziploc bag. These leftover pieces can be used for smaller projects or added to future projects as accents or details.

You can also mix different colors of scraps to create unique color combinations for your next project. Just be sure to keep the pieces separated in their own labeled containers to avoid color contamination.
Step 8: Dispose of Old or Moldy Clay
Lastly, it’s important to know when it’s time to dispose of old or moldy air-dry clay. If you notice any signs of mold growth or a foul odor coming from the clay, it’s best to discard it and start fresh with a new batch.
Additionally, if you have had the clay stored for an extended period, check its texture before using it. If it feels too hard or crumbly, it may not be suitable for crafting and should be disposed of. It’s always better to be safe than sorry and use fresh, pliable clay for your projects. By following these 8 simple steps on how to store air dry clay, you can ensure that your clay stays soft and ready to use whenever inspiration strikes. Happy crafting!
Additional Tips
- If possible, store air dry clay in its original packaging as it usually comes with a resealable bag or container designed specifically for storing the product.
- You can also add a damp paper towel or sponge inside the storage container to help maintain the moisture level of the clay.
- If you live in a particularly dry climate or are storing the clay for an extended period, consider using a terra cotta pot with a lid as it helps regulate moisture levels.
- Avoid mixing different brands or types of air dry clay together for storage as they may have different drying times and can affect each other’s quality.
- When working with air dry clay, make sure to keep it covered when not in use to prevent it from drying out. You can use a damp cloth or plastic wrap for this purpose.
- For best results, use stored air clay within 6 months to ensure its freshness and workability.
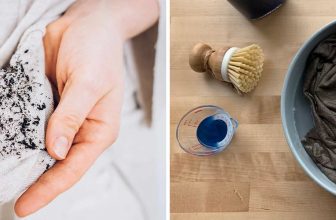
- If your air clay starts to crack while drying, lightly mist it with water and gently smooth out the cracks with your fingers or a damp brush.
- To create a glaze-like finish on your air dry clay projects, you can use a clear acrylic sealer spray or brush on a thin layer of Mod Podge once the clay has completely dried. This will give your project a glossy and protective coating.
- If you plan on painting your air-dry clay project, be sure to let it dry completely before applying any paint. Using wet paint on moist clay can cause cracking or warping.
- Don’t throw away hardened air-dry clay scraps as they can be used for other crafting purposes such as making molds or mixed media art.
- Always follow the manufacturer’s instructions for proper storage and use of air dry clay products to ensure the best results.
With these additional tips, you can confidently store your air-dried clay and have it ready for all your creative projects! Remember, proper storage is key to maintaining the quality and workability of this versatile crafting material. Happy creating!
Conclusion
In summary, proper storage and care of air dry clay are essential for maintaining its quality and ensuring successful crafting experiences. By following the outlined steps on how to store air dry clay—such as storing in a cool, dry place, sealing containers tightly, and reviving dried clay—you can make the most of this versatile material.
Additionally, utilizing leftover scraps creatively and being mindful of disposal practices will help you reduce waste and enhance your crafting projects. Armed with these insights and tips, you’re well-prepared to embark on your artistic journey with air-dry clay. Enjoy your crafting adventures, and remember to embrace the joy of creativity!
Elizabeth Davis
Elizabeth is a creative writer and digital editor based in the United States. She has a passion for the arts and crafts, which she developed from a young age. Elizabeth has always loved experimenting with new mediums and sharing her work with others. When she started blogging, she knew that DIYquickly would be the perfect platform to share her tutorials and tips. She's been writing for the blog from the beginning, and her readers love her helpful advice and easy-to-follow instructions. When she's not writing or editing, Elizabeth enjoys spending time with her family and friends.