
How to Use Lucas Stop Oil Leak
If you have an engine that’s oiling up, then there’s a good chance you have Lucas Stop Oil Leak in your toolbox. This product is designed to help seal leaks and stop oil consumption in engines. We’ll show you how to use Lucas Stop Oil Leak on your engine in this post.
If you’re like most drivers, you probably don’t think about your car’s oil until there’s a problem. And while a leak may not seem like a big deal, it can actually lead to some serious engine damage if left unchecked. We’ll also share some of the pros and cons of using this product. So, if you’re looking for a way to stop your engine from oiling up, then keep reading!
Instructions: How to Use Lucas Stop Oil Leak
Step 1: Park Your Car.
Make sure you park it on level ground, not grass where you can easily get a bunch of mud and dirt stuck under the oil pan.
Step 2: Open Your Hood.
Open your car’s hood by pulling on the metal part attached to the inside of the windshield, just above where it meets the dashboard.
Step 3: Look for Your Oil Cap.
Your oil cap is the round, black thing inside your engine that looks like a really thick nail with an upside-down mushroom top on it. It’s typically attached to the left side of your engine, but not always. If you still can’t find it, get out of your car and open the hood without looking through your windshield or standing near your car. You might have to get a friend or call someone to help you.
Step 4: Turn the Oil Cap Counterclockwise.
Your oil cap has an arrow on it, which tells you where to line up your hand when removing it from your engine. For example, to turn the cap counterclockwise, line the arrow up with your hand and turn just like you would twist a screwdriver counter-clockwise.
Step 5: Open the Oil Cap All the Way.
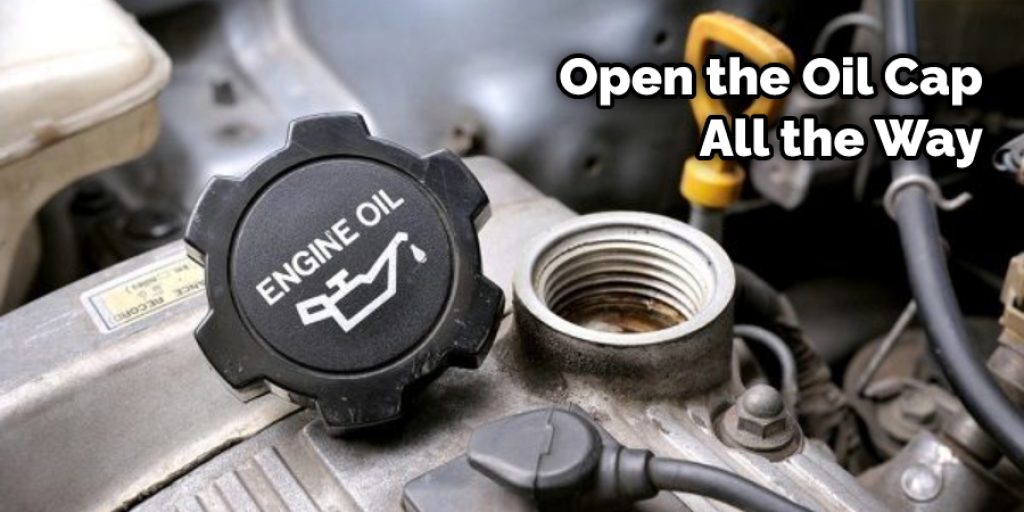
Once you have successfully removed your oil cap, slowly open it to its fullest extent so that the excess pressure inside of your engine can escape before you try to remove your car’s oil.
Step 6: Locate Your Car’s Drain Plug.
The drain plug is the only thing underneath your oil cap that looks like a real working part in your engine. It has a thick, metal loop and a small bolt that connects the loop to your engine block (or whatever it is called). Locate this drain plug.
Step 7: Prepare to Remove Your Car’s Oil.
Before you attempt to loosen your drain plug, make sure that the ground underneath it is completely dirt-free so that nothing gets sucked up under the engine when you do this. To be extra safe, use a small tarp or some cardboard to cover any mud patches that might be on the ground beneath your car.
Step 8: Loosen and Remove Your Drain Plug.
Once you’ve made sure that the area underneath your oil pan is free of mud or dirt, completely remove your drain plug by loosening it with a wrench (then turn counter-clockwise). If you don’t have a wrench on hand, you can probably ask a friend to help you. Make sure that before you start this step, you put on some gloves or something else that will protect your hands from any spillage of oil.
Step 9: Collect the Oil Into an Empty Bucket.
Once your drain plug is completely removed and your car’s engine is no longer under pressure, you should see all of the oil that has been accumulating inside your engine. Collect this oil into an empty bucket, and be careful not to spill any on the ground around where you are standing. Dump it in the trash if you can’t use it for whatever reason (if your car is leaking power steering fluid or transmission fluid, for example, you might not want to use it).
Step 10: Clean Up.
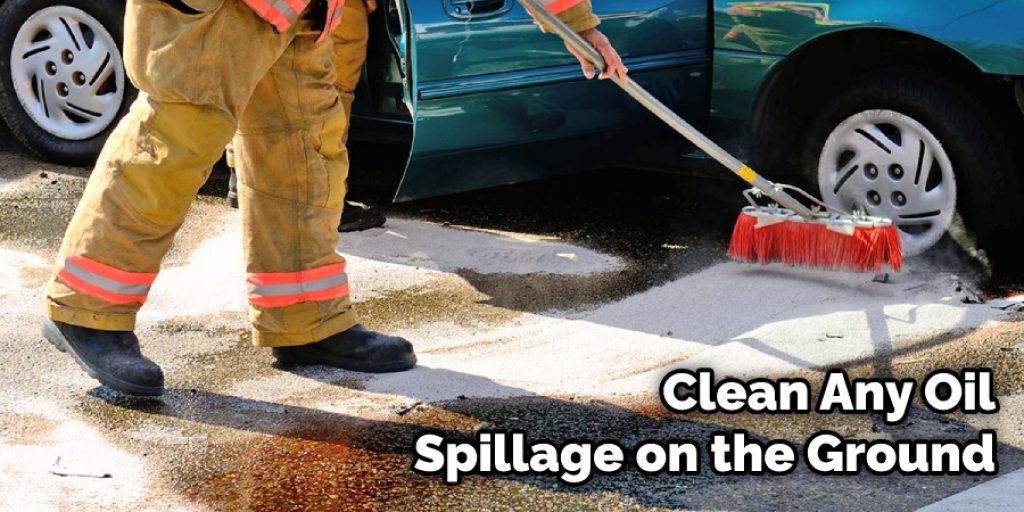
Ensure that you clean any oil spillage on the ground thoroughly before leaving your car in this spot. Also, return your drain plug so that it is nice and secure against your car’s engine block after replacing it.
Step 11: Pour in the Lucas Oil Stop Leak.
Pour in a bottle of Lucas Oil Stop Leak, replace your oil cap tightly, and put everything back together once you have finished. This is why it’s good to park your car on level ground if you leave it at an angle or on a slope; the oil will run down your engine and collect underneath, making it difficult to get everything back together.
Some Tips and Suggestions
1. Coat the threads of studs and bolts with oil-soluble grease.
2. Apply petroleum jelly to O-rings and seals before reassembly, and coat the exterior of new gaskets with a sealing compound like liquid sealant or butyl tape before installing them.
3. Wrap a band of duct tape around the joint being fixed before beginning work. The finished joint will require no retaping as you tighten it.
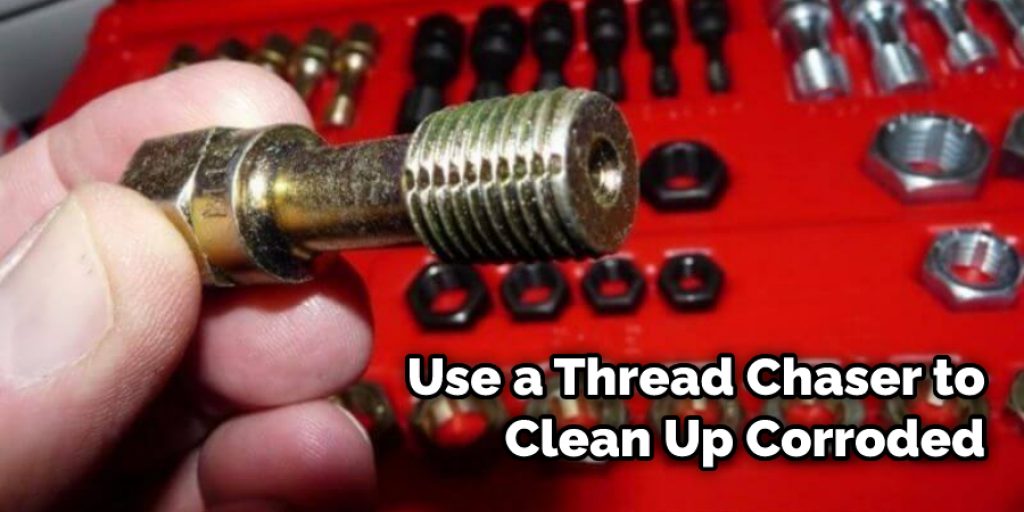
4. Use a thread chaser to clean up corroded or rusty threads on nuts and bolts, then coat them with an oil-based lubricant like WD-40 before reassembling the parts.
5. Ensure all parts, including joints and bolts, are clean and free of debris before reassembly. Use a wire brush to remove corrosion or rust on electrical contacts, then coat them with petroleum jelly to keep out moisture.
6. Tighten high-torque bolts progressively in order to avoid damage to components or fasteners.
7. Coat an entire female thread with lubricant or petroleum jelly before installing a bolt to assure that the threads are coated properly, and there is no rust in the hole.
You Can Check It Out to: Clean Oil Leak on Engine
Conclusion
Whether your car is new or old, you need to take care of the problem if it leaks into the engine oil system as soon as possible. Lucas Stop Leak Oil works by sealing pinhole leaks and can be used on any make or model vehicle with an internal combustion engine.
In addition, the product will provide long-term protection against future breakdowns due to loss of lubrication caused by leakage through seals, gaskets, and other rubber parts for at least one year after application.
If you’re looking for something that really gets the job done, then this may be what you’ve been waiting for! We hope this article helped provide more information about how to use lucas stop oil leak and which one to choose based on your current needs. If you want to learn more or get in touch with us, please contact us!


