
How to Use Pan Pastels
Are you looking to take your artwork to the next level by adding vibrant, lightfast colors and deeply saturated hues? Pan Pastels can help you achieve that goal. Pan Pastels are a unique method of applying color to any surface in an easy-to-use and fuss-free manner.
With their extremely low dust content and increased opacity, they bring your drawings, paintings, and illustrations to life with vivid tones and intensity which traditional pastels can’t match. Whether you’re just starting out or an experienced artist – this comprehensive guide will show you how to use Pan Pastels effectively for every project!
Needed Materials
Given below is a list of the materials needed to use Pan Pastels:
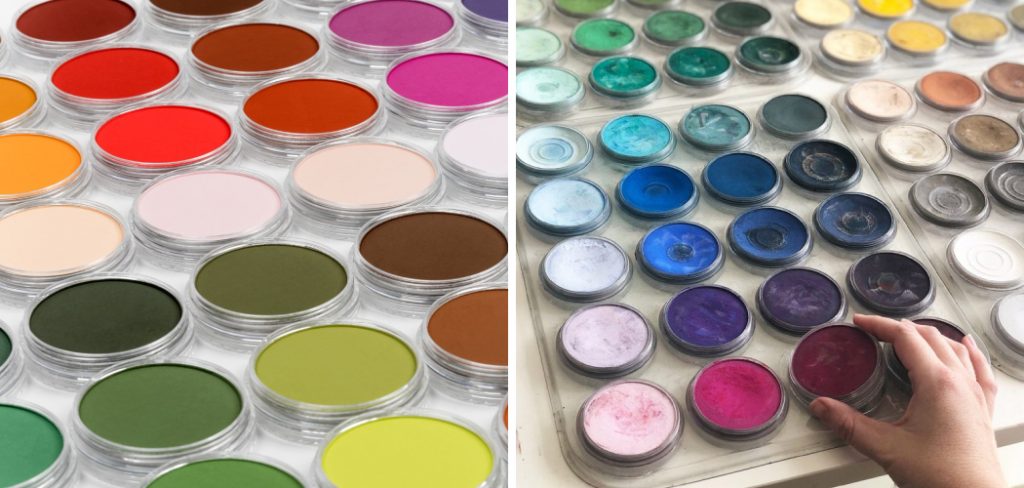
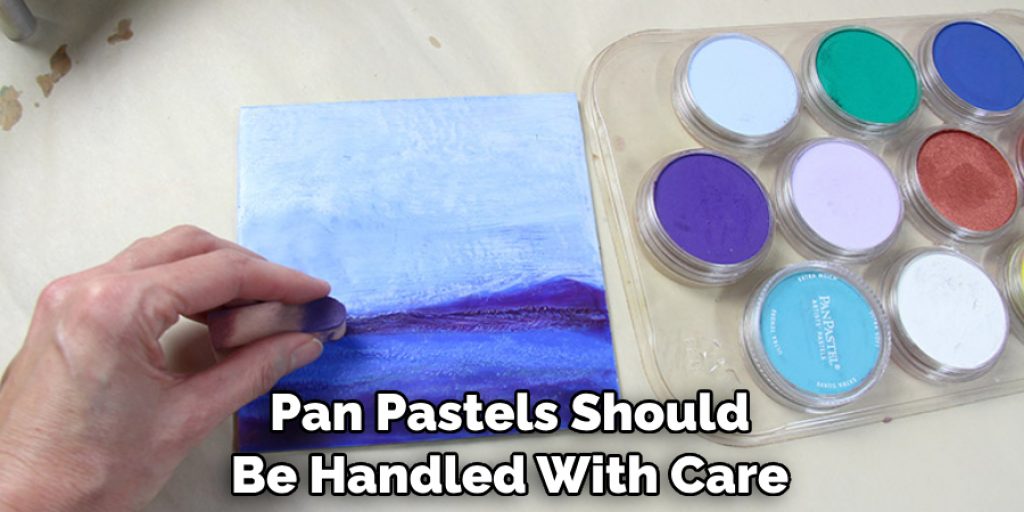
- Pan Pastels (Choose From Vibrant Colors, Metallic or Iridescent Pastel Shades)
- Soft Pastel Paper (This Can Be Either Smooth or Textured Depending on Your Preference)
- Sponges (Different Size and Shape Sponges for Blending the Pastels Together)
- Fixatives (Sprays or Liquids to Ensure Your Artwork Stands The Test of Time)
- Kneaded Erasers (These Will Help to Lift and Blend the Color)
11 Step-by-step Guidelines on How to Use Pan Pastels
Step 1: Prepare the Surface
The surface you choose to work on should always be clean and free of dust. This will ensure the colors of your Pan Pastels blend perfectly and allow them to adhere better. It is also important to use the right kind of paper or canvas for your pastel artwork. Soft pastel papers are best, as these will help to create a strong bond between the colors and the surface. If you’re using harder support like wood or plastic, make sure to add some texture by sanding it lightly first.
Step 2: Prime the Surface
If you’re using a light-colored surface, it is important to prime it in order to make sure the colors of your Pan Pastels will show up. This can be done by applying a thin layer of primer or gesso with a brush. You can also use an acrylic gel medium as an alternative. Let it dry completely before starting your artwork. But make sure not to use too much primer as it can cause the colors to appear dull. It is best to apply one thin layer and let it dry completely.
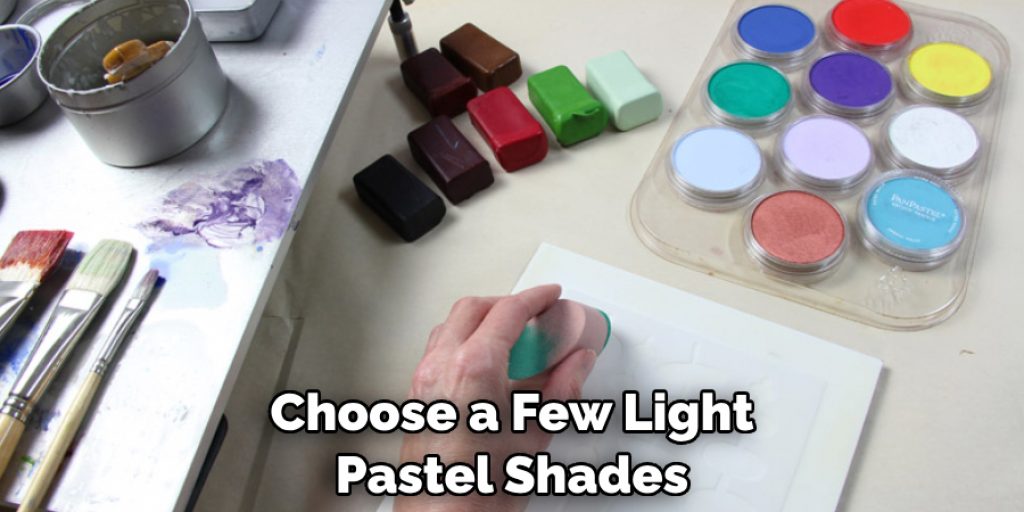
Step 3: Start With Light Colors
When using Pan Pastels, it is best to start out with light colors and then build up darker shades on top. This will help you to keep the vibrancy of the colors while not overdoing them. Choose a few light pastel shades that match your desired mood and apply them to the surface with a soft sponge. The fact that Pan Pastels are extremely lightfast makes it easy to create vibrant artwork without worrying about fading colors over time.
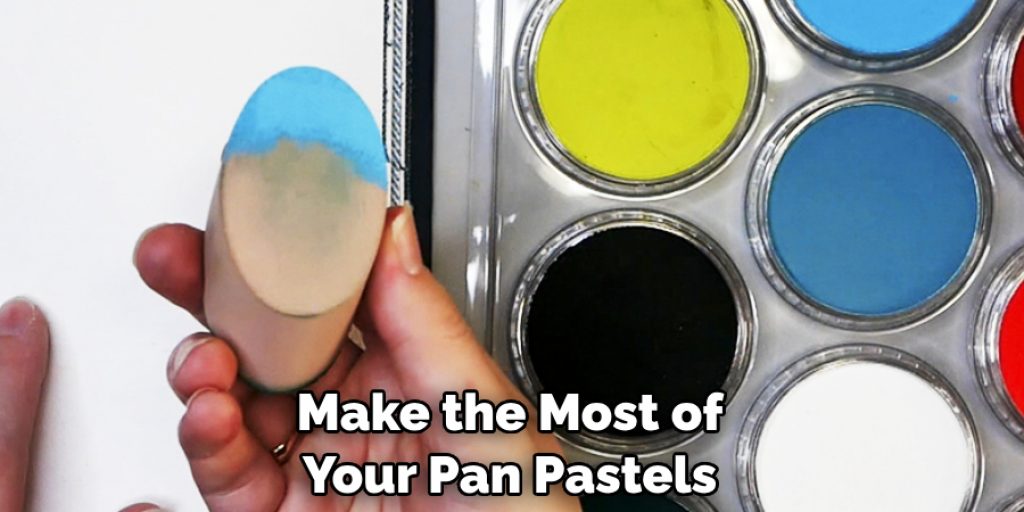
Step 4: Use Different Textures
You can use different textures when working with Pan Pastels to create an interesting effect. Experiment by applying the colors with different-sized sponges. You can also use your fingers or a soft cloth to create unique patterns on the surface. The possibilities are endless! But make sure to always handle the colors with care as they can stain your hands. It’s best to use gloves when using Pan Pastels for a long period of time.
Step 5: Blend Colors Together
Once you’ve applied the colors, use a kneaded eraser to blend them together. This will give them a more natural and seamless look. If you’re looking for a more blended look you can even use your finger or a soft cloth to do this. Although Pan Pastels are extremely lightfast, they can still be blended together to create interesting effects. If you’re looking for an even softer look, use a fixative to secure the colors.
Step 6: Apply Darker Colors
For darker shades, start by applying the color directly with the sponge and then blend it in using the kneaded eraser or a soft cloth. This will create an intense and beautiful effect. You can also layer lighter colors on top of darker ones and blend them together for a more subtle look. However, be careful not to use too much pressure when blending as this can cause the color to become dull.
Step 7: Use Fixatives
To ensure that your artwork stands the test of time, it is important to use fixatives. There are several types available in the market like sprays or liquids. Spray lightly over the surface and let it dry completely. It is best to use fixatives after you’ve completed your artwork as this will help to protect the colors from fading.
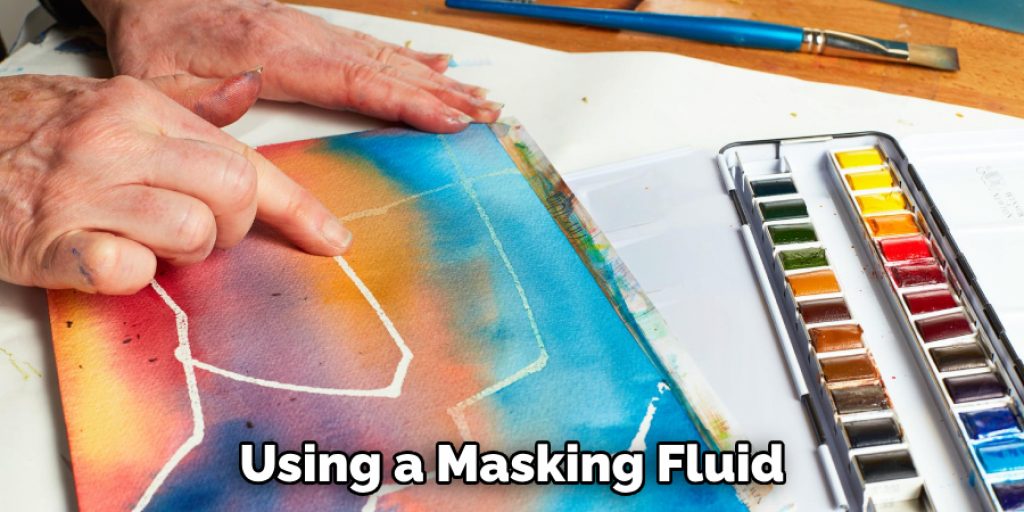
Step 8: Use Masking Fluid
Using a masking fluid is a great way to add special effects to your artwork. Apply the fluid over areas you want to protect from color and let it dry before applying the Pan Pastels. Once you’re done, use an eraser to remove any unwanted edges or marks. You can also use masking fluid for creating interesting backgrounds and textures.
Step 9: Respray the Fixatives
Once you’ve finished your artwork, it is important to respray the fixatives for added protection. This will help keep your colors from fading or smudging over time and will also make them more vibrant. But make sure to not over-spray, as this can cause the colors to become dull.
Step 10: Frame Your Work
Finally, frame your work to add the finishing touch. This will help protect it from dust and other elements which could damage it over time. You can also use a glass or Plexiglas frame as an alternative. You should also make sure to place it away from direct sunlight as this can cause the colors to fade.
Step 11: Enjoy Your Masterpiece!
Now that you know how to use Pan Pastels, you’re ready to create amazing artwork! Enjoy displaying your masterpiece and show it off to friends and family. Always remember to have fun and be creative. With Pan Pastels you can explore a plethora of colors and textures that are sure to bring your artwork to life. So get creative and start exploring today!
So get creative with Pan Pastels and let your imagination run wild! With their vibrant colors, you can now make your artwork stand out from the crowd. Happy creating!
Tips & Tricks For Using Pan Pastels
- Start Out With Light Colors and Build Up Darker Shades on Top for a Vibrant Effect.
- Use Different Sizes and Shape Sponges to Create Interesting Textures on the Surface.
- Blend the Colors Together Using a Kneaded Eraser or a Soft Cloth.
- Use Masking Fluid to Protect Certain Areas From Color.
- Respray Fixatives Once Your Artwork is Finished for Added Protection.
- Frame Your Work to Keep It Safe From Dust and Other Elements.
By following these tips on how to use pan pastels, you will be able to make the most of your Pan Pastels and create stunning artwork with ease! So go ahead and get creative – the possibilities are endless!
Frequently Asked Questions
Q: How Long Does Pan Pastel Artwork Last?
A: The longevity of your Pan Pastel artwork depends on what type of surface you use and how often it is exposed to sunlight. If you protect your artwork with fixatives and frame it correctly, then it can last for many years without fading or smudging.
Q: What Is the Difference Between Pan Pastels and Soft Pastels?
A: The main difference between Pan Pastels and soft pastels is that Pan Pastels are made with an oil-free binder, making them much less powdery and easier to control. Soft pastels also contain more pigment, which can make them more vibrant than Pan Pastels. However, this means they may not last as long as Pan Pastel colors due to the higher concentration of pigments used.
Q: What Is the Best Way to Store Pan Pastels?
A: The best way to store your Pan Pastels is in boxes or organizers made specifically for pastels. This will help keep them clean and dry and prevent them from getting damaged or smudging on other surfaces. It is also important to label each color so you can easily identify them when you’re ready to use them.
Q: Are Pan Pastels Toxic?
A: All art supplies, including Pan Pastels should be handled with care and kept away from children. However, they are generally considered non-toxic since they contain no hazardous materials or heavy metals and are safe for most people to use. Always read the label and follow the manufacturer’s instructions for safety before using any art materials.
Conclusion
Overall on how to use pan pastels, the use of pan pastels requires a certain deftness to allow for the best results. Every artist’s approach is unique. As long as you pay attention to the techniques and tools available, and experiment with which form of application works best for you, you can create excellent pieces with pan pastels. Grease-free paper or a sanded pastel card are highly recommended supports to work on with pan pastels.
Also, be sure to practice blending and layering different colors slowly and gently across your paper surface. With some focused practice, patience, and an understanding of basic painting and artistic concepts one can produce stunning works of art using this unique medium. Pan Pastels are an incredibly versatile tool that will continue to amaze any serious painter!
Angela Ervin
Angela is the executive editor of DIY quickly. She began her career as an interior designer before applying her strategic and creative passion to lifestyle and home. She has close to 15 years of experience in creative writing and online content strategy for housekeeping, home decorations as well as other niche efforts. She loves her job and has the privilege of working with an extraordinary team. She lives with her husband, two sons, and daughter in Petersburg. When she's not busy working she spent time with her family.


