
How to Weave a Basket with Yarn
The best way to pass your free time is doing something that will make your day productive. One of the best productive activity is making something and making it more specific, creating something with yarn. The art of making different things with yarn has been going around forever. If you have seen your grandmother or mother make a sweater, gloves, socks, etc. with yarn, you can also shock them by making a basket with yarn. To do that, we will teach you the way of how to weave a basket with yarn.
Baskets are a great way to keep your household organized and stylish. You can use them to store anything from towels to throws, and they make great home decorations. If you can make your own basket, you can customize it to perfectly match your home’s aesthetic. What could be better than spending your time creating something beautiful and useful? So, let’s get started with how to weave a basket with yarn.
DIY: How to Weave a Basket with Yarn
Before you can start learning the process, you need to make sure that you have all the necessary things. The thing about making a basket out of yarn is that you do not need something hard to find. You can easily buy the stuff from your local shops. The main thing that you need to have is the yarn.
You can use different types of yarn, depending on what your preference is. The other materials that you will need are some craft wire, a pair of scissors, and some beads.
The first step in learning how to make a basket out of yarn is to choose the yarn. You can either use cotton or acrylic yarn.
Materials You Need
- Cotton clothesline
- Yarn
- Needle
- Scissors
These are the items you need to start your process of how to weave a basket with yarn.

Steps to Follow
- The first thing you have to make is the coil of the center . Make a coil of 10 turns and leave 1 cm of free wire at the end. I prefer using enameled copper wire because it doesn’t have any plastic, which could heat up and melt during soldering or if your electronics are getting hot, for example by doing experiments with high currents.
- Cut a ten inches long yarn and get the cotton clothesline ready . Insert the yarn through the bottom of the top hoop. Cross the yarn over the top of the bottom hoop and pull it through the space between the two hoops. Now pull the yarn through the loop on your finger to create a knot.
- Attach the needle on one side of the yarn
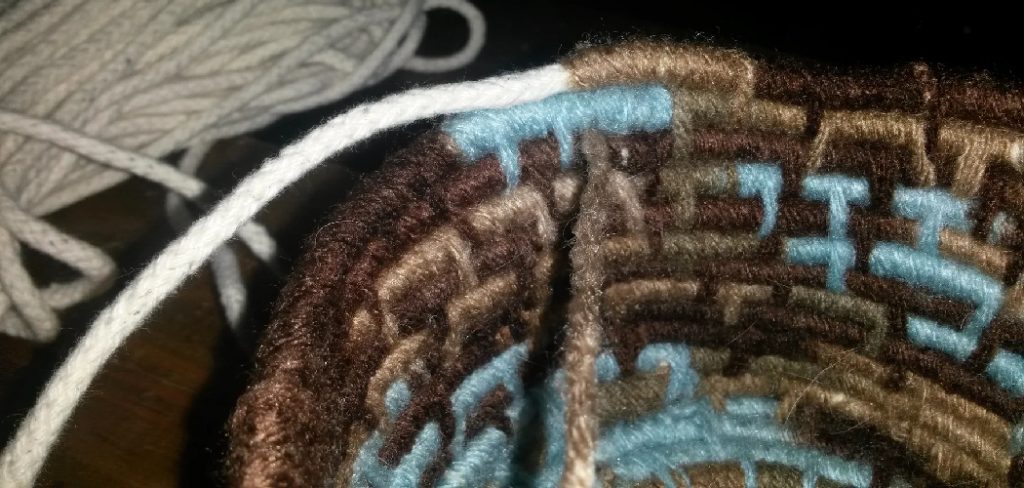
- Hold the other side of the thread in your left hand and put the yarn and the cord parallelly together. The yarn should be lying on top of the cord as shown in the picture above. Make sure that the ends of the two threads are facing the same way.
- Now start to wrap the yarn around the cord with a few inches yarn on the left. You will have to cover the additional yarn as well
- After doing ten wraps, fold the cold in a round coil with a little access
- Now start wrapping again with the access coil and do ten wraps
- After you that, you need to take the needle end and push it through the center and create a loop from the middle to around the cord and back to the middle and that is how you secure the coil
- You can add as many loops as you want
- Make sure everything is tight, and no cord is showing
- Start doing the same process until you get the right length of the base
- You can even add different colors of yarn
- After creating the base, you need to do the next circle on top of the last cord of the base
- And that is how you are going to create the wall of the basket
And you will be done!
Final Thoughts
Once you start making a basket, you will find it very addicting, and by the time you notice, you may end up forming different colors and patterns of baskets. Hopefully, our tutorial on how to weave a basket with yarn will help you.
Elizabeth Davis
Elizabeth is a creative writer and digital editor based in the United States. She has a passion for the arts and crafts, which she developed from a young age. Elizabeth has always loved experimenting with new mediums and sharing her work with others. When she started blogging, she knew that DIYquickly would be the perfect platform to share her tutorials and tips. She's been writing for the blog from the beginning, and her readers love her helpful advice and easy-to-follow instructions. When she's not writing or editing, Elizabeth enjoys spending time with her family and friends.


