
How to Wire a Charging System on a Lawn Mower
In this post, we will explain how to wire a charging system on a lawn mower. For the battery to charge, it needs to connect with the alternator and vice versa. The process of doing so is fairly easy and can be done in an afternoon. First off, remove any wires that are not being used from under the dashboard where you plan on installing your new charging system.
Next, install a fuse box in that same area which should have three slots: one for power going into the ignition switch; one for power going up to the starter relay; and one for power going from the ground back down again through the wiring harness connector at the front of the engine compartment. To get started with the whole process, read below!

Summary: If your lawnmower needs a charging system, there are a few different ways to go about it. The simplest way would be to buy a pre-wired system, but this can be expensive and may not be compatible with your specific lawnmower. Another option is to wire the system yourself, which is easier but may require more technical knowledge.
How Does the Charging System Work on a Lawn Mower?
The charging system on a lawn mower is responsible for making sure the battery stays charged. This is important because the battery is what starts the mower and provides power if the electric starter fails. The charging system does this by using a generator that produces electricity as the mower is driven.
The voltage regulator controls how much energy reaches the battery and thus limits the available starting amps. If more amps are required for starting, the regulator sends them from the battery and keeps it charged.
When you turn off your lawnmower, the generator field stops generating electricity. However, the cooling fan continues to run, using the generator field as a motor. This can cause the generator to overheat and burn out if left idle without a load. If you notice that your battery dies over time as you idle your mower, it is likely due to a faulty voltage regulator.
The actual generator contains a spinning rotor and stationary field coils. The rotor spins inside of magnetic lines of flux produced by the coils to generate an electrical current. This current flows through cables and creates a voltage drop across wires in its path, causing power loss.
The voltage regulator is responsible for sensing the voltage drop and signaling the generator field to produce more power. If it doesn’t do this, the battery will eventually drain when you idle your lawnmower. If you’re interested in the procedure of how to wire a charging system on a lawn mower, then read on for more information.
Five Reasons Why Should Wire a Charging System on a Lawn Mower:
Wiring a lawnmower charging system is crucial and can save you money and time. Below are five reasons why:
1. A new battery will make your mower run like it did when it was new, but without the added cost of buying a new one.
2. A new battery will keep your mower running like new by keeping the motor in good condition.
3. You won’t have to buy a re-manufactured or used battery, which often is defective and shortens the life of the mower.
4. Without electrical power, your lawn mower causes more harm than good.

5. Most manufacturers recommend that the charging system be tested at least once a year or after every 50 hours of mower use.
Things You Need to Know Before Wiring a Lawn Mower Charging System:
Here are some things you must know before taking actions on how to wire a charging system on a lawn mower:
1. The higher the number on the ampere-hour (Ah) rating of your battery, the longer it will last when starting your lawnmower engine.
2. When wiring multiple batteries in parallel, it is important to use batteries of the same voltage to avoid damaging the system.
3. When wiring multiple batteries in series, the voltage doubles, and the ampere-hour rating is cumulative.
4. The total length between your lawn mower’s charging system components can affect spark plug life. Make sure all connections are as short as possible to reduce resistance and increase the life of the spark plug.
5. When wiring a charging system to a lawnmower, you must be sure that your coil and capacitor are compatible with your battery’s voltage.
6. Always use an ammeter when testing or troubleshooting any electrical circuit on a lawnmower. You can get one at most hardware stores for under ten dollars.
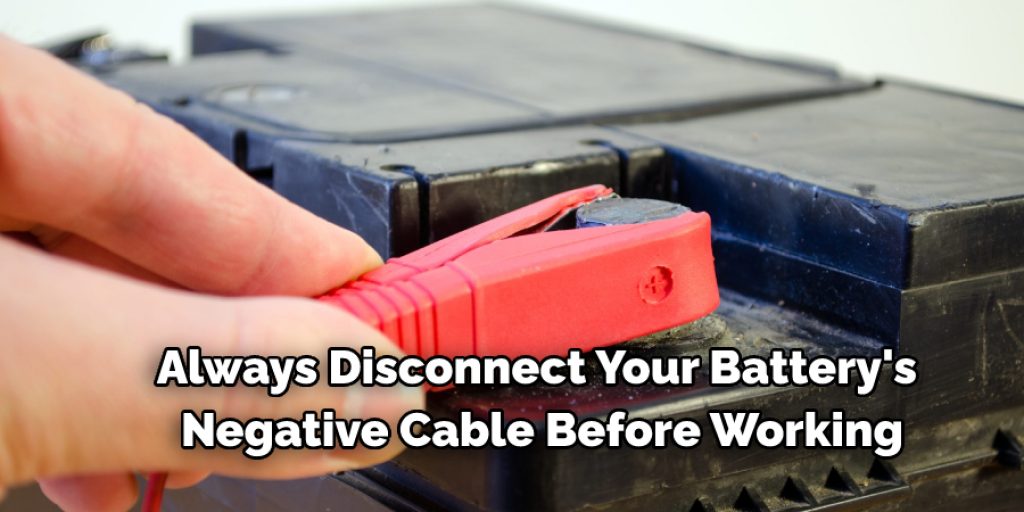
7. Always disconnect your battery’s negative cable before working on any electrical components on your lawn mower.
8. You can use crimp connectors or solder to connect wires together, but soldering will provide the best connection for electronic components like diodes and transistors used in charging systems on lawnmowers.
What You’ll Need to Wire a Lawnmower Charging System:
You will need just a few tools and supplies before stepping on to the process of how to wire a charging system on a lawn mower. The materials needed for the project include:
- A multimeter or a test light
- Wire cutters and strippers
- Cable ties and electrical tape.
Procedure for How to Wire a Charging System on a Lawn Mower:
Step One: Unplug the Sparkplug Wire
Be sure to disconnect the spark plug wire from the spark plug before starting the mower. If you don’t, the mower could start unexpectedly and cause injury or damage.
Step Two: Remove the Battery
Remove the battery from your lawnmower. This may vary depending on your specific mower model, but most require that you loosen a bolt on each side of the mower with an adjustable wrench. Lift the old battery out; dispose of it properly at a recycling center or auto parts store.
Step Three: Identify the Battery Posts
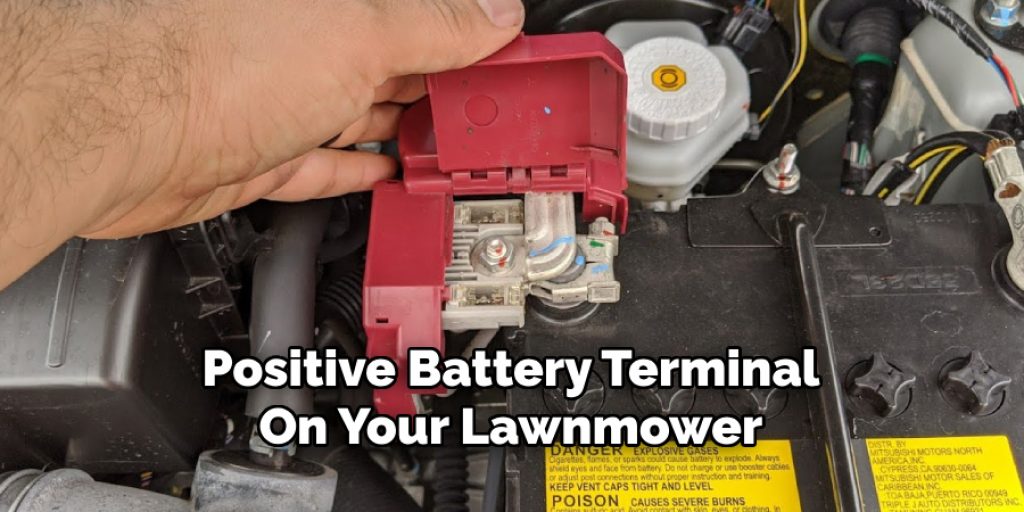
Identify the positive (red) and negative (black) battery terminals on your mower’s battery. You will wire your new battery to these posts to power your lawnmower motor.
Step Four: Attach the Ground Wire
Attach a cable tie to the negative battery post, then run the cable tie through an empty slot on your multimeter’s case. This will keep it from getting lost. The ground wire needs to be attached to the negative post of your mower, or else electricity can’t flow into or out of your batteries.
Wrap one end of an 18-inch wire around the negative post on your mower and tighten with a set of pliers. Wrap the other end of the wire around the multimeter’s case.
Step Five: Check all Grounds and Connections
Check all of your grounds and connections to make sure they are secure. If you find any loose connections, tighten them with a wrench or pliers. If you find any broken wires, attach new ones to the old wire using a set of crimp-on wire connectors. Crimp each connector on tightly, then cover it with electrical tape.
Step Six: Attach Both Battery Wires
Attach one end of another 18-inch wire to the positive battery terminal on your lawnmower. Then wrap the other end of the wire around the positive terminal of your new battery. Using a pair of pliers, tighten both ends onto their respective batteries.
Step Seven: Test the New Charging System
Turn on your multimeter’s switch and check for current using one of two modes on your multimeter – either DC amps or AC amps. Next, check that the voltage of both your mower’s battery and the new battery is the same. If they are, congratulations! You have just successfully wired a lawnmower charging system.
Your lawn mower should now be able to start for what will feel like forever! Enjoy hours upon hours of freshly cut grass, knowing that nothing will stop you from mowing the lawn. With a wiring system you helped create, your lawnmower runs like new.
A Couple Important Tips to Remember:
1. Make sure to keep all of your grounds and connections clean and secure at all times.
2. Always check for any broken or frayed wires before beginning a project. Frayed wires ings can cause a short on your battery, which can explode or catch fire.
3. Always replace all of the old wires from the previous charging system with new ones.
4. If your battery is completely dead, you might need to hook it up to another car or some other device that can provide enough juice for it to turn on.
5. Always conclude a project by running the motor for a short period, not more than five minutes at most, then turning it off and rechecking all connections before trying to start the mower.
6. When replacing wires, make sure to place them in the same spot as their original location and follow the original wiring pattern. This will help keep your lawnmower in proper working order.
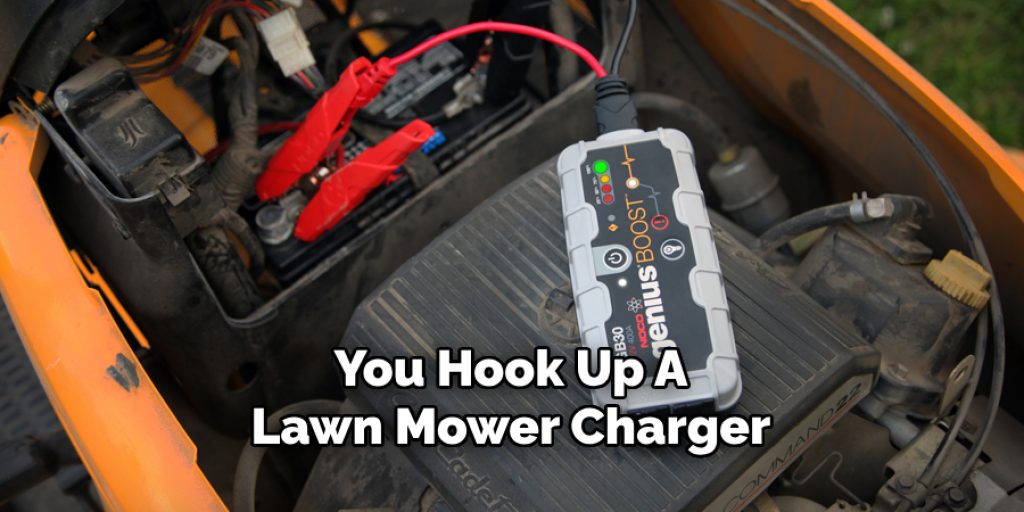
How Do You Hook Up a Lawn Mower Charger?
Before you hook up your lawn mower battery charger, you need to know the voltage of your battery. The voltage is usually stamped on the side of the battery in raised numbers. If it isn’t, check around the base of the battery for a sticker that will have this information on it.
If no sticker can be found, measure the voltage with a voltmeter. The battery’s voltage will determine which charger you’ll need to get, either 6 or 12 volts. Most riding lawn mowers have 6-volt batteries, while most push-type lawn mowers have 12-volt batteries.
To hook up your battery charger, disconnect the negative cable from the negative post on the battery and connect it to the negative post on the lawnmower battery charger. Then disconnect the positive cable from the positive post on the battery and connect it to the positive post of your lawn mower battery charger.
Many chargers have a polarity light to indicate whether or not you have hooked up your cables correctly. If there is no light, check to ensure that you have hooked your positive cable to the correct port on the charger.
Conclusion:
The wiring on a lawnmower can be challenging to work with. However, by following the step-by-step instructions provided in this guide, you should have no problem completing your project safely and successfully.
We hope that reading this blog post has helped you understand how to wire up an electric start charging system for your riding lawnmower. Now that you know how to wire a charging system on a lawn mower, why not check out the other blog posts we have about DIY projects? Again, we hope this article has been helpful!
Louis Wein
Louis has always been fascinated by cars. He loves the way they look, the sound of the engine, and how they make him feel when he's driving. He is always keen to learn more about different mechanics of cars and how the engine contributes to other aspects of the car. As an automotive technician with over 10 years of experience, he knew how they worked and loved taking them apart to see how they went back together. He was especially interested in the mechanics of combustion engines and loved finding ways to make them more efficient. He loves to work on cars and help people keep their vehicles running smoothly. As a senior editor, he enjoys contributing to Diy quickly because it allows him to share his knowledge and expertise with others.


