
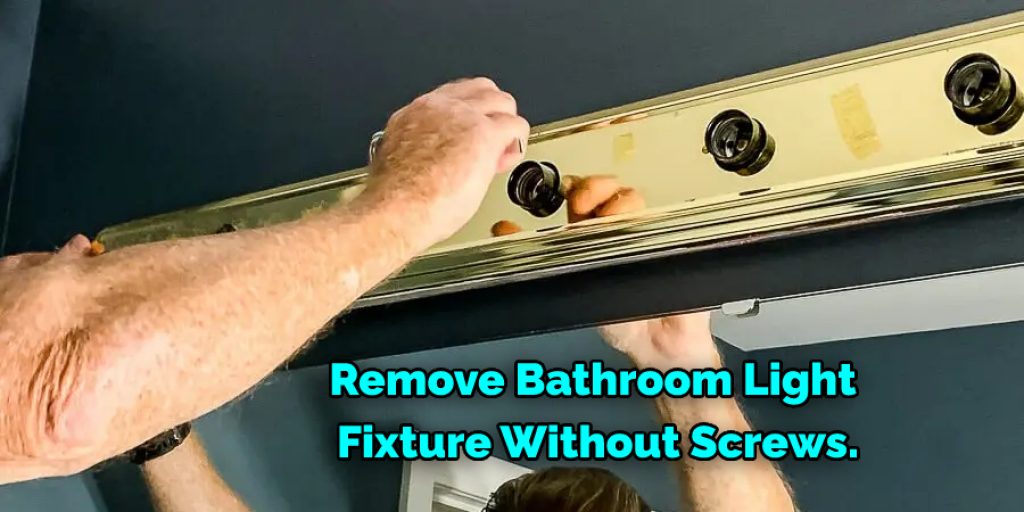
How to Remove Bathroom Light Fixture Without Screws
Have you ever needed to remove a light fixture from the bathroom but didn’t have any screws? Bathroom light fixtures are often installed without screws instead of relying on pressure to hold the fixture in place. If you need to remove this type of fixture, a few methods work well for removing it without damaging your walls or ceiling.

This post will discuss different techniques on how to remove bathroom light fixtures without screws and provide illustrations of each technique so you can see how they look before trying them yourself. So keep reading if you want to learn how to get rid of your old lights!
Why Should You Remove Bathroom Light Fixture?
- You want to replace the light bulb, but it’s recessed into the ceiling.
- You want to clean the light fixture.
- You want to replace a broken light bulb or lamp.
- You want to upgrade the light bulbs for something more energy-efficient and brighter.
- The light fixture is old and ugly; you want to replace it with more excellent looking.
- Your kids keep burning their fingers on the light bulb.
- You want to access ceiling pipes or electrical wiring without removing more than just this light fixture.
- There are annoying cobwebs in the corner of the recessed lights that you can’t reach.
- The basement ceiling is low, and you need to replace the bottom part of the light fixture with a shorter one, so you don’t hit your head while going downstairs.
- You want to see if there is any attic access from this ceiling, and it’s easier to remove the light fixture than take down a significant section of the ceiling.
12 Methods on How to Remove Bathroom Light Fixture Without Screws:
Here we have discussed some methods on how to remove bathroom light fixtures without screws.
1. Remove the Fixture From the Ceiling
To change your bathroom ceiling light, you first need to disconnect it from the wiring. Be careful not to tug on the wires themselves, but rather disconnect them at the junction. If you have trouble pulling the fixture down, there are probably other screws securing it to the ceiling joists above that need to be removed.
2. Use a Plunger
Turn off your bathroom’s power supply to avoid any accidents. Then fill up your plunger with water and stick it over the light fixture. Next, turn the power supply on and plunge away for a minute or two. It should come loose after that amount of time, but if it doesn’t, you can always resort to unscrewing it with your screwdriver.
3. Remove Ceiling Tile
Most bathroom light fixtures are attached to the ceiling with screws inserted into the fixture’s base. The screws hold the fixture against whatever is behind it, usually another piece of drywall, plaster, or concrete. If you run into any resistance when unscrewing the fixture, figure out what’s behind it (if anything) and remove it to get at the light bulb screws inside.
4. Unscrew Bulbs With Wrench
If you can’t remove your bathroom light fixture because it’s attached to other sections of the house above it, then focus on getting at the screws holding the light bulbs inside. If you have a wrench handy, try unscrewing them manually. If your bathroom has no ceilings and your fixture is hanging from the floor or beams above, turn on the light and unscrew the screws that hold the bulbs in place with your hands.
5. Punch Holes in the Ceiling
If you’re still stuck after all this, it’s time to get destructive. Look for a junction box attached inside one of your bathroom’s walls near where the fixture is hanging from. It’s usually the flat metal box with one or two slots for wires leading into it. Punch through the ceiling there with a screwdriver to get at whatever’s inside.
6. Find the Junction Box
If the fixture is hanging from a socket in the middle of your bathroom, start looking for this junction box. It will be on one of the walls near where the fixture meets it. It’s just a metal box with some holes that wires can lead into and out of. You can punch through whatever ceiling material, like drywall, plaster, or concrete, is there to access the junction box.
7. Cut Wires With Wire Stripper
If you’re out of options and don’t want to take down your bathroom ceiling, cut the wires with a wire stripper as close as possible to where they meet the fixture. If it’s dangling from the top, turn it counter-clockwise with your hand and try to bring it down as close to the floor as you can. Whatever wires are leftover after the removal process, strip them and twist their stripped ends together.
8. Use Pliers
If all else fails and you don’t want to take down any of the ceilings in your bathroom, cut the wires as close to the fixture as you can. Please turn off your bathroom’s power supply and strip them with a wire stripper. Twist them together and use pliers (or vice grips if they’re handy) to twist them even closer together.
9. Unscrew Curtain Rods
If you have adhesive hooks holding up your shower curtains, use them to unscrew the light bulb screws. Do not let any water damage occur with these adhesive hooks or anything that comes with them. You might have some heavy-duty rubber bands around that you can use instead.
10. Use Rubber Bands
Use rubber bands if you don’t want to buy adhesive hooks just for their ability to detach lights for this job. Unscrew the screws holding your bathroom’s light fixtures in place and loop some heavy-duty rubber bands around them instead. You can now use those rubber bands to pull the fixture out of the wall or ceiling by sliding an object through its loops.
11. Wear Concrete Gloves
If you have access to some heavy-duty concrete gloves, wear them to unscrew your bathroom light fixture without screws. These are the thickest gloves available, and they’ll protect your hands from any damage you might accidentally inflict upon yourself. In addition, you can use these same gloves to give a good tug at a light fixture you’re having difficulty with.
12. Replace Bulbs With Dimmers
Finally, after you’ve removed your old fixture and installed a new one, it’s time to take care of your old lights. Re-purpose them into something that’ll help you out more than just being a light fixture, like a dimmer for your leading bathroom lights or even less specific things you have lying around the house, like closet lights.
Things to Consider When Removing Bathroom Light Fixture Without Screws:
Here are some things to consider before you know how to remove a bathroom light fixture without screws.
- Find a light fixture close to the same type of light as the one you want to replace.
- The new fixture should ideally be a bit larger or at least the same size as the old one. Replacing a small fixture with a large, imposing light can make your bathroom look smaller and more cramped.
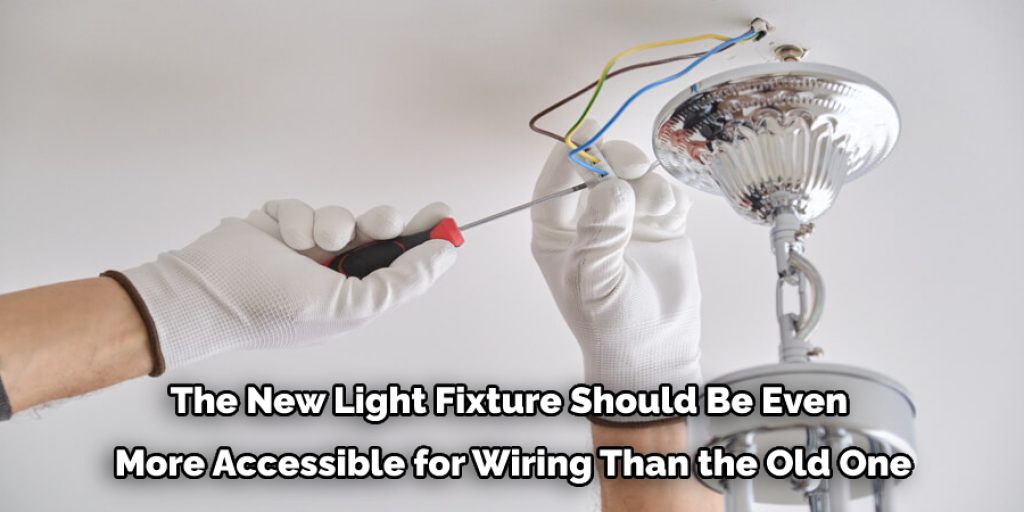
- The new light fixture should be even more accessible for wiring than the old one. If possible, you can choose a different location to install it (underneath the ceiling light instead of underneath an upper cabinet, perhaps).
- The new fixture should have the same number of wires as the old one.
- The screws securing your current light fixture are probably hidden behind an access cover that can be pried off with a flat-head screwdriver. Pop out the small plastic or metal trim pieces, if any, to access these screws.
- Test-fit your replacement light fixture before buying it by ensuring that there is enough space for the light to fit into. A fixture just a few inches too big can look out of place in any bathroom, so try to find one that fits snugly within the room’s existing lighting.
Safety Precautions and Warnings:

- Make sure to turn off the power coming into the light fixture (if there is electrically connected to it.)
- When unscrewing the wire nuts, ensure one hand has a firm grip on each wire nut or at least one of them. Otherwise, they might shoot out and hit. Also, the wire nuts may not come apart evenly, and if one of the electrical wires is still attached to the light fixture, it could create a shock.
- Ensure all wiring has been removed from the old light fixture before attempting to remove any part of it. Also, ensure that there are no pieces left inside of the light fixture.
- Only one person should unscrew the light fixture above, while another should stead it from below.
- Do not touch any exposed wiring or electrical connections with your hands while working on a light fixture. If you come in contact with exposed wires and it is not safe to touch them, use a dry wooden stick or something of the sort to push away wires instead of your hand.
- Call an electrician if you are unsure about what you are doing at any point during this process. But, again, it is better to be safe than sorry.
- Make sure that all parts of the light fixture are clean before reassembly.
Conclusion:
If you are looking for a way how to remove bathroom light fixtures without screws, the easiest option is likely to use pliers. The process can be done in just a few moments and will not cause any damage to the ceiling or wall that may have been holding it up. All you need to do is hold onto one side of the wire while twisting with pliers on the other end until they meet in between both sides of the fixture.
This should loosen them enough so that they come apart from each other. Then push down at an angle with your hand and pull away from where it was attached, which should break off all connections between wires inside. Once this has happened, ensure no loose wiring is hanging around and make your way to the nearest light socket. Finally, twist the two ends together, and you will be good to go!
Check also: How to Reduce Echo in a Bathroom.
Angela Ervin
Angela is the executive editor of DIY quickly. She began her career as an interior designer before applying her strategic and creative passion to lifestyle and home. She has close to 15 years of experience in creative writing and online content strategy for housekeeping, home decorations as well as other niche efforts. She loves her job and has the privilege of working with an extraordinary team. She lives with her husband, two sons, and daughter in Petersburg. When she's not busy working she spent time with her family.


