How to Keep Things From Floating in Resin
If you’re new to resin art, things floating in the finished product may be a little disconcerting. It can take some getting used to, but with a few simple tips, you can easily keep things from floating in the resin. In this article, we’ll share our best tips for how to keep things from floating in resin. By following these guidelines, you’ll be able to create beautifully smooth and consistent resin art every time. Let’s get started!

When first mixed, the resin is a liquid, so some objects will inevitably float to the top as it begins to set. The key to keeping things from floating in resin is to weigh them down, staying in place during the curing process. There are a few different ways you can do this, and the best method will depend on the type of object you’re trying to keep submerged.
Things to Know Before You Start
If you’re new to working with resin, you should know a few things before you start. First, resin is a two-part product that comes as a liquid in two separate containers. When mixed, these two liquids create a third substance, which is then poured into a mold to create your project.
The most important thing to remember when working with resin is that it is poisonous if ingested. Therefore, always work in a well-ventilated area, and wear gloves and a mask to avoid breathing in fumes. In addition, be sure to keep children and pets away from your work area.
Another essential thing to remember is that resin will not cure properly if it is not mixed in the correct ratio. The two parts of resin are usually mixed in a 1:1 ratio, meaning that you would use equal parts of each liquid. However, some types of resin require a different ratio, so be sure to check the instructions on your specific product.
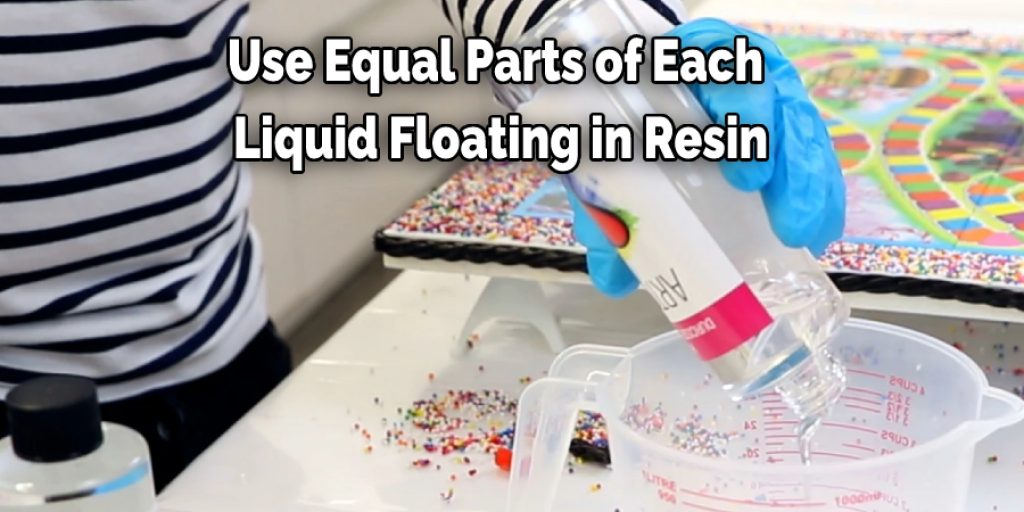
Finally, you’ll need to work quickly when using resin because it hardens when the two liquids are mixed. You’ll only have a few minutes to pour the resin into your mold and add any embellishments before it begins to set.
A Detailed Guide on How to Keep Things From Floating in Resin
Method 1: Use Weights
Weights are a popular method to keep things from floating in the resin. This can be anything from rocks or sand to metal washers or glass beads. The key is to make sure that the weight you’re using is dense enough to sink and not too big to create an uneven surface.
What You Will Need;
- Weights (rocks, sand, metal washers, glass beads, etc.)
- Resin
- Mixing cup
- Stir stick
Step 1: Choose Your Weight.
The first step is to choose the weight you want to use. It’s essential to make sure that the weight is dense enough to sink and not too big to create an uneven surface.
Step 2: Place the Weights in the Bottom of the Mixing Cup.
Next, place the weights in the bottom of the mixing cup. Again, you can use as many or as few as you like, but consider that more weights will result in a heavier piece.
Step 3: Pour Resin Into the Cup.
Once you’ve added the desired weights, pour your resin into the cup. Make sure to mix thoroughly so that the weights are evenly distributed.

Step 4: Pour Into Your Mold and Let Cure.
Pour your resin into your mold and let it cure according to the manufacturer’s instructions. Once it’s cured, you’ll have a beautiful piece that is weighted and won’t float away!
Step 5: Enjoy your new piece!
Enjoy your new piece and admire your handiwork!
Method 2: Use a Mold Release Agent
If you don’t want to use weights, another method uses a mold release agent. This will create a barrier between the resin and the mold so that the piece can quickly be released. This method’s great because it doesn’t add any weight to the piece, and it’s straightforward to do.
What You Will Need:
- Mold release agent ( silicone spray or petroleum jelly)
- Resin
- Mixing cup
- Stir stick
Step 1: Determine What Kind of Mold Release Agent You Want to Use
There are two main mold release agents: silicone spray and petroleum jelly. If you’re using a silicone mold, you’ll want to use a silicone-based release agent. If you’re using a non-silicone mold, you can use either type of release agent.
Step 2: Apply the Mold Release Agent
Once you’ve decided which mold release agent to use, it’s time to apply it to the mold. Hold the mold about 6 inches away from the nozzle and spray evenly over the surface if you’re using a spray. If you’re using petroleum jelly, apply it with a brush or your fingers. Ensure that the entire surface is covered with a thin layer of the release agent.
Step 3: Pour Your Resin
Once the mold is evenly coated with the release agent, you can pour your resin. First, mix your resin according to the manufacturer’s instructions and pour it into the mold. Be sure to pour slowly so that you don’t create any bubbles.
Step 4: Let the Resin Cure
Let the resin cure according to the manufacturer’s instructions. Once it’s cured, you can remove the piece from the mold. The release agent will have created a barrier between the resin and the mold, so the piece should easily come out.
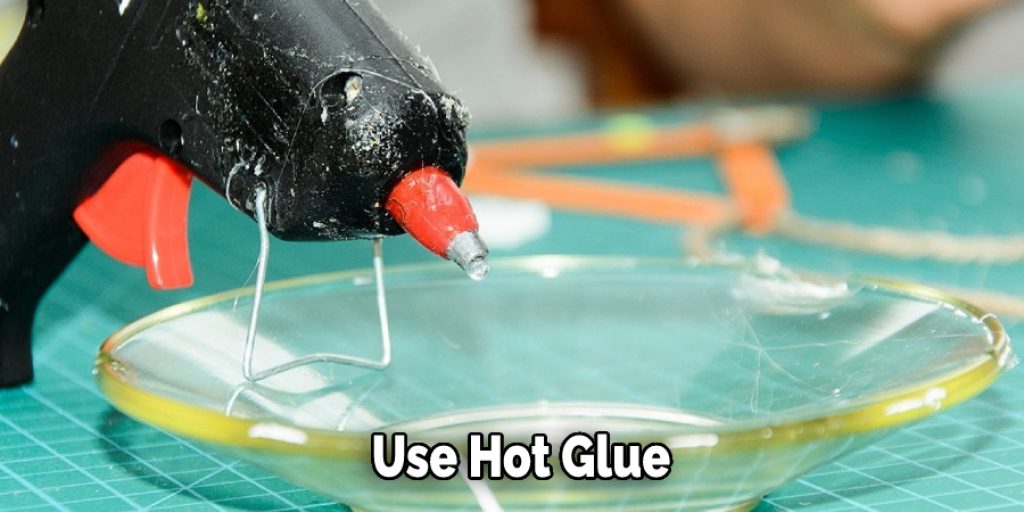
Method 3: Use Hot Glue
Hot glue is another popular method to keep things from floating in the resin. The key to this method is to make sure that the glue is completely dry before adding it to the resin. If not, the hot glue will react with the resin and create an unpleasant smell.
What You Will Need:
- Hot glue gun
- Glue sticks
- Resin
- Mixing cup
- Stir stick
Step 1: Before You Start
Read the instructions on your resin carefully. Some resins require you to add a catalyst or hardener before starting working with them. Choose a well-ventilated area to work in. Resin fumes can be harmful if inhaled for prolonged periods.
Step 2: Prepare Your Work Area
Cover your work area with a disposable tablecloth or piece of cardboard. This will make cleanup easier later.
Step 3: Melt the Glue
Plugin your hot glue gun and insert a glue stick. Allow the glue to melt completely.
Step 4: Apply the Glue
When the glue is melted, apply it to the back of the object you want to keep from floating in the resin. Again, make sure to apply an even layer of glue.
Step 5: Let the Glue Dry
Let the glue dry completely before moving on to the next step. This is important because if the glue is not completely dry, it will react with the resin and create an unpleasant smell.
Step 6: Mix the Resin
Follow the instructions on your resin to mix it properly. Once it is mixed, pour it into a disposable cup.
Step 7: Add the Resin to the Glue
Slowly pour the resin onto the glue. Be careful not to add too much at once, or the resin will overflow.
Step 8: Let the Resin Cure
Follow the instructions on your resin to cure it properly. Once cured, your object should be securely attached and ready to use.
There you have it! Three methods how to keep things from floating in resin. Experiment with these methods to see what works best for you and your project.
Can You Put a Printed Picture in Resin?
Many people enjoy creating 3D objects by pouring resin into molds. You can find molds in the shape of just about anything, and they come in a variety of materials, including silicone, plastic, and metal. Once the resin has cured, you can remove the mold to reveal your one-of-a-kind creation. While you can pour the resin into a mold without adding anything else, many people like to personalize their pieces by adding elements like glitter, beads, or even photographs. But can you put a printed picture in resin?
The short answer is yes; you can put a printed picture in resin. However, there are a few things you need to keep in mind to ensure that your project turns out the way you want it to.
First of all, it’s essential to use an inkjet printout rather than a photocopy. This is because photocopies are made with toner, which doesn’t play well with resin.
Secondly, you’ll need to coat your printout with a clear sealant before adding it to the resin. This will help to prevent the colors from bleeding and will also make it easier to remove the printout from the mold once the resin has cured.
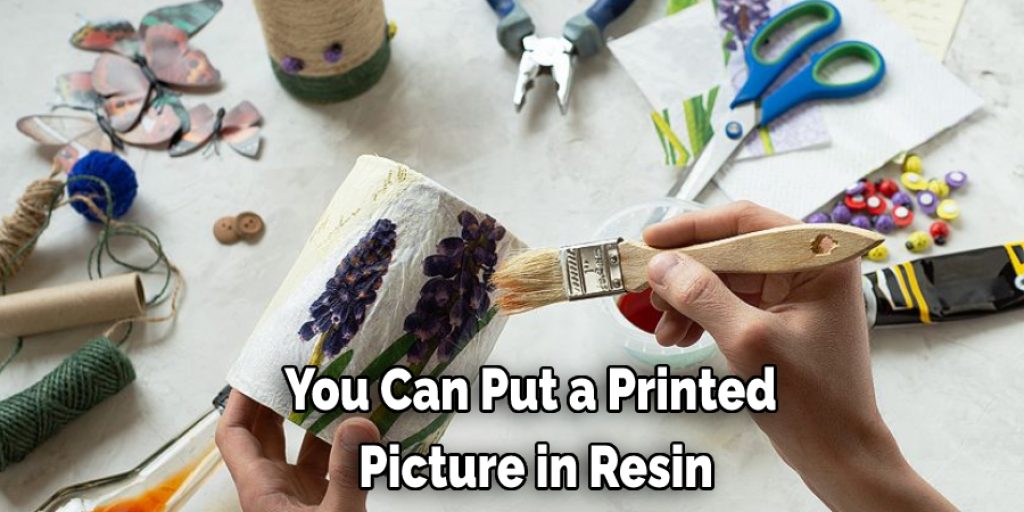
Finally, remember that pictures add depth to your piece, so you’ll need to consider when calculating how much resin you’ll need to use.
With a bit of care and attention to detail, you can easily add a printed picture to your next resin project. Just be sure to follow the instructions above, and you’ll be on your way to creating a one-of-a-kind work of art.
Adding pictures to your resin projects is a great way to personalize them and make them unique. Follow the tips in this article, and you’ll be sure to create a beautiful piece that you’re proud of.
Conclusion
The best way to avoid things from floating in resin is by using a weight or clamp. Make sure that whatever you are casting is completely dry before submerging it in resin. Finally, always use caution when working with resin, and be sure to read all safety instructions. We hope you have learned how to keep things from floating in resin.
You can check it out to Make a Press Mold