How to Make a Coil Basket
Coil basket-making is a centuries-old craft that has remained popular over the years. Whether you want to add a unique touch to your home décor, give it as a gift, or learn how to make something with ancestral roots and meaning – coil baskets can be crafted in such creative ways.
If you’ve ever wanted to try your hand at making one of these traditional pieces yourself, this post will teach you everything you need to know about how to make a coil basket! From gathering materials and supplies needed for the project, understanding key techniques like coiling and weaving, and adding decorative touches.
I’ll cover all steps so that by the end of this article, you’ll have yours completed! So let’s get started on creating an amazing coil basket — no matter what your skill set or experience level may be!

Is Fiber Basket Trendy Enough?
Coil baskets crafted from natural plant fibers are becoming more popular for both functional and decorative uses. Many people appreciate the rustic, handmade look of these baskets as well as the texture of the fiber material.
As a result, they can be found in homes, offices, stores, and restaurants around the globe. But is a fiber basket trend enough to make it an essential part of your home decor? The answer depends on what you are looking for in terms of style and functionality.
If you prefer a clean, modern look that is still rooted in nature-inspired elements, then coil baskets are definitely worth considering. Not only will they bring natural materials into your space, but they also add visual interest with their unique shapes and textures. The range of colors and sizes, along with the ability to customize them with beads or other adornments, makes these baskets even more versatile.
On the other hand, if you are looking for something that is purely functional and less decorative, then a fiber basket may not be as practical. While they can be used for storage or organizing, their lightweight nature means they may not offer enough durability to withstand heavy use over time.
However, if you don’t need a lot of weight-bearing capacity or are looking for something that can easily move from room to room without feeling bulky, then a coil basket might just do the trick!
10 Methods How to Make a Coil Basket
1. Gather Materials:
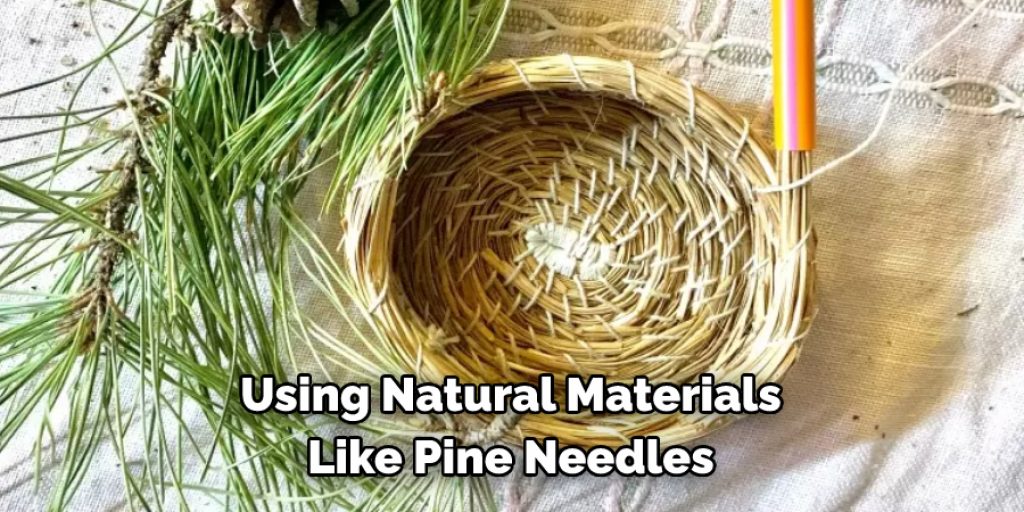
Choose your preferred coiling material, such as rope, twine, fabric strips, pine needles, sweetgrass, wire, paper, or beads. Select materials that are pliable and suitable for coiling.
Additionally, you will need scissors or wire cutters and a flat surface, such as a table or floor. To fasten the coil together, you will need either glue or wax. However, be aware that some materials may not bond well with glue or wax. Try to select a fastening method that will work best for your specific material.
2. Prepare Materials:
If using natural materials like pine needles or sweetgrass, soak them in water to make them more flexible. If using fabric or paper, cut them into strips of equal width and length. If using wire, make sure it’s malleable and easy to bend.
You will also need a large dowel, a sharp pair of scissors, and some glue. While gathering the materials, consider what colors or textures you want to use in your basket. To add accents, you can use ribbons, beads, buttons, or other embellishments. However, it’s best to keep the materials as simple as possible so you can focus on your technique.
3. Create a Base:
Start by creating a small coil with your chosen material and coil it tightly to form the base of your basket. This will serve as the foundation for your basket. For added stability, you can create a second coil and nestle it within the first.
To hold the coils together, wrap thick thread or thin wire around the base. Once the base is secure, you can begin to build up the sides of your basket. However, be sure to keep the base close to the center of the basket as you build. This will help maintain an even shape and support the walls of the basket.
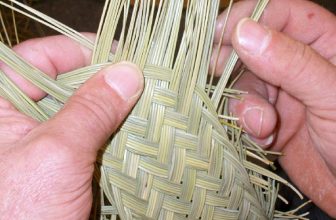
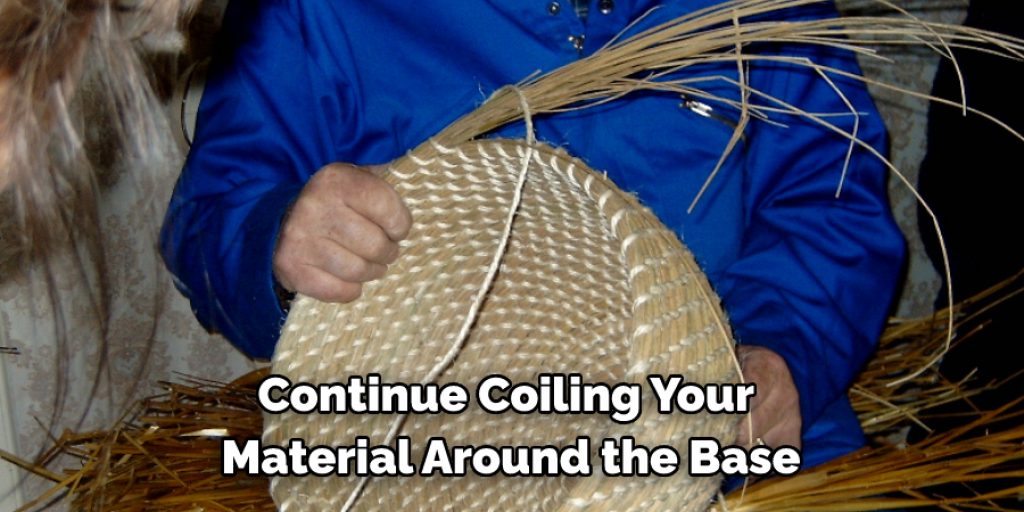
4. Coil and Stitch:
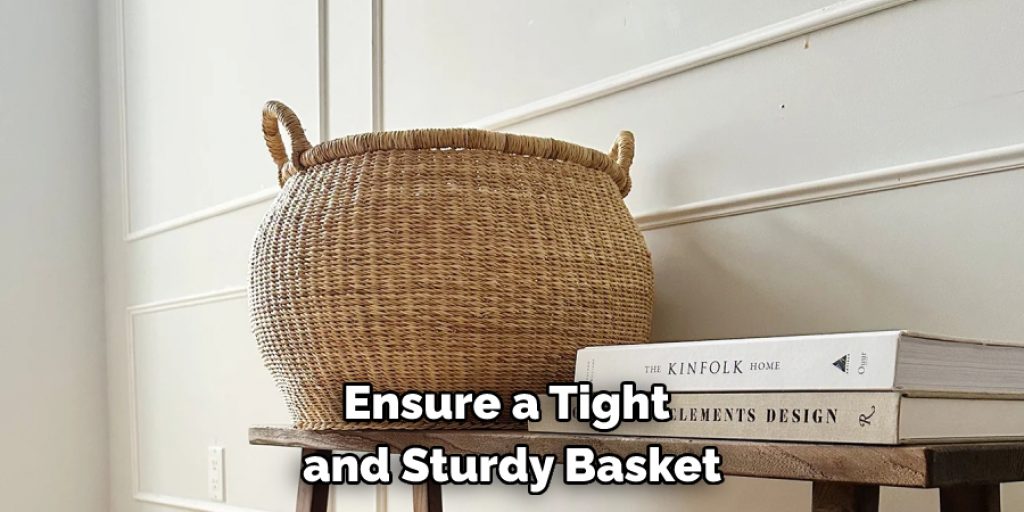
Continue coiling your material around the base, stitching it to the previous coil using a needle or your fingers. Pull the material snugly to ensure a tight and sturdy basket. Repeat this process, coiling, and stitching, to build the sides of your basket to the desired height.
You can make a tight coil by pushing each new bit of material down into the previous one, or you can leave room between coils to give your basket a looser shape. When you have the desired height, you can then begin to taper off and make the top edge of the basket. To do this, start leaving larger gaps between each coil.
5. Shape your Basket:
As you coil, you can shape your basket by gently bending and molding it to the desired form. You can create a traditional round shape or an oval or experiment with unique shapes and designs. You can also use a blunt object, such as the handle of a spoon, to press against the coils and shape them.
To make the basket more secure, occasionally press the coils against each other by pushing them in opposite directions. This will help keep your basket from unraveling. To give your basket shape and body, you can fill it with foam or packing peanuts. This will also help the coils to stay in place as you work. Once you have achieved the desired shape and height of your basket, you can cut off any remaining coil.
6. Add Decorative Elements:
If desired, you can incorporate decorative elements such as beads, additional colors of material, or other embellishments into your coiling. String beads onto your material or stitch in different colored strips to create patterns or designs. Once your basket is complete, you can use your imagination to customize it however you like.
7. Secure the Ends:
When you reach the desired height for your basket, secure the ends of your coiling material by stitching it tightly to the previous coil. Trim any excess material if necessary. Once the ends are secured, you can enhance the appearance of your coil basket with any additional detail work. You could add beads or leather strips to the threads for a colorful, rustic look. Or you could add intricate stitch work to the basket’s body to create shapes or designs.
8. Finishing Touches:
Take a moment to inspect your basket and make any adjustments or tweaks as needed. Ensure that all the coils are tightly stitched, and the shape is to your liking. If desired, you can add an embellishment such as beads or feathers to the basket.

This is a great way to make your basket even more unique and special. Finally, use a sealant to protect the basket from wear and tear. This will help ensure that your basket lasts for years to come. With these simple steps, you now have a beautiful homemade coil basket!
9. Optional Handles or Rims:
If you want to add handles or rims to your basket, you can do so by attaching additional coils of material to the sides or top edge. Stitch them securely to the existing coils, shaping them as desired. For a rim, create a complete circle of material and stitch it to the top edge of your basket.
When attaching handles, use an even number of coils, as this will help your handle stay even and balanced. You can use leather strips, twine, or any other type of material that is strong enough to hold the weight of your basket.
10. Final Touches:
Once you are satisfied with the shape and design of your coil basket, you can give it a final trim, tidy up any loose ends, and add any additional finishing touches, such as a coat of varnish or a ribbon tied around the rim. Once everything is secure, you can admire your beautiful handmade coil basket!
Conclusion
As you can see, making a coil basket is simple and easy to do. Depending on the size of your basket, it should take you at most half an hour to create a masterpiece with your own hands. With just a few materials, patience, and dedication, anyone can make a beautiful coil basket – a great decoration piece or gift to wow family and friends.
When you’ve finished making your unique creation, be sure to display it proudly in your home or give it away as the perfect present! Making something by hand is sure to put smiles on everyone’s faces this holiday season. So why wait? Put those creative juices flowing and start coiling today! How to Make a Coil Basket is here to guide you every step of the way so you can showcase your one-of-a-kind work. Give it a try and experience the satisfaction of creating in no time.
Angela Ervin
Angela is the executive editor of DIY quickly. She began her career as an interior designer before applying her strategic and creative passion to lifestyle and home. She has close to 15 years of experience in creative writing and online content strategy for housekeeping, home decorations as well as other niche efforts. She loves her job and has the privilege of working with an extraordinary team. She lives with her husband, two sons, and daughter in Petersburg. When she's not busy working she spent time with her family.