How to Repair Loose Drywall Tape on Ceiling
Have you noticed the walls in your home beginning to sag or separate at the top? This may be due to loose drywall tape on your ceiling, which is an all-too-common problem that can cause considerable damage if left unchecked. Fortunately, there are some simple and straightforward steps you can take to repair the issue before it becomes serious.
In this blog post, we’ll provide a detailed guide on how to repair loose drywall tape on ceiling so that you can keep your ceilings looking perfect for years to come!
Tools and Materials You Will Need to Repair Loose Drywall Tape on Ceiling
- Ladder
- Utility knife
- Putty knife
- Joint compound
- Drywall screws
- Sandpaper (120-grit)
- Paint and paintbrush or roller
Step-by-step Guidelines on how to Repair Loose Drywall Tape on Ceiling
Step 1: Identify the Problem Area
Before you can fix the issue, you’ll need to identify where exactly the loose tape is located. Use a ladder to carefully inspect your ceiling for any areas with sagging or separated drywall tape. Identifying the problem areas will make it easier for you to target them during the repair process. This is also a good time to examine the surrounding areas for any signs of water damage or other issues that may have caused the tape to come loose.
Step 2: Prepare the Area for Repair
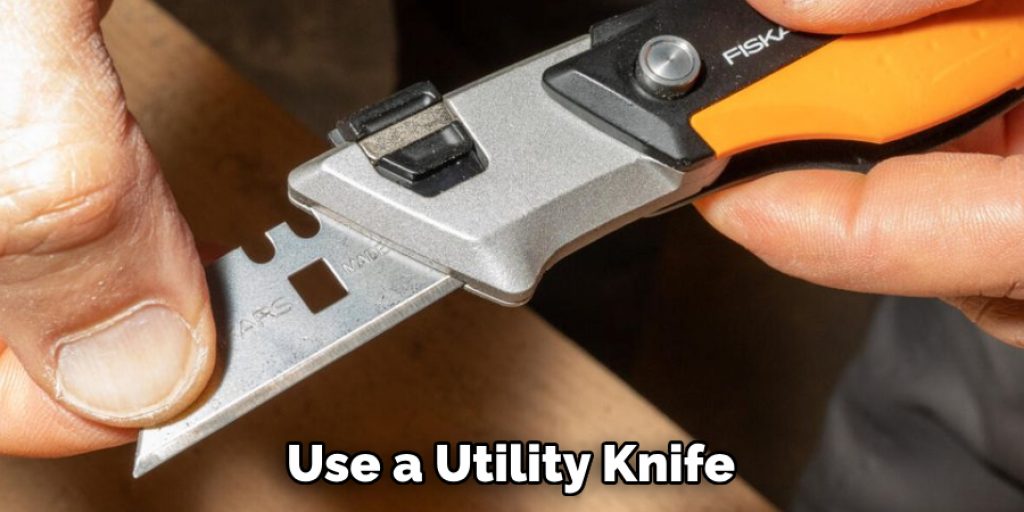
Once you’ve identified the problem area, it’s time to prepare it for repair. Use a utility knife to carefully cut away any loose or damaged sections of drywall tape and remove any debris. This will create a clean surface for the new tape to adhere to and ensure a smooth repair. Preparing the area properly is key to achieving a long-lasting fix.
Step 3: Add New Screws
In some cases, loose drywall tape may be caused by underlying issues such as shifting or settling the ceiling. To prevent future problems, adding new screws to reinforce the area is important.
Use a drill to carefully insert drywall screws every six inches along the area where the tape has come loose. This will help to secure the drywall and prevent any further damage. While this step may add some extra time to the repair process, it will ultimately save you from having to fix the same issue again in the near future.
Step 4: Apply Joint Compound
Once you’ve added new screws, it’s time to begin repairing the actual drywall tape. Use a putty knife to apply joint compound over the damaged area. Make sure to spread it evenly and smooth out any excess. This will help to create a strong bond between the new tape and the ceiling. This process may require a few layers of joint compound, so be patient and allow each layer to dry completely before applying the next.
Step 5: Apply New Drywall Tape
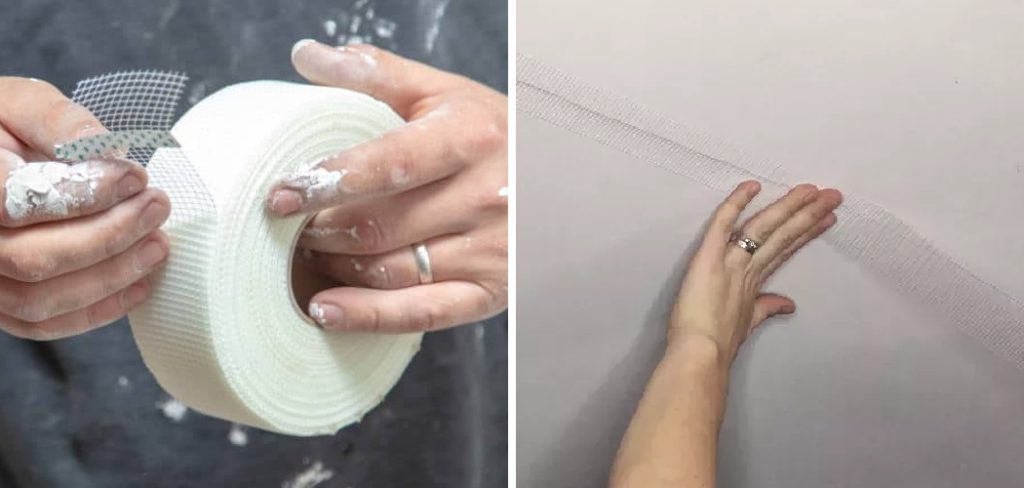
After applying the joint compound, place a new strip of drywall tape over the damaged area. Use your putty knife to gently press it into the compound and smooth out any air bubbles or excess compound. Ensure the tape is fully embedded in the joint compound to create a sturdy repair. While some may choose to use mesh tape, paper tape is typically recommended for this type of repair.
Step 6: Sand and Paint
Once the joint compound has dried, use sandpaper to smooth out any rough edges or excess compound. Then, use paint and a paintbrush or roller to cover the repaired area and blend it with the rest of the ceiling. This will give your ceiling a seamless finish and make the repair virtually undetectable.
Following these simple steps, you can easily repair loose drywall tape on your ceiling and prevent any further damage. Just remember to always take necessary safety precautions when working on a ladder and consult a professional if you are unsure about the severity of the issue. With a little bit of effort, you can keep your ceilings looking perfect for years to come! Happy repairing!

Additional Tips and Tricks to Repair Loose Drywall Tape on Ceiling
1. If you have a small area of loose drywall tape on your ceiling, you can try using a caulk gun to apply some joint compound behind the tape and press it back into place. This method works best for minor repairs.
2. For larger areas of loose drywall tape, cut off any excess or dangling pieces with a utility knife before attempting to reattach the tape.
3. To ensure a strong bond, use self-adhesive fiberglass mesh tape instead of paper tape when reattaching loose drywall tape. The extra strength and stickiness of the mesh tape will help keep the tape in place.
4. When applying the joint compound behind the loose drywall tape, make sure to spread it evenly and smoothly using a putty knife. This will prevent any bumps or lumps from forming under the tape.
5. If you notice any air bubbles or wrinkles in the drywall tape after reattaching it, use your putty knife to gently smooth them out before letting the joint compound dry.
6. Once the joint compound has dried, sand down any rough or uneven spots using fine-grit sandpaper. This will create a smooth and seamless finish.
7. To prevent future loosening of the drywall tape, consider adding some screws along the edges of the tape to provide extra support.
8. When applying a new layer of joint compound over the repaired area, make sure to feather out the edges so they blend in with the rest of the ceiling.
9. If you don’t have any joint compound on hand, you can also use spackling paste to repair loose drywall tape. It may not be as strong as a joint compound, but it can still do the job for smaller repairs.
10. Don’t forget to wear protective gear such as goggles and a dust mask while working with joint compound or spackling paste.
Following these tips and tricks can help you successfully repair loose drywall tape on your ceiling and achieve a smooth and seamless finish. However, if the damage is extensive or requires professional expertise, it’s best to consult a contractor for assistance. Remember to always prioritize safety and follow proper techniques when working with any materials. Happy repairing!

Things You Should Consider to Repair Loose Drywall Tape on Ceiling
- Always inspect the ceiling before repairing loose drywall tape to determine any underlying damage or issues that need to be addressed. This will ensure that your repair will last for a long time.
- Make sure you have all the necessary tools and materials before starting the repair process. This includes a drywall joint compound, a putty knife, sandpaper, and a utility knife.
- Clean the area around the loose tape using a damp cloth or sponge to remove any dust or debris. This will help the joint compound adhere better to the surface.
- Cut off any loose or damaged sections of drywall tape using a utility knife. Make sure to cut along the edges of the tape and remove any frayed edges.
- Apply a thin layer of drywall joint compound over the area where you removed the loose tape using a putty knife. Smooth out any excess and ensure that the compound covers the tape completely.
- Place a new piece of drywall tape over the joint compound, making sure it is aligned with the existing tape on the ceiling. Use your putty knife to smooth out any air bubbles or wrinkles in the tape.
- Allow the joint compound to dry completely according to the manufacturer’s instructions. This usually takes anywhere from 24-48 hours.
- Once dry, lightly sand the repaired area using fine-grit sandpaper to create a smooth surface.
- Apply a second layer of joint compound over the tape and surrounding area, feathering it out to blend with the rest of the ceiling. Let it dry completely before moving on to the next step.
- Sand again if necessary and repeat the process until you have a smooth and seamless surface.
- Lastly, prime and paint the repaired area to match the rest of your ceiling. This will not only make it visually appealing but also help protect the repair from future damage.
Following these considerations will ensure a successful repair of loose drywall tape on your ceiling. It is important to take your time and follow the proper steps to avoid any mistakes or further damage. If you are unsure or uncomfortable with completing this repair yourself, it is always best to consult a professional for help.
Remember, safety should always be a priority when working on any home improvement project. So, make sure to wear appropriate protective gear and follow all safety precautions. With patience and attention to detail, you can have your ceiling looking as good as new in no time! So don’t let a loose drywall tape on your ceiling bring you down, follow these tips and get it fixed today. Happy repairing

Precautions Need to Follow for Repairing Loose Drywall Tape on Ceiling:
- Before working on any home repair project, safety should always be your top priority. Make sure to wear protective gear such as goggles, gloves, and a dust mask when working with drywall.
- Clear the area around the damaged tape on your ceiling. Move any furniture or objects that may hinder your repair process.
- Use a ladder to reach the damaged area on your ceiling. Make sure the ladder is secure and stable before climbing up.
- To prepare for repairing loose drywall tape on the ceiling, you will need the following materials: joint compound, drywall tape, putty knife, sandpaper, and a paintbrush.
- Begin by carefully removing any loose or damaged pieces of drywall tape from the ceiling. Use a putty knife to gently scrape away any debris.
- Clean the area thoroughly with a damp cloth to remove any remaining dust or debris.
- Apply a thin layer of joint compound over the damaged area using a putty knife. Make sure to cover the entire area where the tape was removed.
- Place a strip of drywall tape over the wet joint compound, pressing it firmly into place with your fingers.
Following these precautions will ensure that your repair process goes smoothly and safely. Remember to take breaks if needed and always follow manufacturer instructions for any materials you use. Good luck with your drywall repair project!

Conclusion
Now you know how to repair loose drywall tape on ceiling, you can keep your ceilings looking pristine and professional without hiring a contractor. Remember to follow the steps closely, take your time, and use the right tools for the job. With practice, you’ll be able to fix any loose drywall tape on ceilings in no time.

