
How to Clean Motorcycle Disc Brakes
Cleaning disc brakes on a motorcycle are not only an easy process, but it’s also one that will improve the performance of your bike. Brakes are something you want to take care of because they’re responsible for stopping your bike and keeping you safe. If your brake pads aren’t in good condition or there is a lot of dirt or debris built up, they need to be cleaned as soon as possible.

Cleaning them can help with this problem and give them back their original function-stopping power! However, cleaning them properly will require some elbow grease and time, so make sure you have both before beginning this project. This blog post will go over how to clean motorcycle disc brakes correctly from start to finish, so read on for more information.
10 Ways on How to Clean Motorcycle Disc Brakes
When the brake fluid becomes cloudy, also when the dust starts to stick to them. A few drops of dirt can become a blockage in your motorcycle disc brakes, preventing you from using them at their full potential. This article will cover how to clean motorcycle disc brakes in 10 different ways.
1. Closet Cleaning:
Cleaning motorcycle brakes is easy, and you need to use a brake cleaner. First, perform an inspection to ensure that your brakes are in good condition and the disc pads are still attached to the calipers. Then spray the brake cleaner on each of them, including the rotor. The amount of time it takes for this cleaning method depends on how dirty they are. The initial spray will easily remove most of the dirt and allow you to see if more cleaning is required.
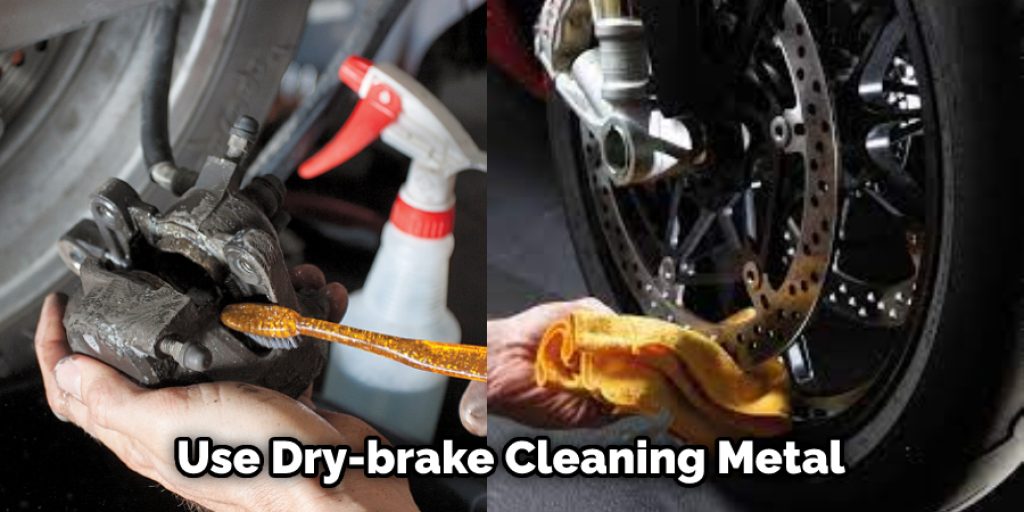
2. Dry-Brake Cleaning:
Use a paintbrush or a soft brush to clean motorcycle disc brakes, be careful not to scratch them with metal brushes because this can damage your brake pads, especially if they are made from a softer metal and the disc rotor itself.
3. Wet Cleaning:
Use a hose or a bucket of water and add some dish soap. Submerge the brake calipers into the solution and spray some on the disc rotor as well. This will clean both of them at once; watch out for more stubborn dirt that needs a second helping of detergent. Then rinse off your motorcycle disc brakes with clean water, allow them to dry before you re-install them.
4. White Spirit Cleaning:
Another effective cleaner is white spirit. Pour a little of it onto a clean cloth and wipe off the dirt carefully. You can also use a dish brush to scrub the dirt away; just remember not to use a metal one as this will scratch your brake discs. Once you’ve removed most of the dirt from the motorcycle disc brakes, you can wipe them clean with a dry cloth.
5. Use Citrus Cleaner:
The citrus cleaner is another great way to remove dirt from your motorcycle disc brakes, and it will not only dissolve the grime but also leave a protective coating behind. Spray some on and wipe away any excess before allowing it to dry thoroughly.
6. Residue Cleaning:
Sometimes stubborn dirt and residue have built up around the brake pads after a lot of use, and this can prevent them from touching the brakes discs completely. In situations like these, you will need to remove the brake pad caliper from your motorcycle to get rid of any build-up or debris that might be preventing the pads from contacting the disc. You can use a screwdriver to push back the small clips that are holding them in place, then remove any dust with a brush or wipe it away with some clean cloth.
7. Cleaning With Wax And Grease Remover:
A bottle of wax and grease remover will cut through any stubborn dirt and grime. It is safer to use than many other materials as the acids don’t eat away at the metal as much as you might imagine, but be careful not to leave it on too long as this can damage your brake discs and rotors. Instead, spray some onto a clean cloth, then wipe down any dirty areas until they are free of dirt and grime.
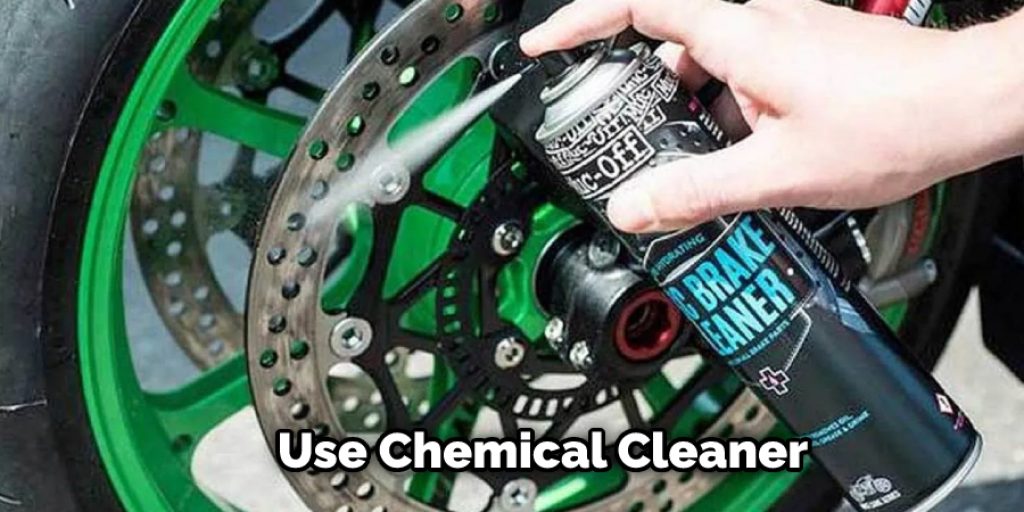
8. Chemical Cleaning:
There are a few chemicals that you can purchase to clean motorcycle disc brakes, and these include brake cleaner and some special metal cleaners. They will work well at removing any grime from the discs but be sure not to leave them on for too long as they might start eating away at your rotors or even your brake pads.
9. Disc Shaker:
This is a mechanical process to clean motorcycle disc brakes, but it does work very well. You will need to get hold of a disc shaker that is available for purchase online or from some mechanics if they are having a clear-out. Just attach the pad adaptor to the drill, put on your brake pads, and turn the drill on. When the pad is spinning, it will dislodge any dirt that has built up in between them, and it will help to remove some of the grime from your rotors.
10. Disc Rotor Spray Cleaner:
Buy a disc rotor spray cleaner, and these are often used to keep the rotors shiny and look good when they have been painted. When you use this spray on your brakes, you will remove any dirt accumulated since you cleaned them. Make sure to apply some lubricant or anti-seize to the rotors as well after you’ve cleaned them.
Conclusion
Cleaning your bike is one of the essential parts of maintaining it, and doing so will help you avoid costly repairs in the future. You don’t need any special tools or products for this task; here are some simple instructions that should take less than 15 minutes! First, brush off as much dirt from your brake pads with a dry cloth before applying soap-based cleaner on the surface.
Then use an old toothbrush to scrub away stubborn stains before rinsing them thoroughly under running water. Finally, apply lubricant oil onto all surfaces where metal meets metal and wipe clean with a paper towel until no more fluid remains visible on the surface. We hope this blog post on how to clean motorcycle disc brakes has been helpful. Let us know your thoughts in the comments below!


