
How to Connect PEX to PVC
The flexibility of PEX is literally outstanding. It eases the process of attaching the water supply lines that run throughout the entire house. With these advantages, you can save on some plumbing costs. Whenever you need to replace a portion of your old PVC pipe, you can simply install a PEX to connect the portion properly. Since the material is flexible, you can even bend it around corners. Unlike PVC, which has to be cut, PEX is easy to work with. You can quickly install a new pipeline without having to tear the entire home apart. This will save you a lot of time and money!

However, the sizing standards of the PEX and PVC are sometimes a bit different as they don’t refer to the same sizing standards. So, before you dive in to complete the job yourself, you have to know how to connect PEX to PVC. Let’s show you the exact way to attach the PEX with PVC pipes. How to Connect PEX to PVC The Connection of the PEX to PVC is not as complicated as you can expect it to be. There are two different methods to connect them, and both of them are very simple.
Summary: In order to connect PEX tubing to PVC, you will need a coupling such as a reducer coupling or a slip joint coupler. To make the connection, first slide the coupling over the tubing. Make sure that the ends of the tubing are pointing in the same direction. Then, use the crimping tool to crimp the coupling onto the tubing.
What is important to note is that PEX and PVC cannot be directly connected together as they have different sizing standards. This means a proper coupling must be used in order to make the connection. Additionally, it is crucial to properly secure the connection with crimp rings or clamps to ensure a tight and leak-free seal.
Furthermore, when working with PEX and PVC, it is important to follow all local building codes and regulations. Some areas may have specific guidelines for the use of PEX and PVC in plumbing systems, so it is important to research and understand these rules before beginning any work.
Required Materials:
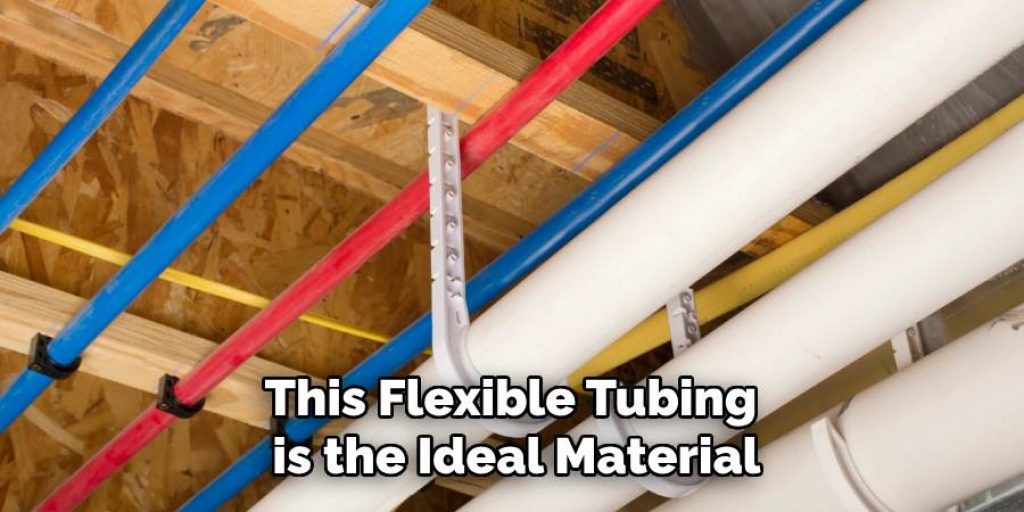
PEX Pipe:
This flexible tubing is the ideal material for connecting to PVC pipes. It is available in various sizes and can easily be cut and bent as needed.
PEX Coupling:
As mentioned before, a proper coupling is necessary to connect PEX to PVC. Make sure to choose one that fits the size of your PEX tubing and has a slip joint or reducer fitting for the PVC pipe.
Crimping Tool or Clamps:
To ensure a secure connection, you will need to use either a crimping tool or clamps to tighten the coupling onto the PEX tubing. Choose whichever method is recommended by your local building codes.
PVC Pipe:
This is the other half of the connection. Make sure to choose a PVC pipe that matches the size and type of your existing pipes.
Pipe Cutter or Saw:
To cut the PVC pipe, you will need a pipe cutter or saw. Make sure to measure and mark the area where you need to make your cut before beginning.
Marker or Chalk:
To mark the area where you need to cut your PVC pipe, use a marker or chalk. This will ensure a precise and clean cut.
Methods on How To Connect PEX To PVC
Method One
Step One:
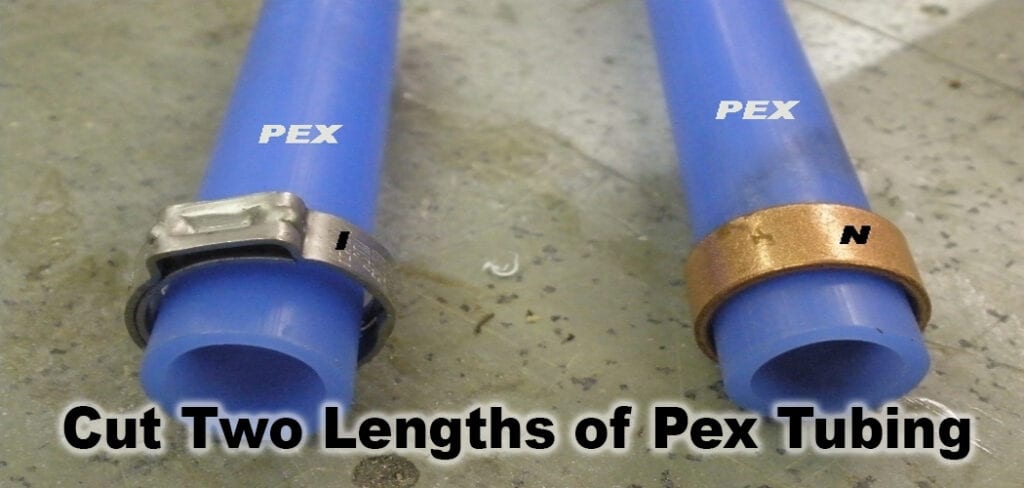
Cut two lengths of PEX tubing to the desired length. Measure and cut one end at an angle. This is where you will put in your connectors for easy connection later on.
You may want to leave a little extra length above your connector so that you can see which side they would go if it gets difficult to tell when connecting them together later on. Don’t worry about cutting both ends at angles just yet – we’ll get back to that soon enough. Making the Wires Manageable: You need to be able to twist each wire between your fingers without it slipping out.
Step Two:
Slide Teflon tape over the threads of each tube’s male adapter fitting (the threaded part). Thread these fittings into each other until they are tight to ensure they won’t come back out when you are trying to connect them later on.
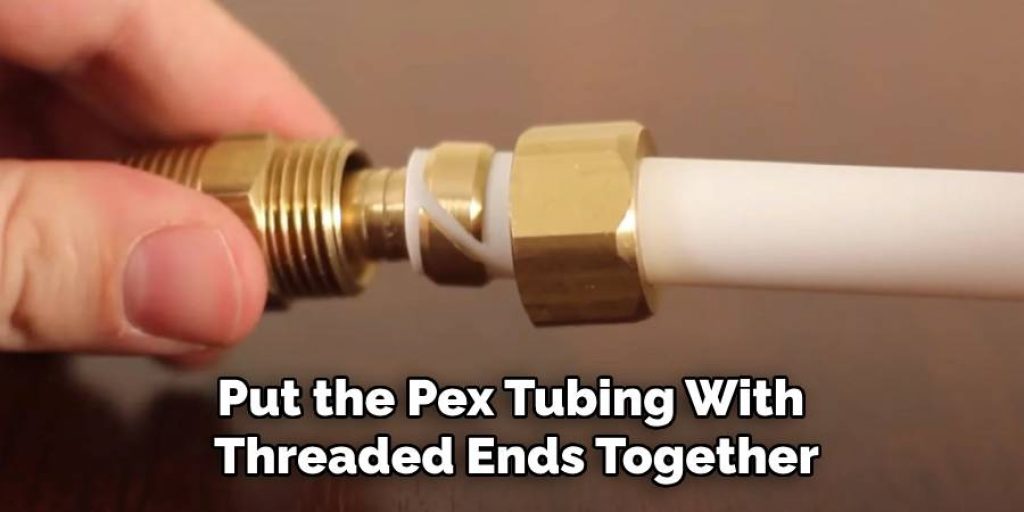
Step Three:
Put the PEX tubing with threaded ends together and slide the Teflon tape onto both of those threads as well, making sure that it is snugged up all around so there isn’t any air leakage along the joint.
Now, take your other length of PEX tubing (the one without threaded fittings) and cut off a small piece at an angle – this will be where we put our connectors in to join these two lengths together later on.
Step Four:
Slide some more Teflon tape over each thread and push your connector pieces into place on either side for easy connection down the line. When connecting them together, make sure you do not cross the threads and that they’re threading nicely.
Step Five:
Now, join these two lengths of PEX together by slipping each connector piece into place on either side, making sure they are lined up with one another so no air leaks out at the joint.
Here’s where it starts getting tricky – now we need to use a coupling ring that will help us attach both of our connectors (or couplings) together in order for them to create an airtight connection without any leaks or seepage along the way.
The last step would be connecting this final length back downline from your main water line coming straight out of your city water tap, branching off towards different sections of your building as needed.
Method two
Step 1
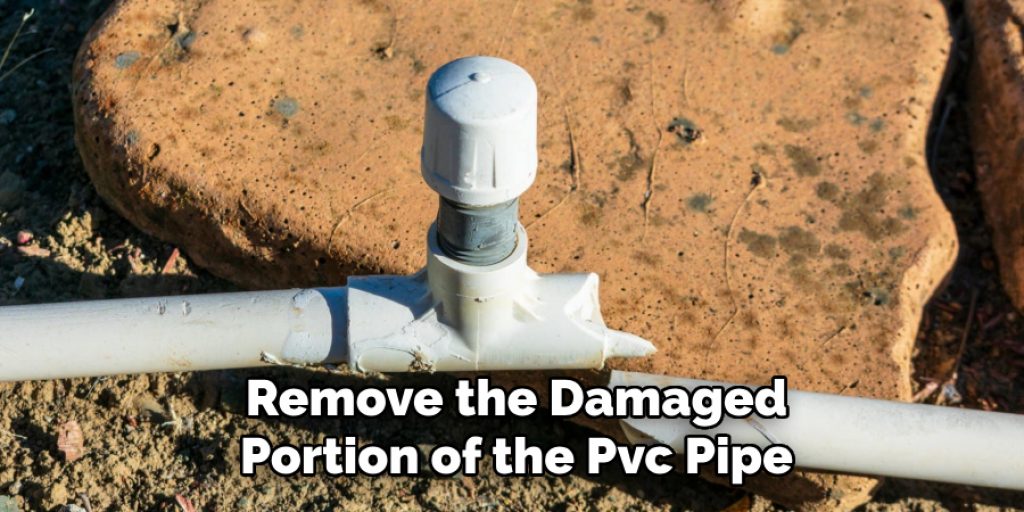
First of all, you have to remove the damaged portion of the PVC pipe. Simply cut it out with a hacksaw. Slide the rounded side and continue the process until you remove it completely. The process may vary on the type of cutter you are using. The tool is like a scissor that is used to cut through thick plumbing pipes.
Step 2
Now, apply a thick coat of PVC primer on the surface where you have just cut the portion out. Make sure to coat each end with PVC glue and then slide the pieces into the fitting. Hold them together for 40 seconds, at least. You can put them in for a few minutes to ensure that the bond is secure.
Step 3
Next, wrap a pipe sealant tape around the PVC fitting. Make sure to cover the entire surface with tape. This will make the fitting leak-proof. Otherwise, water will come out of the joint. You should cover at least three times the diameter of the pipe.
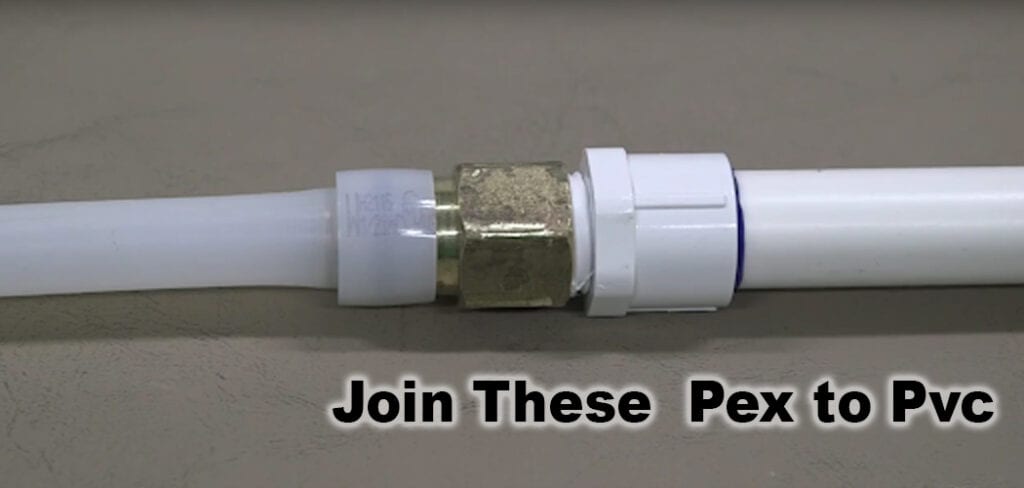
Step 4
After that, take the female threaded brass, set it into the PEX adapter, and the male threads into the PVC fitting. Now twist the fitting by your hand and make sure to tighten them clockwise. If needed, use an adjustable wrench and secure both ends properly. The female PVC fitting will get tightened into the PEX adapter, and the male thread of the PVC pipe will now run through it.
Step 5
Roll over an end of a PEX tubing with a crimped loop. Move the tube end to the edge of the brass fitting mounted. That’s it; you have made it. Set the crimp ring in place and crimp it with your pipe crimping tool. Repeat the process for the other sides, too. You can use a PEX cutter if necessary. The cutter is also necessary if you have to make a 90-degree turn in the PEX tubing. When you are done, open up your water supply and check for any leaks.
Step 6
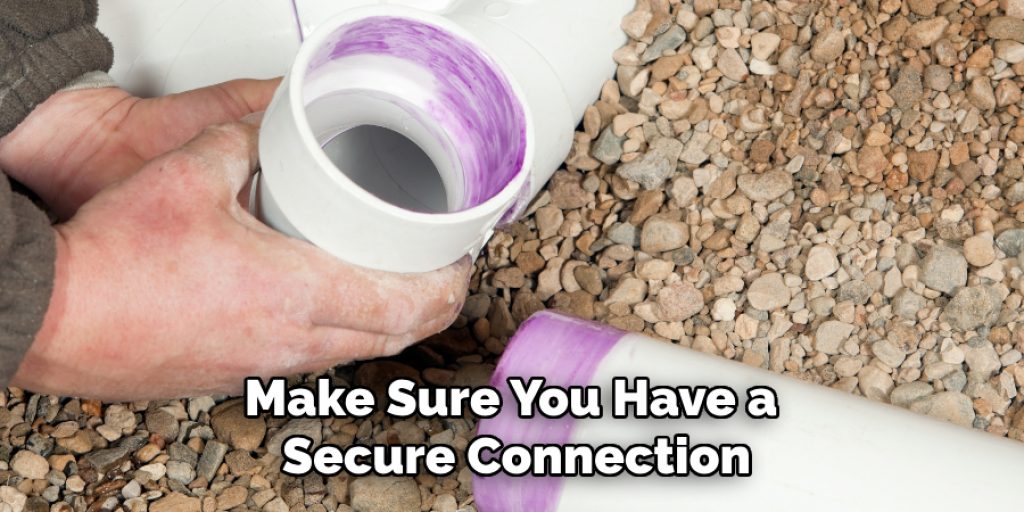
Before connecting both pipes, make sure you have a secure connection. Run some water through it and check if everything is working perfectly or not. If there are any leaks around the joint, remove the coupling ring and repeat the process with a new one. You can also use a plumber’s tape to make it more secure. If you plan on using clamps, they should be placed about 1/4 inch from the end of the PEX tubing and crimped securely with a clamp tool.
Repeat these steps for every joint that needs to be connected, making sure to follow local building codes and regulations. Always double check all connections before turning on your water supply, and if any issues arise, don’t hesitate to contact a professional plumber for assistance. With proper installation and maintenance, your PEX and PVC plumbing connection should provide reliable and efficient water flow for your household or building needs. For more information on PEX and PVC plumbing, be sure to check out our other articles and resources. Happy plumbing!
Additional Tips for PEX to PVC Connections
- Always follow local building codes and regulations for plumbing installations.
- Before beginning any plumbing project, make sure to turn off your water supply.
- Use caution when using tools such as pipe cutters or saws and always wear appropriate safety gear.
- If you are unsure about any step in the process, it is best to consult a professional plumber for assistance.
- Regular maintenance and inspections of your plumbing system can help prevent any potential issues down the line.
- Consider using a pipe cutter specifically designed for PVC pipes to ensure clean, precise cuts.
- When connecting PEX to PVC, always use approved fittings and connectors for a secure and leak-free connection.
- Keep Teflon tape or thread sealant on hand to seal threaded connections.
- Remember to always crimp or clamp correctly and securely for a strong connection.
- If using method two, be sure to use sealant tape specifically designed for PVC pipes.
- Always check for any potential leaks before completing the project. With proper techniques and materials, you can successfully connect PEX to PVC for all your plumbing needs. Happy connecting!
Do You Need to Get Help From a Professional?
While connecting PEX to PVC can be a DIY project, it is important to know your own abilities and when it might be best to seek the help of a professional plumber. If you are unsure about any step in the process or if issues arise during installation, it is always best to seek guidance from an experienced plumber. This will not only ensure the safety and efficiency of your plumbing system, but it can also save you time and money in the long run. So, before starting any PEX to PVC connections, carefully evaluate your skills and consider seeking professional assistance if needed.
You can also reach out to a professional plumber for advice on the best materials and techniques to use for your specific plumbing needs. They may even be able to provide you with tips and tricks for a successful PEX-to-PVC connection. Remember, proper installation is crucial in ensuring the longevity and effectiveness of your plumbing system. So don’t hesitate to get help if needed – it’s always better to be safe than sorry. Happy plumbing!
How Much Will It Cost?
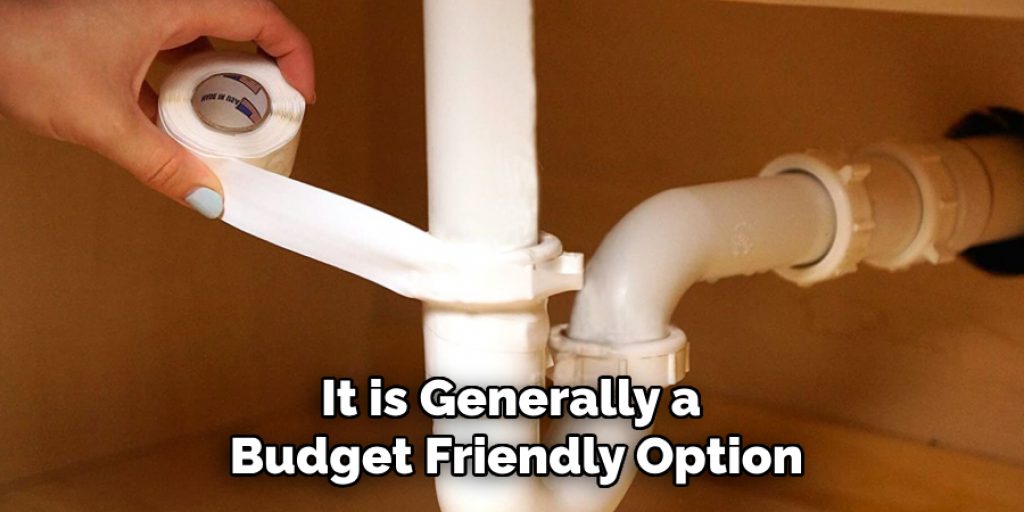
The cost of connecting PEX to PVC will depend on the materials and tools you need, as well as any potential labor costs if seeking professional assistance. However, in general, PEX fittings and connectors tend to be more affordable than their PVC counterparts. Keep in mind that investing in high-quality materials may cost more initially but can save you money in the long run by preventing potential leaks and repairs. Additionally, consider the cost of any necessary tools or equipment that you may not already have on hand.
Overall, while the cost of connecting PEX to PVC may vary, it is generally a budget-friendly option for plumbing installations. So whether you are looking to renovate your home’s plumbing system or just need a quick fix for a leaky connection, PEX and PVC can provide a cost-effective solution. Just be sure to properly research and budget for all necessary materials and tools before beginning your project.
Frequently Asked Questions:
Q: Can I Connect Pex to Pvc Without Using a Coupling Ring?
A: No, a coupling ring is necessary for creating an airtight and leak-free connection between PEX and PVC pipes. Attempting to connect them without one can result in potential leaks or bursts. You may also consider using a PEX to PVC transition fitting for added security. It is always best to follow proper installation procedures and use appropriate materials for a successful connection. It is also recommended to consult a professional plumber for guidance and assistance.
Q: Can I Connect Pex to PVC Underground?
A: Yes, you can connect PEX to PVC underground using the same methods discussed in this article. However, it is important to ensure that your local building codes and regulations allow for this type of connection in underground installations. You may also need to take additional precautions, such as using waterproof sealants and extra layers of protection for the pipes. As always, it is recommended to consult a professional plumber for assistance with any underground plumbing projects.
Q: How Can I Check for Leaks After Connecting PEX to PVC?
A: Before turning on your water supply, you can visually inspect all connections for any potential leaks. Additionally, you can run water through the connected pipes and check for any signs of leakage. If you do notice any leaks, make sure to address them immediately by re-crimping or tightening the connections or using a new coupling ring. It is always best to test for leaks before completing the project to avoid any potential issues down the line. Again, if you are unsure or need assistance, do not hesitate to consult a professional plumber.
Q: How Do I Maintain My PEX to PVC Connection?
A: Regular maintenance of your plumbing system is important to ensure the longevity and effectiveness of your PEX to PVC connection. Make sure to regularly check for any potential leaks, cracks or damages in the pipes, and address them immediately if necessary. It is also recommended that periodic inspections be scheduled with a professional plumber to catch any issues early on. Proper maintenance can save you time and money in the long run and help keep your plumbing system running smoothly. So, make sure to stay on top of any necessary repairs or replacements for a successful PEX to PVC connection.
Q: Is It Better to Use PEX or PVC for My Plumbing Needs?
A: The answer to this question depends on various factors, including your specific plumbing needs and local building codes and regulations. Both PEX and PVC have their own advantages and disadvantages, so it is best to research and consult with a professional plumber before making a decision. In some cases, a combination of both PEX and PVC may be necessary for different parts of your plumbing system. Ultimately, the most important factor is proper installation and maintenance to ensure a safe and effective plumbing system.
Conclusion:
You can’t go wrong with this easy DIY project. All you need is a few basic tools and supplies, including PEX pipe, PVC pipe, wire cutters or pliers, Teflon tape (optional), steel wool (optional), and an adjustable wrench. We hope we’ve given you the confidence to tackle your own plumbing projects!
Angela Ervin
Angela is the executive editor of DIY quickly. She began her career as an interior designer before applying her strategic and creative passion to lifestyle and home. She has close to 15 years of experience in creative writing and online content strategy for housekeeping, home decorations as well as other niche efforts. She loves her job and has the privilege of working with an extraordinary team. She lives with her husband, two sons, and daughter in Petersburg. When she's not busy working she spent time with her family.
