
How to Crochet a Giant Circular Rug
Introduction:
Crochet is a form of needlework that uses a single hook to create an endless variety of patterns. It has been around for centuries and is well-known as the craft involved in creating knitted clothing, such as sweaters and afghans, but crochet can also be used to make decorative objects such as doilies and tablecloths.
In addition, crochet has become popular with those who wish to decorate their houses or even build furniture. In this article, I will discuss how to crochet a giant circular rug. So let us get started.
A Detailed Stepwise Guide on How to Crochet a Giant Circular Rug:
Crocheting a giant circular rug isn’t as challenging as you think, and if you take your time and double-check to make sure what you’re doing can be undone and that your stitches are uniform, extra points! You should finish within a couple of hours if you’ve never crocheted before. I suggest checking out this article first: how to crochet. Here’s what I used: ~2 skeins of worsted (medium) weight yarn, about 500 yards total; ~Size H Crochet Hook; Scissors; Yarn Needle; Ruler/tape measurer.
- First, choose your desired diameter, then calculate how many stitches you’ll need. Remember to add a few extra stitches, as you’ll lose some during the joining process. In this example, I used a diameter of 40″.
- Next, chain as many stitches you need for your circle plus an additional four (the first and last chains don’t count). Using my example: ch 35 + 4 = 39
- Now comes the fun part… single crochet around the entire circumference of this chain until you get back to where you started. (you should have about 39 single crochet stitches) Be sure to join at the end of every round by slipping stitching into the top of your beginning stitch. The first round will be spiral-like with no definition between each pattern row, but that’s okay because it will help with your edging.
- Here comes the second round… simply single crochet in each stitch around plus two in each corner. (you should have about 39 stitches) When you get back to where you started, your circle will have a bit of shape, but that’s okay because it will help during joining.
- The third round is where your work sets itself apart from other circles! All this round consists of is alternating front post double crochets and back post double crochets. Front Post Double Crochet (FPDC): Instead of inserting hook under top 2 loops as you usually would with dc, insert hook behind the vertical bar (similar to how you work a bpdc but instead of performing it in front of the stitch, you’ll be inserting hook behind it) and complete stitch as standard -in other words: under top 2 loops.
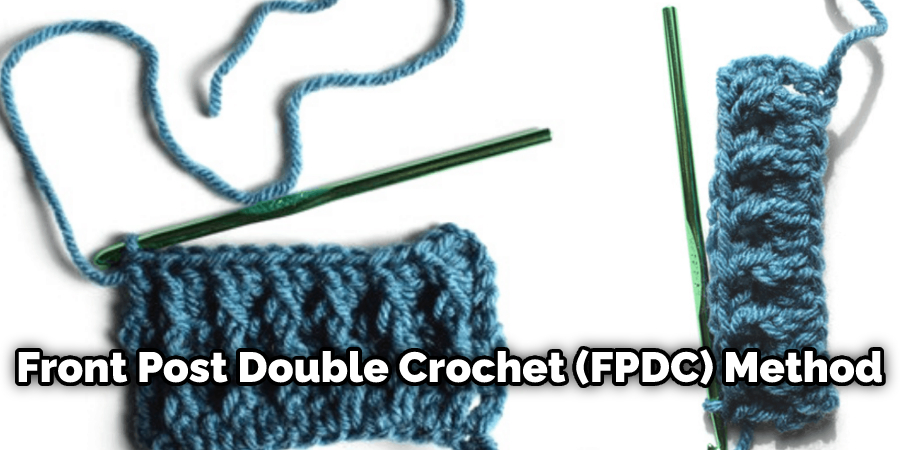
- Back Post-Double Crochet (BPDC): Yarn over (YO), insert hook behind the vertical bar (similar to how you work an FPDC), complete as per usual -under top 2 loops.
- Now comes the dreaded joining! I know, trust me, there are ways to make this step quicker and easier, but for this example, we’re going with the standard way that will ensure that all stitches reach their proper height/depth by requiring a few extra chains. Depending on how many stitches you had in each row and which stitch pattern was used will affect your total number of chains needed for this step -you’ll need one chain for every two rows plus an additional four: 2 Rows = 2 Ch + 4, 3 Rows = 3 Ch + 4 6 Rows/Pattern Repeat = 6 Ch + 4 To determine how many chains to make for this example, I used the following calculation: 39 single crochets per round x 3 rounds = 117 stitches per round x 2 rows= 234 total stitches around the circumference. Two hundred thirty-four sts divided by two rows= 117.5, rounded up= 118, so I chained 118 to start joining. As a side note… I started my joining chain in the third round to make it easier to figure out how many chains were needed.
- The joining process is simple but takes a bit of time because you’ll be working in two sections -one side at a time- using slip stitches for each department to join. , So first work one half, then when done with that half, rotate your project 180 degrees and work on the other half. Insert hook into any stitch of first row/round, YO and pull up a loop, insert hook into next st and pull through both loops on hook -as if doing a stitch. Continue this process until all stitches have been joined. 8a & 8b. When you get all the way around, join with a slip stitch into top of beginning ch3.
- The final round will be worked in joined rounds, but it’s important to remember that your project is still divided half and half, so you’ll need to rotate 180 degrees between each game. For this step, sc in each st around (no increases or decreases), at the end of the round slip stitch into the beginning.
- Now for the edging! Work this entire step inside remaining loops from joining; do not join rounds but work continuously instead. For example, Ch 1, sc in same space, *work four dc over next sp (tr made), skip one st then sc in next st* (pineapple made), continue pattern around; at the end of round slip stitch into beginning st and fasten off.
- To finish, weave in ends and block as desired.
Precautions While Crocheting a Giant Circular Rug:
If you’re thinking of crocheting a giant circular rug, please take these precautions into account:
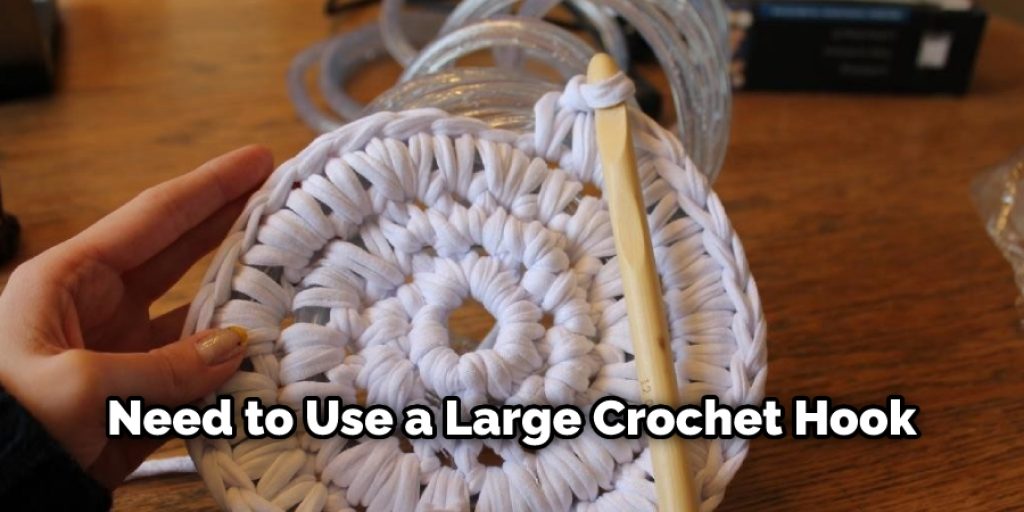
- You’ll need to use a large crochet hook. This is not something I would recommend beginners jump right into. Seek advice from an experienced crochet artist first.
- The person who suggested this project to me had to do it in several pieces rather than one whole piece (see picture below) because the weight of the blanket was pulling down on her shoulders and back. That’s why you must consider all precautions before attempting this project!
- It takes FOREVER! Seriously, one round took about 30 minutes for my friend to complete (and she was using a super-duper mega-size hook).
- This project will take a long, long time. If you’re looking for something quick and easy, this isn’t the project for you.
Conclusion:
I hope this article has offered all the descriptions on how to crochet a giant circular rug. Ensure all the precautions are correct. Thank you and have a nice day!


